Set Up and Activate Your New iPhone [Ultimate Guide]
To get your new iPhone up and running, you need to activate it using a Wi-Fi or cellular network. Apple makes it easy to set up and activate your iPhone. If you're new to iPhones and want to do it right, our simple guide will show you how to set up and activate your iPhone step-by-step!
Prepare for setup
Use a Wi-Fi network (know the network name and password) or a cellular data service. Note: Cellular data is not required for iPhone 14 and later models.
Have your Apple ID and password ready. If you don't have one, you can create it during setup.
Keep your credit or debit card details handy if you plan to set up Apple Pay.
If you plan to transfer data, have your previous iPhone or its backup ready.
If your current device doesn't have enough storage to back up, iCloud offers free temporary storage for up to three weeks after buying your new iPhone. To use this:
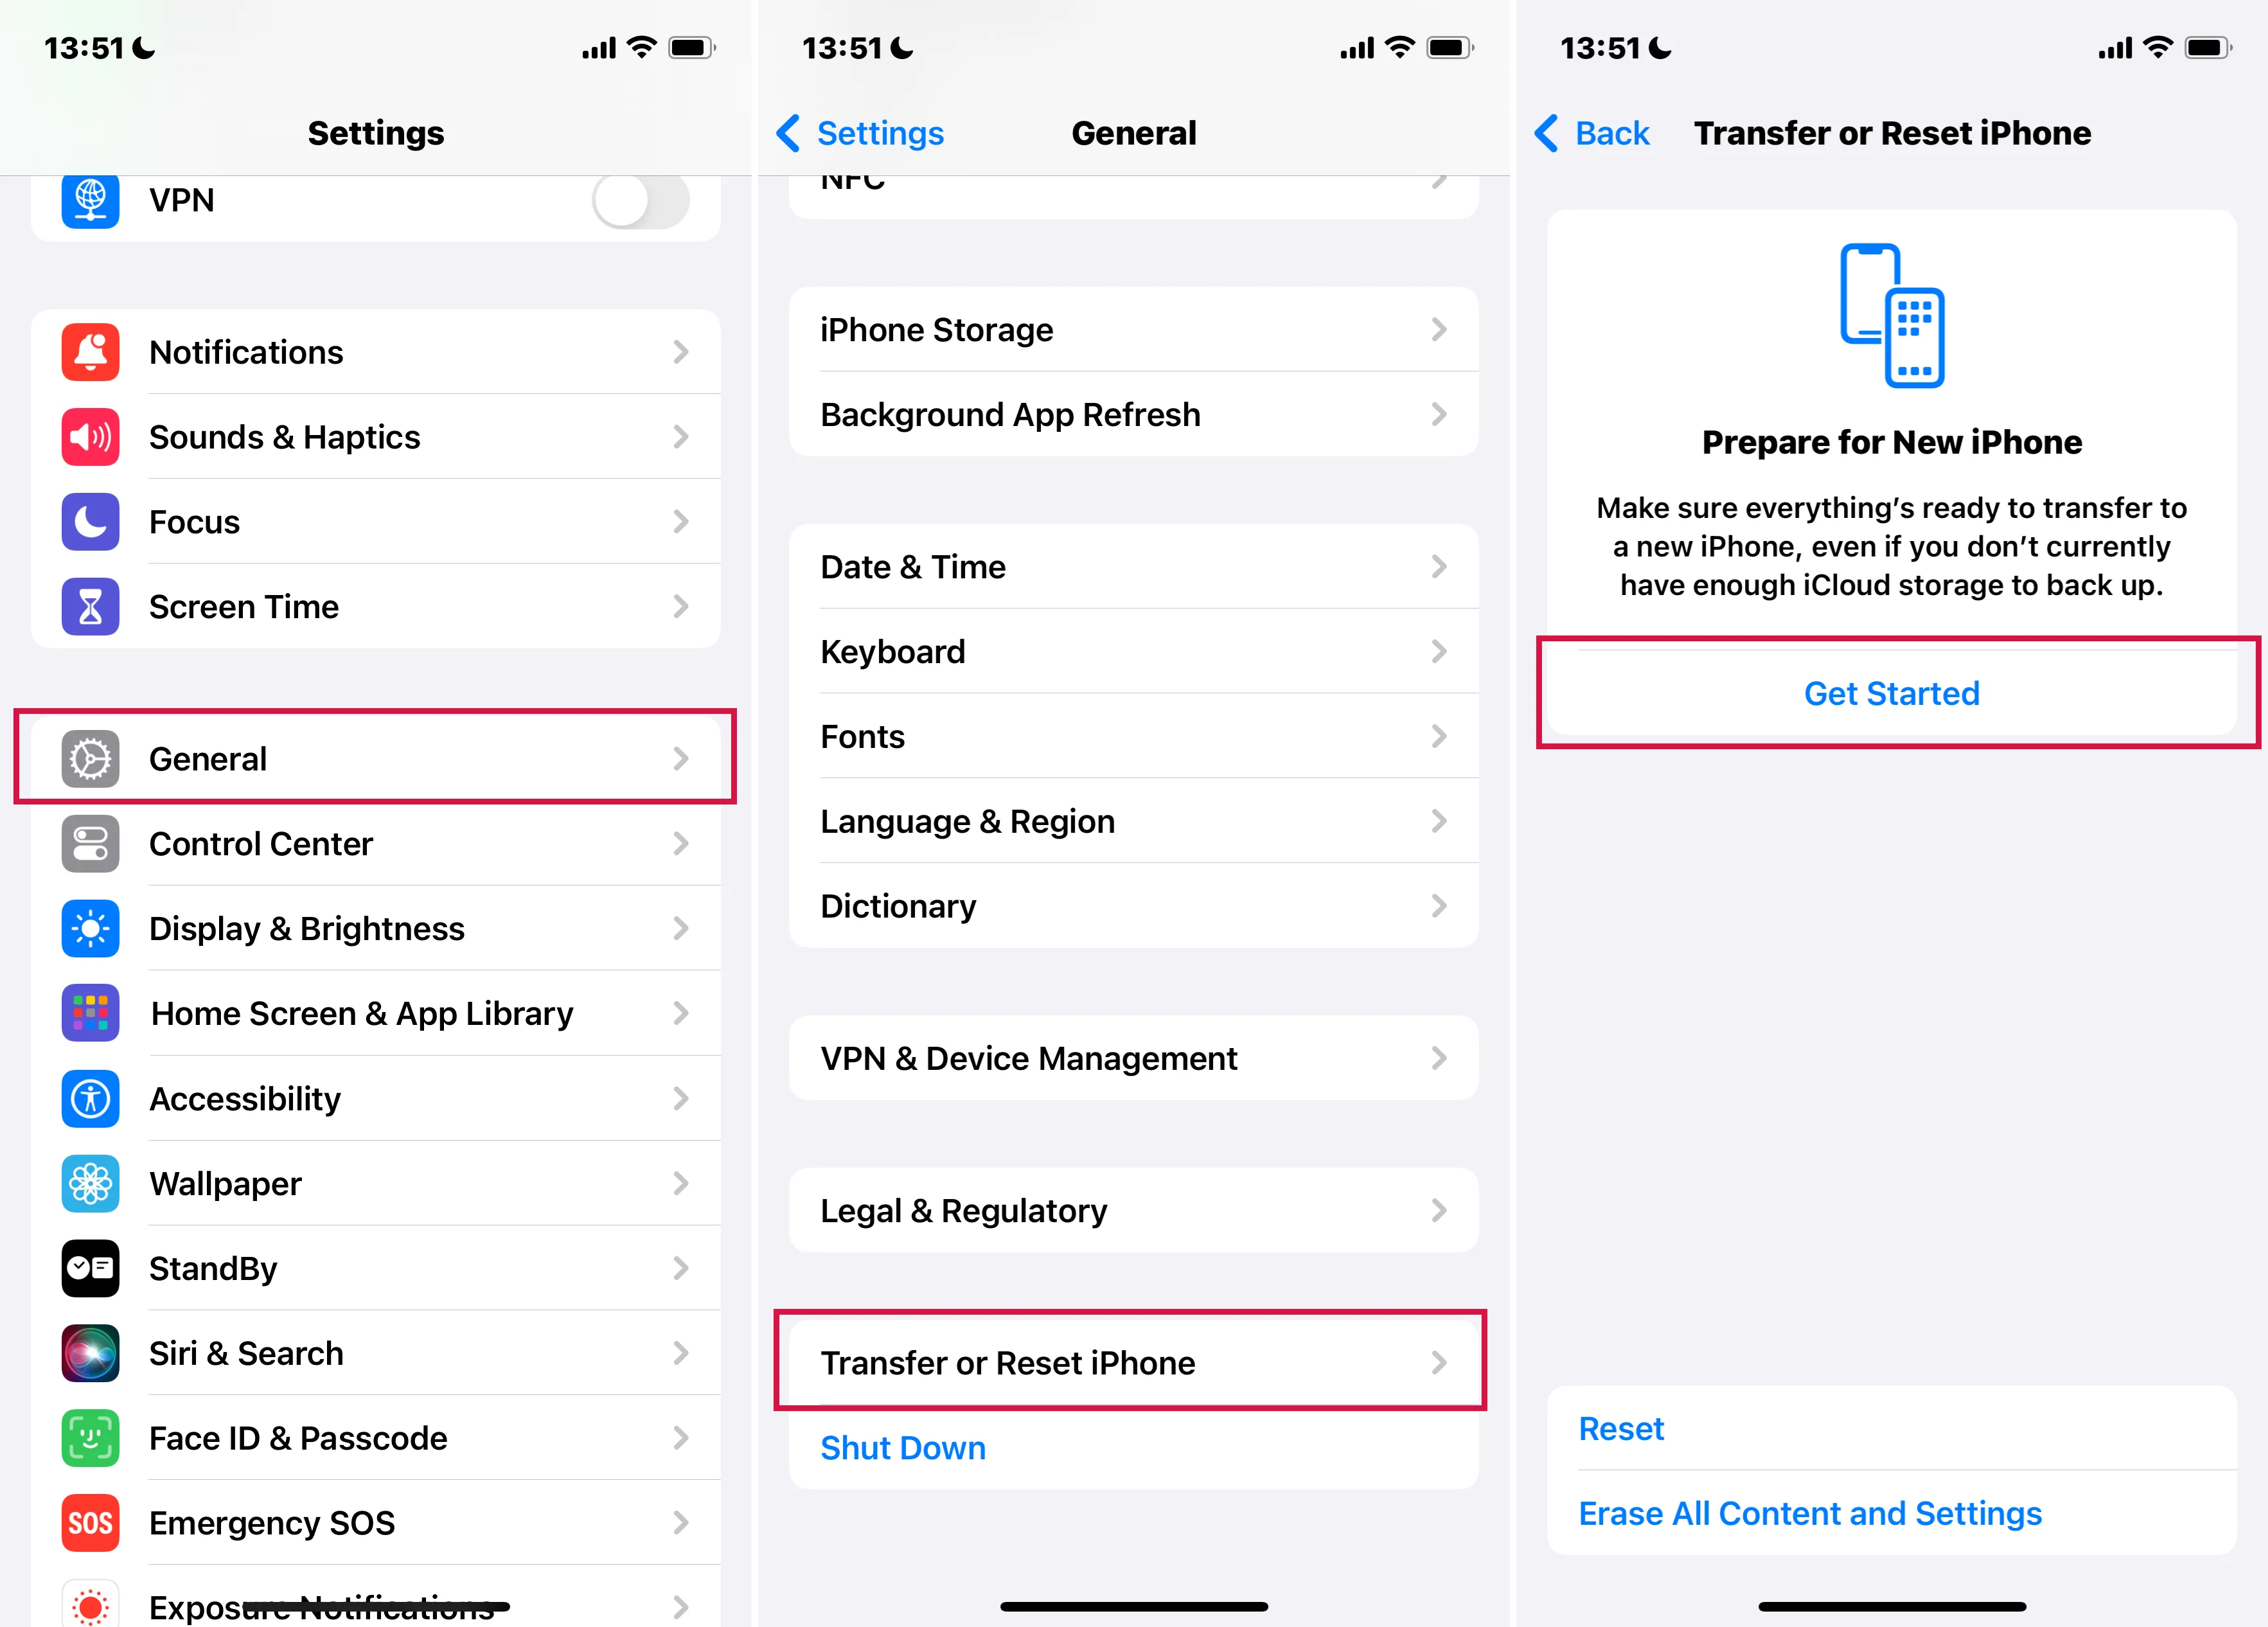
Go to Settings > General > Transfer or Reset [device] on your old device.
On the “Prepare for New iPhone” screen, tap 'Get Started' and follow the instructions.
Set Up and Activate Your New iPhone: A Step-by-Step Guide
1. Turn on your iPhone
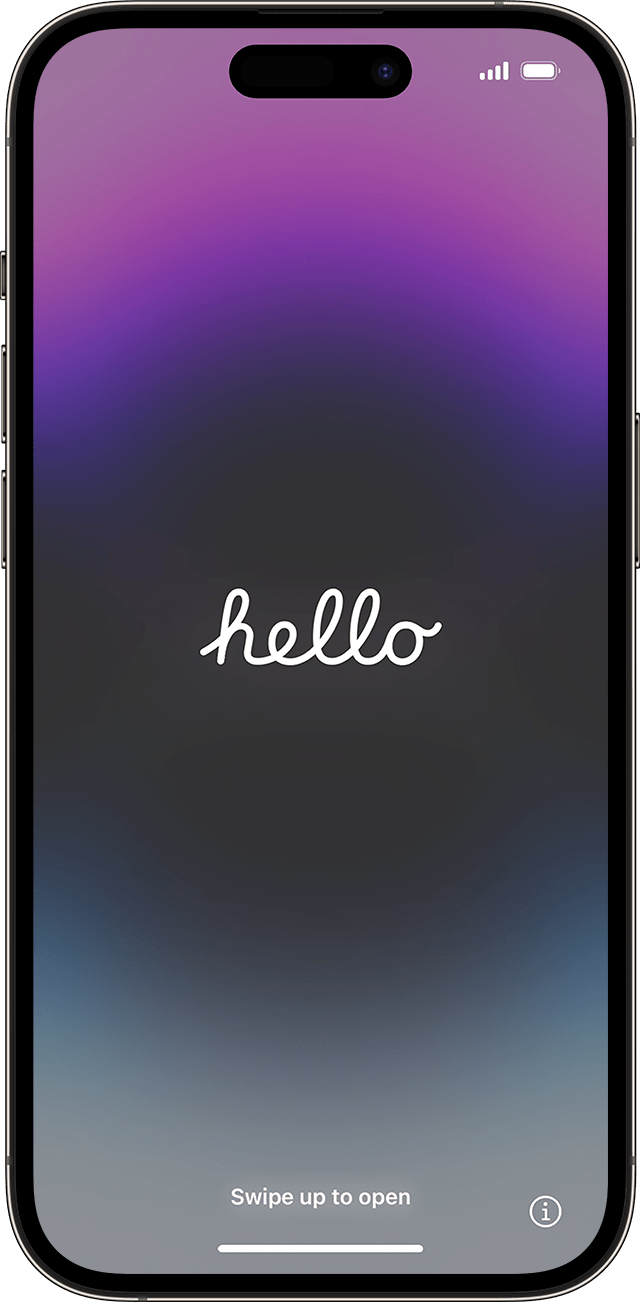
Press and hold the power button until the Apple logo appears. A "Hello" screen in various languages will greet you. Follow the onscreen prompts to start.
For those with visual impairments, activate VoiceOver or Zoom right from the Hello screen.
If your iPhone doesn’t turn on, it may need charging. For more assistance, refer to the article to fix your iPhone won’t turn on or is frozen.
2. Customize Text and Icon Size
Choose how big you want text and icons to appear: Default, Medium, or Large. As you adjust the settings, the Appearance screen will update to show you a preview.
Once you've decided, slide to your preferred size and tap 'Continue' to proceed.
![]()
3. Use Quick Start or set up manually
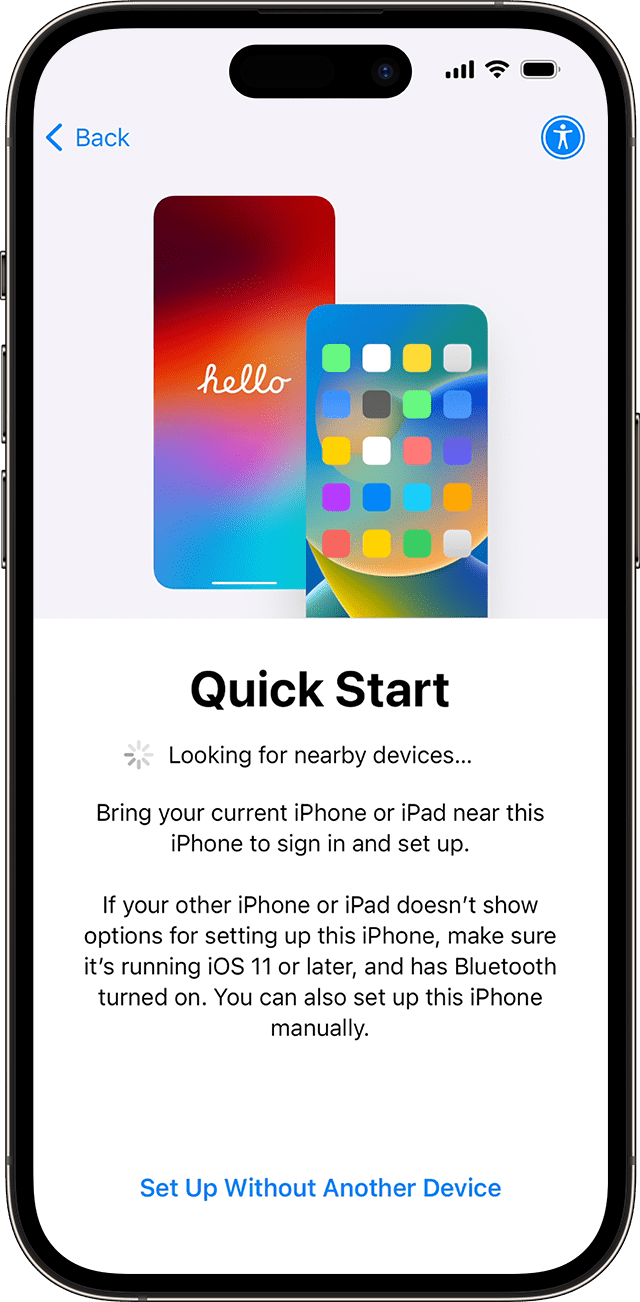
If you have another device, use Quick Start for automatic setup.
No other device? Tap 'Set Up Without Another Device' to manually configure your iPhone.
You can also tap the blue accessibility button on the Quick Start screen to set up Accessibility Options.
Use Quick Start to transfer data to a new iPhone
Set up your new iOS device automatically using another iPhone. Transfer all your data wirelessly from your previous device to your new one via Quick Start.
Preparations:
Ensure both your old and new iPhones are charged.
Turn on Wi-Fi and Bluetooth on both devices.
Keep your devices near each other and plugged into power until the data migration process is complete.
If your new device is enrolled in Apple School Manager or Apple Business Manager, Quick Start can't be used for data transfer.
Steps:
Turn On Your New iPhone: Power on your new iPhone and place it near your current iPhone. The Quick Start screen should appear on your old iPhone, showing the option of using your Apple ID to set up your new iPhone.
If the prompt to set up your new device disappears from your current device, restart both devices.
Start the Process: Tap "Continue" on your old iPhone. An animation will appear on your new iPhone.
Use Camera for Pairing: Use your old iPhone's camera to scan the animation on the new iPhone's screen. If the camera doesn’t work, you can also choose to authenticate manually.
Enter Passcode: Once you see a message stating “Finish on New [Device]”, enter the passcode of your old iPhone on your new iPhone. Follow the instructions to set up Face ID or Touch ID on your new iPhone.
Transfer Data: You will be given the option to transfer data directly from your old iPhone to your new iPhone. Choose this option for a direct transfer.
Complete the Setup: Follow the remaining on-screen instructions to finish setting up your new iPhone.
Use accessibility options to set up a new iPhone
Steps:
Turn On Your iPhone: Press and hold the side button until the Apple logo appears.
Enable VoiceOver or Zoom:
To Enable VoiceOver (an audio guide):
1)Quickly press the side or Home button three times. Then wait for the announcement that VoiceOver is on.
2)Or use Siri to enable VoiceOver by pressing and holding the side or Home button and saying, “Turn on VoiceOver.”
To Enable Zoom (a screen magnifier): Tap the screen two times with three fingers.
Select Language and Region: Swipe (for VoiceOver) or tap (for Zoom) to select your language and region.
Connect to Wi-Fi Network: Follow the on-screen instructions to choose a Wi-Fi network. VoiceOver will read the options aloud, and you can swipe and double-tap to select.
Set Up Face ID or Touch ID: The setup wizard will guide you through setting up Face ID or Touch ID. Follow the audible instructions if using VoiceOver.
Create a Passcode: Choose and enter a passcode for security. VoiceOver or Zoom will assist in this process.
Restore or Transfer Data: You can set up your iPhone as a new device, restore from a backup, or transfer data from another phone. Use accessibility options to navigate these choices.
Sign in with Apple ID: Enter your Apple ID and password. VoiceOver can read the text fields and buttons.
Set Up Siri and Other Services: Follow the prompts to set up Siri, Apple Pay, and other services. VoiceOver will guide you through each step.
Configure Accessibility Settings: Once the initial setup is complete, go to "Settings" > "Accessibility" to customize any additional accessibility features as per your needs.
Remember, these accessibility features are designed to assist users with visual, hearing, or other impairments during the setup process and beyond.
4. Activate your iPhone or iPad
To activate and continue setting up your device, connect to a Wi-Fi or cellular network.
Select a Wi-Fi network or opt for 'Continue Without Wi-Fi' to use cellular data. If you have an iPhone (Wi-Fi + Cellular), ensure your SIM card is inserted. You might also need to activate an eSIM.
5. Set up Face ID or Touch ID and create a passcode
Follow the instructions to set up Face ID or Touch ID, enabling face or fingerprint recognition for unlocking your device and authorizing purchases.
Then, create a six-digit passcode to protect your data. This is required for Face ID, Touch ID, and Apple Pay. For different passcode options, like a four-digit code, custom code, or no code, choose 'Passcode Options'.
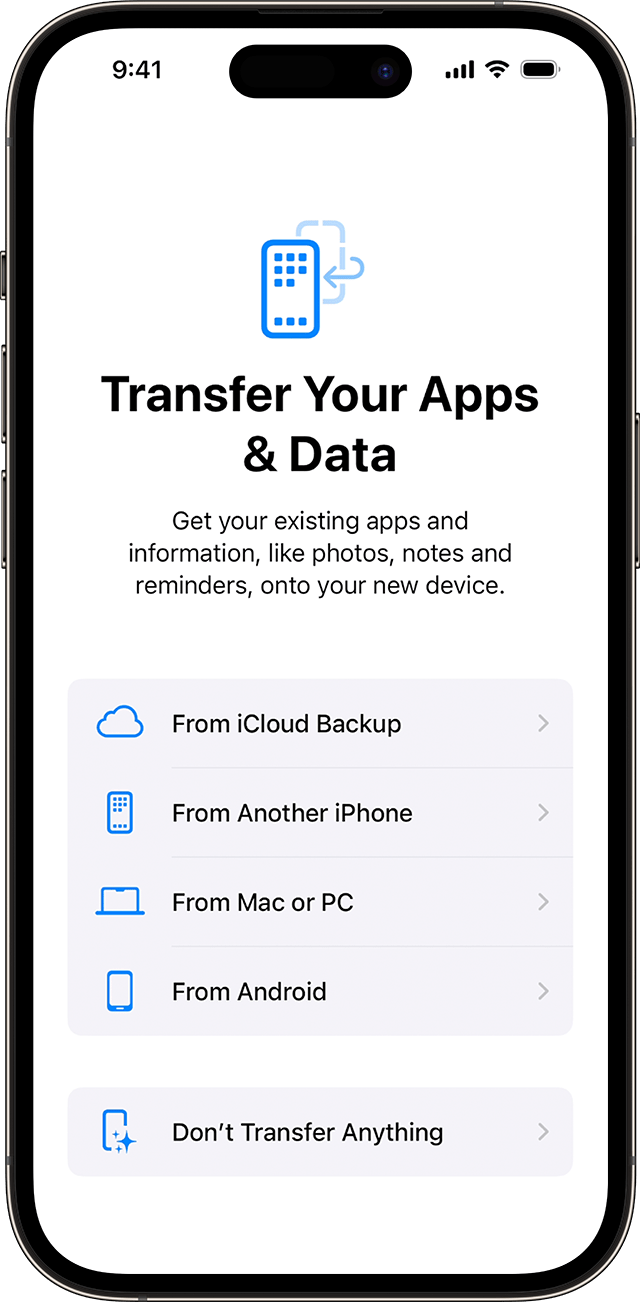
6. Restore or transfer your data and apps
Select a method to transfer data from your old device: iCloud backup, a computer backup, or data from an Android device.
If you don’t have a backup or another device, choose 'Don't Transfer Anything'.
7. Sign in with your Apple ID or another Apple device
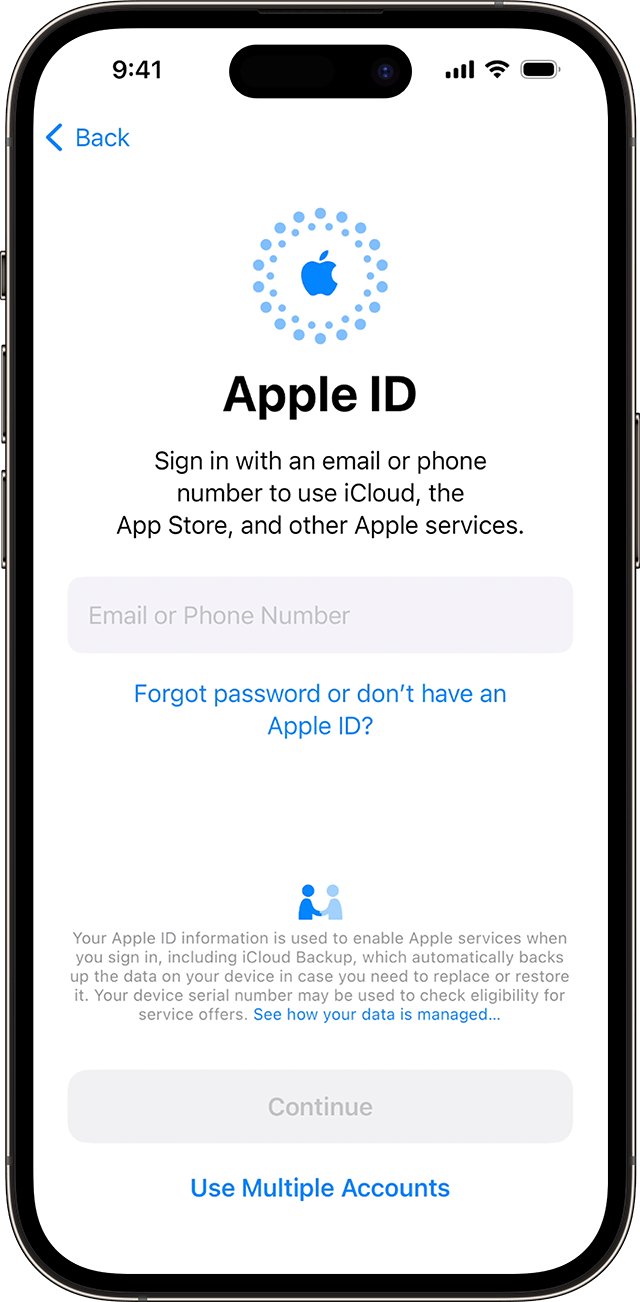
Enter the email or phone number associated with your Apple ID and your password.
If you’ve forgotten your details or don't have an Apple ID, tap 'Forgot password or don't have an Apple ID?' to recover your ID, reset your password, create a new ID, or decide to set it up later.
For multiple Apple IDs, select 'Use Multiple Accounts'.
Signing in may prompt a verification code from your previous device.
8. Turn on automatic updates and set up other features
On the setup screen, choose to update iOS automatically and configure other features like cellular service, a phone number, or Apple Pay.
Set up services like Siri. For some devices, you'll be prompted to say a few phrases to help Siri recognize your voice.
Then, set up Screen Time for insights on device usage and to set daily app time limits for you and your family.
Decide if you want to share data with Apple and app developers.
Choose between Light and Dark mode. Select 'Auto' to switch modes automatically throughout the day. Press 'Continue' when you're ready to finish.
Activate Phone Number and Cellular Service on New iPhone
If you're changing to a new phone number or cellular service on your iPhone, here's how to activate it. You'll need a physical SIM card or an eSIM for networks like Verizon's 5G, AT&T Wireless, T-Mobile, or Sprint. iPhone 16 users in America may require an eSIM from their carrier.
Activate a physical SIM card on a new iPhone
Step 1: Insert the SIM Card
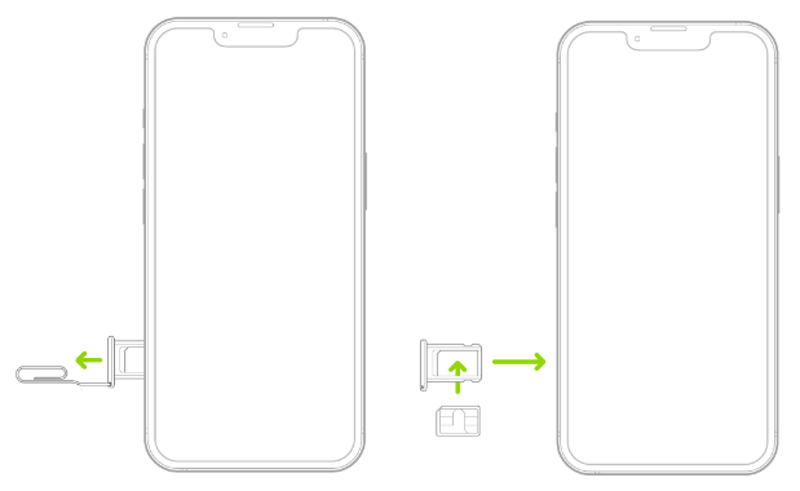
Before powering on your iPhone, insert the SIM card into the SIM tray. This tray is typically located on the side of the iPhone. Use the SIM eject tool (or a small paperclip) to eject the tray, place the SIM card in the tray, and then reinsert it into the phone.
Step 2: Power On Your iPhone
Press and hold the side button until the Apple logo appears on the screen. If the phone was already on, you might need to restart it to recognize the new SIM card.
Step 3: Set up the Cellular Network
Open the Settings app on your iPhone and go to 'Cellular'. Turn on 'Cellular Data' to connect to your carrier's data network. For iPhones with Dual SIM capability, choose your new phone number under the 'SIMs' section.
Occasionally, your iPhone may prompt you to update carrier settings. This is important for ensuring optimal network performance. Accept any updates if prompted.
Activate an eSIM on a new iPhone
For detailed instructions on activating an eSIM on your iPhone, refer to our comprehensive guide!
Summary
Activating a new iPhone is simple. Our guide offers a step-by-step approach, covering everything to ensure you can start enjoying your new device quickly. Whether you're transferring data from an old phone or setting it up as a new one, this guide has all the information you need.

