(3 Free Ways) How To Screen Record On iPhone In 2026

Do you want to record your game progress or part of a live-stream match you're watching? Or perhaps you are an academic looking to create a tutorial video. In this era, screenshots are no longer enough. The built-in setting is usually the safest place to start before you try extra tools.
Luckily, the iPhone unveiled a new screen recording feature with the iOS 11 update. So, how to use it, and are there any interesting features? This guide illustrates the steps and tricks for recording an iPhone screen. Read on! Built-in slow-motion capture often looks smoother than stretching a normal recording later in an editor. Testing the change on a short clip first is a quick way to avoid re-editing a longer video from the start.
Add Screen Record Button To Control Center
Before anything else, check to see if the screen record button is in the Control Center and add it if otherwise. The good thing is that you won't need to perform this process again if you desire to record videos in the future.
Steps:
For iPhone X or later, swipe down from the top right corner to open the Control Center For iPhone 8 or earlier, swipe up.
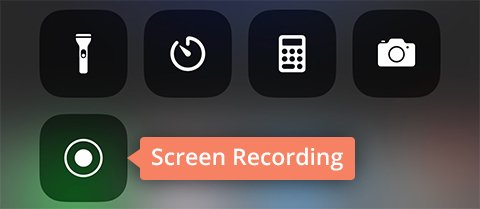
Locate the Screen Record button, which looks like a dot with a circle around it.T

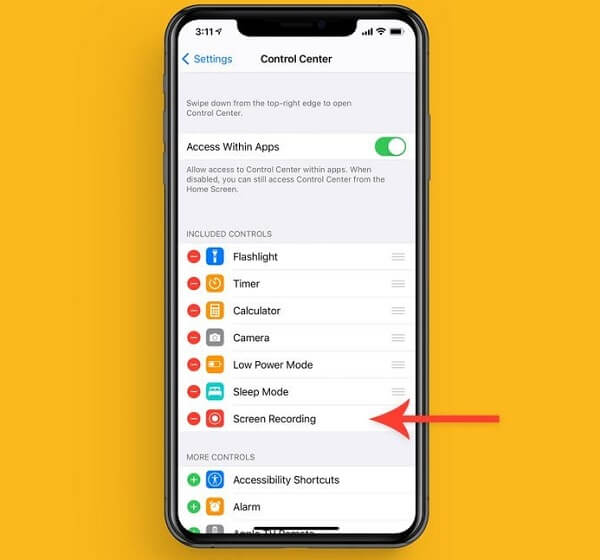
If you don't see it, tap Settings.
Tap Control Center > Customize Controls.
Scroll down to the More Controls menu.
Select the Screen Recording option.
Tap the green + symbol to the left of the text.
The feature will be added to the Included Controls menu.
Tip: Only selected iPhones have this function. If you didn't see this option, update your iPhone to iOS 11 or later.
Way 1 Via Control Center
It's time to start using the Screen Record button. The screen recording video feature will allow you to make a video of every swap, tap, and sound on your screen for as long as you want to record. Here's how to record your screen:
How to Start Recording:
Open Control Center.
Tap the Record button.
Wait for the three-second countdown. The clock on the upper left-hand corner of the screen will turn red.
Tap the Screen to exit the Control Center. Now you're recording both the video and audio of your screen.
How to Stop Screen Recording:
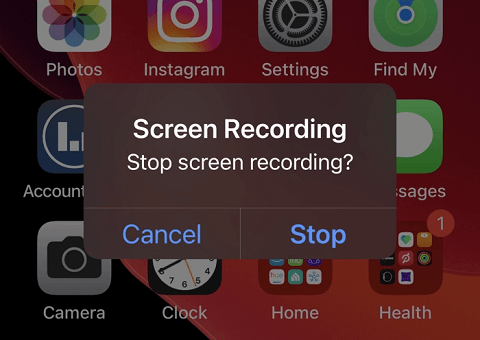
Open Control Center.
Tap the red Record button or the red status bar at the top of your screen and tap Stop.
Tip: Use theTip: Use theDo Not Disturb feature to record your screen without interruptions from alerts. Recording in slow motion first usually looks cleaner than slowing a regular clip after the shot has already been captured.
Way 2 How To Record With Audio
The iPhone's screen recording function allows you to record the screen sound and yourself while talking. This trick would be useful, in many scenarios, like making teaching videos, recording an online meeting briefing, or recording recipe instructions.
Steps:
Press and hold the Record button.
In the pop-up screen that appears, tap the Microphone icon at the bottom of the screen.
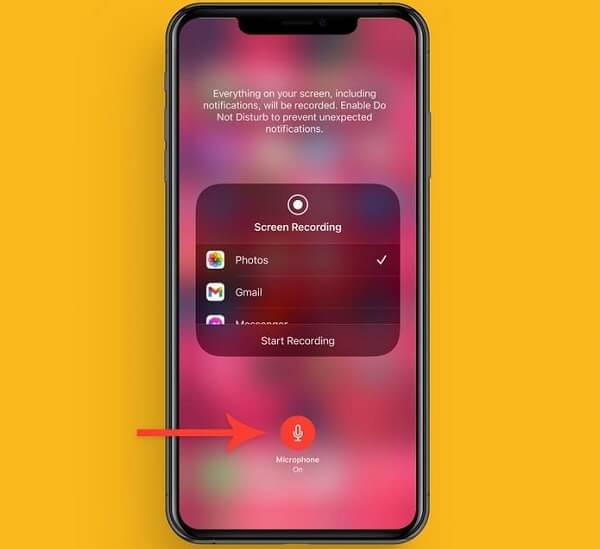
Tap Start Recording and wait for the countdown.
Tap the screen twice to exit the Control Center.
Now you can start recording.
Tips:
Audio recording is mostly disabled while screen-recording on the iPhone. If need be, hold the button for a few seconds and select the Microphone Off symbol to enable audio recording while screen recording.
The Microphone will subsequently automatically record audio when you screen record if you don't turn it off.
Open And Edit Your Screen Recording
It's possible to watch and edit the video you just recorded. Go to the iPhone's Camera Roll in the Photos app to preview the video. Here, you can utilize iPhone's editing tools to add filters, shorten the video, and save it as a new clip.
Steps:
Go to the Camera Roll album in the Photos app and tap the video.
Tap Edit in the top-right-hand corner of the screen.
Select the visual timeline of the video at the bottom of the screen.
Drag the arrow alongside the Play button to the right to trim the beginning of the video. Trim the end by tapping and dragging the arrow on the left. It should turn yellow while editing.
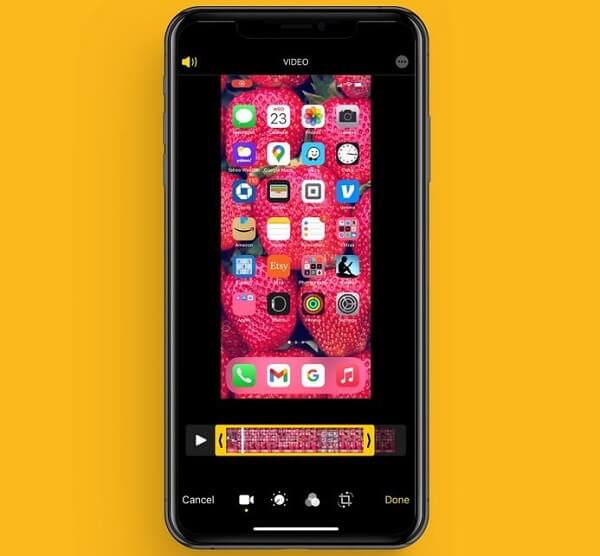
Press the Play button to watch the newly edited clip. Continue adjusting until you're satisfied with its length.
Adjust the filters with similar buttons you used to edit a photo in the Photos app.
Once done, tap Done,then choose Save As New Clip.
Way 3 Use Third-Party Apps
Sadly, you might find your iPhone doesn't support screen recording. Perhaps, the iPhone recording function is basic, and you want to do more with your recording than what's accessible with the iPhone. Then, you can choose third-party apps such as the following to record videos and get more features.
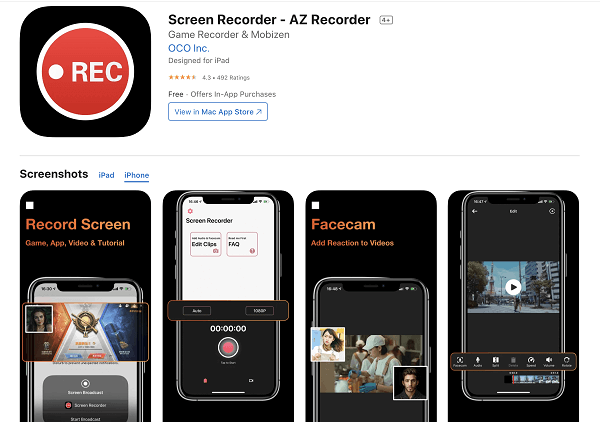
Screen Recorder - AZ Recorder
This app is a readily available iOS screen recorder for iPhone and iPad users. As a high-quality video recorder, it can record video in HD and allows you to adjust recording parameter settings like Resolution, FPS, and Orientation.
AZ Recorder can work inside any application or game and record audio alongside your screen video. Also, it has a video editor to make quick edits to videos and change the size of your face cam. If the screen looks different on your device, compare software version, model, and account state first. That is often the fastest way to avoid repeating the same edit workflow on a longer recording.
Go Record
Go Record is an iPhone screen recorder app perfect for recording gameplays, tutorials, and screencasts so the next part of the process is easier to complete without backtracking. It has an in-built video editor to add images, effects, and music to your recordings. It gives you finer control when only one moment should stay slow and the rest of the recording should play normally. If the result still looks off, compare a built-in method with one app-based method so you can see which handles your clip more cleanly.
Similar to other apps, it allows you to add audio to the recording using the microphone. The app supports iOS version 11 or newer and supports adding Facecam overlay while screen recording.
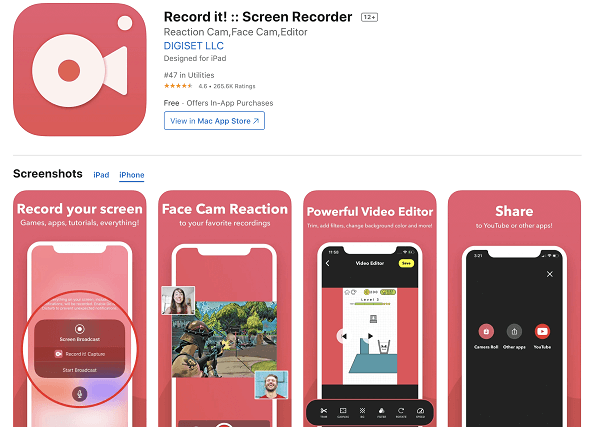
Record it!
Record It is a simple and easy-to-use iOS recording app that lets you record reaction videos, demo videos, training videos, etc. Also, it can add audio commentary to make your videos more personalized and engaging.
Also, it's equipped with an in-built video editor that lets you trim and do some other basic video editing. That matters when you only want one part of the video to play back slower while the rest keeps its normal speed.
DU Recorder
DU Recorder is a screen-recording app with a built-in video editor that lets you record videos at 1080p quality.
You can upload recorded videos directly to social media platforms like Facebook. Plus, you can add watermarks to your recordings and make recordings in any app or game.
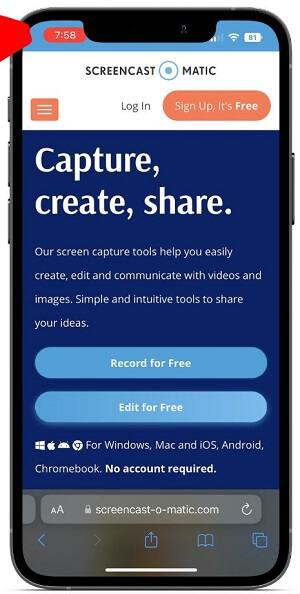
Screencast-O-Matic
This screen recorder app for iPhone makes it easy to record your screen, add commentary, edit your recordings and share them. Screencast-O-Matic offers free music tracks to choose from and free captioning capabilities. Also, its free screenshots tool helps you capture your screen's images.
Also, the app comes with a free hosting account to organize and manage your content. That gives you another route if the built-in iPhone tools feel too limited for the result you want.
When To Use Screen Recording
Screen recording is usually helpful for videos you can't download on social media and YouTube, except for premium members and live-streaming events. The following are some scenarios with similar examples.
Scenarios | Examples |
|---|---|
Share videos | Record funny videos on social media and share them with friends. Record your favorite song on YouTube and share it with that special someone. |
Create tutorial videos | Record a step-by-step instructional video that shows the functionality of an app. Create sample videos of how to solve a math assignment problem. If a step looks different on your device, the app version is usually the first thing to compare before assuming the feature is missing. Demonstrate how to turn on and off accessibility features of a system |
Troubleshooting | Record your user experience and usability problem and send it to the support team for quick and efficient assistance. Record issues with apps or devices to be shared with developers. |
Pass the game faster | Gamers use screen recordings to create gameplay videos and learn how to Go through a difficult section. |
Bonus Tip 1: Take A Screenshot On Your iPhone
Besides recording videos, you can easily and quickly save what's on your screen with a screenshot. It captures every inch of your iPhone screen. Taking a screenshot differs with each iPhone model. That makes it easier to keep a copy of the edited result and post it right away from the same device. A quick test clip usually makes it easier to compare whether the built-in editor or an app gives you the cleaner result.
Steps on iPhone 13 and other models with Face ID:
Press the Side and the Volume Up buttons simultaneously.

Quickly release the buttons.
Tap the thumbnail in the lower-left corner of your screen to open it or swipe left to dismiss it.
Steps on iPhone models with Touch ID and Side button:
Press the Side button and the Home button at the same time.
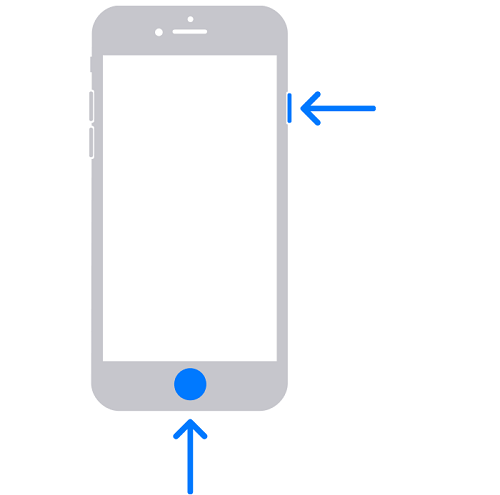
Quickly release both buttons.
Tap the thumbnail to open it or swipe left to dismiss it.
Step on iPhone models with Touch ID and Top button:
Simultaneously, press the Top and Home buttons.
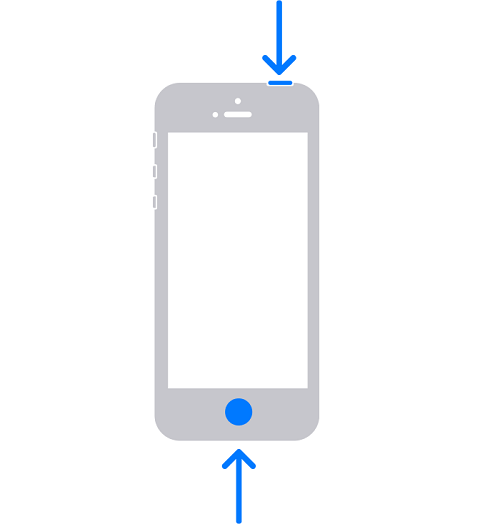
Quickly release both buttons.
After taking the screenshot, a thumbnail appears on the lower-left corner of the screen. Tap to open it or swipe left to dismiss it.
How to find the screenshots:
Open the Photos app.
Go to Albums.
Select Media Types,then click on Screenshots.
How to edit the screenshots:
After taking a screenshot, you can edit it to fit your personal preferences. Achieve this by using the Markup tool. This tool allows you to edit screenshots and photos, select different fonts and opacity and even add a signature to a PDF document. Below is how to edit your photos with Markup. A quick check of the device model, software version, and account state usually explains why the same menu looks different on another device. If the first method does not work, compare software version, device compatibility, and account status before repeating the same step.
Open Photos and select the photo you want.
Tap Edit, then tap the Markup button, which looks like a marker pen.
Tap the Add + button to add text, shapes, and other effects.
Tap Done, then tap Done again.
Bonus Tip 2: Use QuickTime To Record Screen On Mac For Free
Developed by Apple, QuickTime is a popular multimedia player that can handle many pictures, video, audio, and panoramic image formats. Plus, you can use its video editor to share clips online directly. This helps when you want to export the clip, send it quickly, and avoid another round of cleanup edits.
Steps:
Connect your iPhone or iPad to a Mac with a USB cable.
Tap Trust This Computer on the alert that appears.
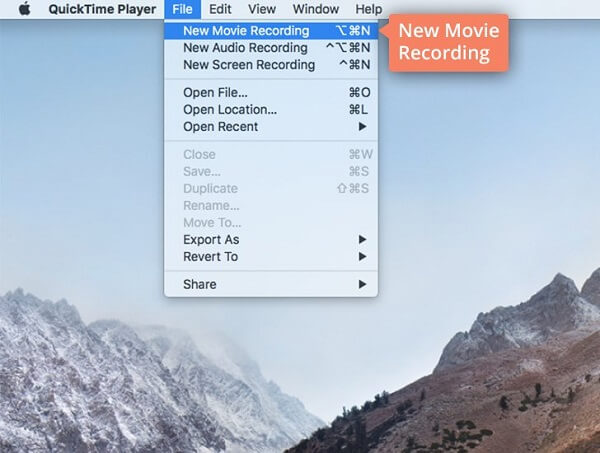
Open QuickTime and go to the File Choose New Movie Recording.
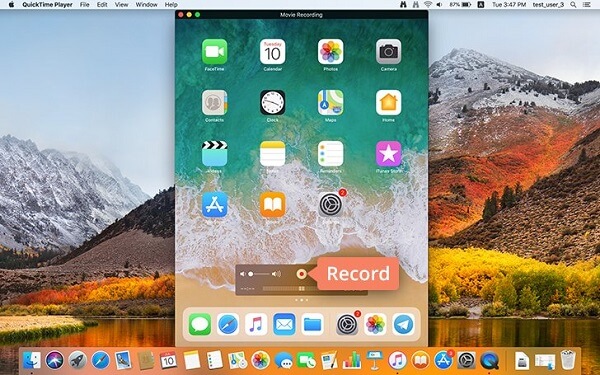
Change the recording source near the Record The iSight camera will turn off.
Choose your connected device.
To start recording after your device appears on the Mac screen, tap the Record button.
To finish recording, click the Stop button in the QuickTime preview window.

Go to the File Menu and select Export to save the recording. Tap Share if you wish to share the video.
Tip: Despite the tool being available for Windows users, it has stopped receiving support for the Windows version.
FAQs About How to Screen Record on iPhone
Below are some answers to some of the common questions iPhone users ask regarding screen recording.
1. Is there a time limit to screen record on iPhone?
There's no limit to how long you can screen record on your iPhone. The iPhone's storage space is your only hindrance. Your video recording can randomly stop due to the large video size and lack of storage space.
2. Is it possible to screen record Zoom on an iPhone?
Luckily, yes! Your iPhone's built-in screen recording feature allows you to record any Zoom meeting, whether you're the host or simply attending.
3. Can you record a call on your iPhone?
Unfortunately, the answer is no. Even the most recent iPhone 14 and iPhone 14 Pro don't have built-in tools for recording calls. The best method would be recording the call with another device, using a third-party app, or using Google Voices services.
Conclusion
Now you know how to screen record on iPhone. As illustrated, there's no need to use many professional apps to record your device's screen anymore. The screen recording tool is designed to make your life easier and enable you to put all the fantastic ideas in mind into action. That usually makes the steps easier to follow on a real device. That gives you a practical reference point if you need to repeat the process later on another device.
Also, even if your iPhone does not support iOS 11 and this feature, you can use some third-party apps to record the iPhone screen.
