
Is the System Data on your iPhone consuming too much storage space? If it is, would you like to know how to clear it? In this detailed article, I will show you 9 easy and effective solutions to clear system data on iPhone. I will also show you how to factory reset your iPhone to help free up more storage space. That said, let's get going.
The system data on your iPhone consumes too much storage space. You want to clear it but need to know how or which data to delete. Can you delete system data quickly and keep your important files?
Yes. You can clear browsing History and cache, remove large message attachments, etc. Let's learn tips to help free up more storage space!
What Is System Data, and Where Is It Found on an iPhone?
How to Check the System Data
- Open Settings > General > iPhone Storage
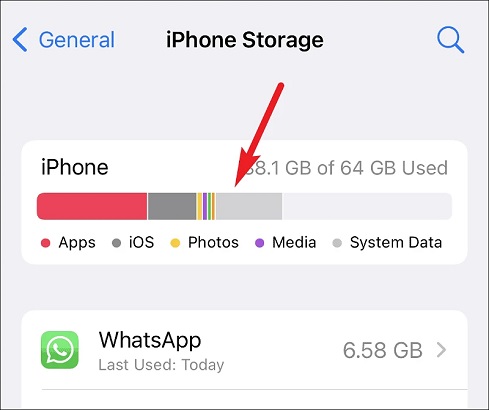
- You will notice a bar chart showing your iPhone storage with different colors for different storage contents like photos, apps, etc. You will also see your apps arranged according to the amount of storage they occupy.
- Look at the bar closely and check if 'System Data' or 'Other' has taken up a considerable chunk of the bar. System data is colored gray in the bar chart and is located towards the right end.
- If you see the System Data category, scroll down past the apps.
- You will have a 'System Data' or ' Other' option and the storage it's occupying. Tap it to open it.
How to check the System Data
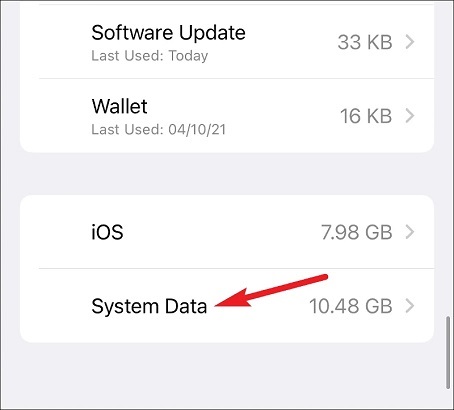
Tap the System Data option to view the System data.
Method 1: Clear Your iPhone's Browsing History and Website Cache
Option 1: Delete Safari 's Browsing History and Cache
You can delete safari's history and cache. Browser history and cache make Internet surfing more convenient and allows you to access websites faster. But keeping them on your iPhone for too long causes them to hog the much-needed storage space. Clearing them can create space, it also allows your browser to run more smoothly.
Steps:
- Launch Settings.
- Tap Safari > Clear History and Website Data
- You will see a confirmation pop-up. Press Clear History and Data.
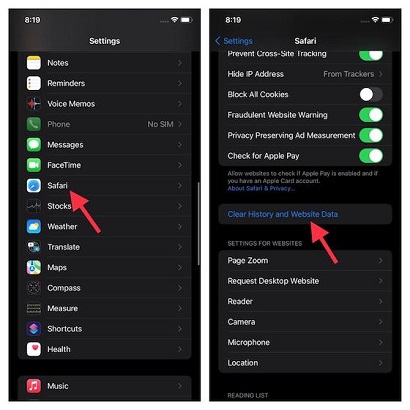
How to clear Safari’s browser history via the Settings app
Alternatively, you may delete Safari's browser history and cache from within the app itself.
Steps:
- Open Safari.
- Go to the Safari toolbar at the bottom and tap Bookmarks.
- Open the History tab and press Clear on your screen's bottom-right corner.
- You will see the options: All Time, Today and yesterday, Today, and The last hour. Press All Time.
- This will delete all your Safari browser history without closing your tabs.
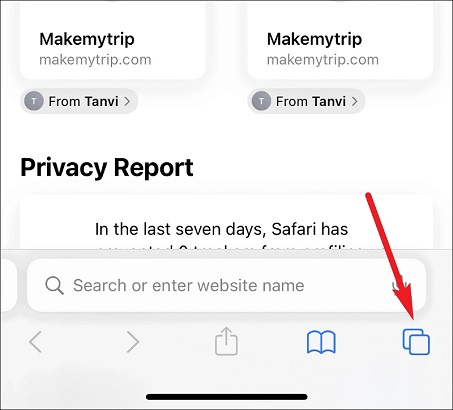
How to clear Safari’s website history through the Safari app
Option 2: Delete Chrome Browsing History and Cache
Steps:
- Open the Chrome browser.
- Press the icon with three dots at the bottom of your screen.
- Select History, then tap Clear Browsing Data.
- Select the time range of the data you wish to clear, then tap Clear Browsing Data again.
How to clear Chrome’s browser history and cache on iPhone
Option 3: Delete Firefox Browsing History and Cache
Steps:
- Open Firefox.
- Press the menu button (three small horizontal lines) at the bottom right corner of your iPhone's screen.
- Tap History > Clear Recent History.
- You will see a list of options. Select Everything to wipe out all history.
Delete Firefox browser history on iPhone
Method 2: Turn off iCloud Photos
Turning off iCloud Photos can help when photo syncing is stuck and cached sync data keeps building up in System Data. It will not fix every storage issue, but it is worth trying if your photo library has been pausing, retrying, or taking a long time to sync. Before you switch it off, make sure you understand whether you want to keep a downloaded copy of your photos on the iPhone or remove the local copies.
Steps:
- Open Settings > Your Name > iCloud > Photos > Sync this iPhone and toggle it to an off position.
- When prompted, tap Download Photos & Videos if you want a local copy before you continue.
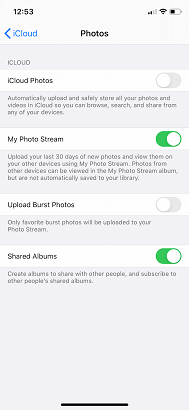
Turn off iCloud photos to clear System Data on iPhone
Method 3: Clear Large Message Attachments and Reduce Message History
Option 1: Erase Large Message Attachments
You should always delete any message attachments that you no longer need to prevent these files from taking up storage space. Luckily, the iPhone's message app enables you to keep track of message attachments and remove them easily.
Steps:
- Go to Settings > General > iPhone Storage.
- Tap the Messages option.
- Beneath the Documents section, you will see categories like Photos, Videos, and Top Conversations. Go into each category and erase any useless attachments.

How to clear large message attachments on iPhone
Option 2: Reduce Message History
The more messages you keep on your iPhone, the more storage space they consume. Hence, delete your old text messages after removing the useless attachments to save some more space. You may also enable auto-deletion so your messages auto-clear from time to time.
Steps:
- Open Settings > Messages > Keep Messages.
- Select whether to keep the messages for 30 days or a year instead of forever.
- You will then be asked whether to delete older messages. Tap Delete if you want to clear all messages older than your set time range.
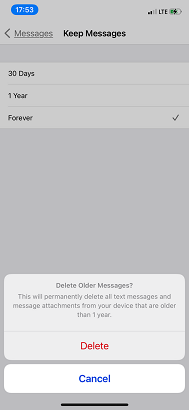
Delete old messages on iPhone to clear System Data
Method 4: Clear App Cache and Uninstall Apps You Don 't Need
Option 1: Clear App Cache
Piling up cached data from apps on your iPhone can contribute to a huge part of the System Data. It can also create problems like crashing and freezing on your iPhone. Despite this, Apple doesn't make deleting the cached data easy. Sometimes, you have to uninstall an app and then reinstall it. Luckily, many apps allow you to delete their cache from inside the app's settings.
Steps:
To delete cache data via an app's settings:
- Open the target app.
- Go to the app's Settings.
- Find an option to clear the cache.
Delete cache from iTunes in-app settings
To delete then reinstall an app:
- Go to Settings > General > iPhone Storage.
- Scroll through the apps list. They are arranged in a descending order starting with those that consume the most space.
- Select an app to delete, then select Delete App.
- Visit the App Store to reinstall the app.

How to delete an app on iPhone
Option 2: How to Automatically Uninstall Unused Apps
The offloading feature lets your iPhone remove an app you rarely use while keeping its documents and data on the device. That makes it a safer first step than deleting the app outright, especially when you want to free storage without losing progress or saved files. Offloading also clears the app package and some of the cache tied to it, and you can do it automatically or one app at a time.
Steps:
To automatically offload unused apps:
- Go to Settings > General > iPhone Storage > Offload Unused Apps. On current iOS versions, you can also go to Settings > Apps > App Store > Offload Unused Apps.
- Enable the toggle next to Offload Unused Apps. It should be green when enabled.
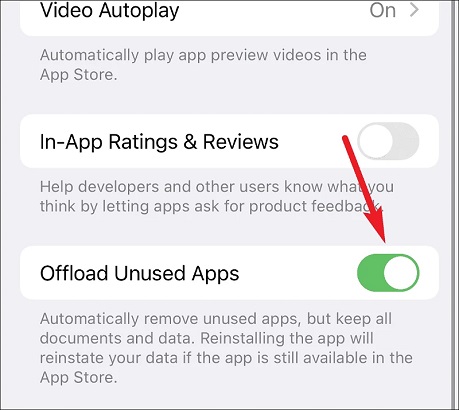
Enable your iPhone to offload unused apps automatically
To offload apps manually:
- Open Settings > General > iPhone Storage.
- Select the app you want to offload from the apps list.
- Tap Offload App.
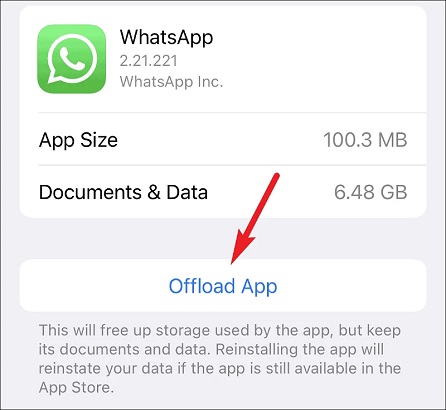
How to offload unused apps manually.
Method 5: Update to the Latest Software
Installing the latest iOS update is still a practical fix when System Data looks unusually large. Newer releases can replace buggy temporary files, refresh system caches, and improve storage management, so updating is worth trying before you erase the phone. This method is most useful if you have been delaying updates for a while.
Steps:
- Go to the Settings app.
- Click General.
- Select the Software Update option.
- Download and install the latest iOS version.
- Once the update is complete, go to iPhone storage to check the status of the System data storage.
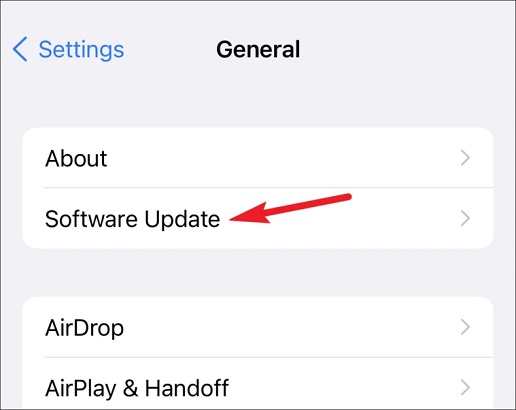
iOS software update
Method 6: Cut Down on Streaming If Possible
Streaming is not the same as downloading and could be the reason why your iPhone 's System Data storage is filling up. Streams use caches to support smooth playback, which is classified as System Data.
Steps:
- Open Settings.
- Go to specific media streaming apps such as YouTube.
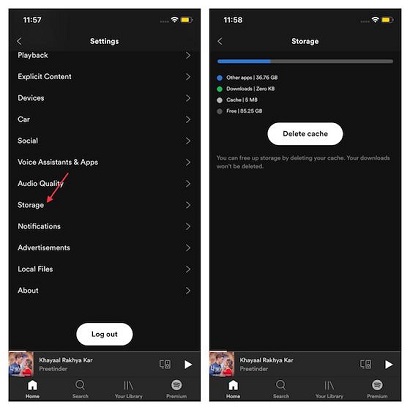
- Click on Storage.
- Tap Offload App to clear the cache.
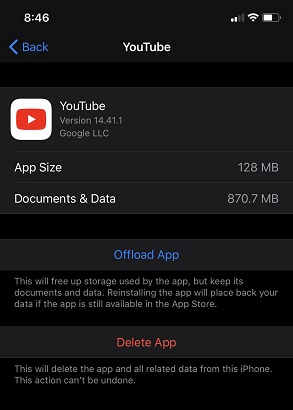
Clear YouTube cache
Method 7: Check Your Notes & Voice Memos
Notes and Voice Memos can also add to System Data over time, especially if you keep image-heavy notes, scanned documents, or long recordings. Removing the app alone is not the cleanest fix because the large files you created are what usually consume the space. Review the actual notes and recordings instead, then delete the ones you no longer need so the storage drop is meaningful.
Steps:
To review and delete notes:
- Launch the Notes app.
- Select the folder from which you want to delete notes.
- Press Edit in the upper-right corner. (Alternatively, swipe left on any note, then hit Delete.)
- Select the note or notes you want to delete.
- Go to the bottom-right corner and tap Delete.
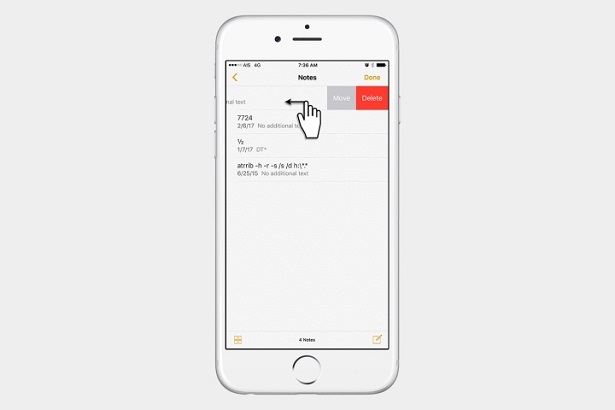
Delete notes on iPhone to clear the System data.
To review and delete recordings in the Voice Memos app:
- Open the Voice Memos app.
- Press Edit in the top right corner. (Alternatively, tap on any individual recording, then press the dustbin icon() to delete it.)
- Select the recording or recordings you want to remove, then tap Delete in the bottom-right corner.
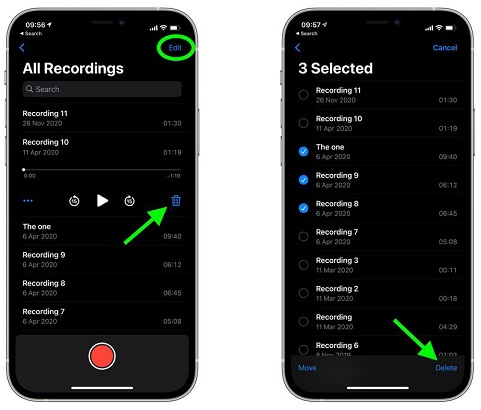
Clear System Data by erasing recordings in the Voice Memos app
Method 8: Disable Background App Refresh & Location Data
Background App Refresh and location access can contribute to extra cached data because apps keep checking for updates, content, and location changes behind the scenes. Turning these features off will not produce a huge drop on every iPhone, but it can help if many apps are constantly active in the background.
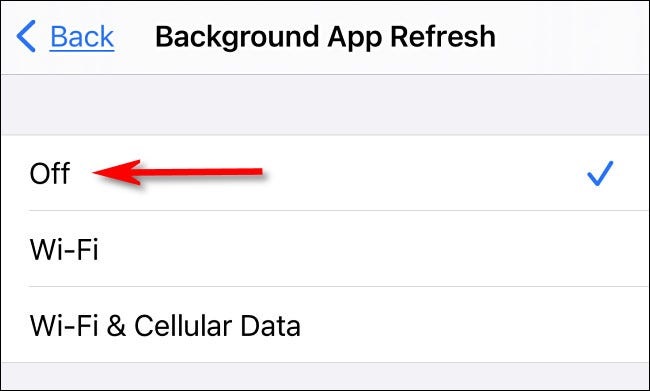
Steps to disable background app refresh:
- Launch the Settings app.
- Select General.
- Click Background App Refresh
- Toggle the button to turn off.
Turn off location services
Steps to disable location sharing:
- Open Settings.
- Scroll down to Privacy & Security.
- Click on Location Services.
- Tap the button to turn off location services.
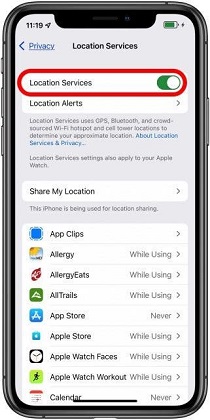
Turn off location services
Method 9: Reset Your iPhone as the Last Solution
If the above solutions don't work or the space you recover is insufficient, resetting your iPhone is the only other way to fix the System Data problem. While factory resetting may seem extreme, it is effective. There are two options to reset your iPhone entirely. You can either back it up on iCloud and reset the iPhone itself or back it up and restore it via iTunes on a computer.
Option 1: Backup and Restore via iCloud
An iCloud reset is one of the easiest ways to wipe and restore your iPhone. This method is effective as long as you have sufficient space in your cloud. Before erasing your iPhone, back up all its contents to iCloud.
Steps:
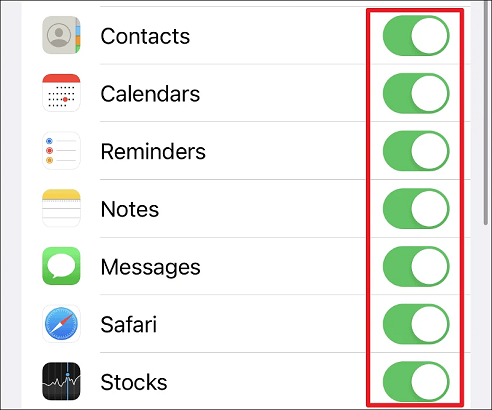
- Open Settings, then tap on your name.
- Tap iCloud.
- Enable the toggle for each app. The toggles are green in color when enabled.
- Press iCloud Backup > Backup now. This can take a few minutes to an hour, depending on the size of your backup.
- Once the backup is complete, go to General in Settings.
- Scroll down and tap Transfer or Reset iPhone > Erase All Content and Settings > Continue.
- Input your passcode when prompted, then tap Erase iPhone.
- Once your iPhone erases and restarts, you will see the Hello screen. Follow the on-screen instructions until you get to the Apps & Data screen.
- Press Restore from iCloud Backup.
- Log in to your Apple ID, then select the most appropriate backup by checking the size and date of the backup. The backup transfer will then begin. Ensure your iPhone has enough battery power and uninterrupted internet access during this period. You will see the transfer progress on your iPhone screen.
- Once the restore process is complete, continue setting up your iPhone. Some content like music, apps, and photos will continue to restore in the background. Depending on the size, this background process can last a few hours or days.
Backup and restore your iPhone via iCloud
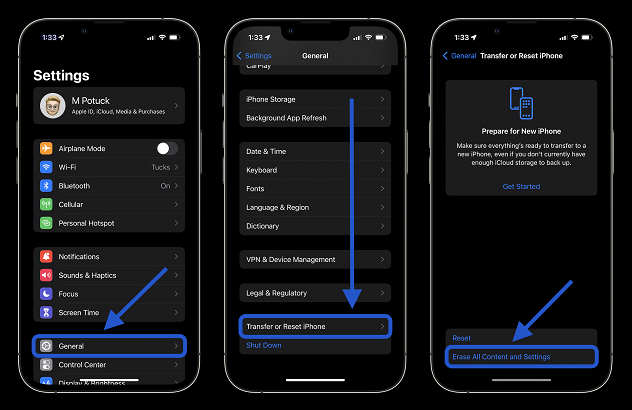
Factory reset your iPhone to clear System data
Option 2: Backup and Restore via iTunes
You can also reset your iPhone with a computer, which is often the most thorough way to strip out stubborn system caches. On a modern Mac, you will use Finder instead of iTunes, while Windows users may see Apple Devices or iTunes depending on their setup. This takes longer than the other methods, but it usually gives you the cleanest storage reset.
Steps:
- Connect the iPhone to your computer, then launch iTunes or open Finder on a Mac with macOS Catalina or later.
- If you see a prompt to 'Trust this Computer' on your iPhone, press Trust.
- A device icon or sidebar entry will appear in the app window. Select your iPhone.
- Select This Computer under 'Automatically Back Up. '
- Select the Encrypt local backup option and choose a password you won't forget. Checking this option will ensure you also back up your passwords and health data.
- Click Back up now.
- Once the backup is complete, click Restore iPhone and follow the on-screen instructions.
- After the iPhone is restored, press Restore Backup in the computer app you are using.
- Choose an appropriate backup depending on the date and size to restore your iPhone. Enter the password you set to encrypt the local backup, then click Restore.
- Keep the iPhone connected to your computer as it restores.
- Once the process is over, check the iPhone Storage via the Settings app to see how effective this process was.
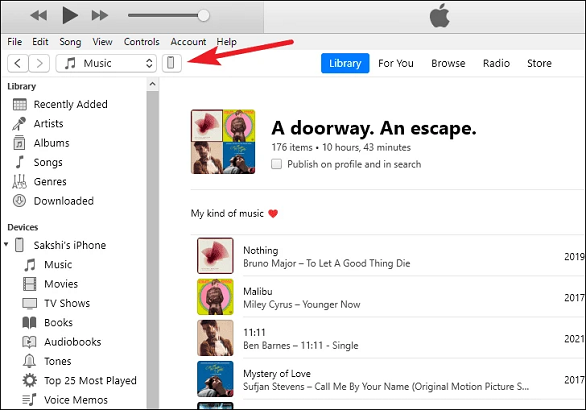
Reset your iPhone via iTunes.
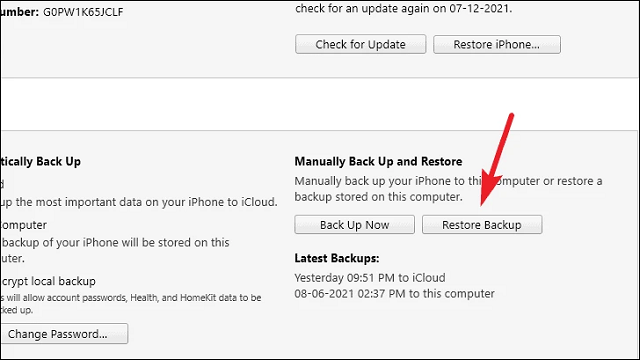
Restore iPhone backup from iTunes
You now know 9 methods to clear your iPhone's System Data. With the help of this article, you do not have to struggle to find or erase these files. But, do not wait until your iPhone runs out of space so you can clear the System Data. Instead, regularly review and remove this content to prevent it from piling up and causing you storage problems.