[5 Work Tips] How to Send Long Videos on iPhone (2024)

You need to send long videos from your iPhone, but you may be asked to shorten the video size. Can you send long videos and maintain the file size and video quality?
Yes. You can use AirDrop, Mail Drop, and other ways that won't cut or compress the video quality. Please read this article keenly to the end to find yourself the best solution.
Large Video File
The standard to measure whether a file is considered significant depends on the platform you're using.
Generally, email providers consider any file over 25MB to be too large for email delivery. Additionally, if the video has a high resolution or is longer than usual, it's likely over 2GB and will only fit within a few file size restrictions.
Shortening the file appears to be a preferred option. The good news is that regardless of the video's size, there are other ways to send that fantastic video you've longed to share with your friend.
1. Use AirDrop with Wi-Fi and Bluetooth
AirDrop is Apple's wireless file-sharing feature, allowing users to quickly and easily send large files between iPhones, iPads, and Macs. It has no file size limit, so you don't have to worry about how big your file is.
Additionally, AirDrop makes it simple to beam videos from your device to other AirDrop-enabled devices — as long as you have Wi-Fi and Bluetooth turned on. You must also sign in with your Apple ID to use this feature.
Here's How:
Check that the receiving device is nearby and switched on.
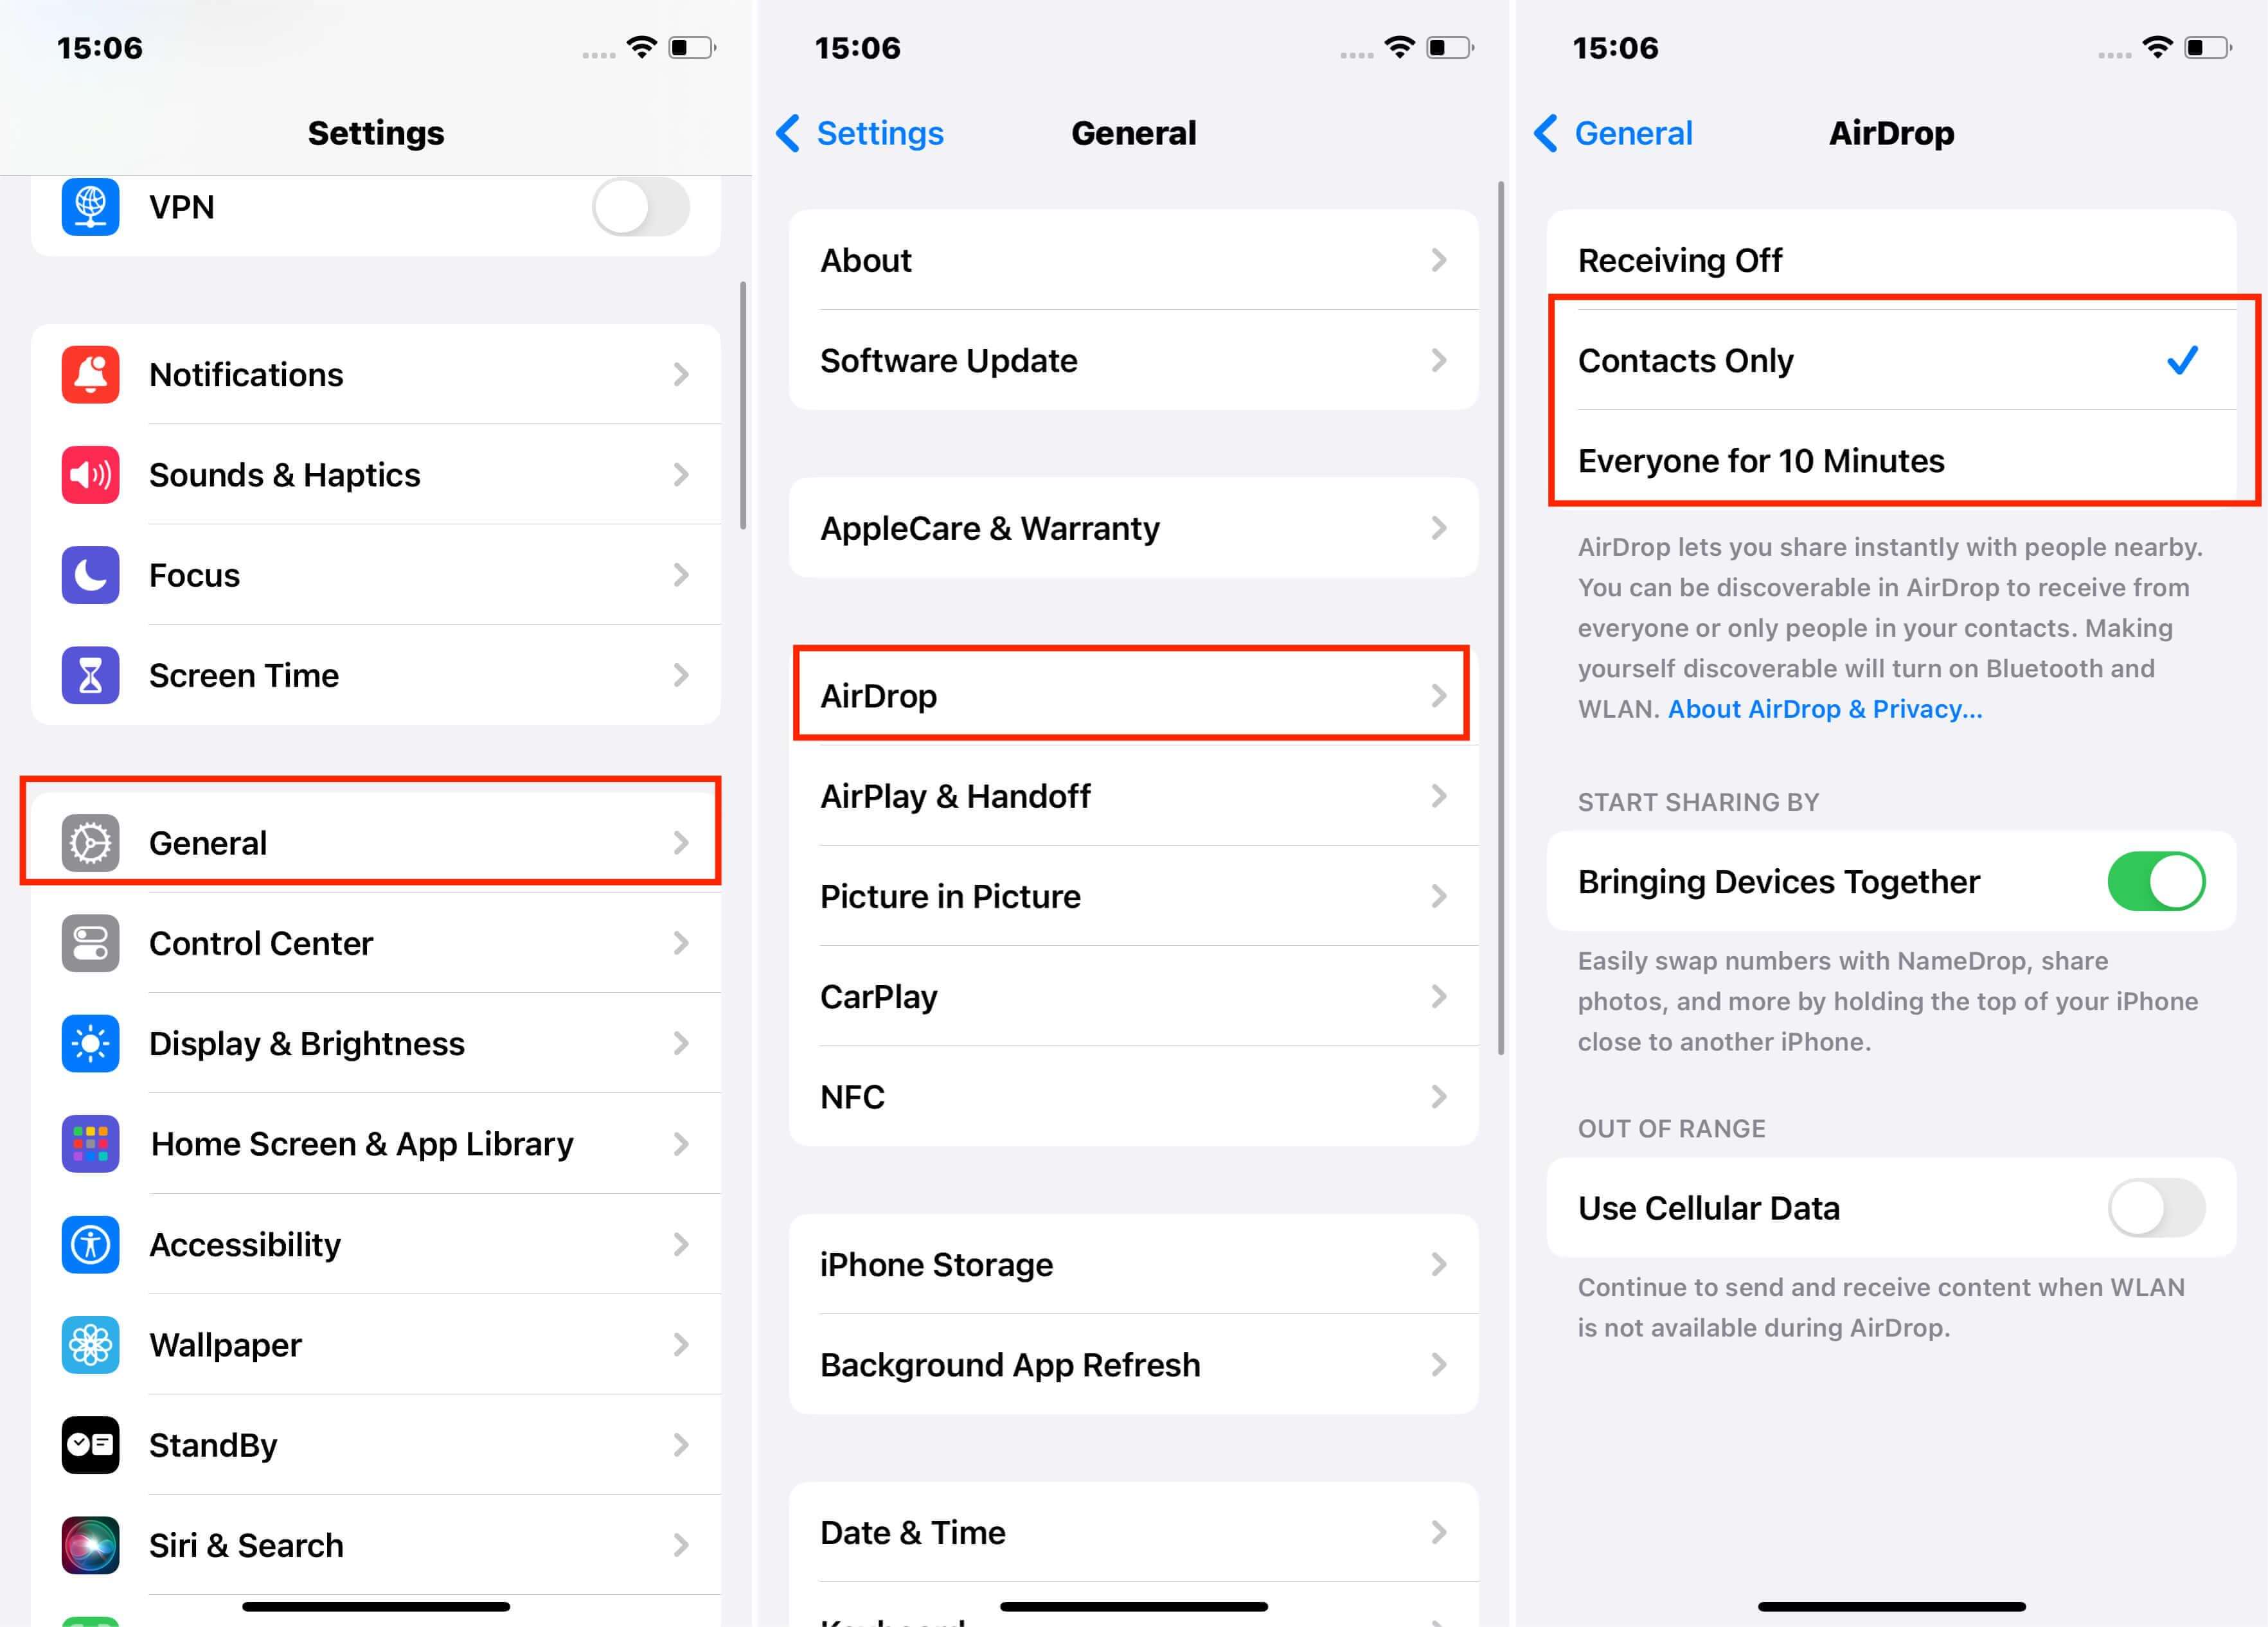
Ensure the recipient device is set up to accept AirDrop files, navigate to Settings > General > AirDrop, and select Contacts Only or Everyone.
On the sending device, launch the Photos app.
Choose Videos from the list of media types. Select the video you want to send.
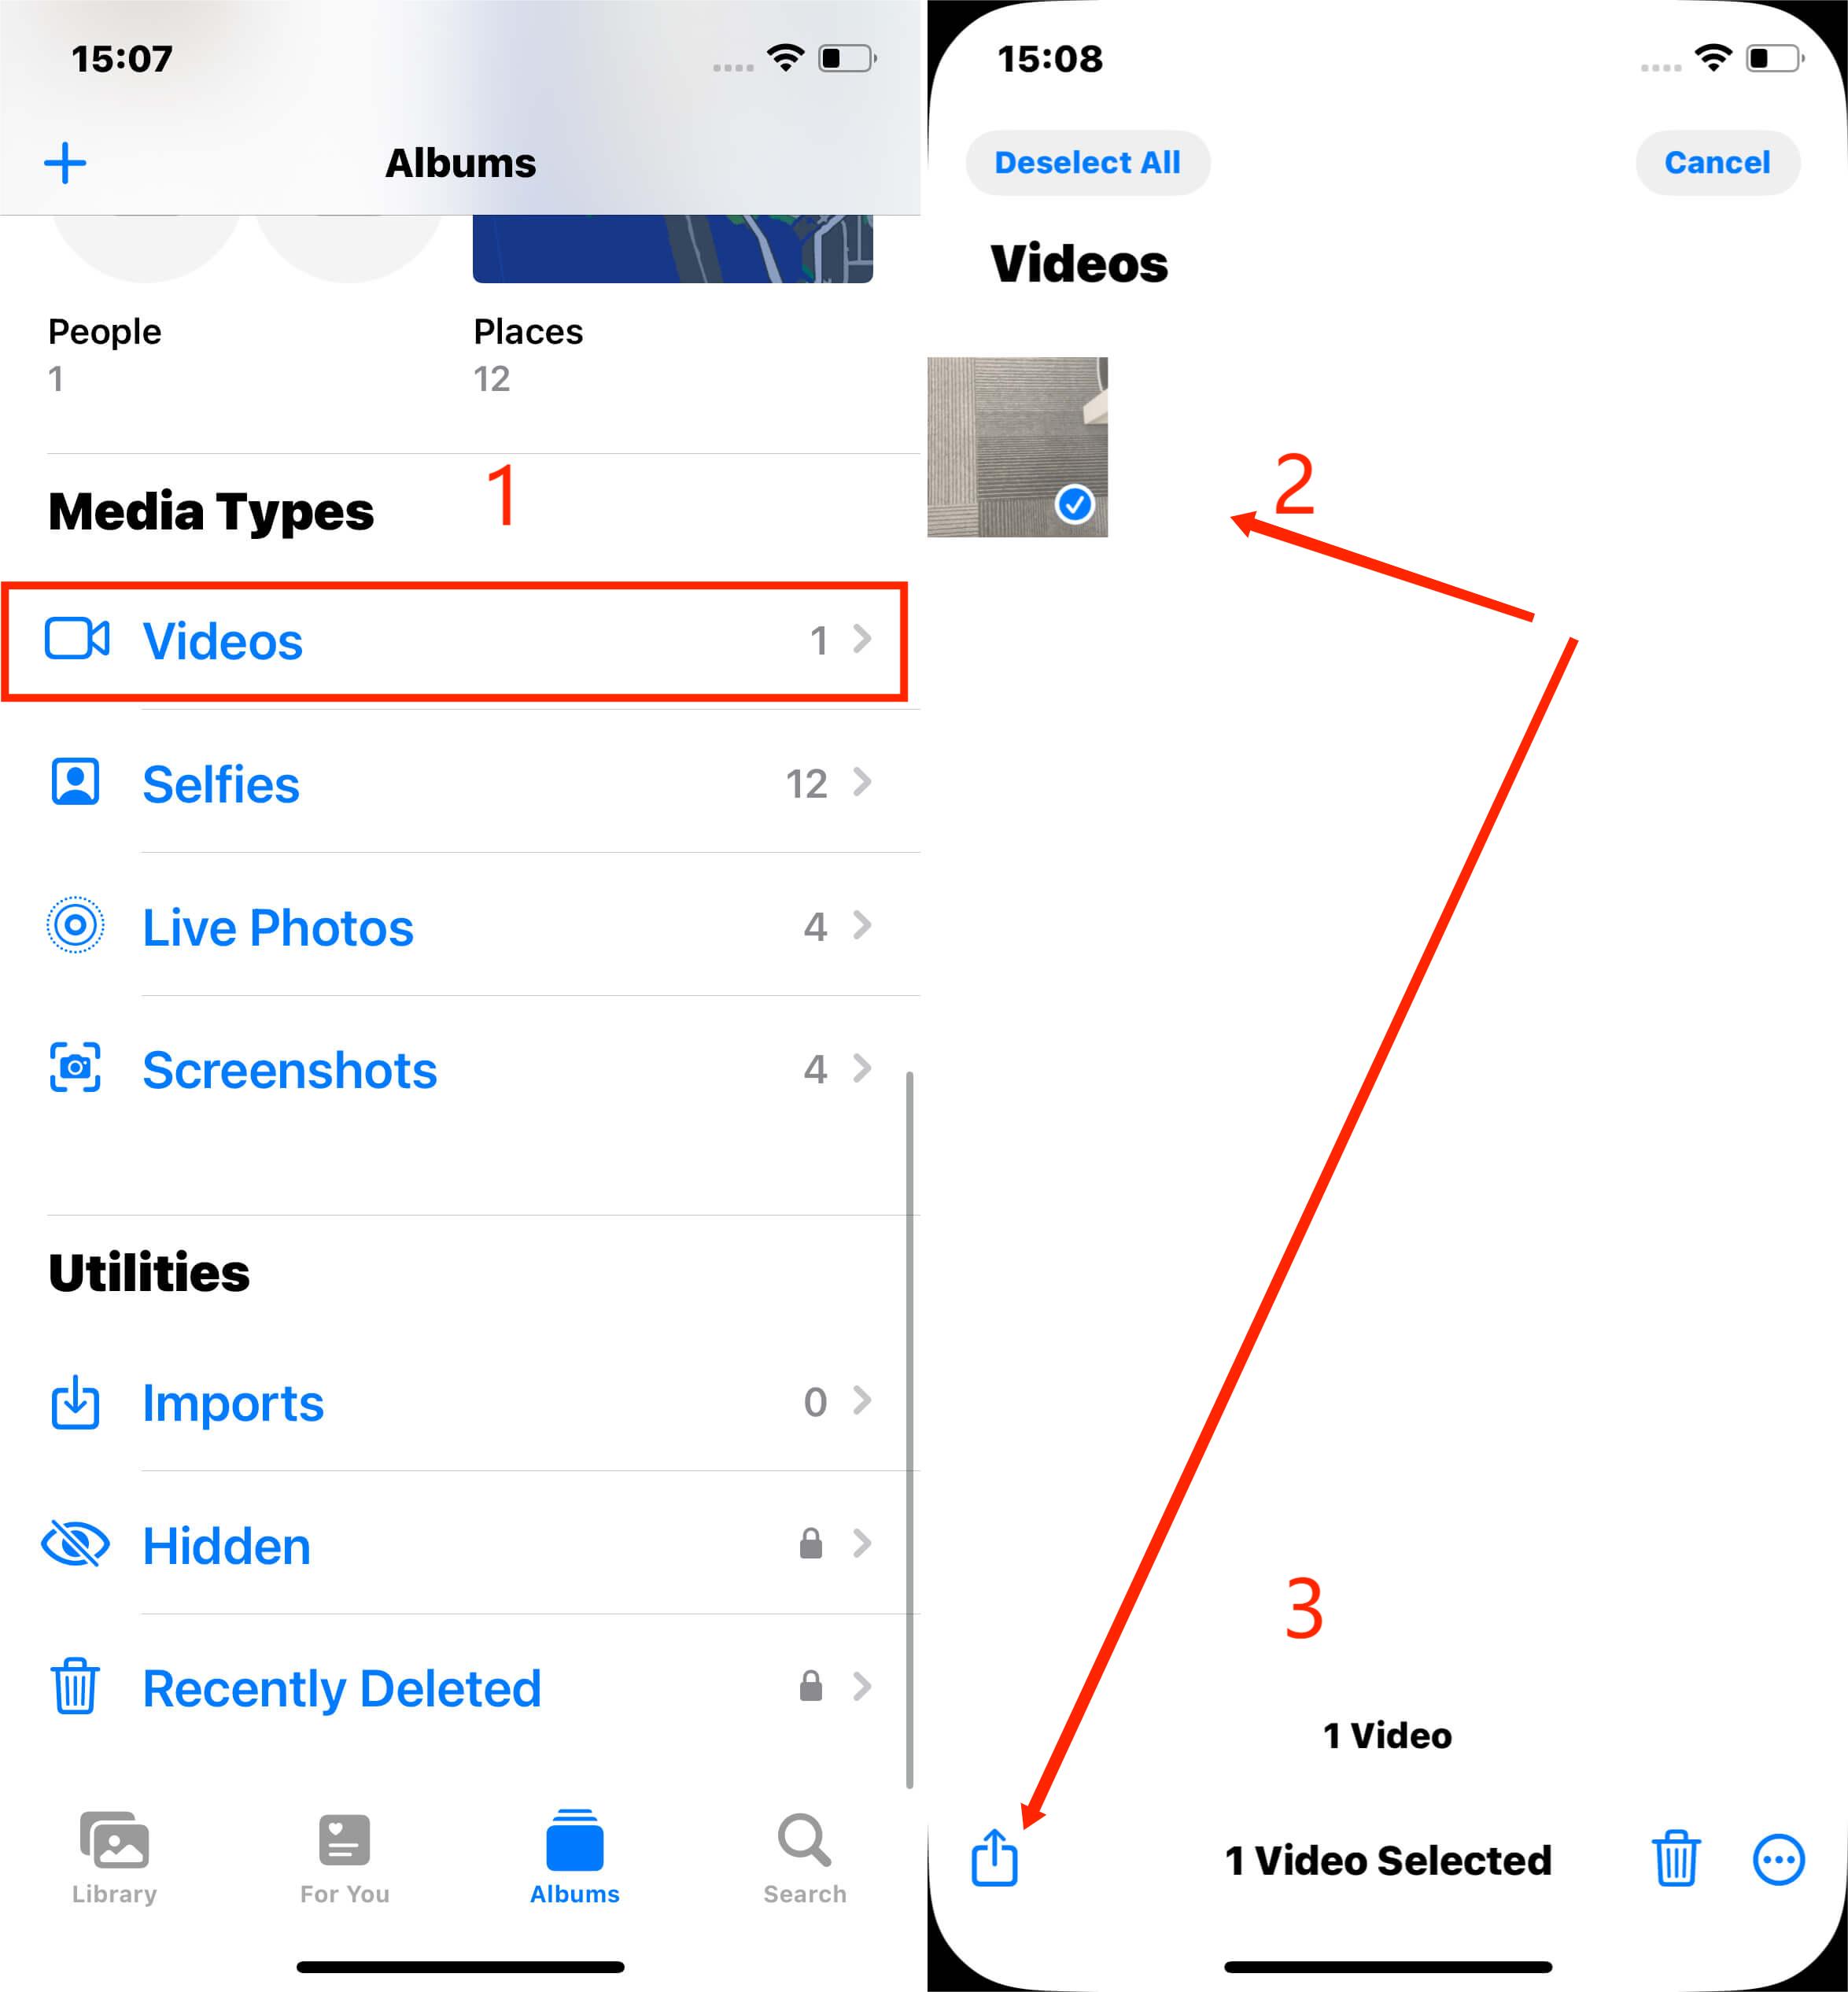
Tap the Share icon.
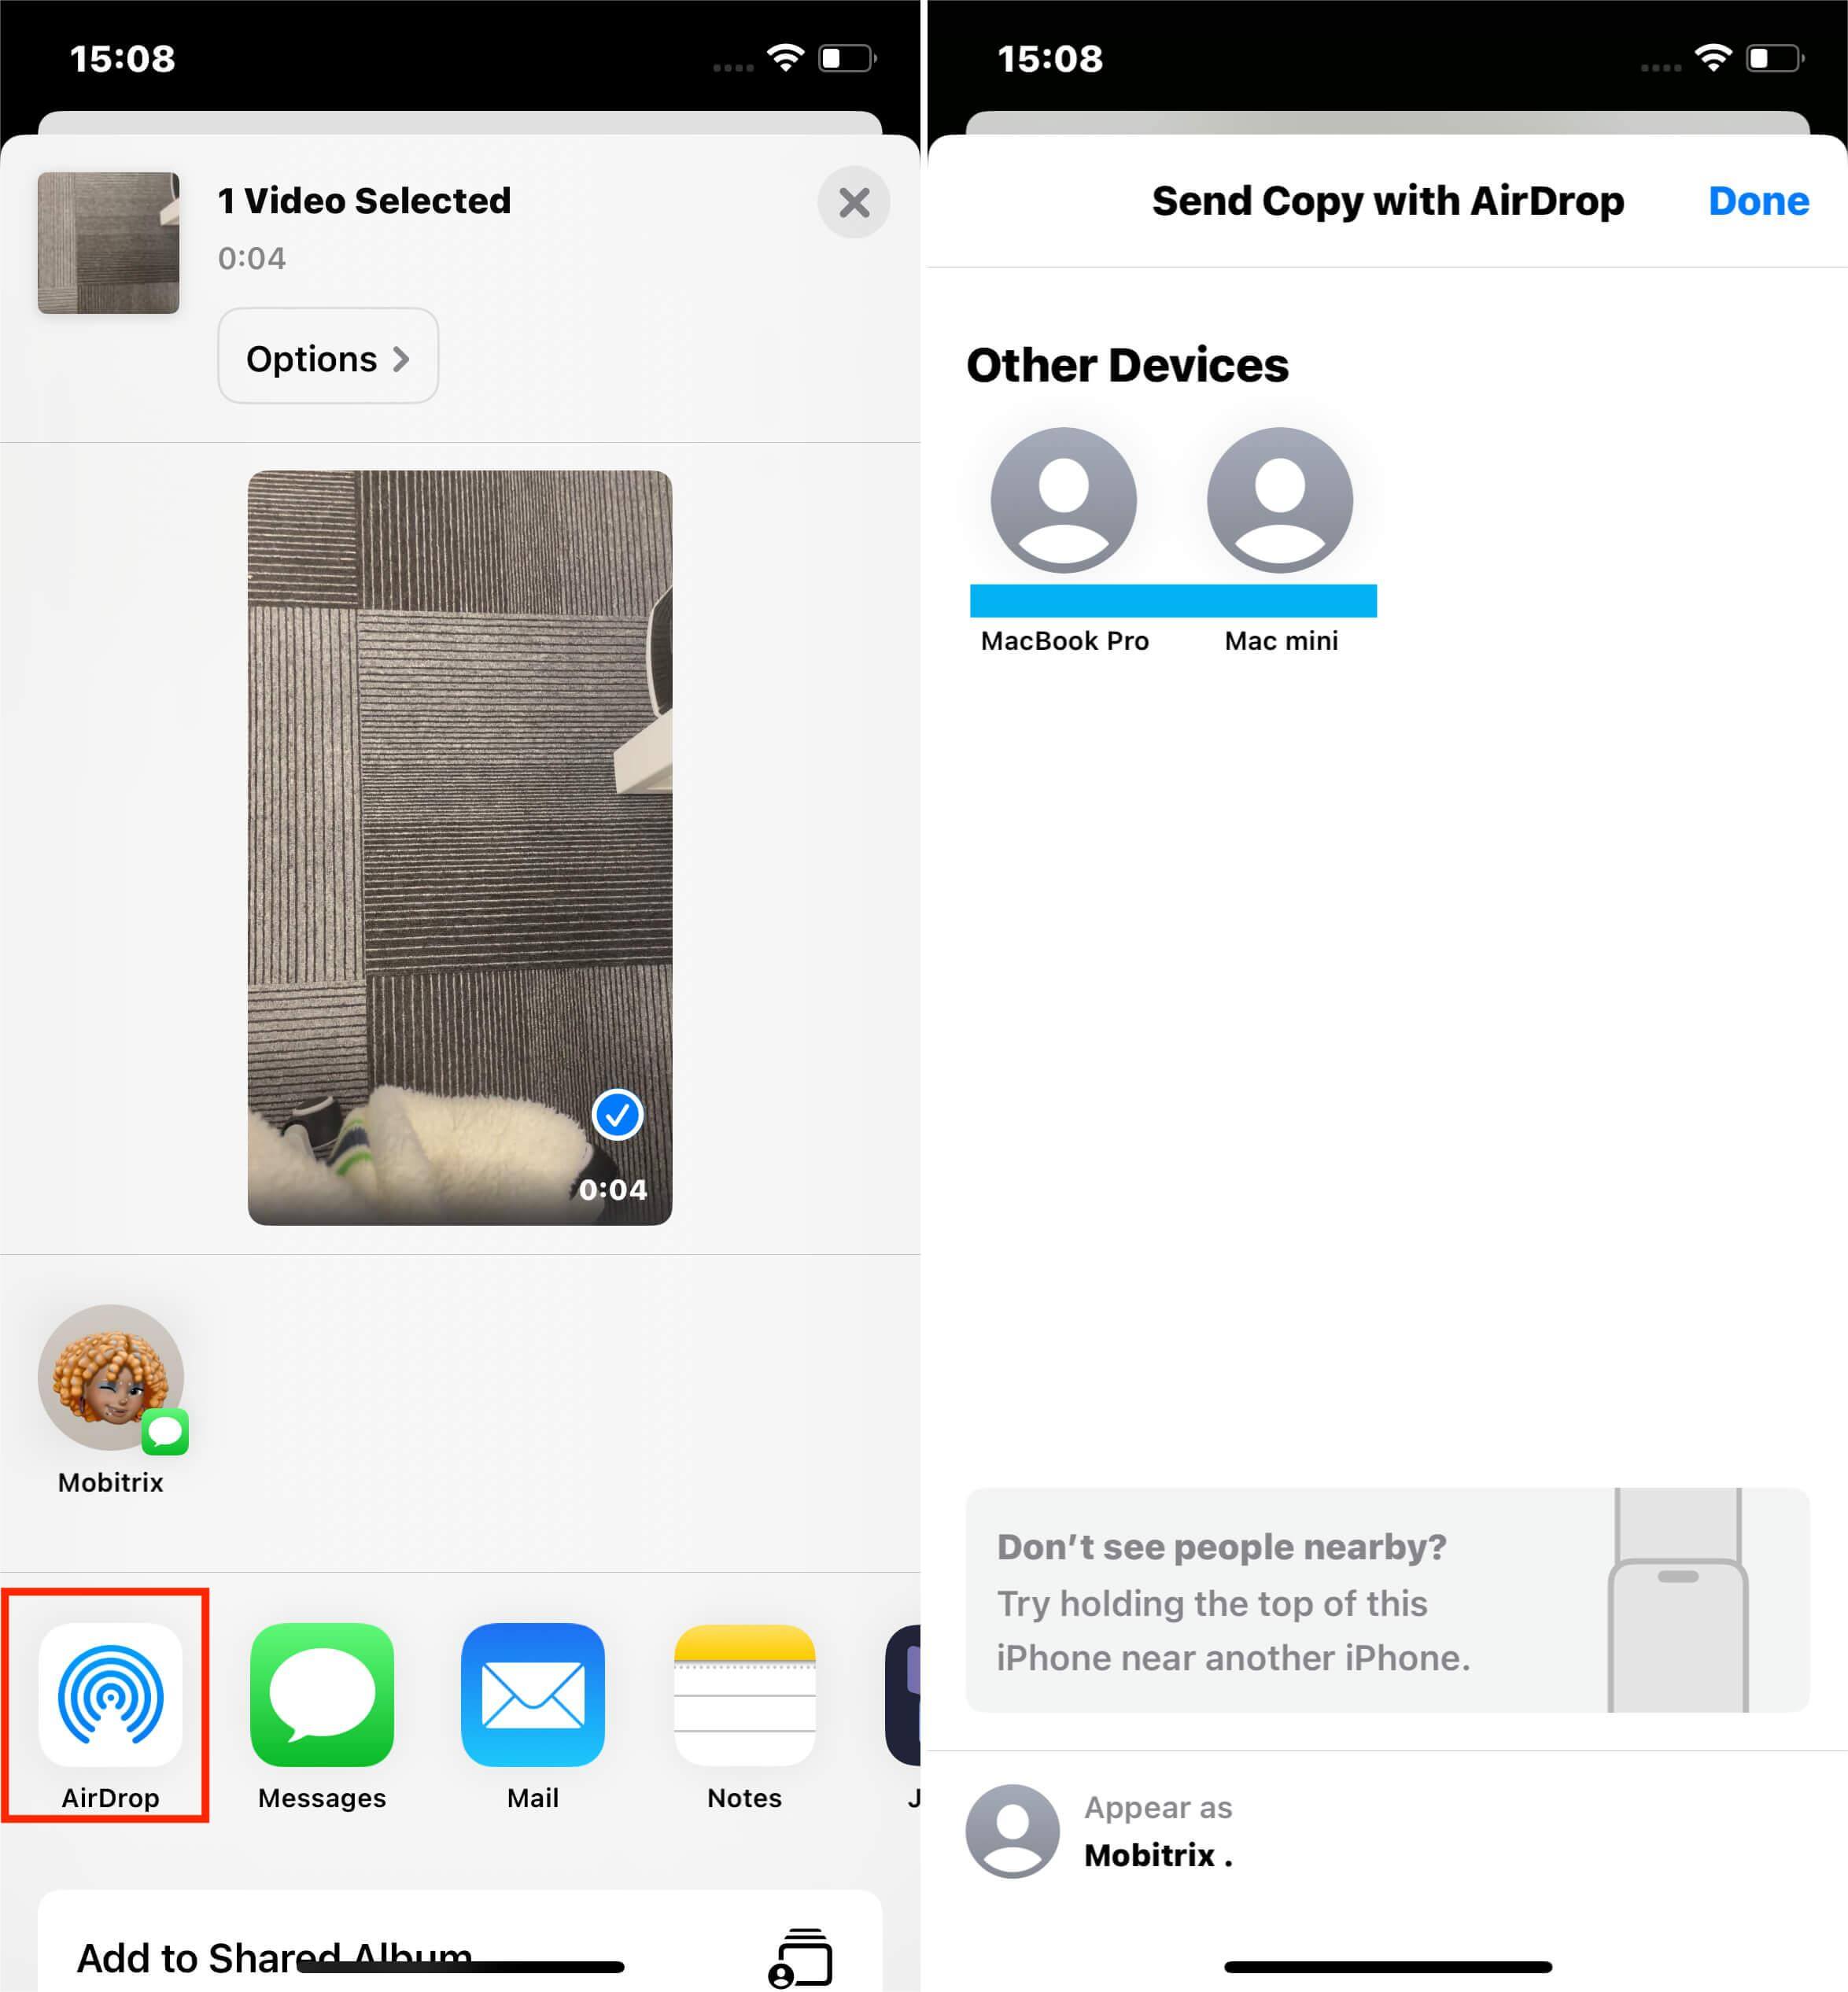
Tap the AirDrop After a few seconds, you should see a list of available devices. If you don't see the receiving device, wait for the list to refresh or press the AirDrop icon.
Choose the receiving device.
The transfer will begin on its own. It may take some time to send the video, depending on its size, so be patient and avoid moving the devices too far apart. The receiving iOS device's Photos app will display the video when it has arrived.
Note:
The transfer may fail if you transfer multiple videos larger than a few hundred megabytes. As a result, it's advised to transfer the videos one after the other.
The videos you record are saved to your camera roll. A video camera icon and the length of the video can recognize it. Downloaded videos can also be accessed through the Files app.
2. Use iCloud to Send Videos Up to 5GB
iCloud is another reliable way to send large videos, as it allows you to store up to 5GB of data for free, allowing you to share long videos and other larger files.
Using iOS Mail, you can utilize the Mail Drop feature to send file attachments up to 5GB directly via an email link; after the link is shared, the recipient has 30 days maximum to download the file. With this efficient option available with iCloud, sending large files is a breeze!
Steps via Photos app:
Launch the Photos app and select the video you wish to share.
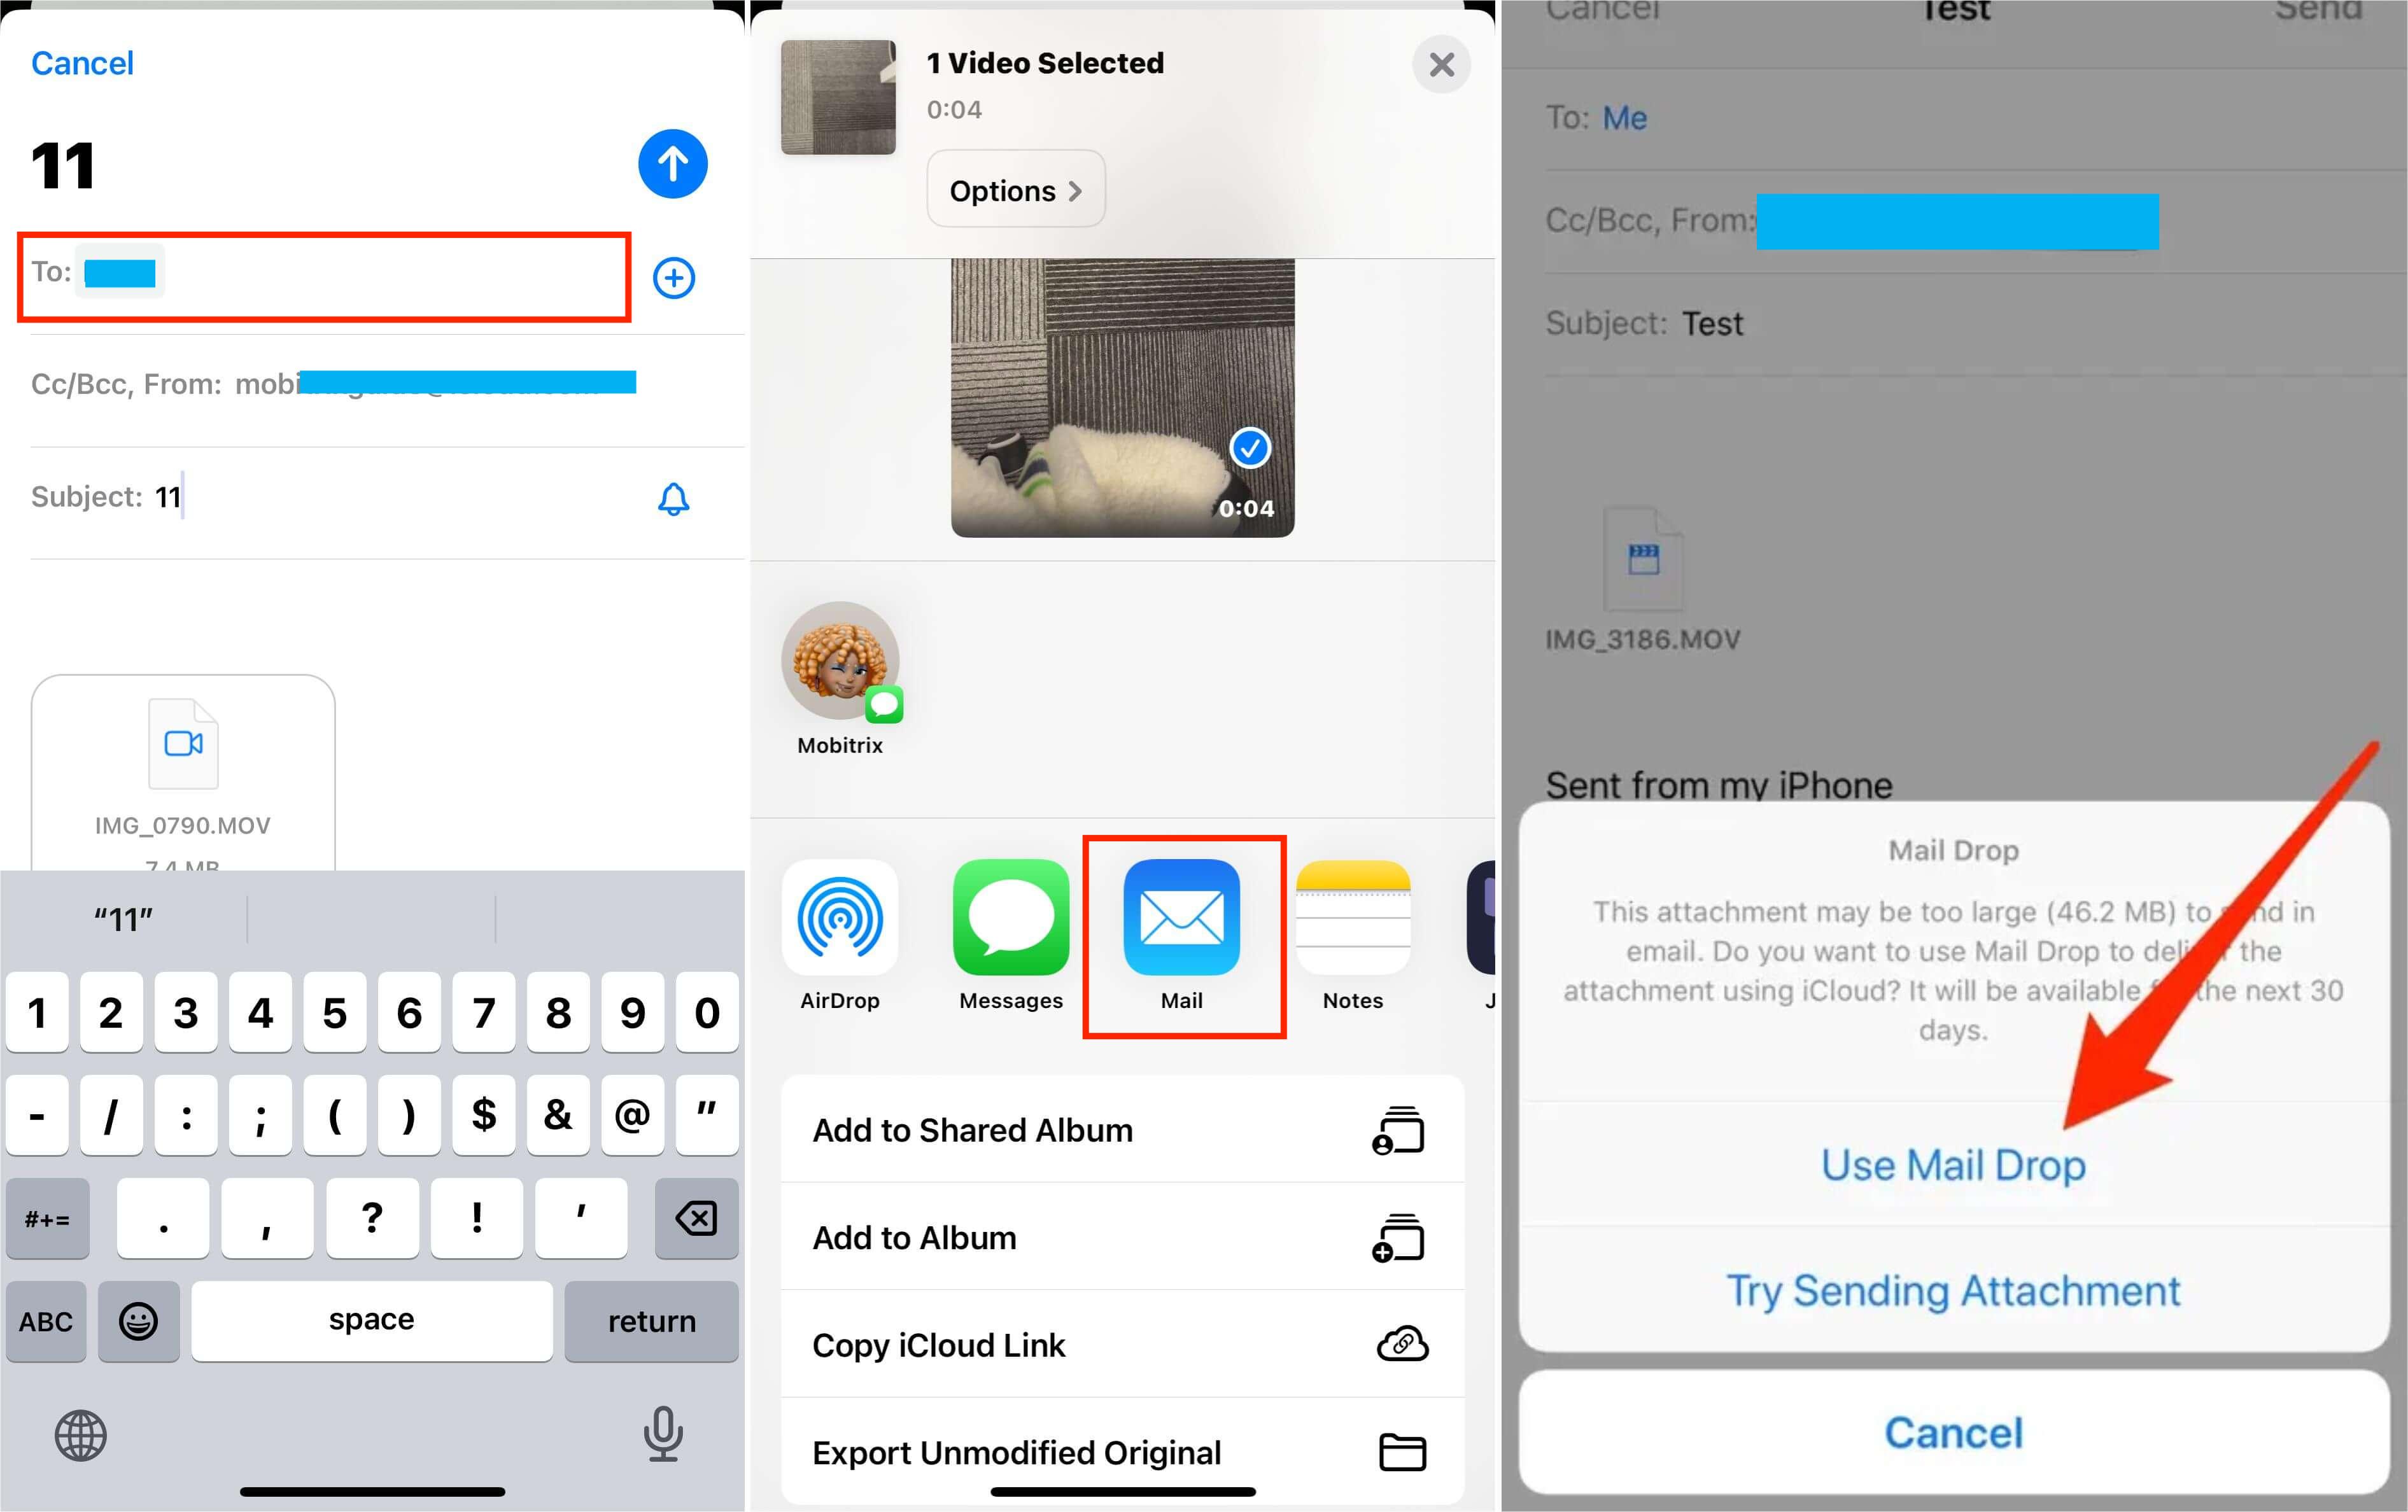
Select the Share icon followed by email.
You will be sent to the Mail compose page with the attachment automatically included. Add the recipient and topic before composing the email usually.
Choose Send.
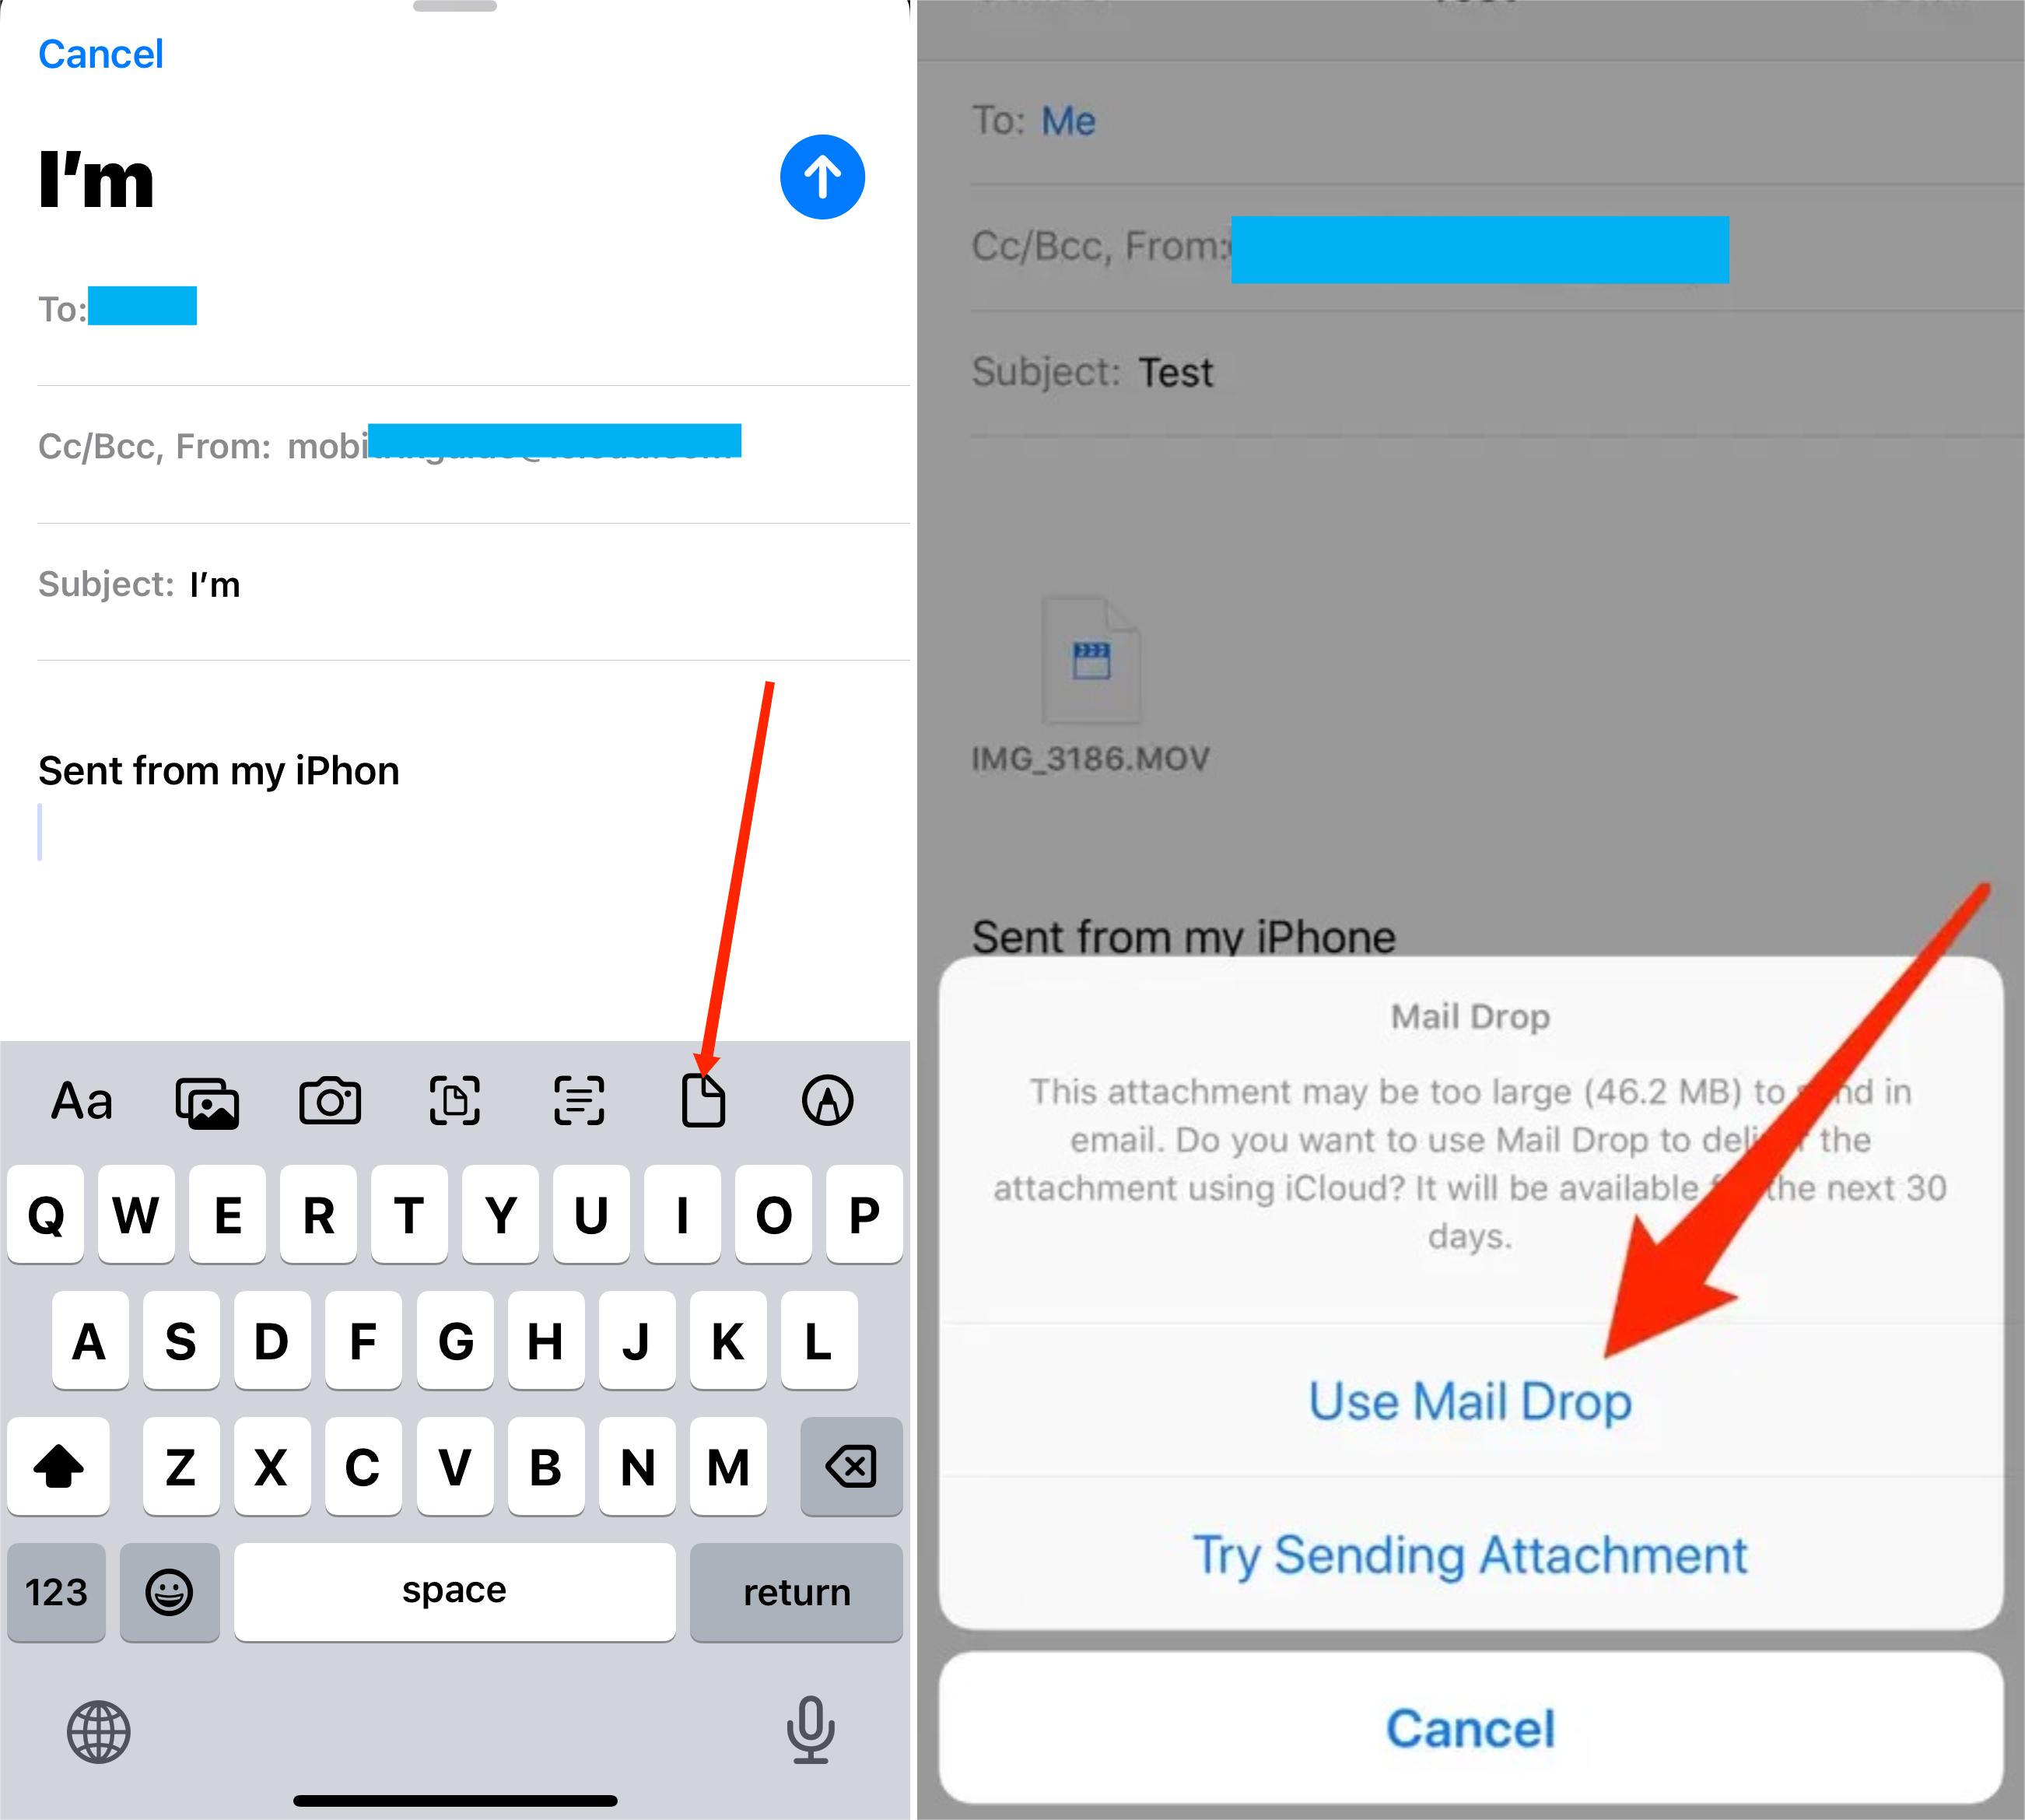
You will see a message indicating that your attachment is too large to send and the option to use Mail Drop. Select Use Mail Drop, and your message will start sending immediately.
The transfer process begins in the background if you haven't already backed up your video attachment to iCloud. Your email will be sent once the upload is complete.
Note:
You must be connected to Wi-Fifor Mail Drop to work when sending video above 100MB. Even if the clip is already saved to your iCloud account, Mail Drop will not let you share it as an attachment via cellular data alone.
The file will be uploaded to the iCloud platform and sent through email via the app. The file must be downloaded within 30 days by the other party.
Steps on the iPhone Mail app:
Open the iPhone Mail app and create an email.
To attach a video from the Files app, tap the left arrow icon and select the file menu.
The Mail app will prompt you to use Mail Drop when you tap the Send icon at the top.
3. Using Google Drive With No Videos Length Restriction
Google Drive is a user-friendly cloud-based storage system that allows you to access your files from any device. Once you upload your content to the platform, you can easily send it out with an individualized link that can be emailed directly to your recipient.
Follow these simple steps, and you can effortlessly send videos of any size in just a few short moments - no matter where you are!
Steps:
Install and launch the Google Drive app on your smartphone.
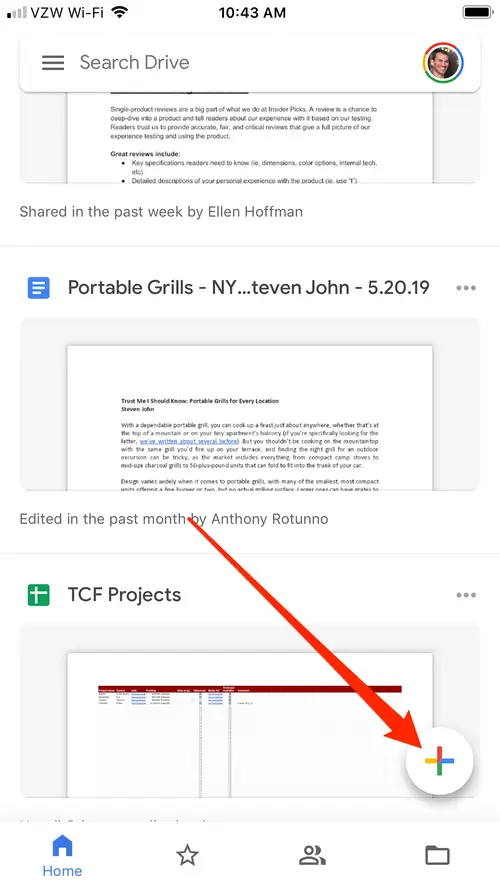
Tap the colorful plus (+) icon in the app's bottom-right corner.
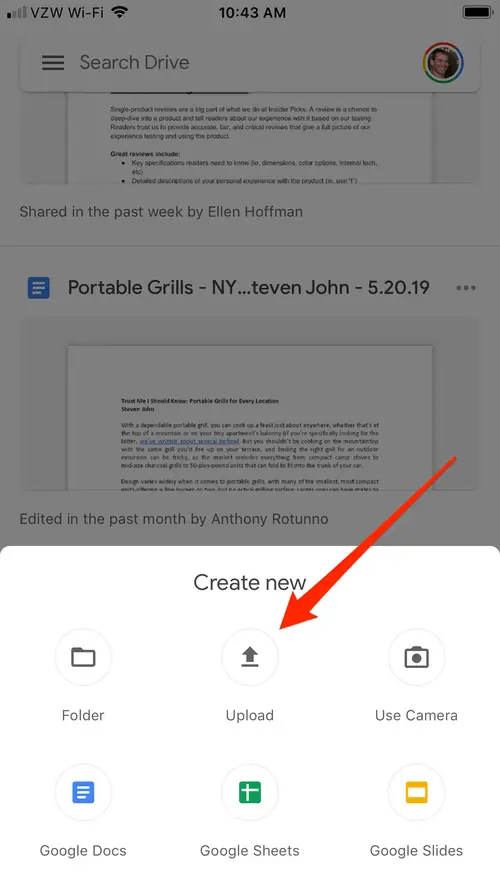
On the popup menu, select "Upload" then "Photos and Videos."
Select the video you want to upload and begin the uploading process.
When the video has been uploaded, locate it and tap the three dots next to it.
Tap "Share" in the option that appears.
Enter any email address you want to send the file to in the "People" area at the top of the page.

You may now go to your Drive and share the video with anyone.
4. Compressing Your Videos
Compressing your videos is another way to send long clips from your iPhone. This method reduces the file size and makes it easier for you to send. You can achieve this by adjusting your iPhone's video recording settings or using an application to compress the video. Here's how:
Steps to Adjust the Video Recording Settings
Open the Settings app and select Camera.
Tap the Record Video button.
Select a setting that balances the size and quality of your videos. The smaller the number, the smaller the file size.
Many apps in the App Store help you compress videos. Here's how to do so:
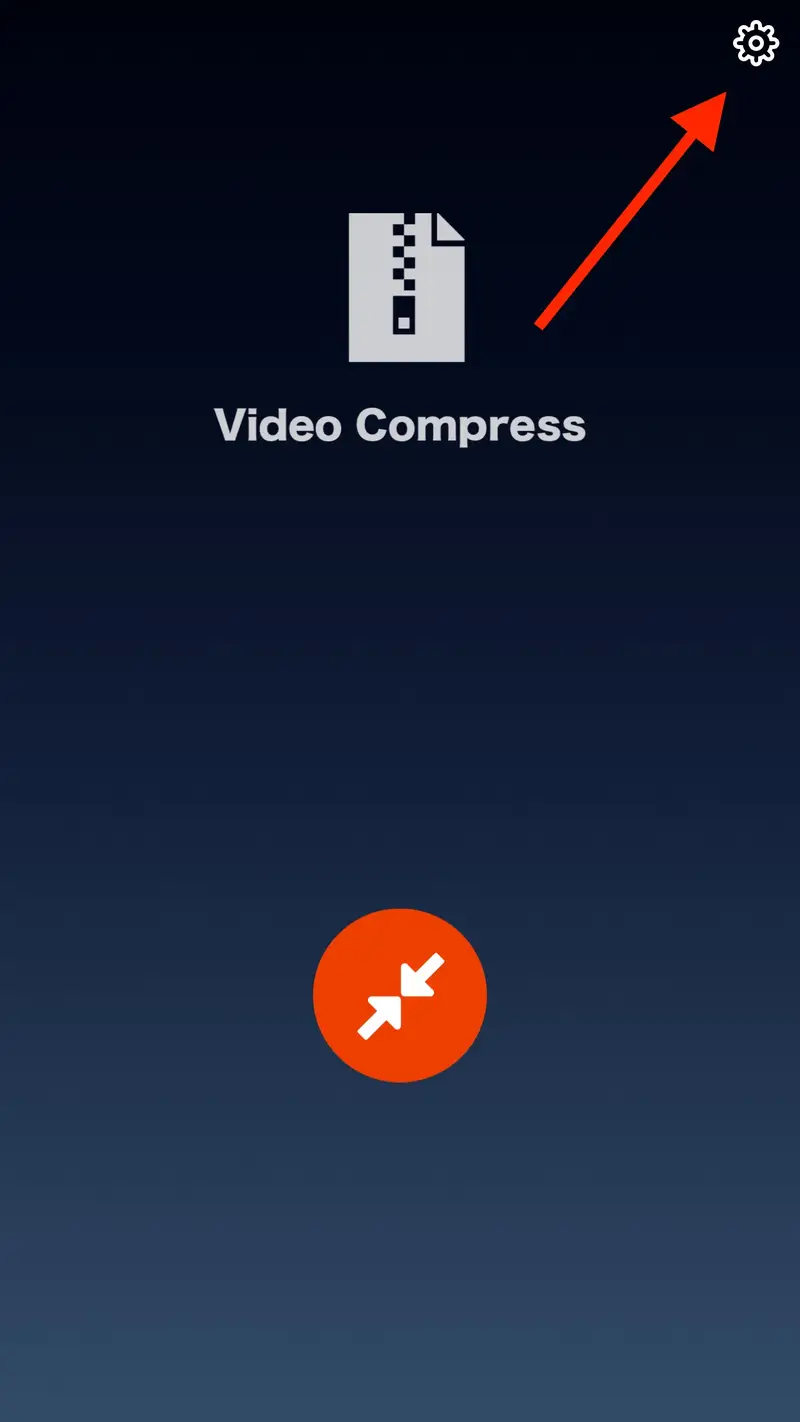
Install and launch an app, such as Video Compress, to your device.
Launch the app and select the cog icon in the upper-right corner. Then, choose an output file format from the Export File Type menu. This is the format in which your compressed video will be saved.
Go back to the main screen and tap the only icon you see.
Give the app access to all of your photos and videos.
Select the video you wish to compress from your gallery, then touch the checkmark in the upper right corner.
You'll notice a slider that allows you to change the video compression level. To view the final file size, move this slider. Tap the symbol in the top-right corner when you are satisfied with the size.
Wait as the app compresses the video.
The compressed video will be saved automatically. Once the compression is done, you can delete the original video on the next screen by tapping Delete Original.
5. Send to Windows Using the Photos App
The Photos app is your best bet for sending large video files from your iPhone to a Windows device. Ensure you have installed the latest version of iTunes on your Windows 10 or Windows 11 PC before you begin.
Steps:
Launch the Photos app and connect your iPhone to your computer using the USB connection.
On iPhone, enter the passcode and, if prompted, select Trust.
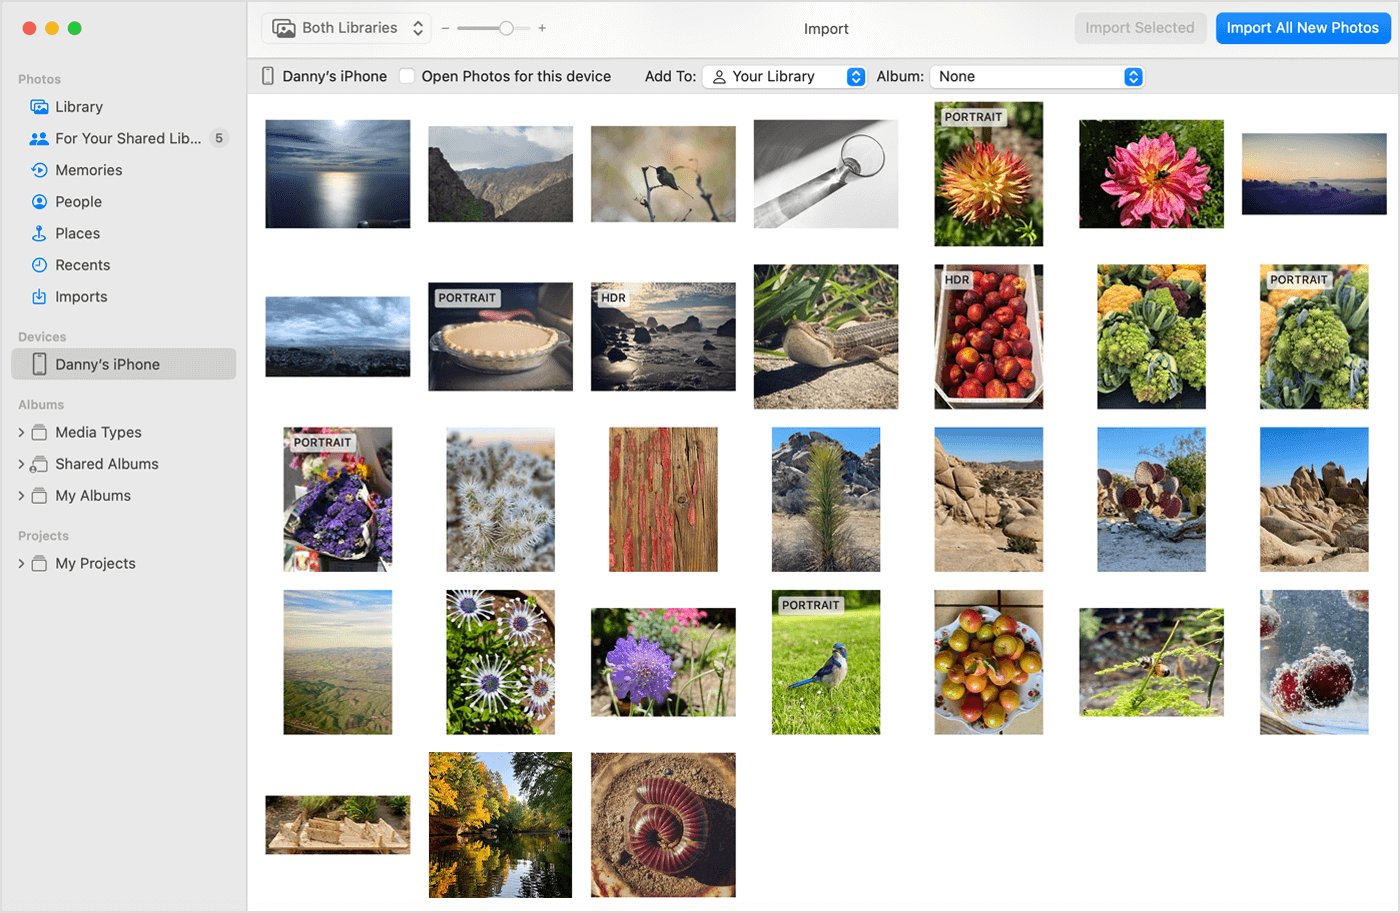
Select Import > Select From A USB Device > Click Import Settings to adjust the destination and whether or not to erase the files from your iPhone after importing them to your PC > To confirm, click Done.
Uncheck the boxes next to any other photos or videos you don't wish to import > Finally, click Import Selected.
How to Setup Device to Receive Airdrop Files on iPhone
Airdrop allows you to share files between two Apple devices, such as an iPad and iPhone. You can also Airdrop files from your iPhone to a Mac. Before you can use Airdrop, you must configure your device to receive files:
Steps:
On the home screen, select the Settings icon.
Select General from the Settings menu.
Click on Airdrop.
You can specify whether you want Everyone or just your contacts to be able to send you files. Choose your preferred option.
How Do I Send Video Files From My iPhone to My Computer?
You can transfer your video files from your iPhone to your computer with iTunes, image capture, or the Photos app. All you need to do is plug in your phone via USB and follow the steps below. If you do not have a USB Cord, you may need to download the videos from the cloud.
Connect the iPhone to the computer with a cable, and then unlock it.
To open the app, choose Start and then Photos.
Click Import, followed by From a USB device.
Choose the files you wish to import to your PC and where you want them saved. Check that the videos are on your device. They will not be visible if they are saved in the cloud.
Conclusion
Now that you know how to send long videos on your iPhone, there's no excuse not to make those hilarious family reunion montages or share your travel vlogs and share with friends and family.
Though we may not be able to meet up with our loved ones in person as often as we'd like, sending video clips is the next best thing. Thanks for following along, and don't forget to check back for more tips on using the iPhone.
