(100% Works) How to Fix Apple ID Verification Failed
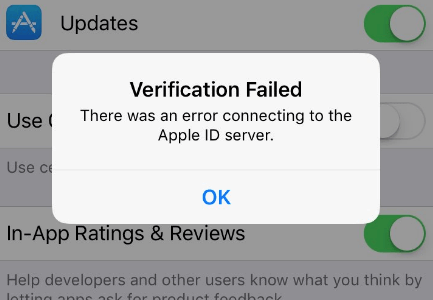
Are you frequently encountering the "Verification Failed: There was an error connecting to the Apple ID server" error on your iPhone?
It's especially frustrating when you're certain that your login details are accurate, but this error still hinders your access to crucial services like iCloud and the App Store.
In this guide, we will explore the different reasons behind this Apple ID verification failure error and offer you 6 practical methods to resolve this error.
Part 1: Check Your iPhone When Apple ID Verification Fails
When this error appears on your iPhone, there are a few things you should check right away.
1. Are You Connected to the Internet?
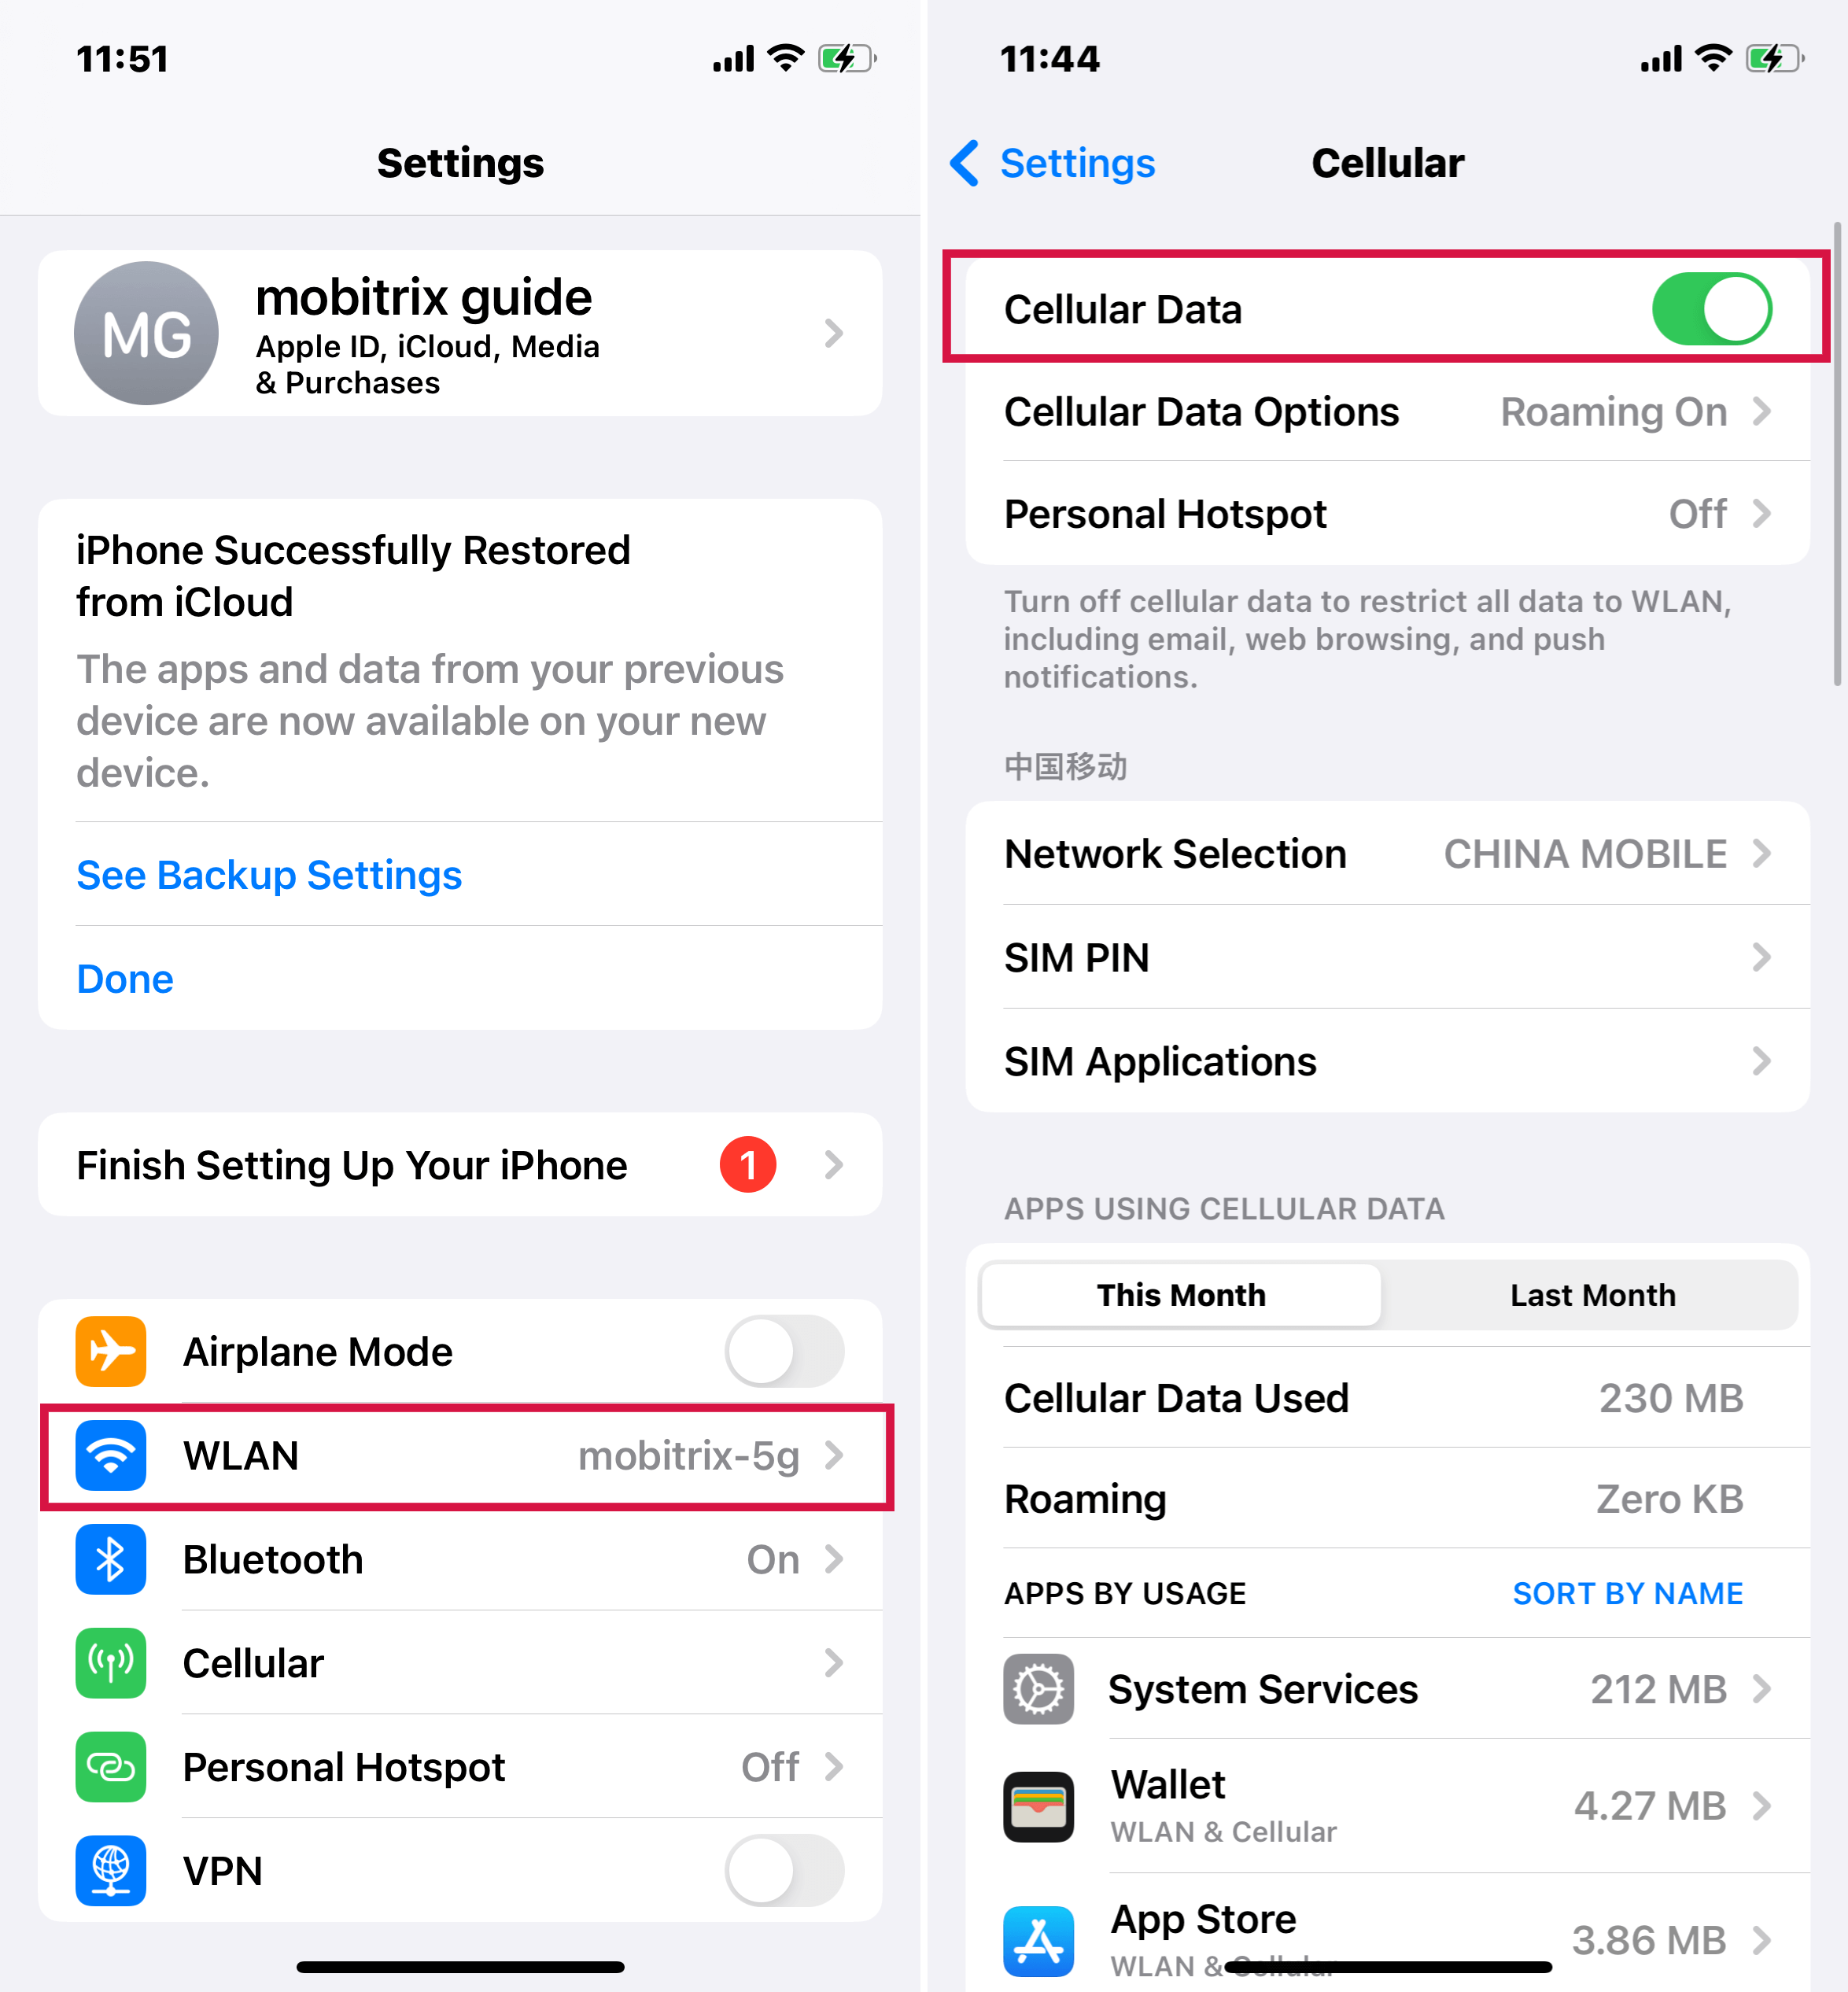
Apple services require a stable internet connection, either through cellular data or Wi-Fi. So, if your iPhone or any other Apple device you’re using does not have an internet connection, Apple services will not work.
When you get an error that says Apple ID Verification Failed, check your internet connection first and foremost. If your device is connected to the internet and the error still stays, try the suggestion I have given below.
2. Visit Apple's System Status Page
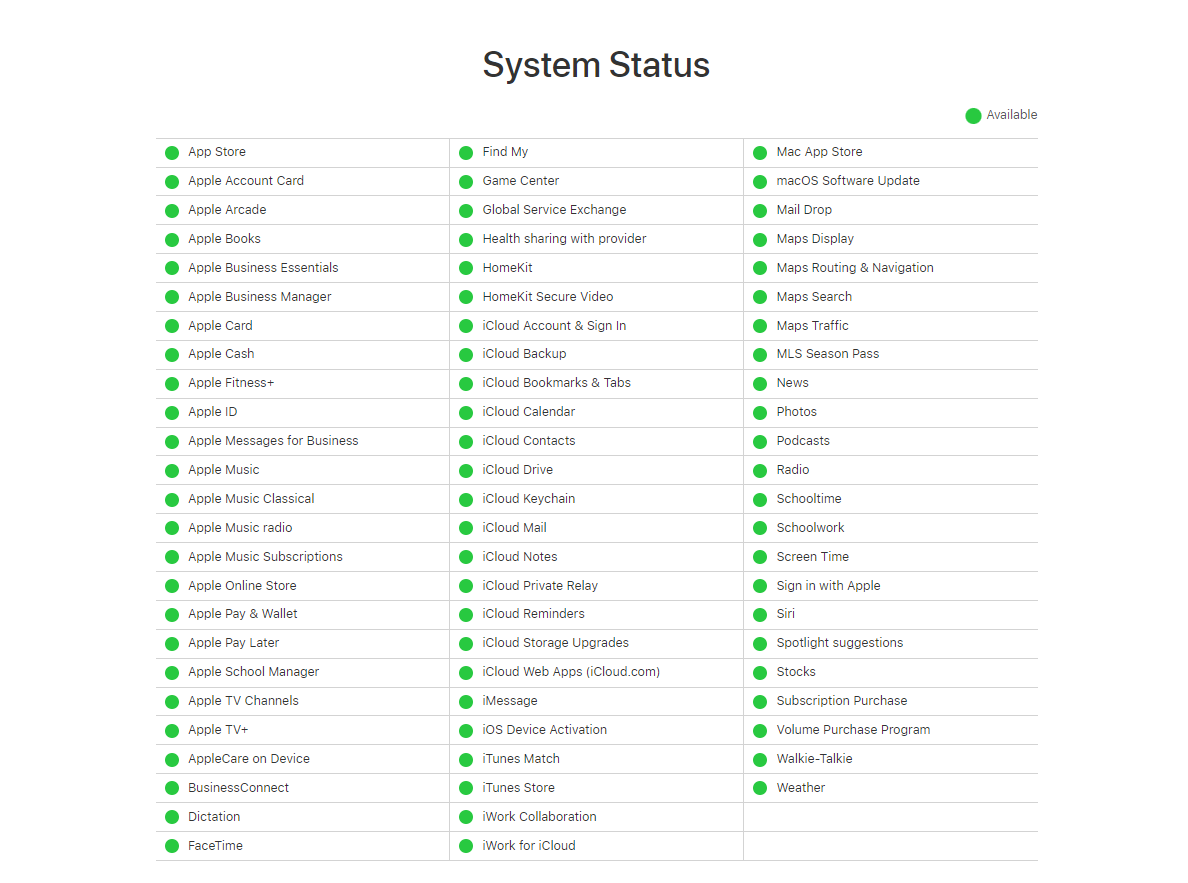
There is a good chance that the problem is not at your end. But at Apple’s end. Check the System Page of Apple to see which services are available. A green dot next to the service means it is available.
If the service you are trying to access has a green dot next to it, try some suggestions below.
3. Check your VPN Server
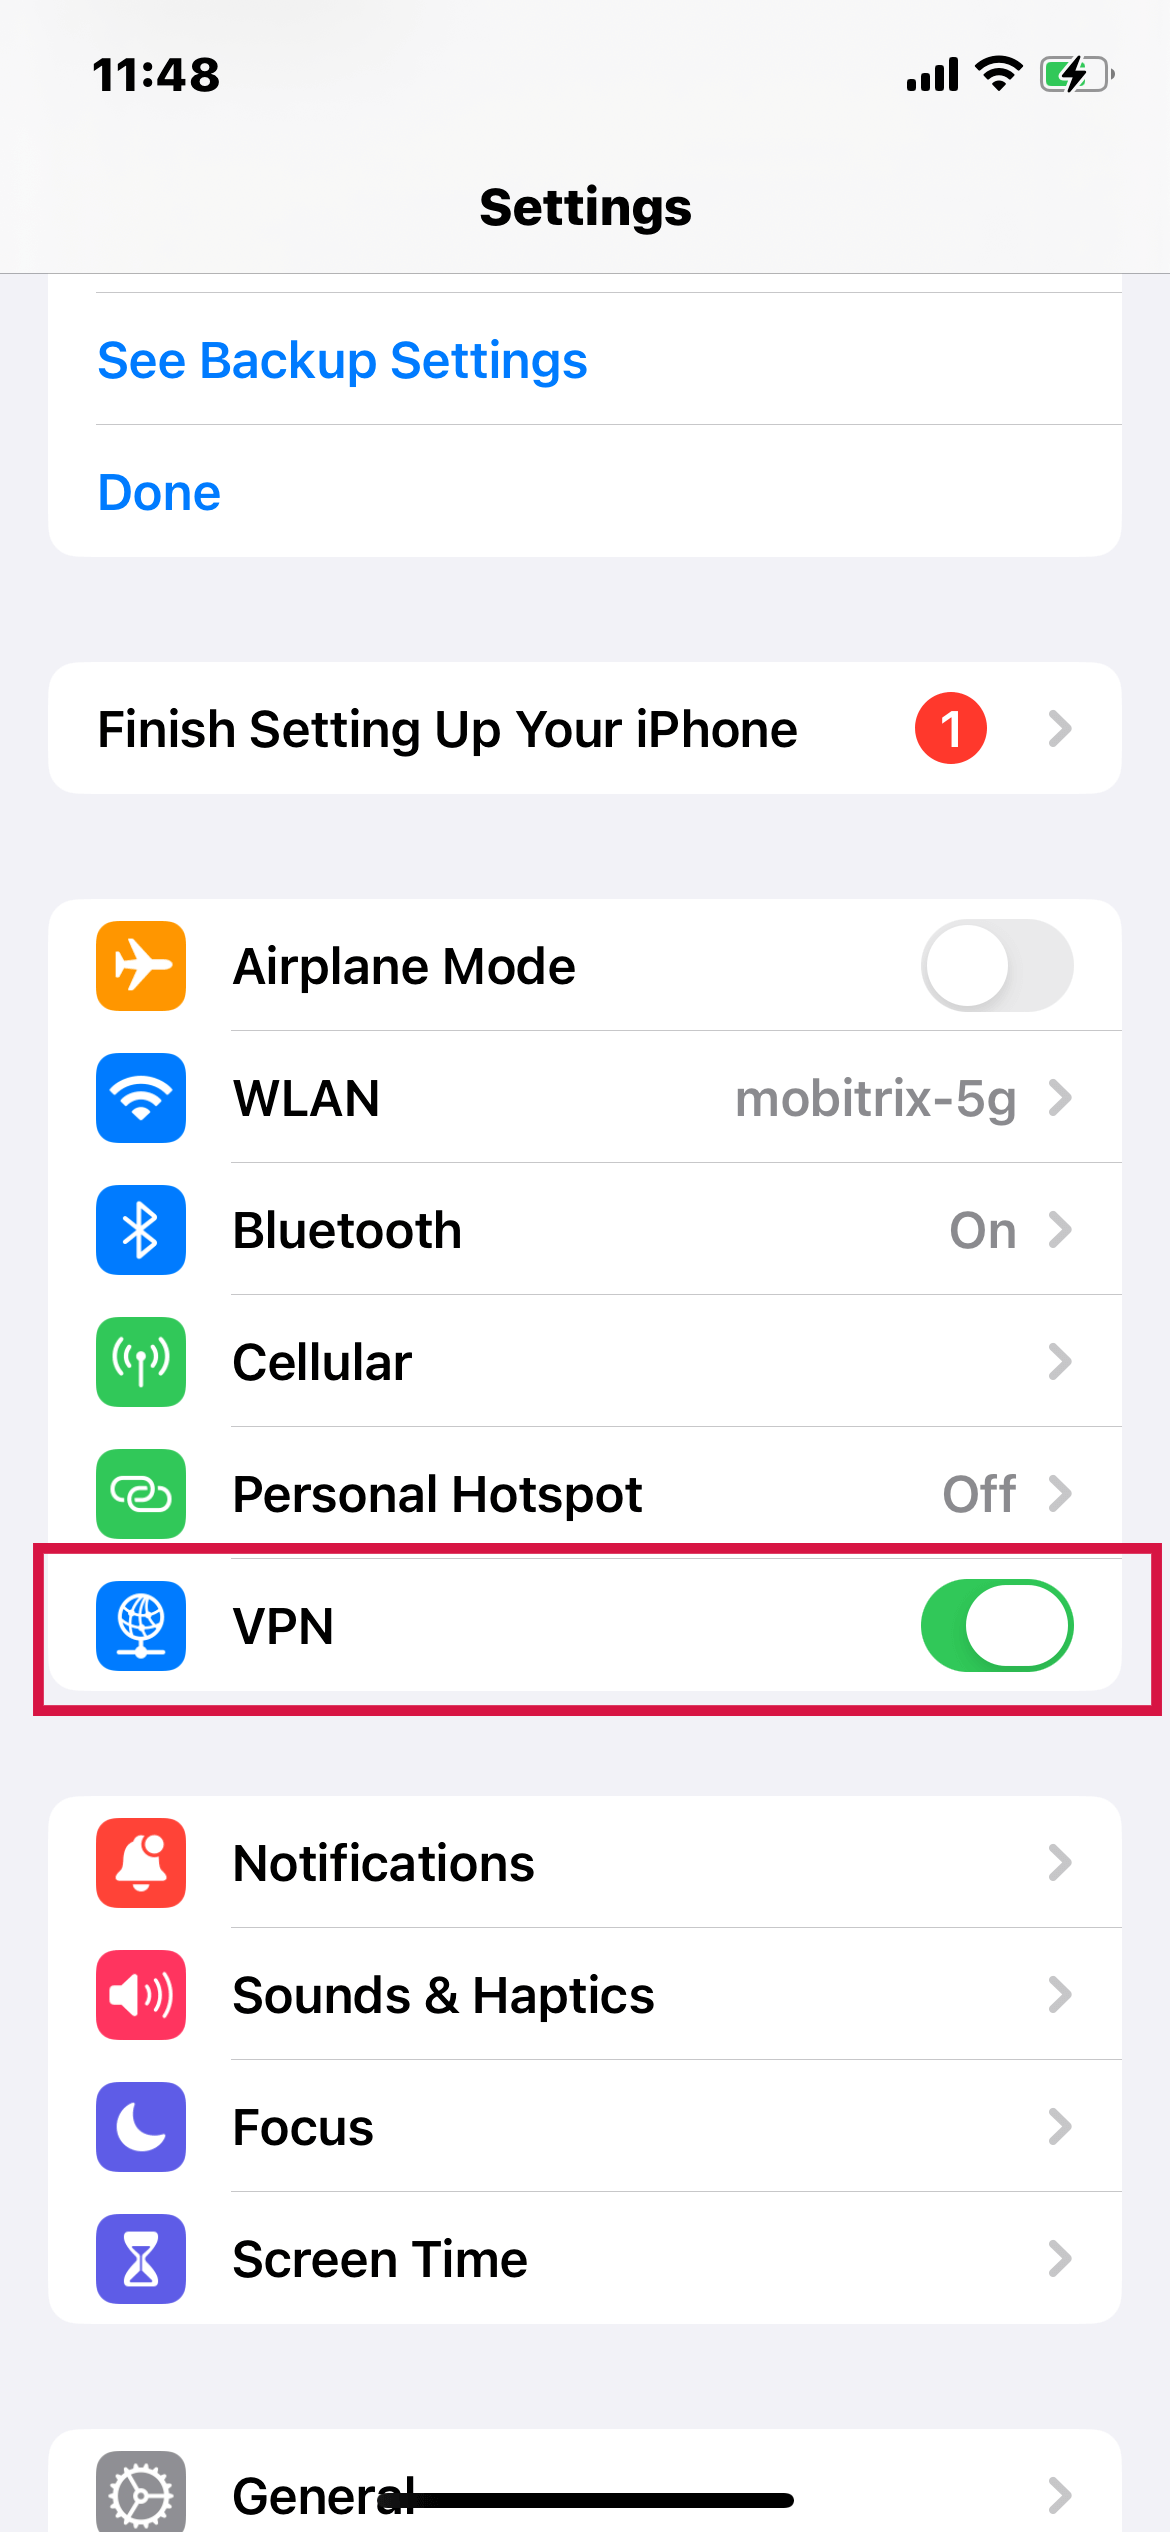
Are you using a VPN Server? If yes, then there might be a problem there. Try turning your VPN connection off and then turning it on again.
This might solve your error. However, if it doesn’t, don’t worry and follow along with our article.
Part 2: Update Your Information to Resolve Apple ID Verification Error
Our iPhones have certain information that we need to update regularly to work correctly. Below, I have mentioned all the updates that might be necessary for your iPhone to work error-free.
1. Update iOS or Restart iPhone
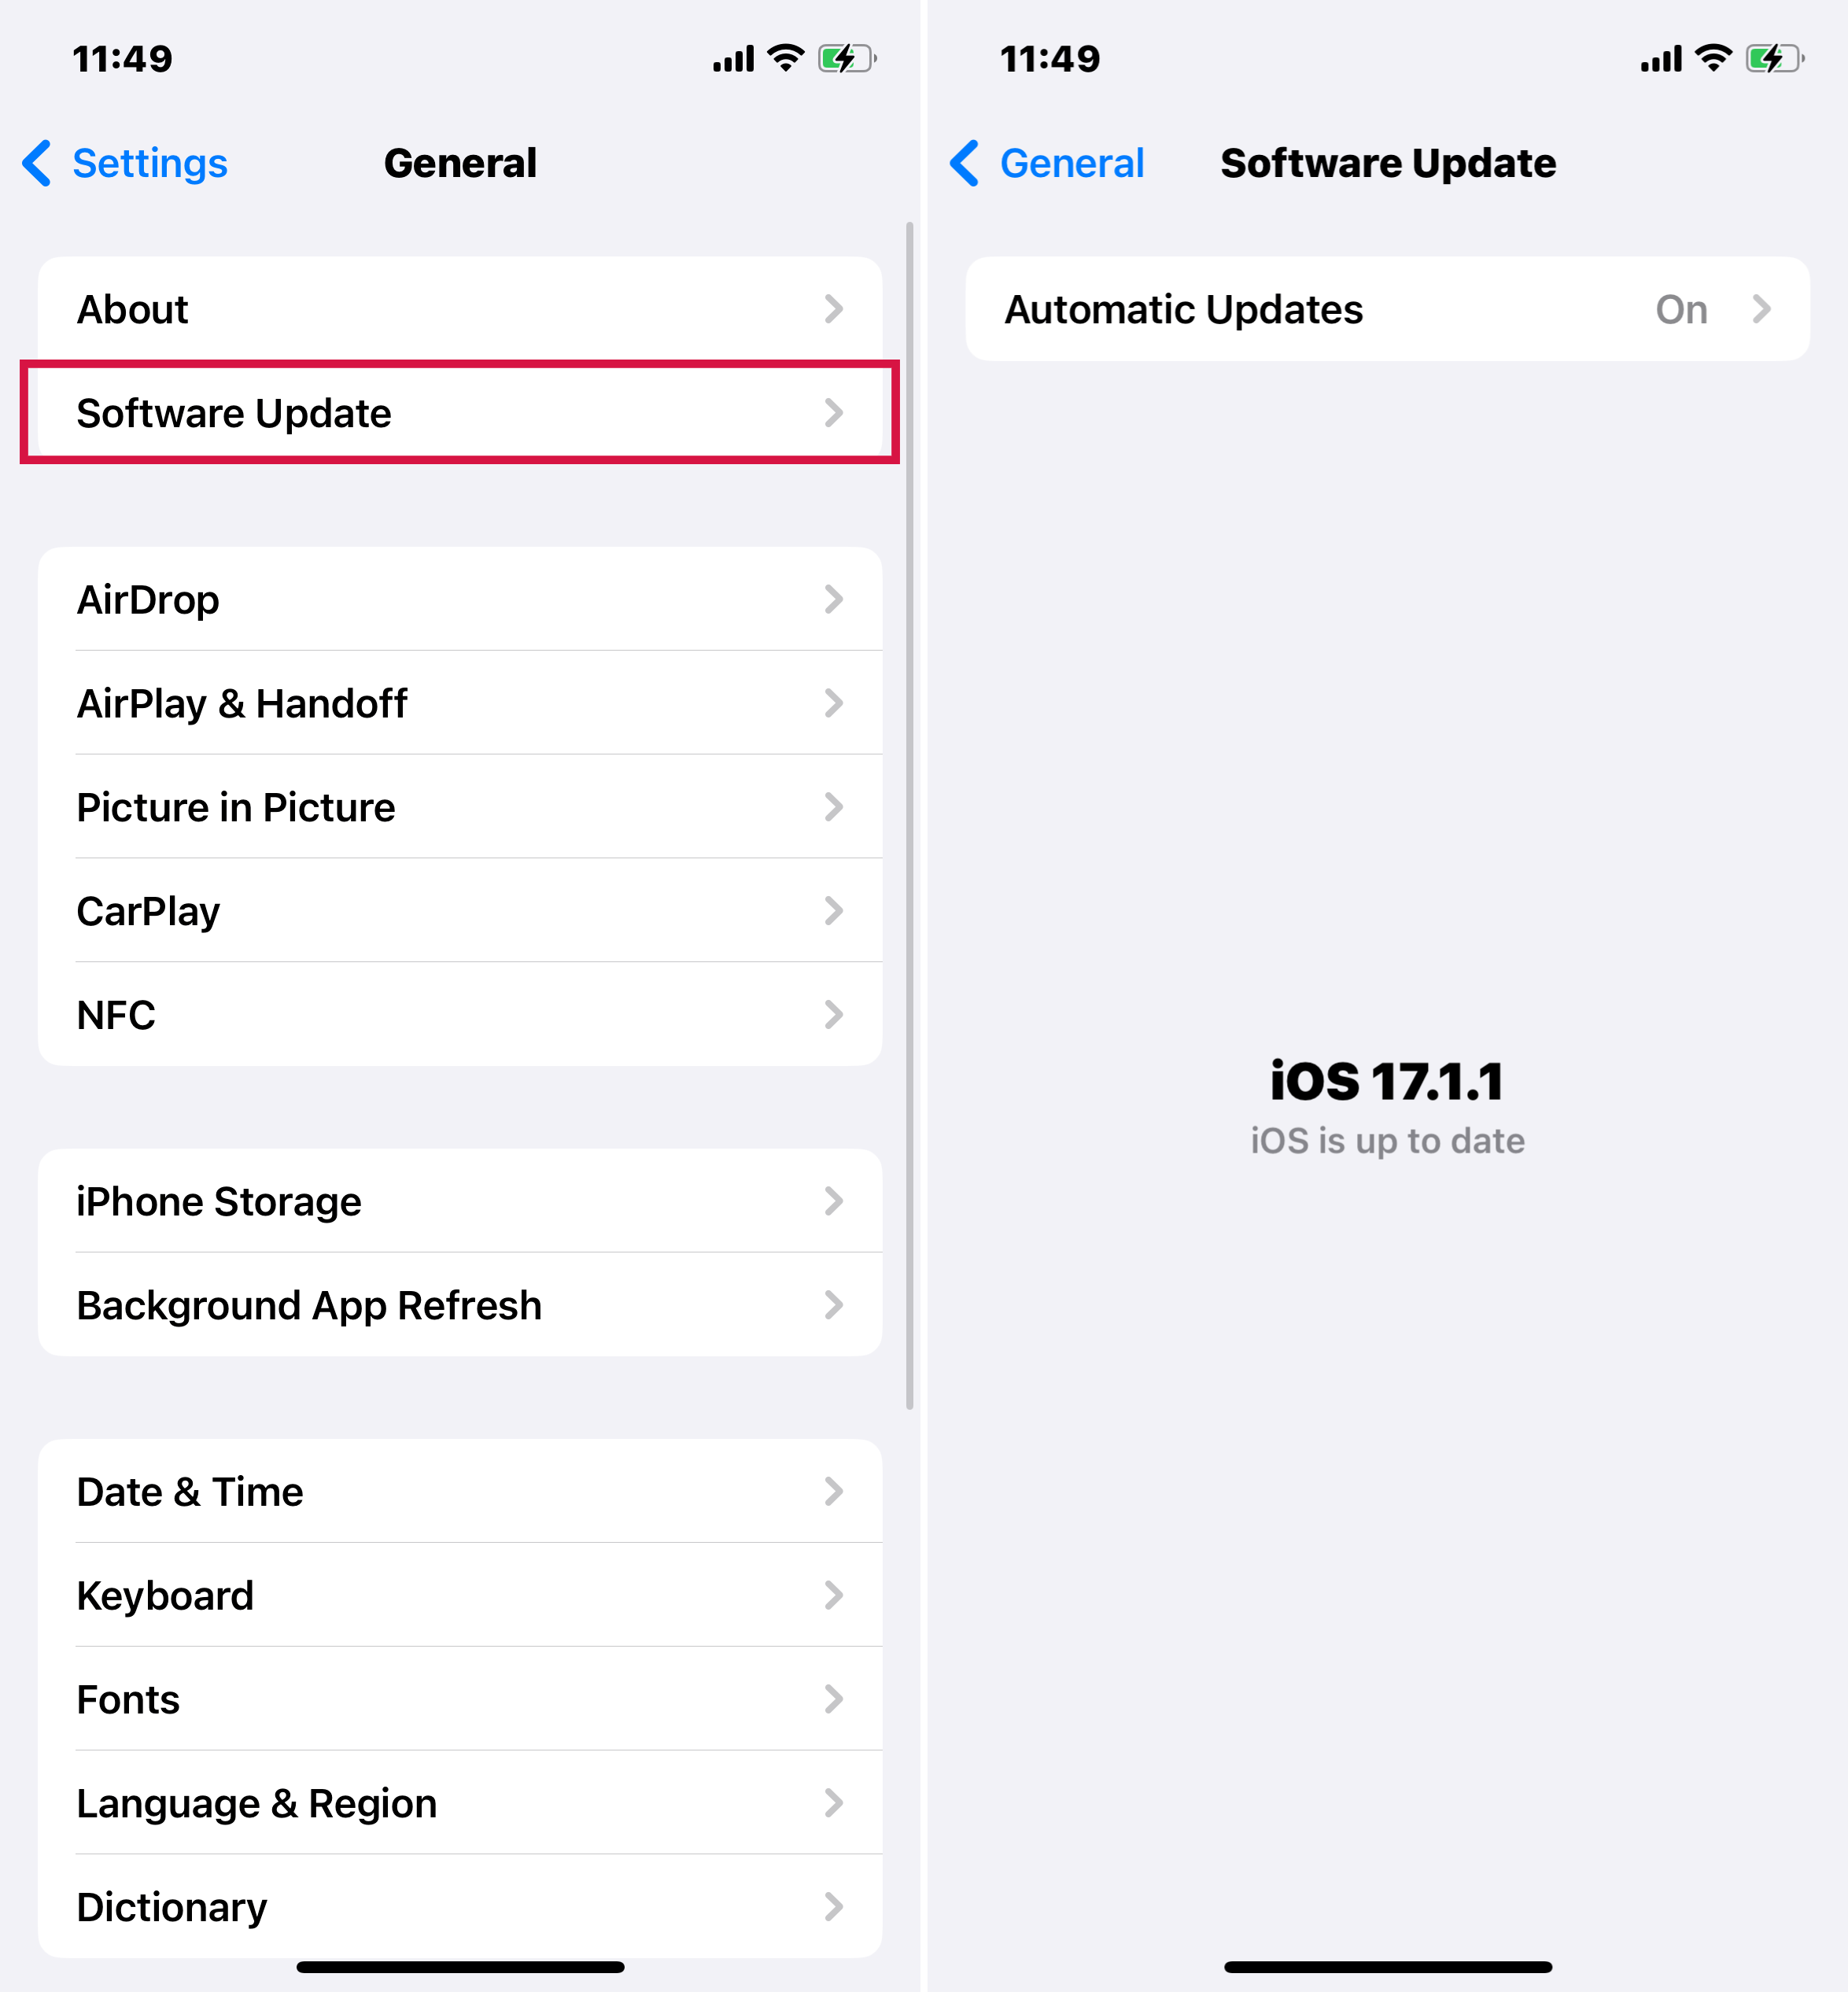
It is a good practice to install an iOS update as soon as it arrives. If you receive an Apple ID Verification Failed Error, you should check if your iPhone has the latest update or not. Follow the steps given below to update your iPhone’s iOS:
Step 1 – Go to your iPhone’s Settings
Step 2 – Then go to General
Step 3 – Tap Software Update, and from here, download the newest update available.
Say your iPhone was already up to date, or you installed the new updates, but the error is still there. In this case, you will benefit from restarting your iPhone.
2. Update Your iPhone’s Date & Time
Sometimes, an issue with your iPhone’s time and location settings can cause errors like the Apple ID Verification Failed ones.
When your iPhone’s date, time, or location is different from the Apple server, this problem occurs. So, you should check to see that your device’s date and time are correctly set.
To check your device’s date and time settings, follow the steps given below:
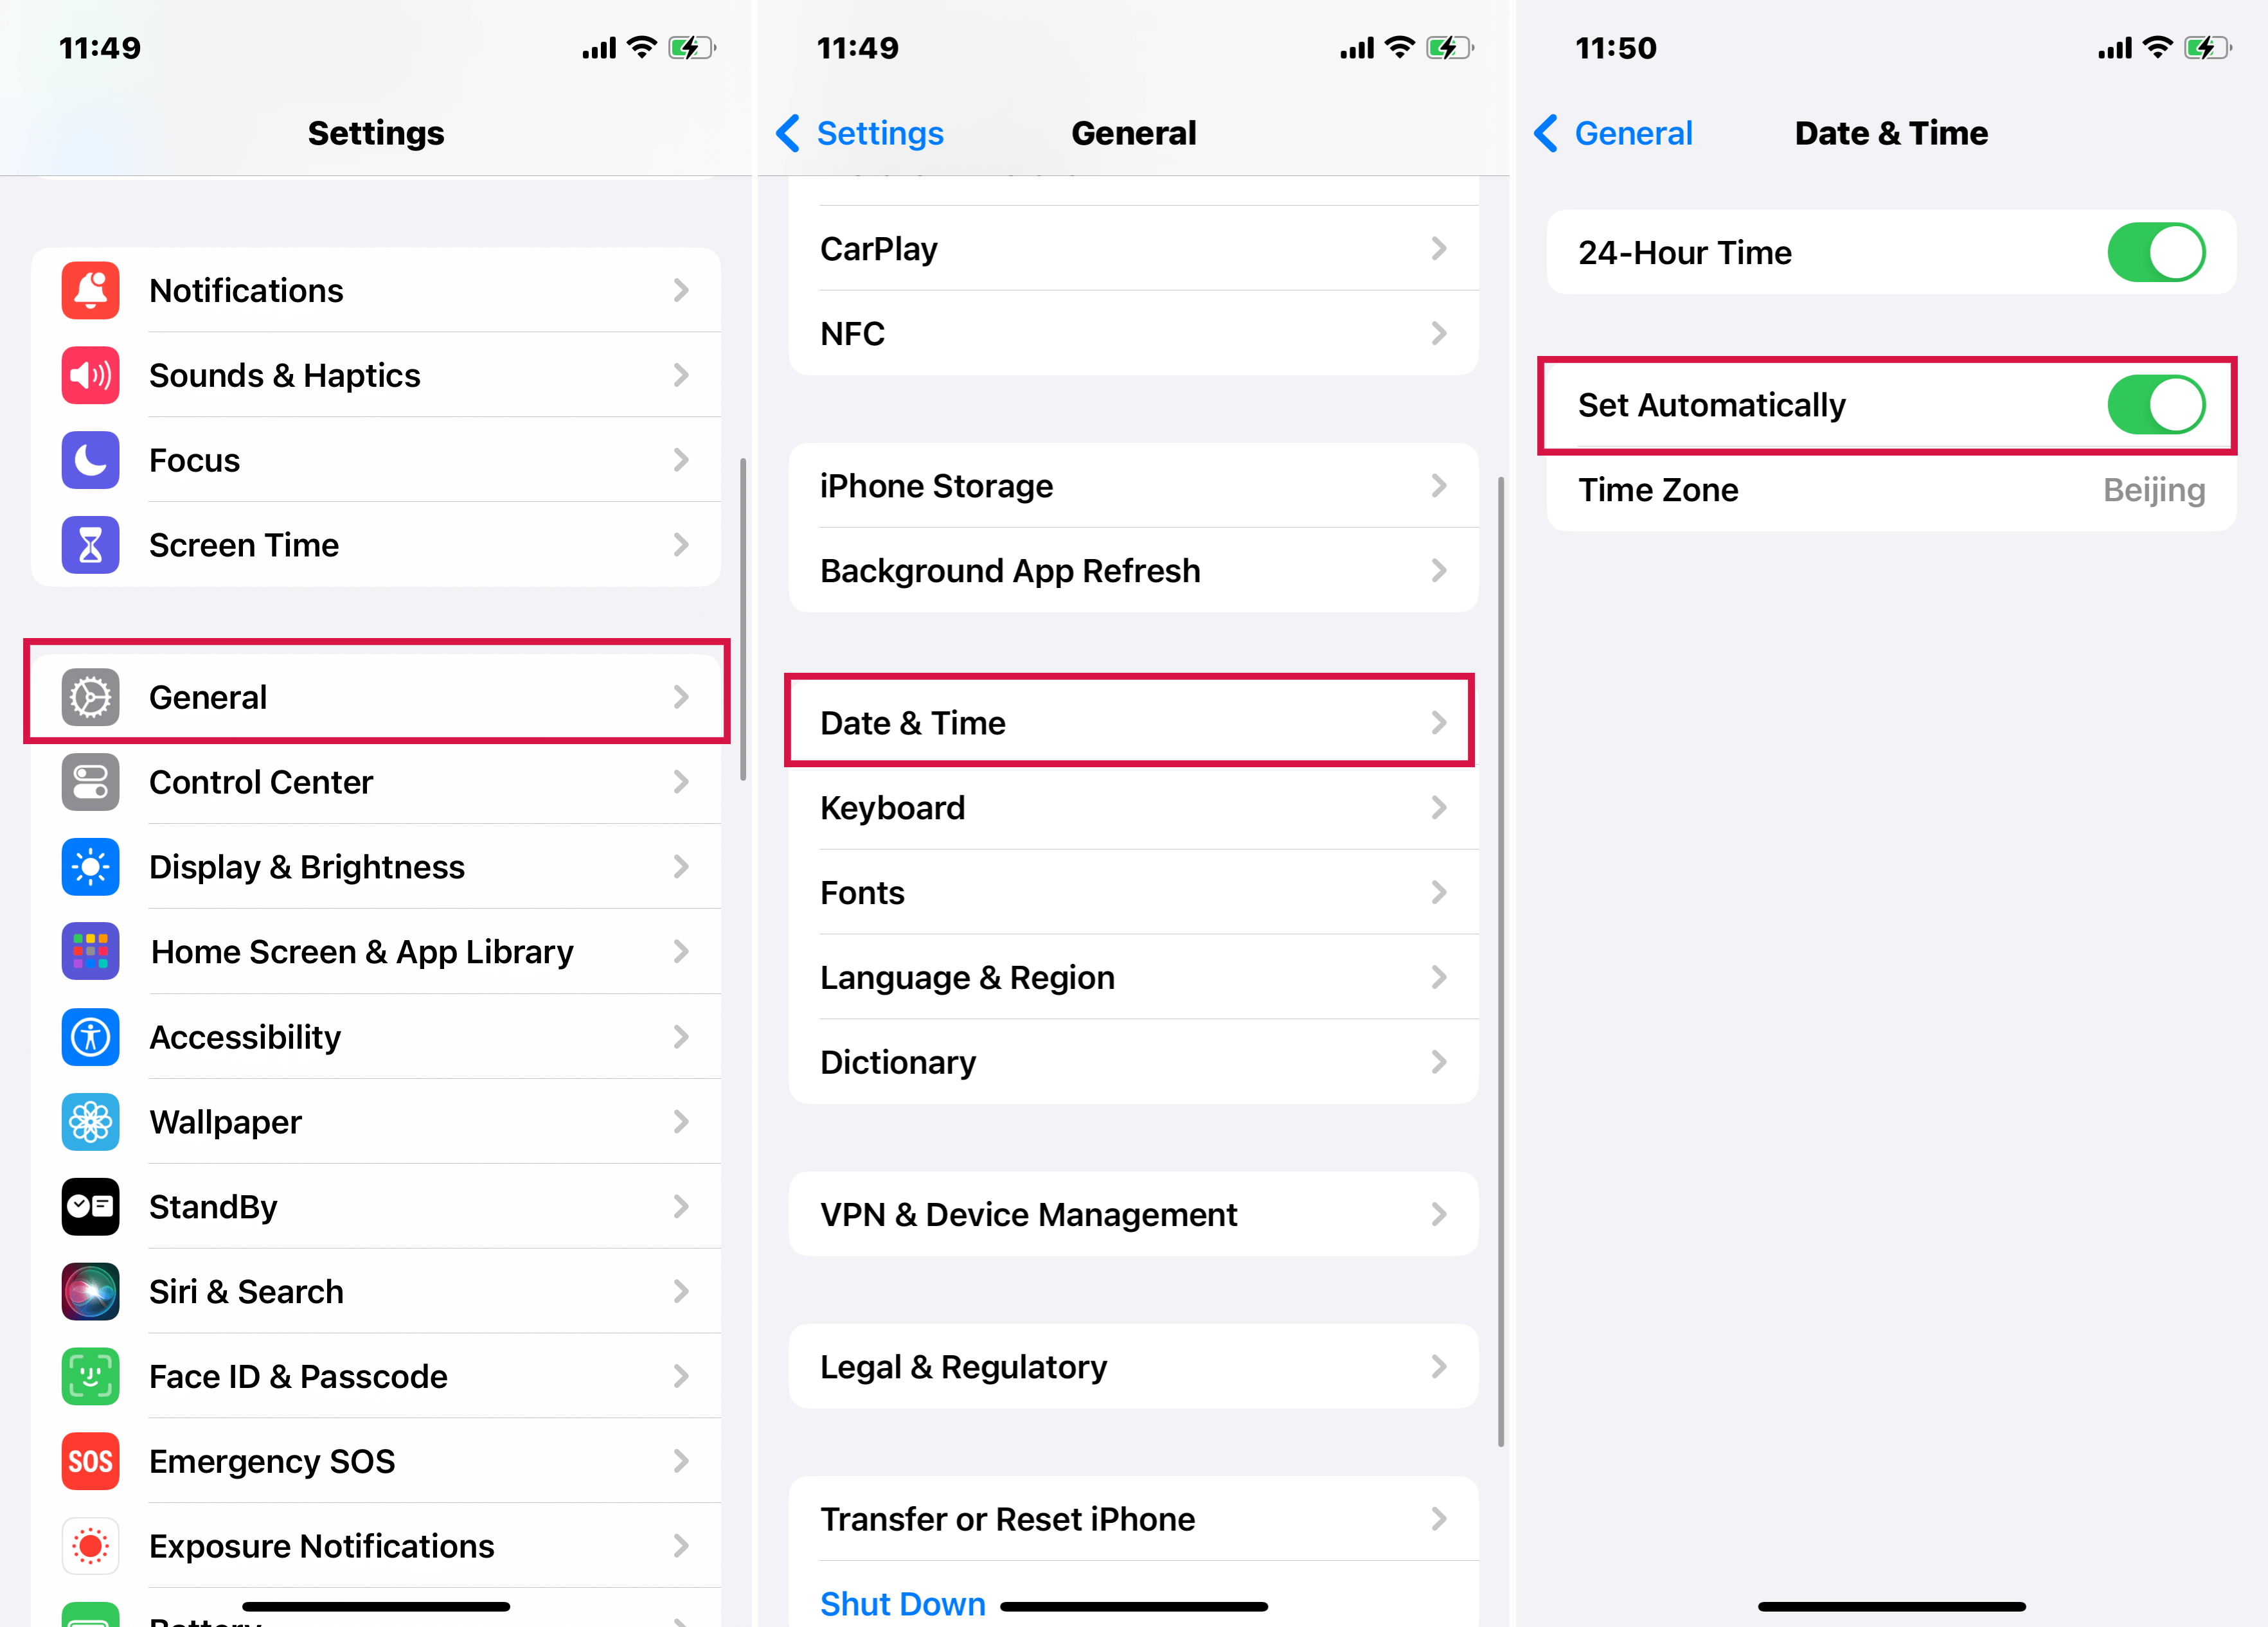
Step 1 – Open Settings on your iPhone
Step 2 – Go to General and tap Date & Time
Step 3 – If Set Automatically is toggled off, toggle it on. This should automatically match your iPhone’s time and date to the Apple Server’s.
3. Update Password for Your Apple ID
It is naturally a clever idea to change your passwords from time to time. You should apply that logic to Apple ID as well. If you haven’t changed your Apple ID’s password in a while, it might not be up to par with Apple’s recommendations.
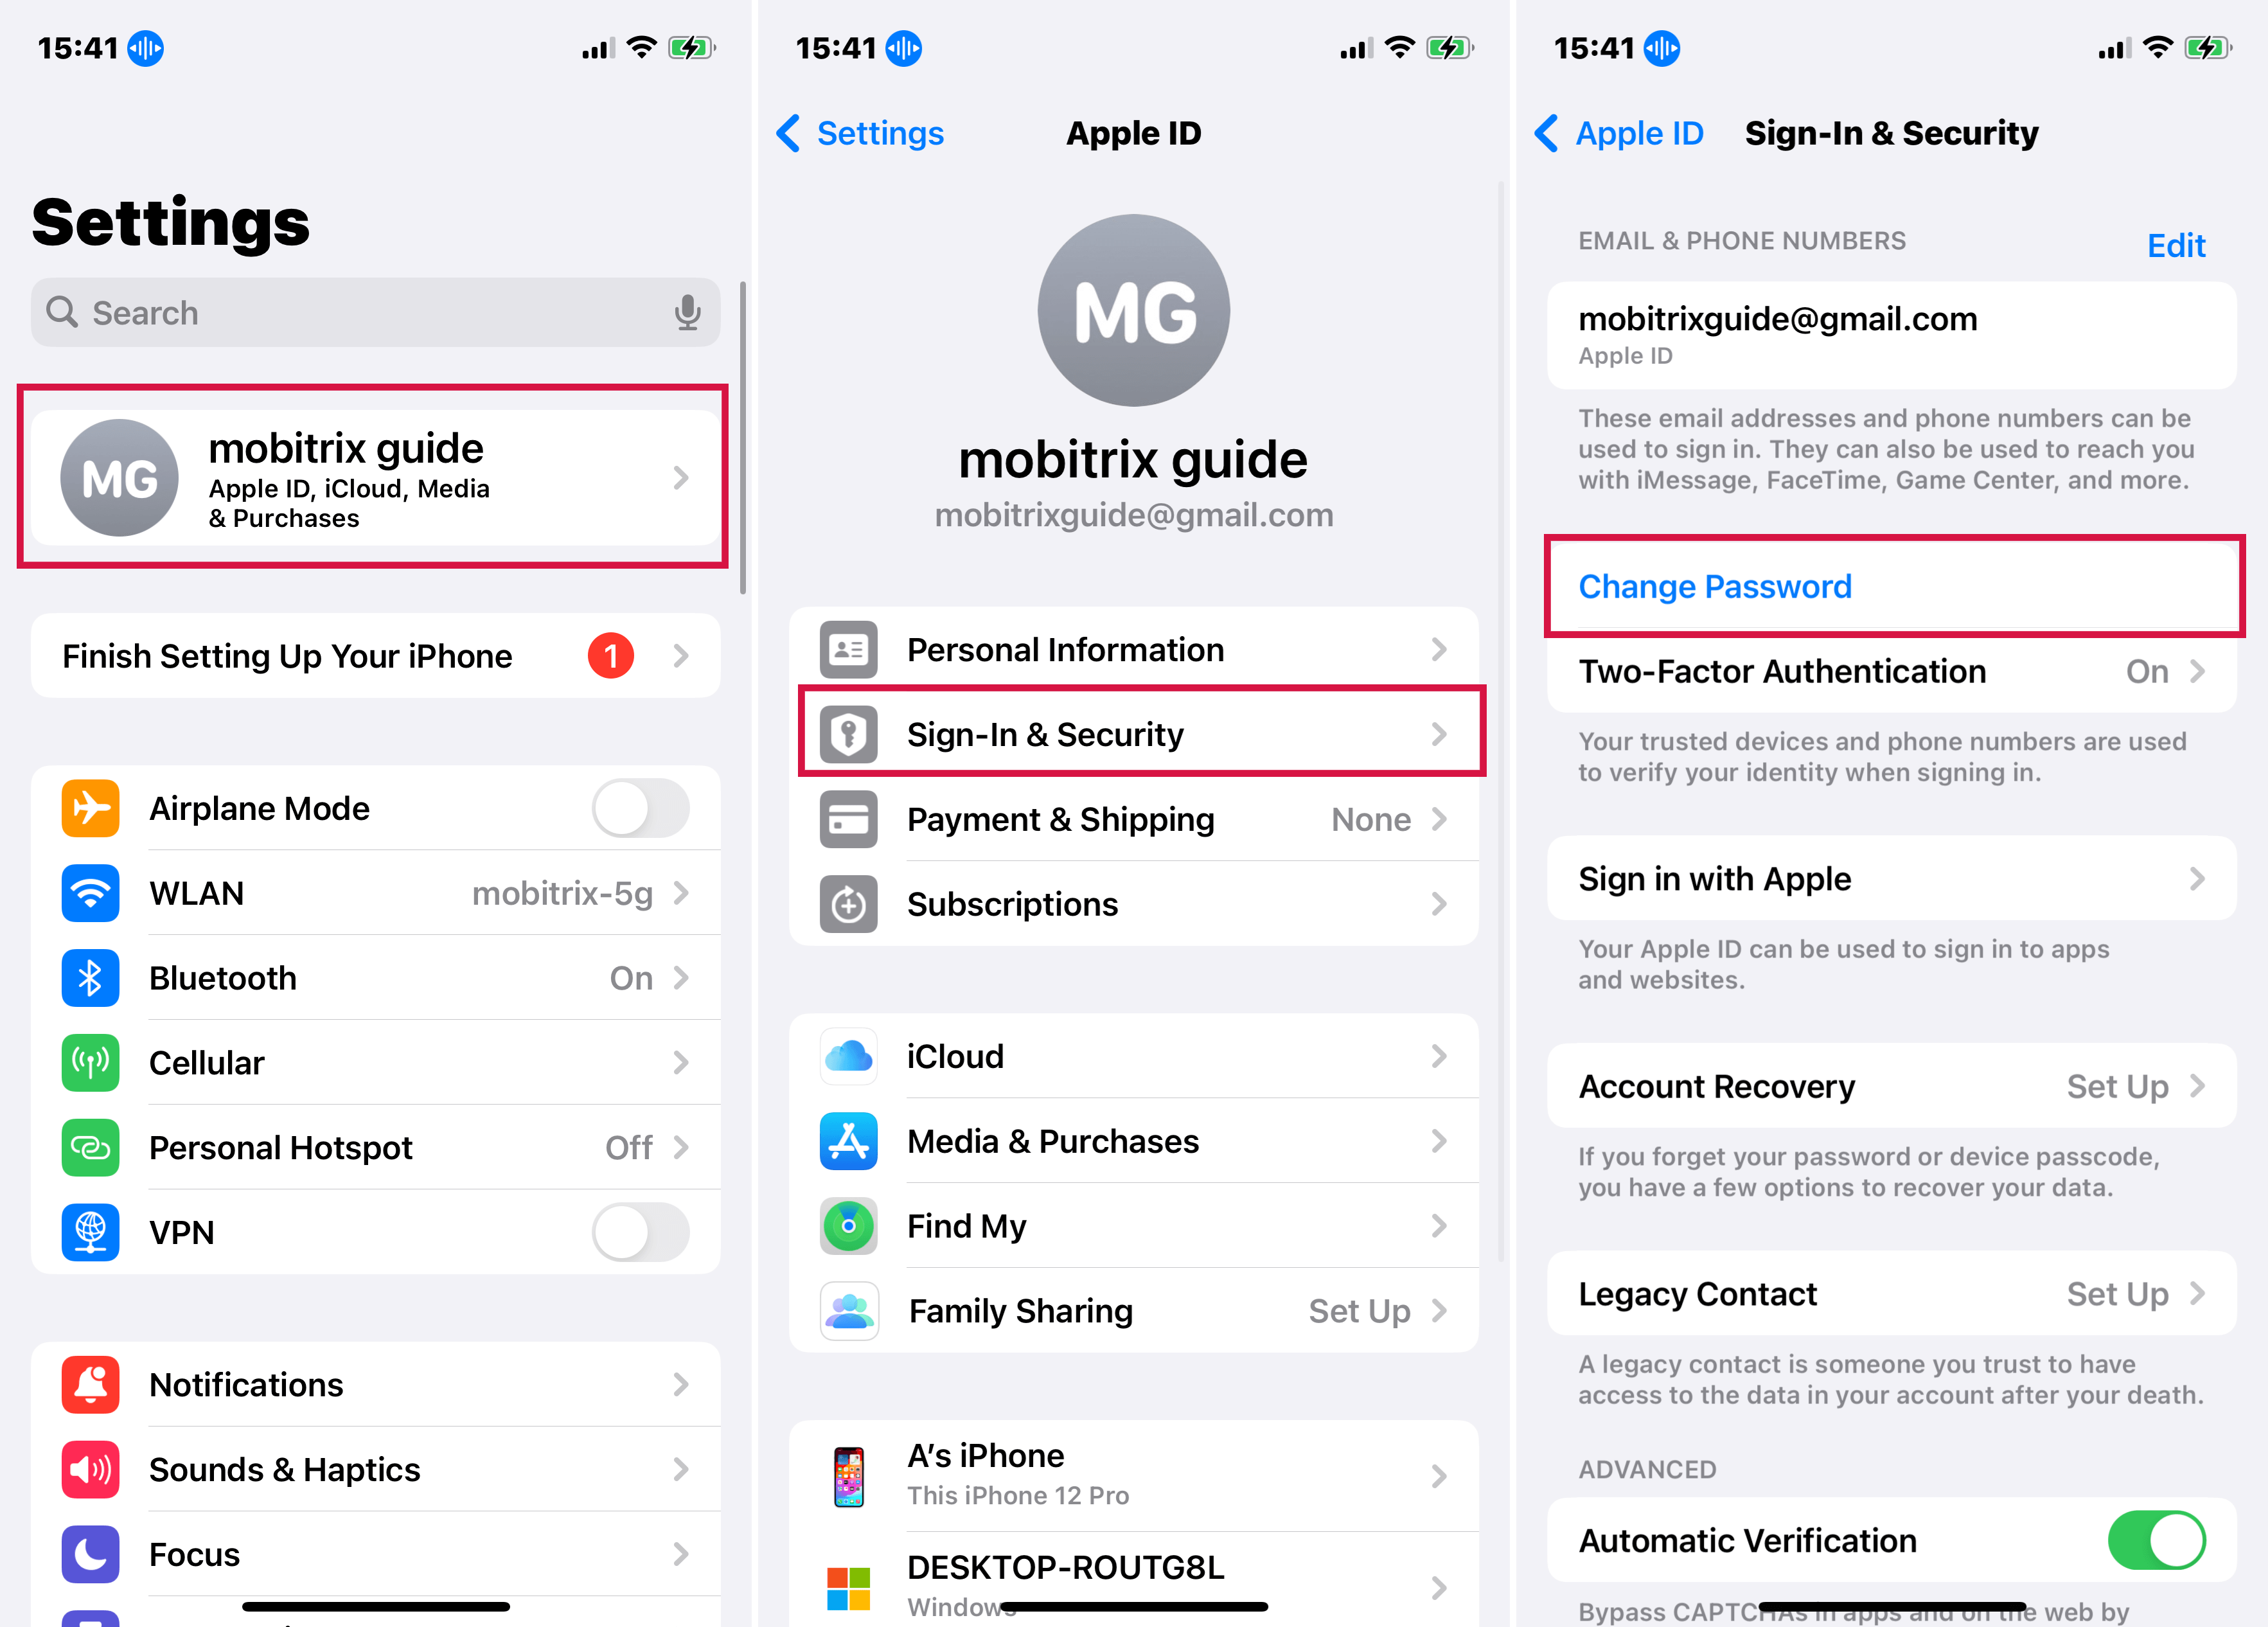
Resetting your password frequently gives you a chance to keep up to date with Apple’s regulations. Follow the steps I have outlined below to change your Apple ID’s password:
Step 1 – Go to Settings on your iPhone and select your name which should be appearing at the top of the screen.
Step 2 – Go to Sign-In & Security.
Step 3 – Now, select the Change Password option.
Step 5 – If you have a passcode on your iPhone, your iPhone will ask you to enter it. Enter the passcode here.
Step 6 – Now, your iPhone will prompt you to enter a new Apple ID password. Enter a password that follows Apple’s guidelines.
Step 7 – Re-enter the new password again to confirm it.
Step 8 – Tap Change at the top of your iPhone’s screen to set your new password for Apple ID.
Now you will be asked to sign out of all devices and accounts and sign in with the new password. Sign in with the new password, and you should be set!
4. Reset Network Settings
If your device is having trouble connecting to the internet despite checking your Wi-Fi and cellular connections, updating your network settings could be the next step.
This action won't delete any data on your iPhone, but it will reset your cellular connections and require you to log in to Wi-Fi networks again.
To reset your iPhone's network settings, follow the steps outlined below:
Step 1 – Go to Settings on your iPhone and then go to General.
Step 2 – Now tap Transfer or Reset iPhone and then tap Reset.
Step 3 – Tap Reset Network Settings
Step 4 – Your iPhone will ask you to enter your passcode. Enter your passcode and tap Reset Network Settings again to confirm.
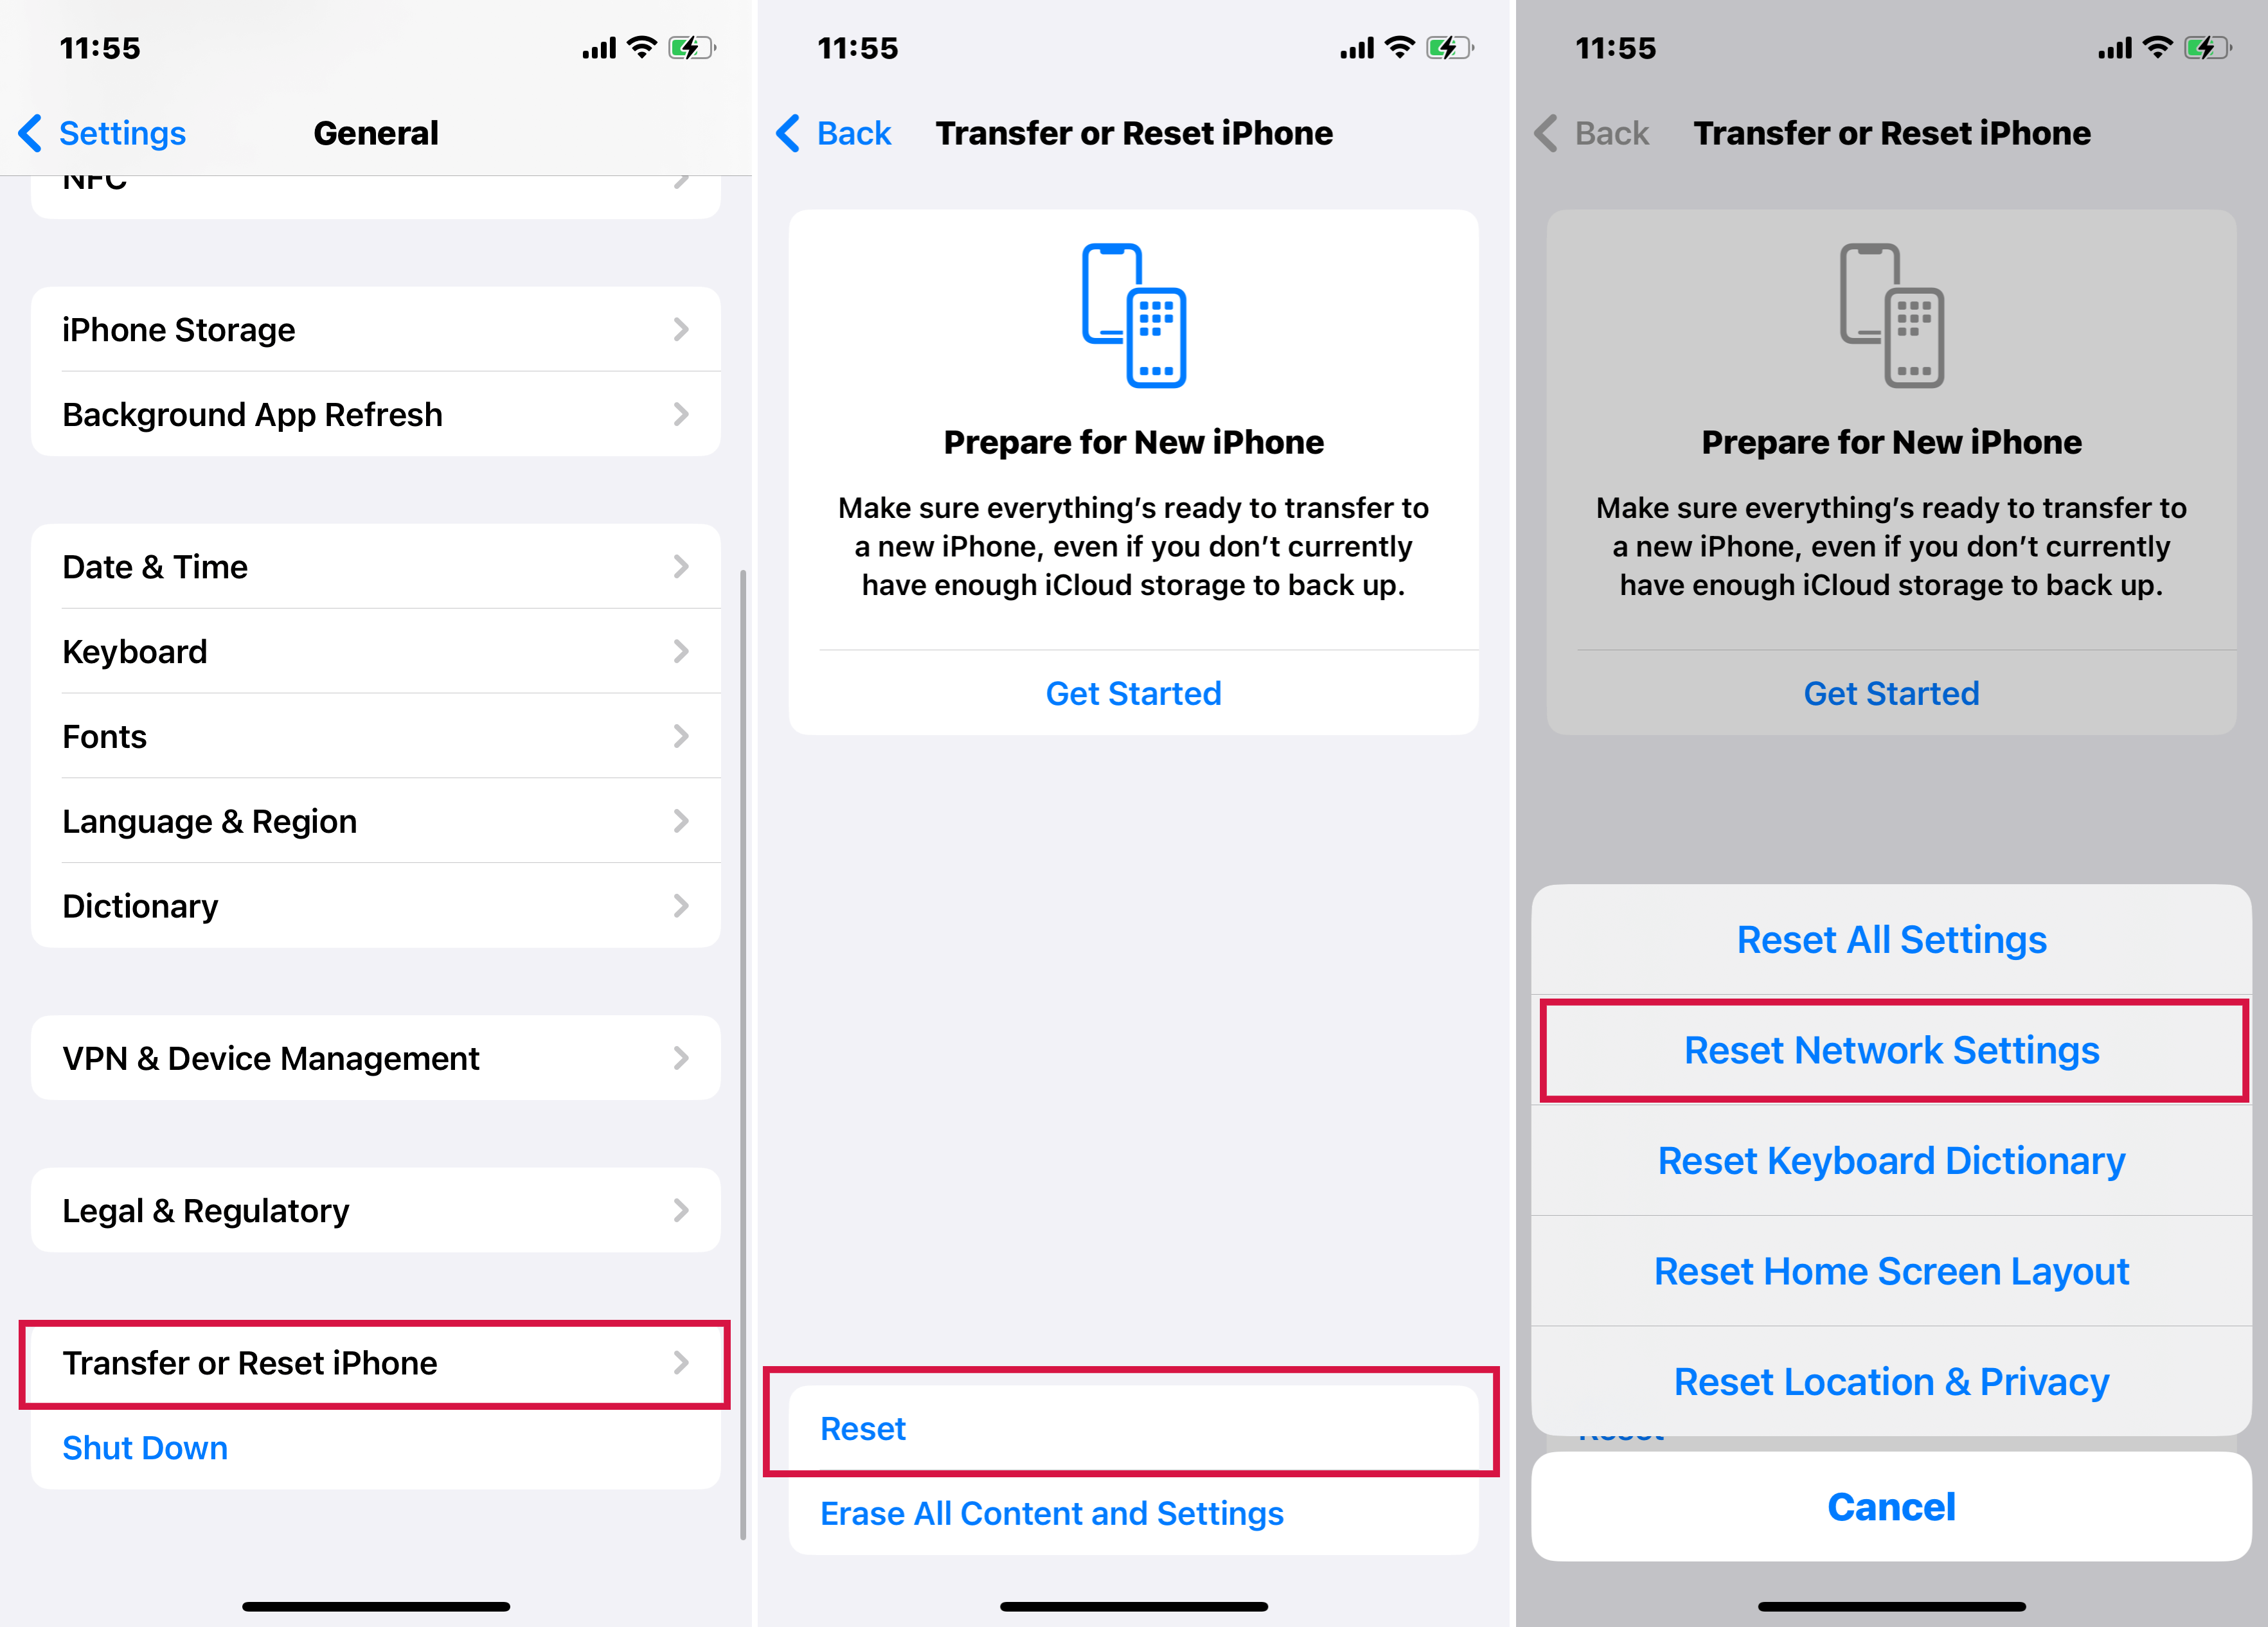
This will delete all network settings, returning them to factory defaults. Now, you should be able to sign back into your networks and use your Apple ID again.
If, however, you've tried all the above methods and are still encountering the error, don't lose hope. Below, I have listed additional ways to fix this issue.
Part 3: Using a Verification Code to Resolve Apple ID Verification Failure
Sometimes, there can be synchronization issues between your iPhone and the Apple server. You might appear logged in on your device, but this might not be reflected on the server, leading to errors such as 'Apple ID Verification Failed.'
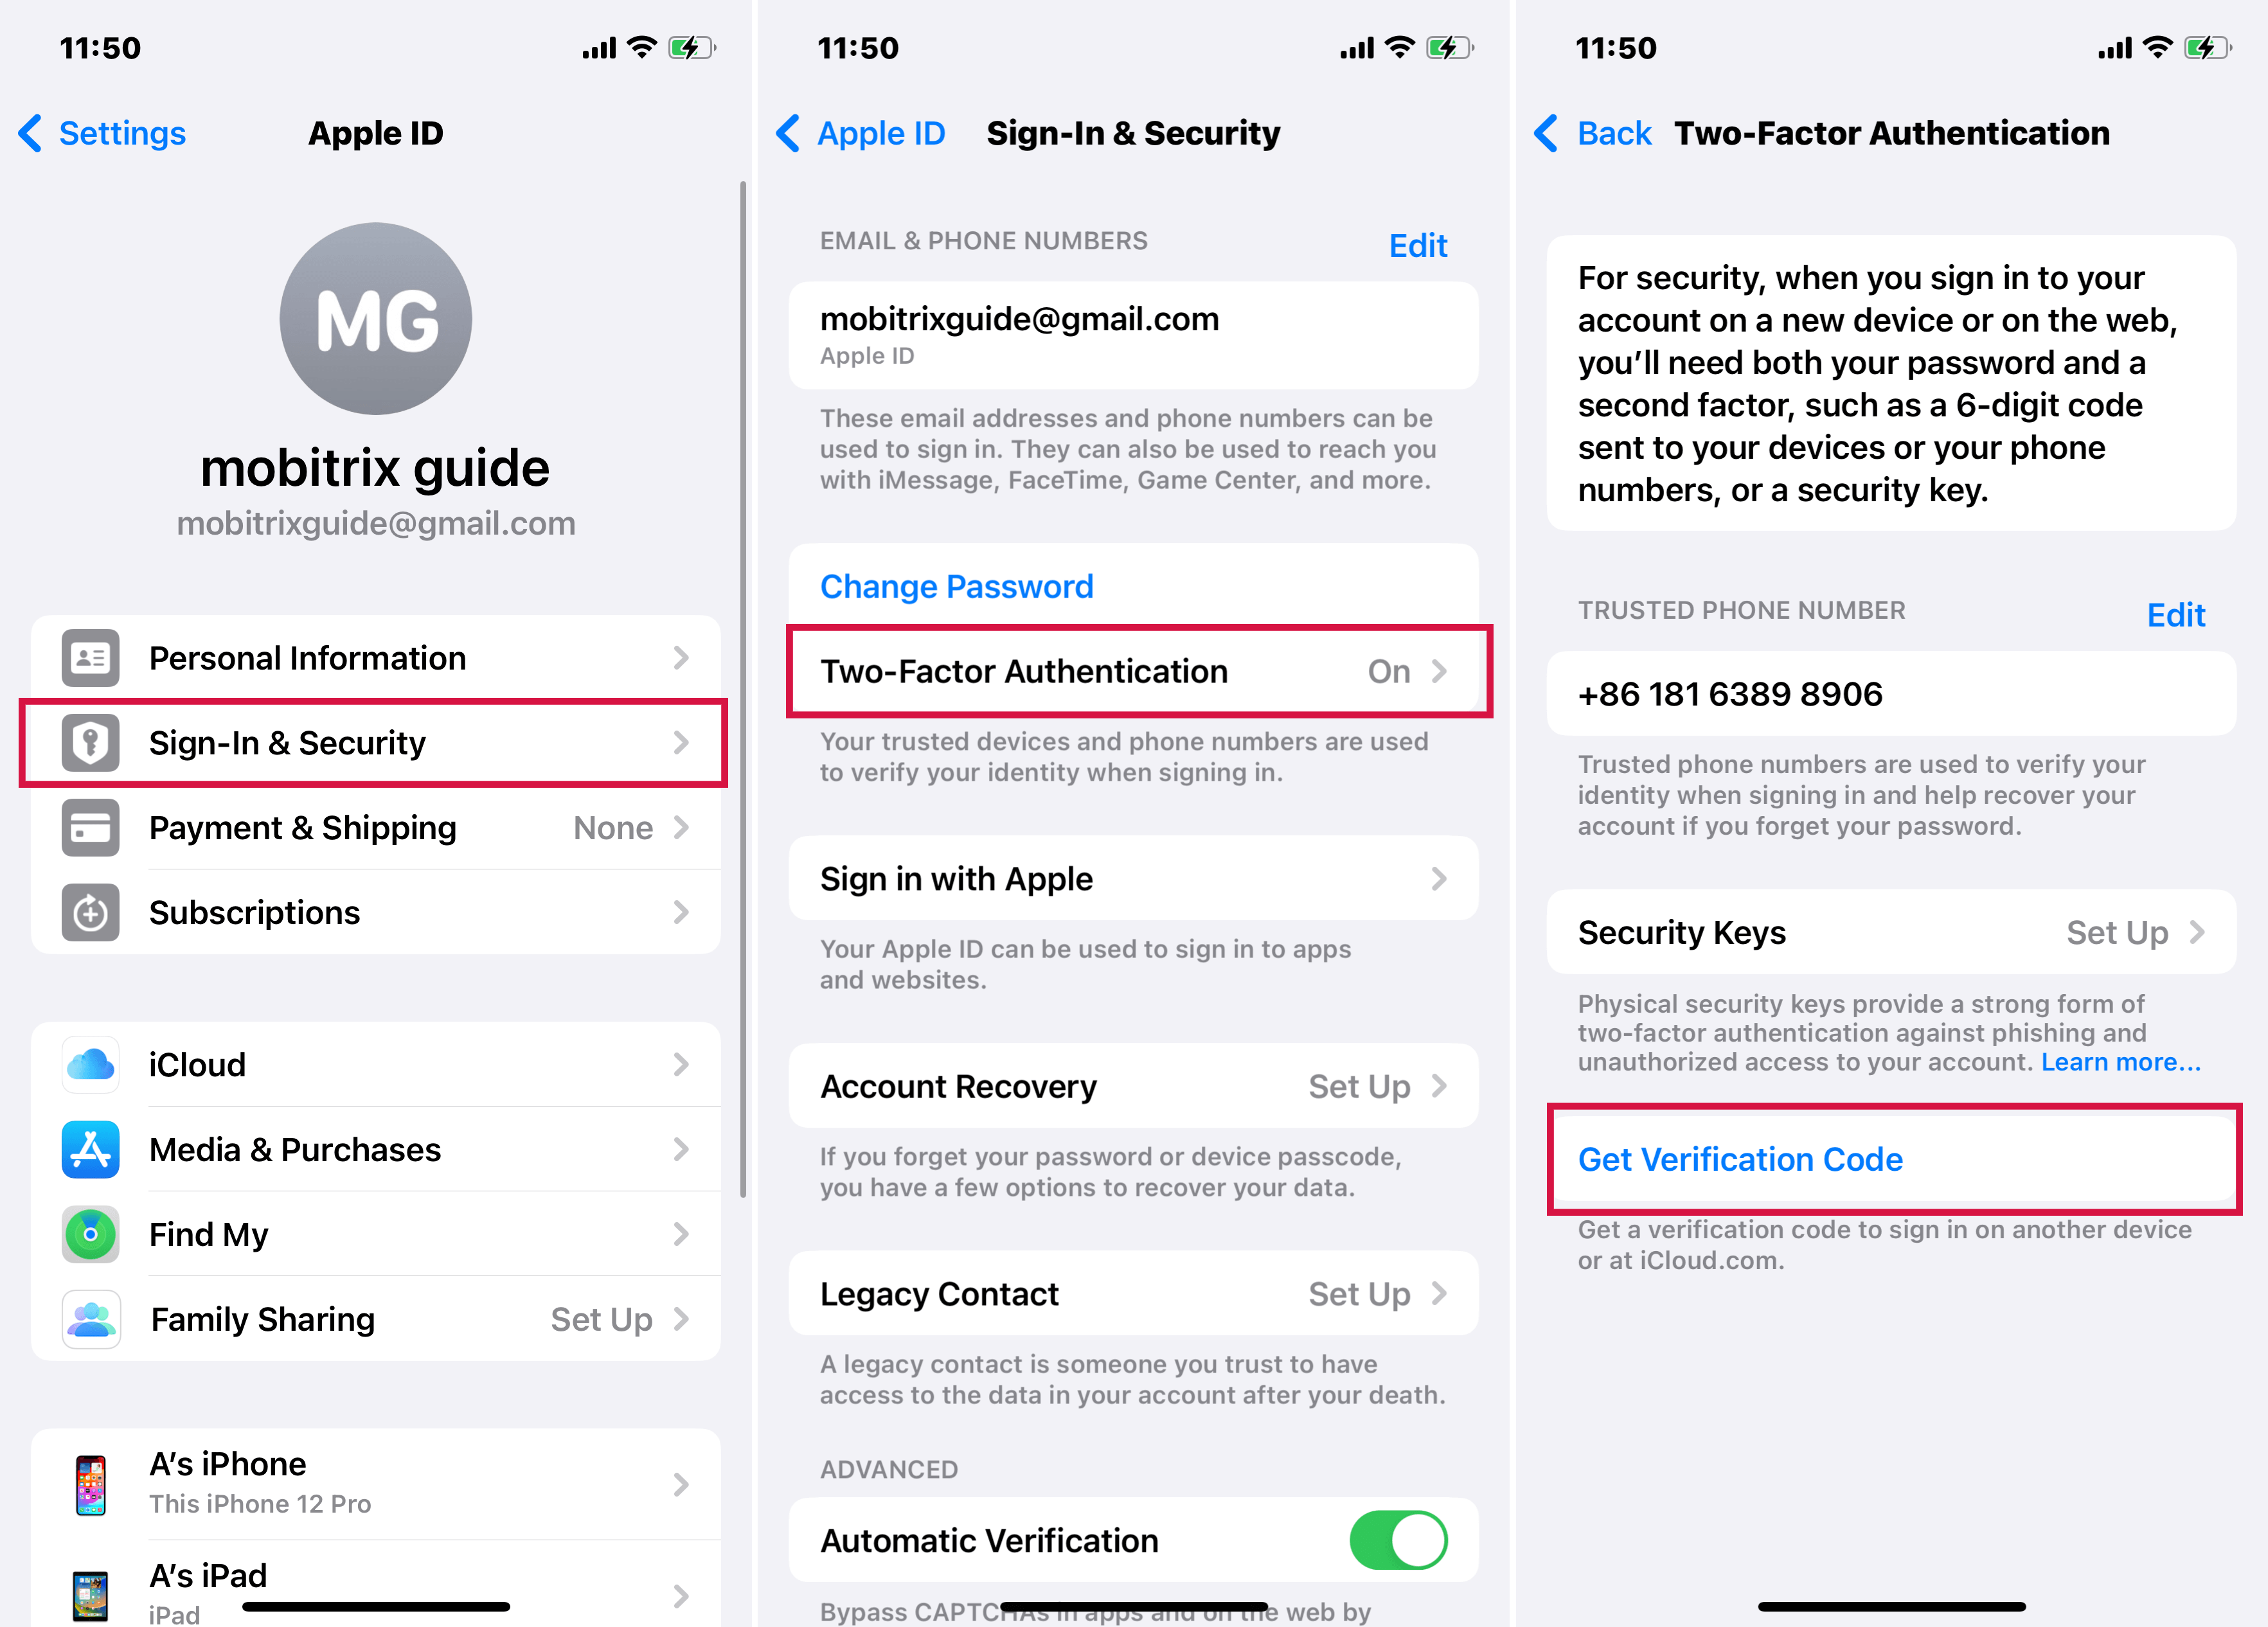
In this method, I will guide you to check if you are actually logged into your ID through a verification code. Follow the steps I have mentioned below:
Step 1 – Log in to your Apple ID on another iPhone.
Step 2 – On this iPhone, go to Settings, then tap your Apple ID name.
Step 3 – Choose Sign-In & Security > Two-Factor Authentication > Get Verification Code.
Step 4 – Now, use this verification code in your own iPhone that has the error.
Remove any OpenDNS settings or VPNs from your device, as they can interfere with logging into Apple.
Note that this method requires access to another iPhone. If it doesn’t resolve your issue, continue reading for more solutions.
Part 4: Use Mobitrix LockAway to Fix Apple ID Verification Failed Error
If you're still stuck with the Apple ID verification errors after trying the above methods, or you prefer an easier solution, consider using Mobitrix LockAway to remove your Apple ID.
It's a powerful tool that simplifies the process. You can fix the verification issue in just three easy steps and it usually takes only about 20 minutes.
No need to struggle with complicated methods – we'll show you a super easy way to get it done!
FREE DOWNLOADFREE DOWNLOADFREE DOWNLOAD
Advantages of Using Mobitrix LockAway:
You don’t need a password for Apple ID to use LockAway.
You can follow simple steps to reset your Apple ID password.
You can easily fix issues with Apple’s Sever.
It fully supports iPhone 5s to iPhone 16 and iOS 18 and earlier versions.
Below, find a simple three-step process to fix your Apple ID login error using Mobitrix LockAway:
Step 1 – Connect your iPhone, or the device displaying the error, to a computer.
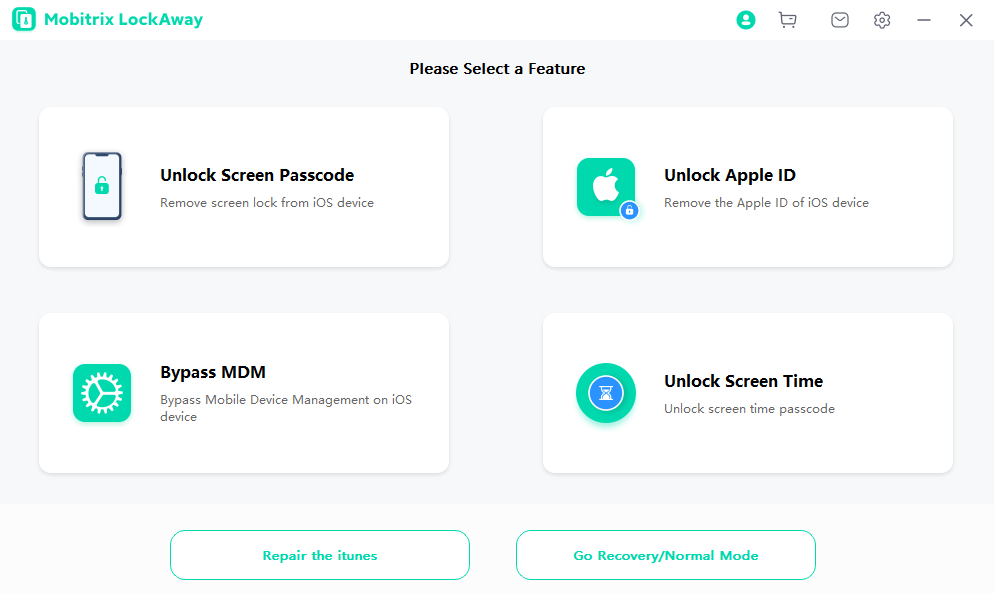
Step 2 – Select the “Unlock Apple ID” option from the main menu.
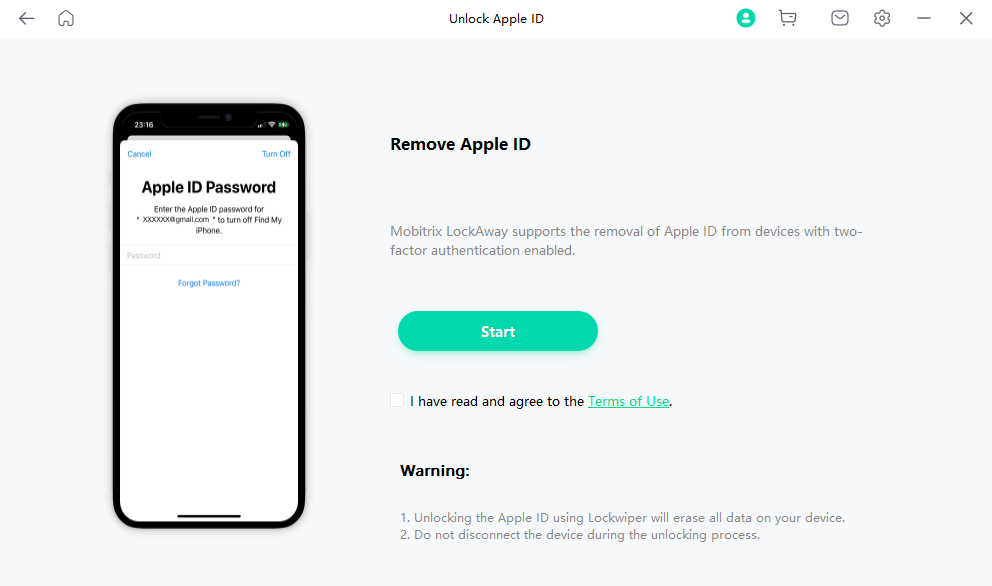
Step 3 – Click "Start" to remove your Apple ID.
If none of the methods in the article above has worked for you, there is an incredibly good chance that you will have success with LockAway.
You can use LockAway to simply fix the error without having to follow any complex steps. LockAway can help you in all kinds of situations, whether you have a login error or you’ve forgotten your Apple ID and password.
To Sum Up
In this article, we've explored 6 ways to tackle the "Verification Failed Apple ID" issue on your iPhone. If the error continues despite trying all the suggested methods in this article, your remaining option is to install and use Mobitrix LockAway to unlock your Apple ID.
This tool is straightforward to use for unlocking your Apple ID, even if you don't remember your password. Just start Mobitrix LockAway and follow the simple steps we've already covered, and you should be able to fix the "verification failed Apple ID" error quite easily.

