[Easy Guide] How to Quickly Record Video on Your iPhone?
Shooting video on an iPhone is easy, and no matter which iPhone model you have, you can create high-quality videos if you know the right techniques and change settings.
In this article, we’ll teach you how to record video on an iPhone and introduce some useful recording tips. Let’s jump in!
Note: This article applies to IOS 17 and above.
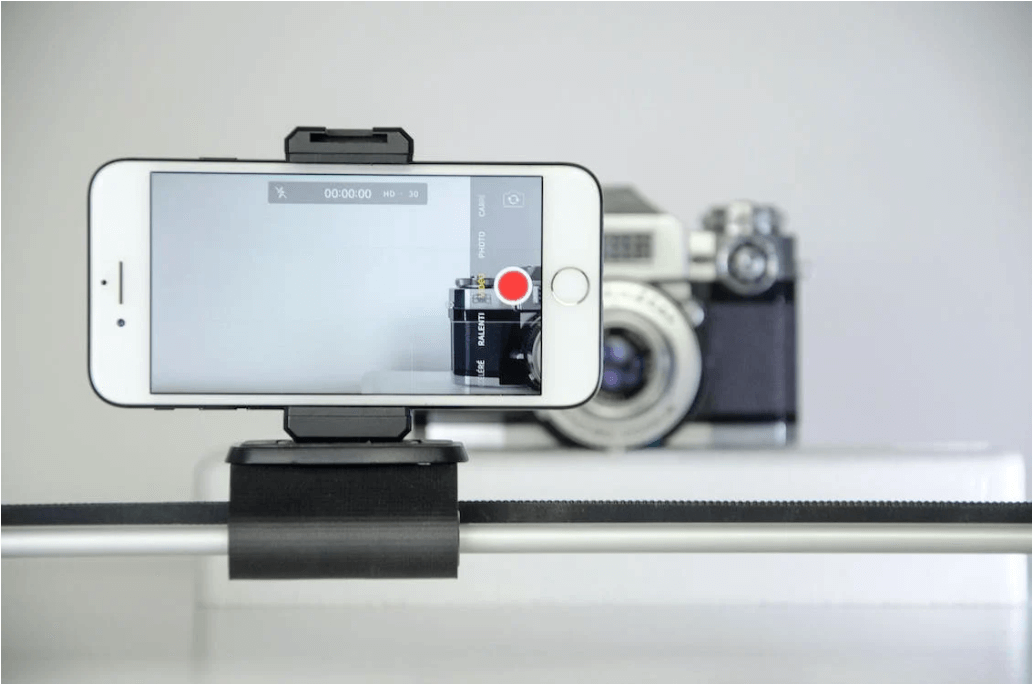
Capturing video on your iPhone is quite simple. Follow these steps to record video on your iPhone:
Launch the Camera app on your iPhone.
Tap ‘Video’ or swipe right to shift into Video mode.
Hit the red button to begin recording and again to stop.
During recording, pinch to zoom for a closer shot.
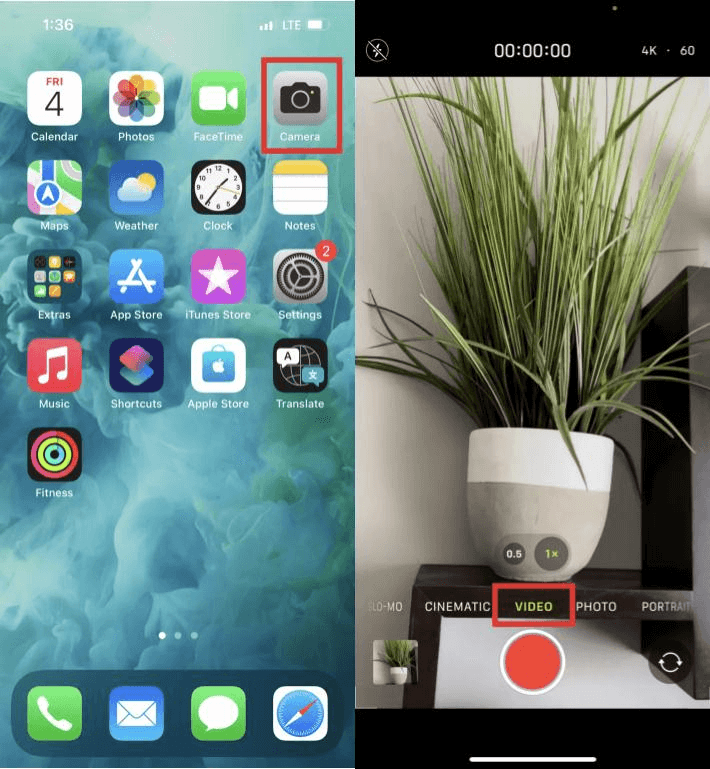
Tip: In Photo mode, press and hold the shutter button to start recording instantly. Drag the shutter to the right to lock in video mode for continuous shooting.
How to Record Your Phone Screen?
To capture your iPhone’s screen, first add the feature to your Control Center:
Go to Settings > Control Center.
Tap the green plus icon next to “Screen Recording” to include it.
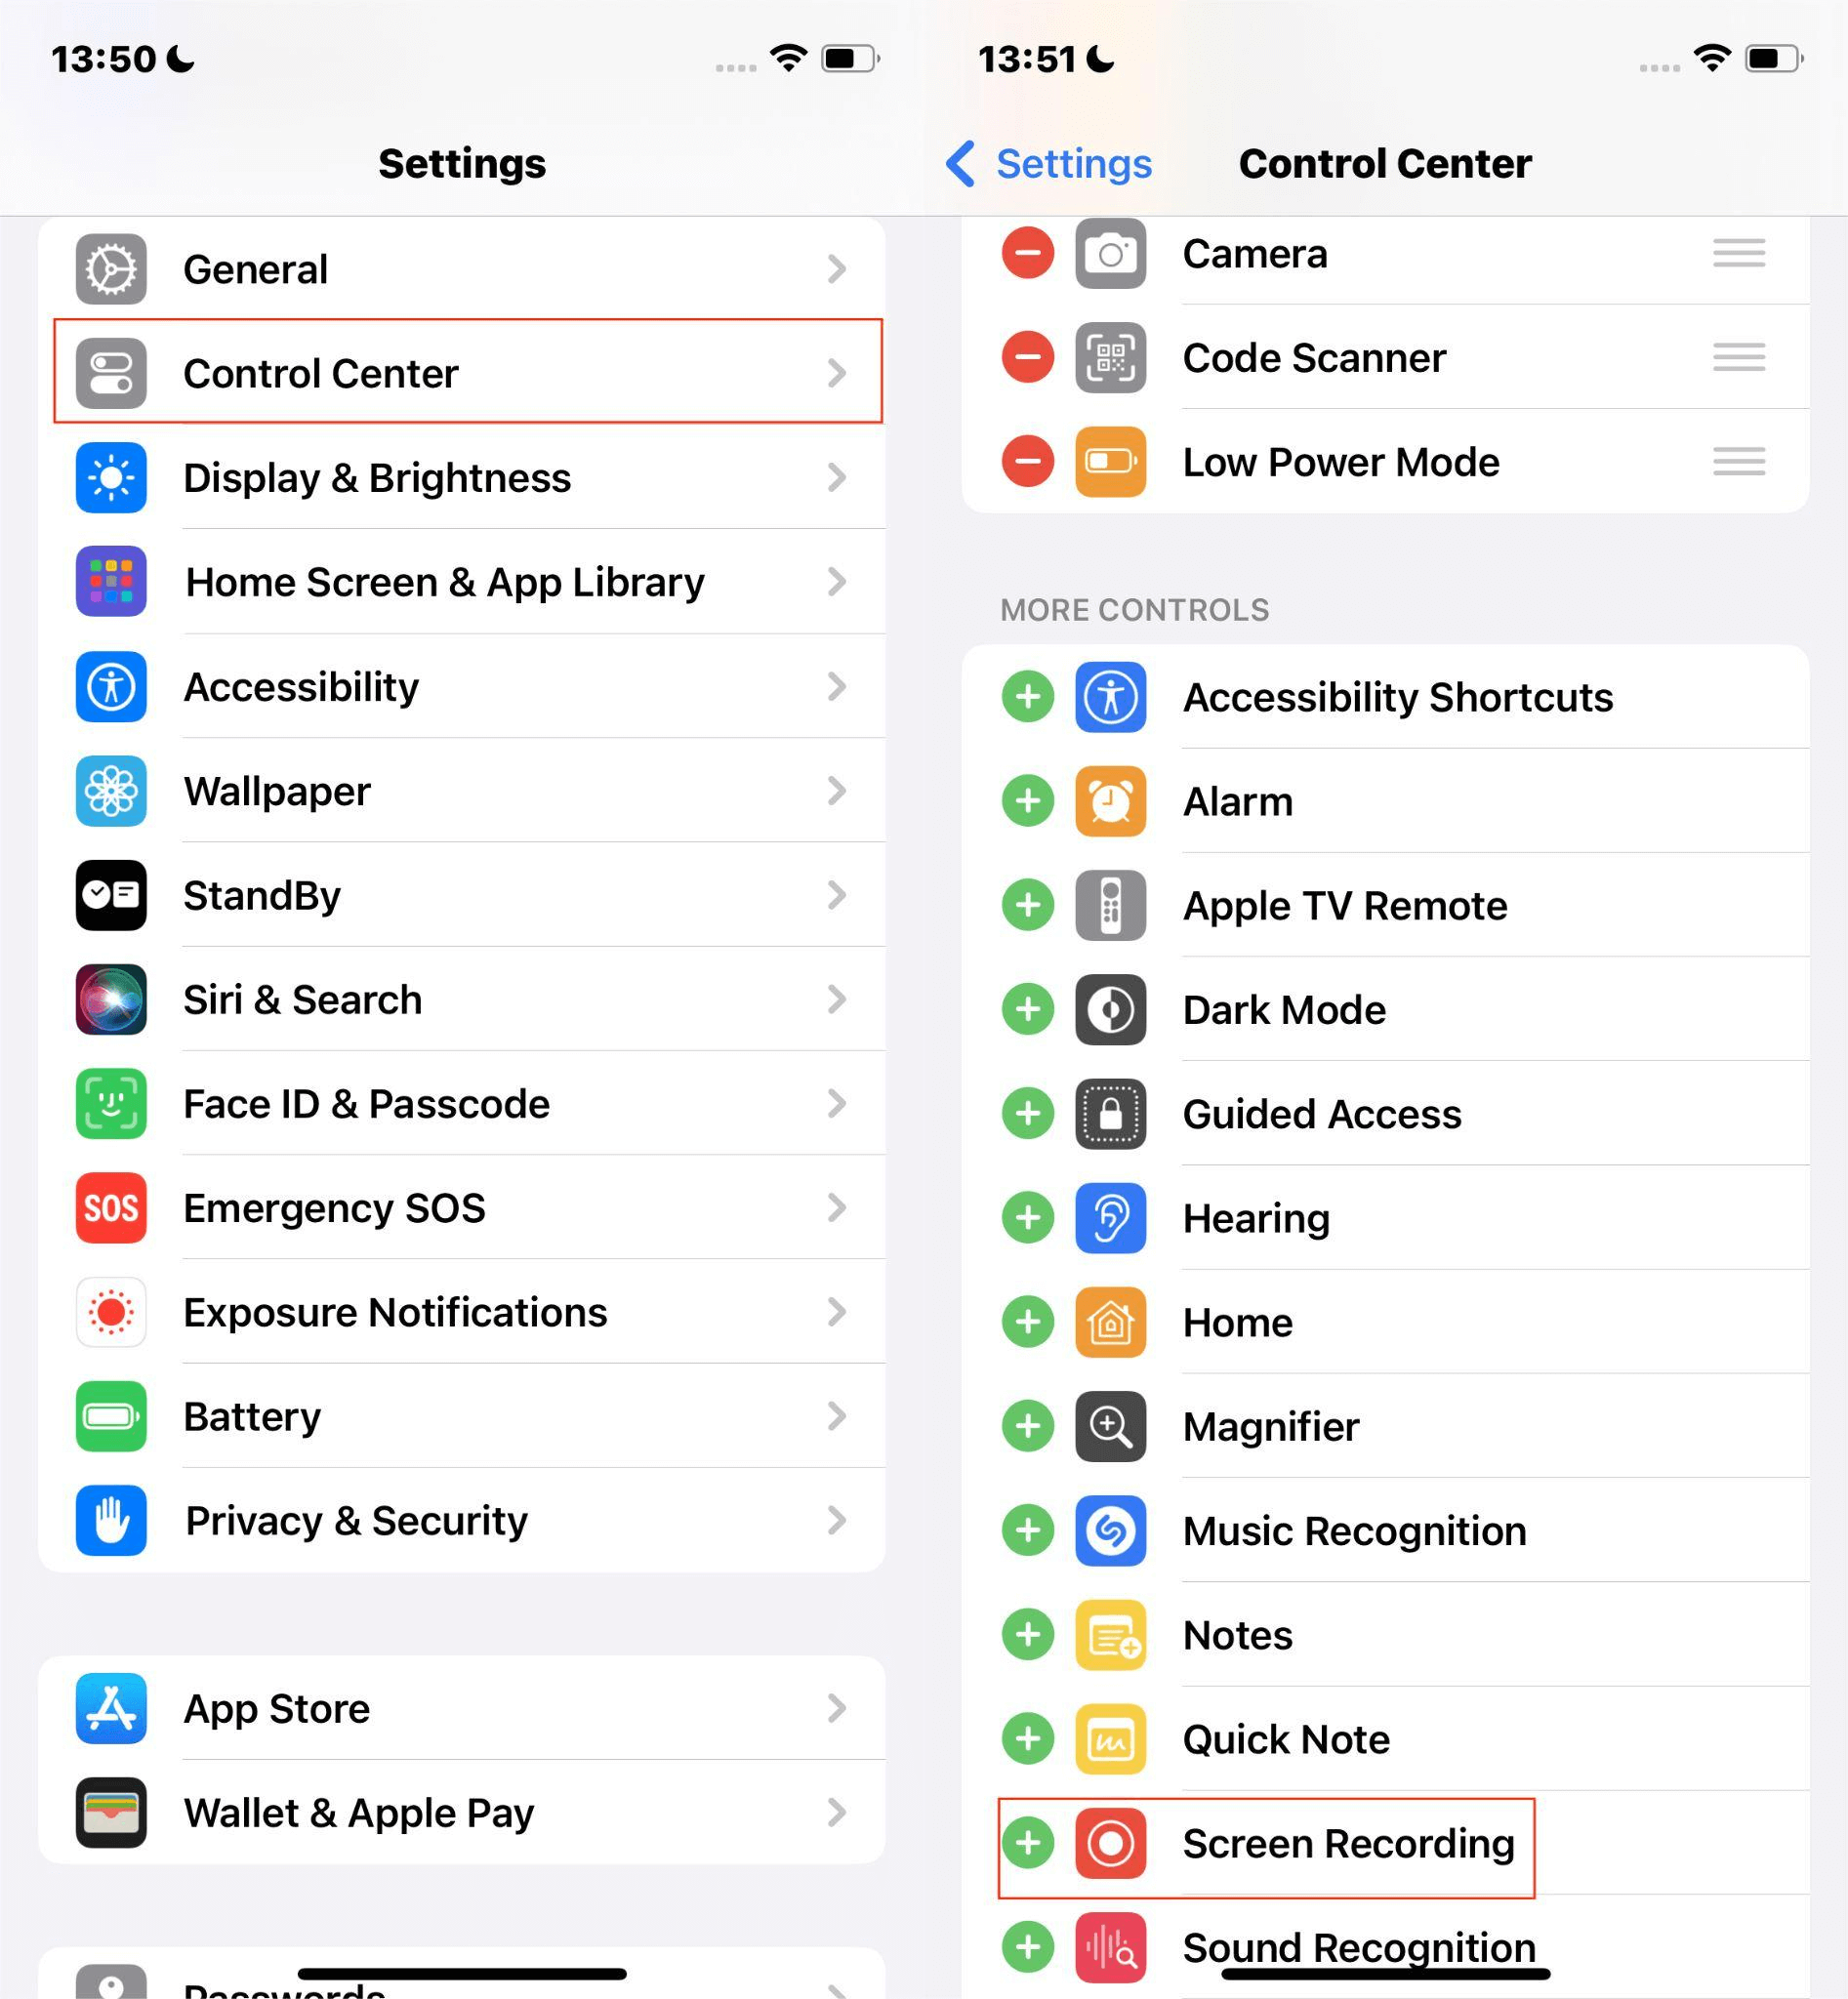
Tip: Rearrange the controls by dragging the three-line icon next to them. This adjusts their order in the Control Center.
To start recording:
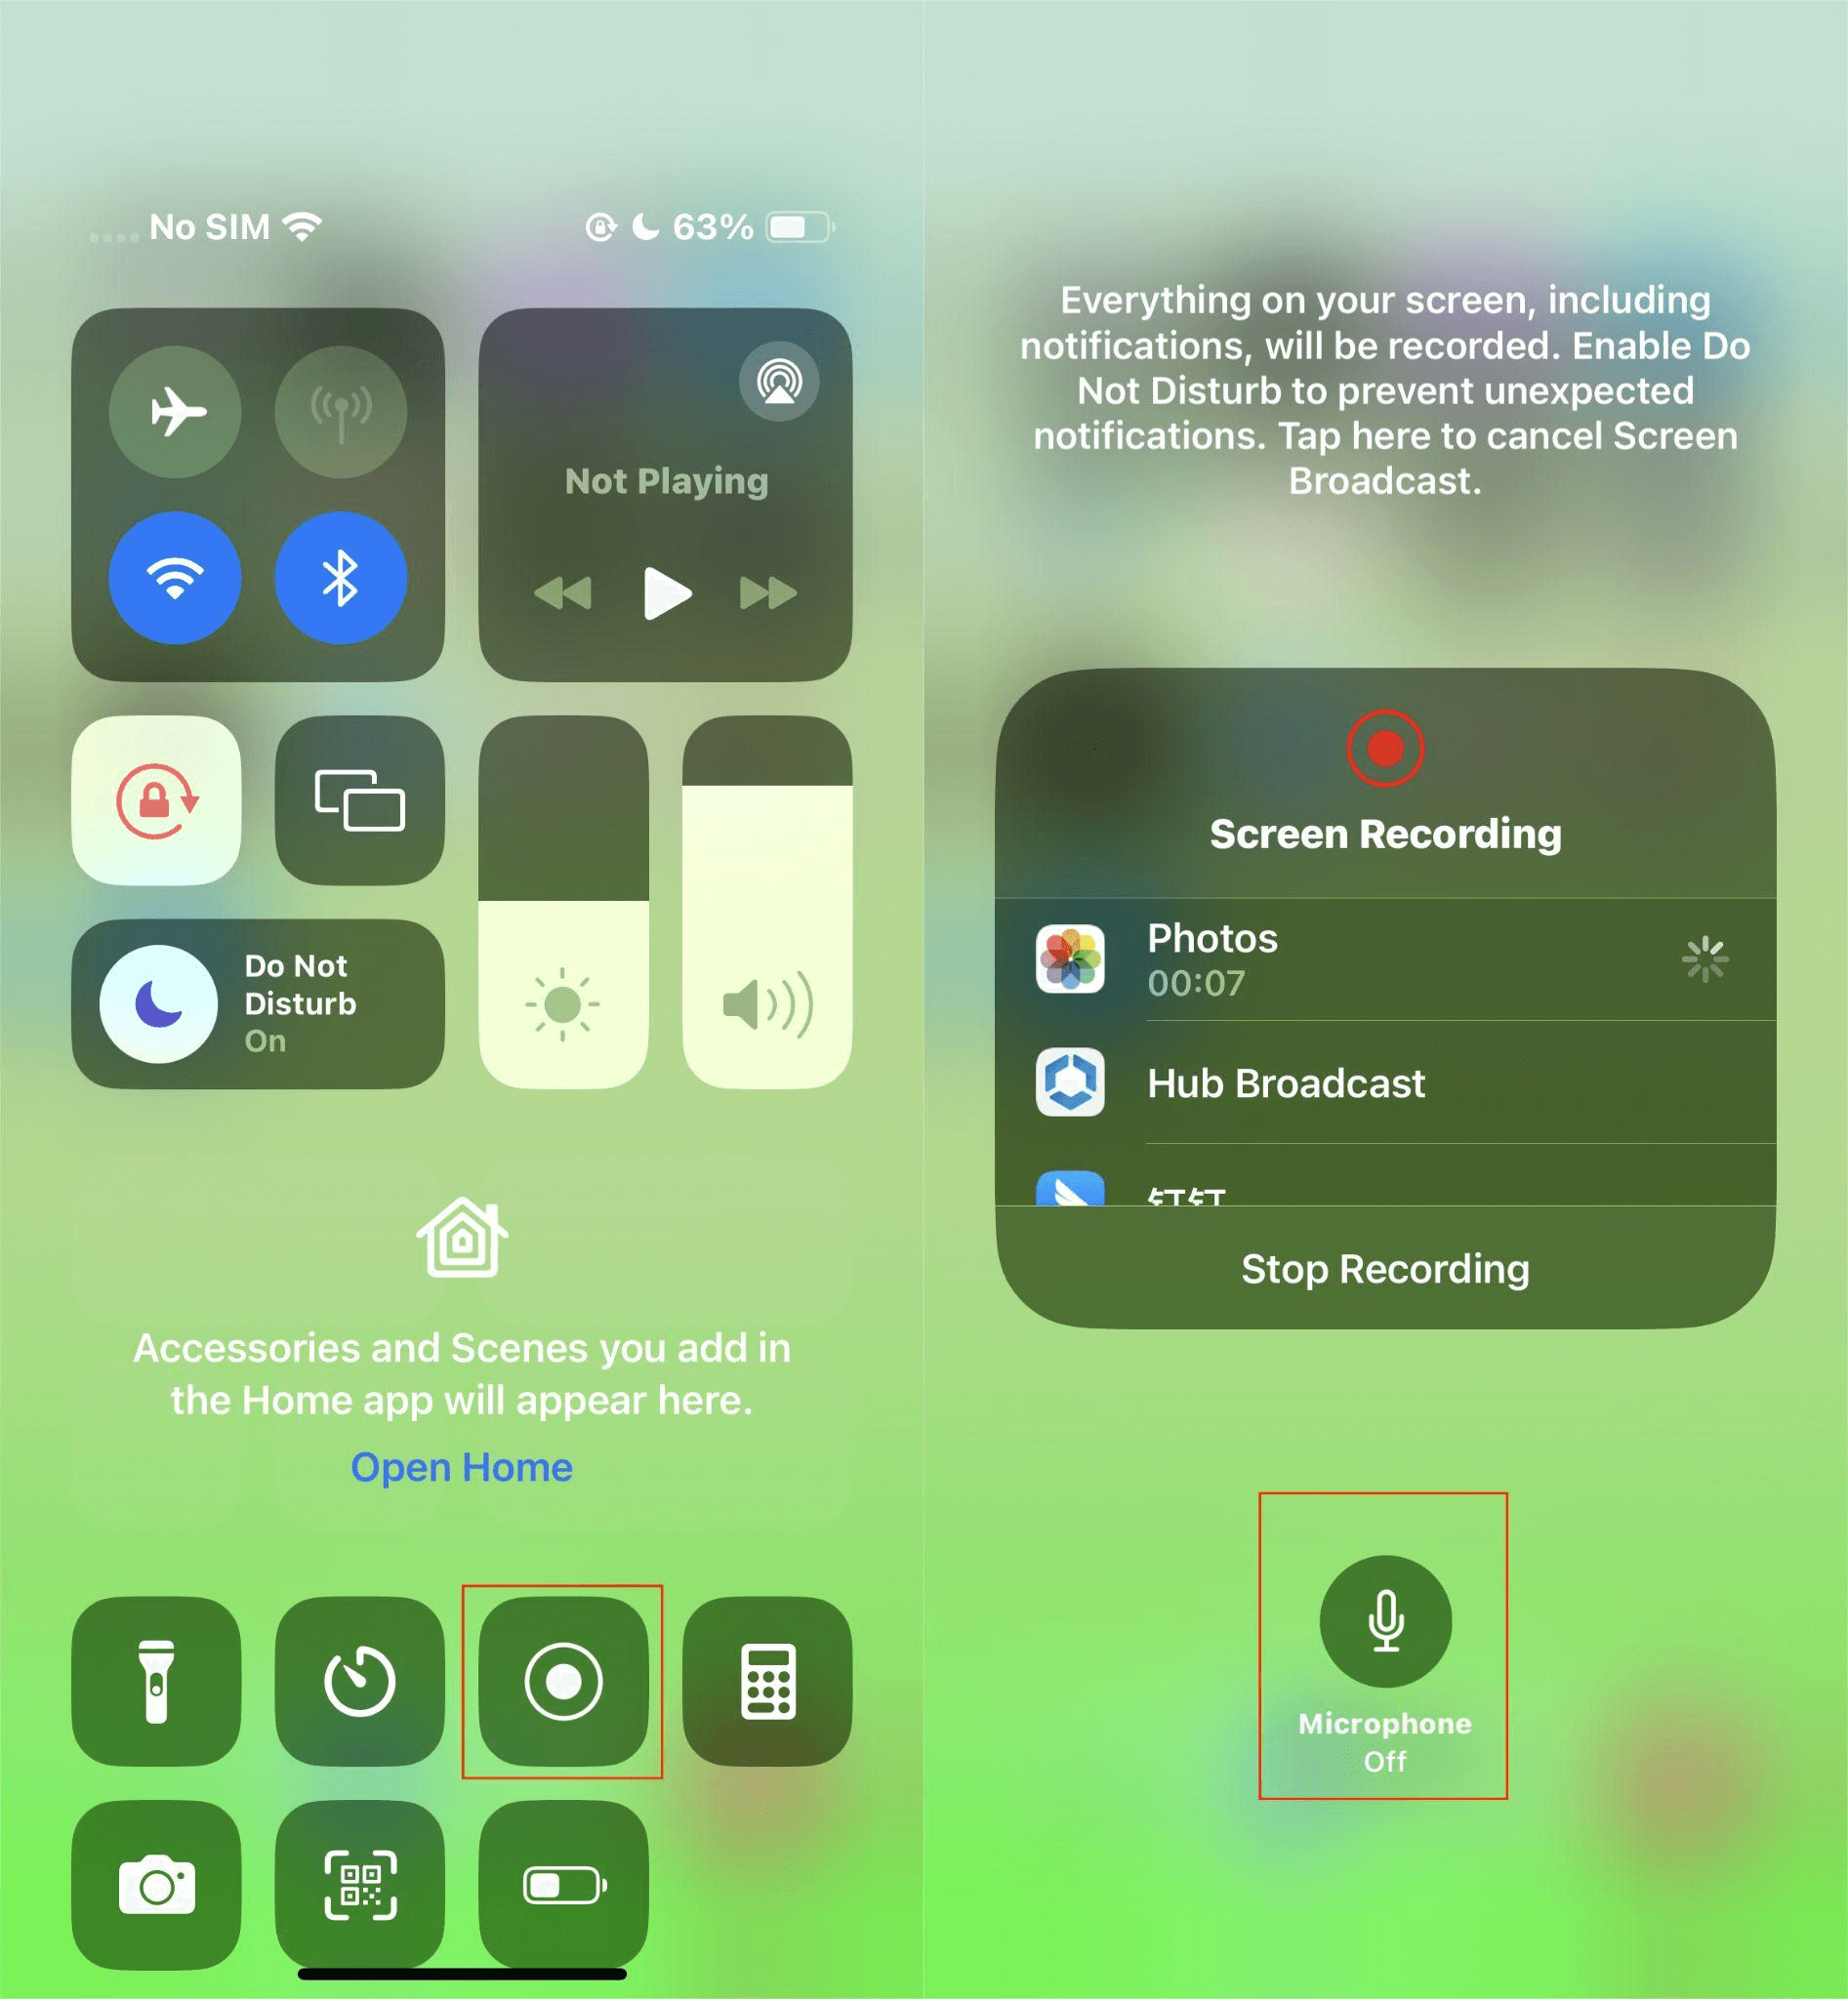
Access the Control Center (swipe down the screen).
Press the screen recording icon; a three-second countdown begins.
If you want to turn on the microphone, press and hold the record button and then tap the microphone icon.
To end screen recording, click the red recording button
You can then find your recorded video in the Photos app.
iPhone Video Recording Tips
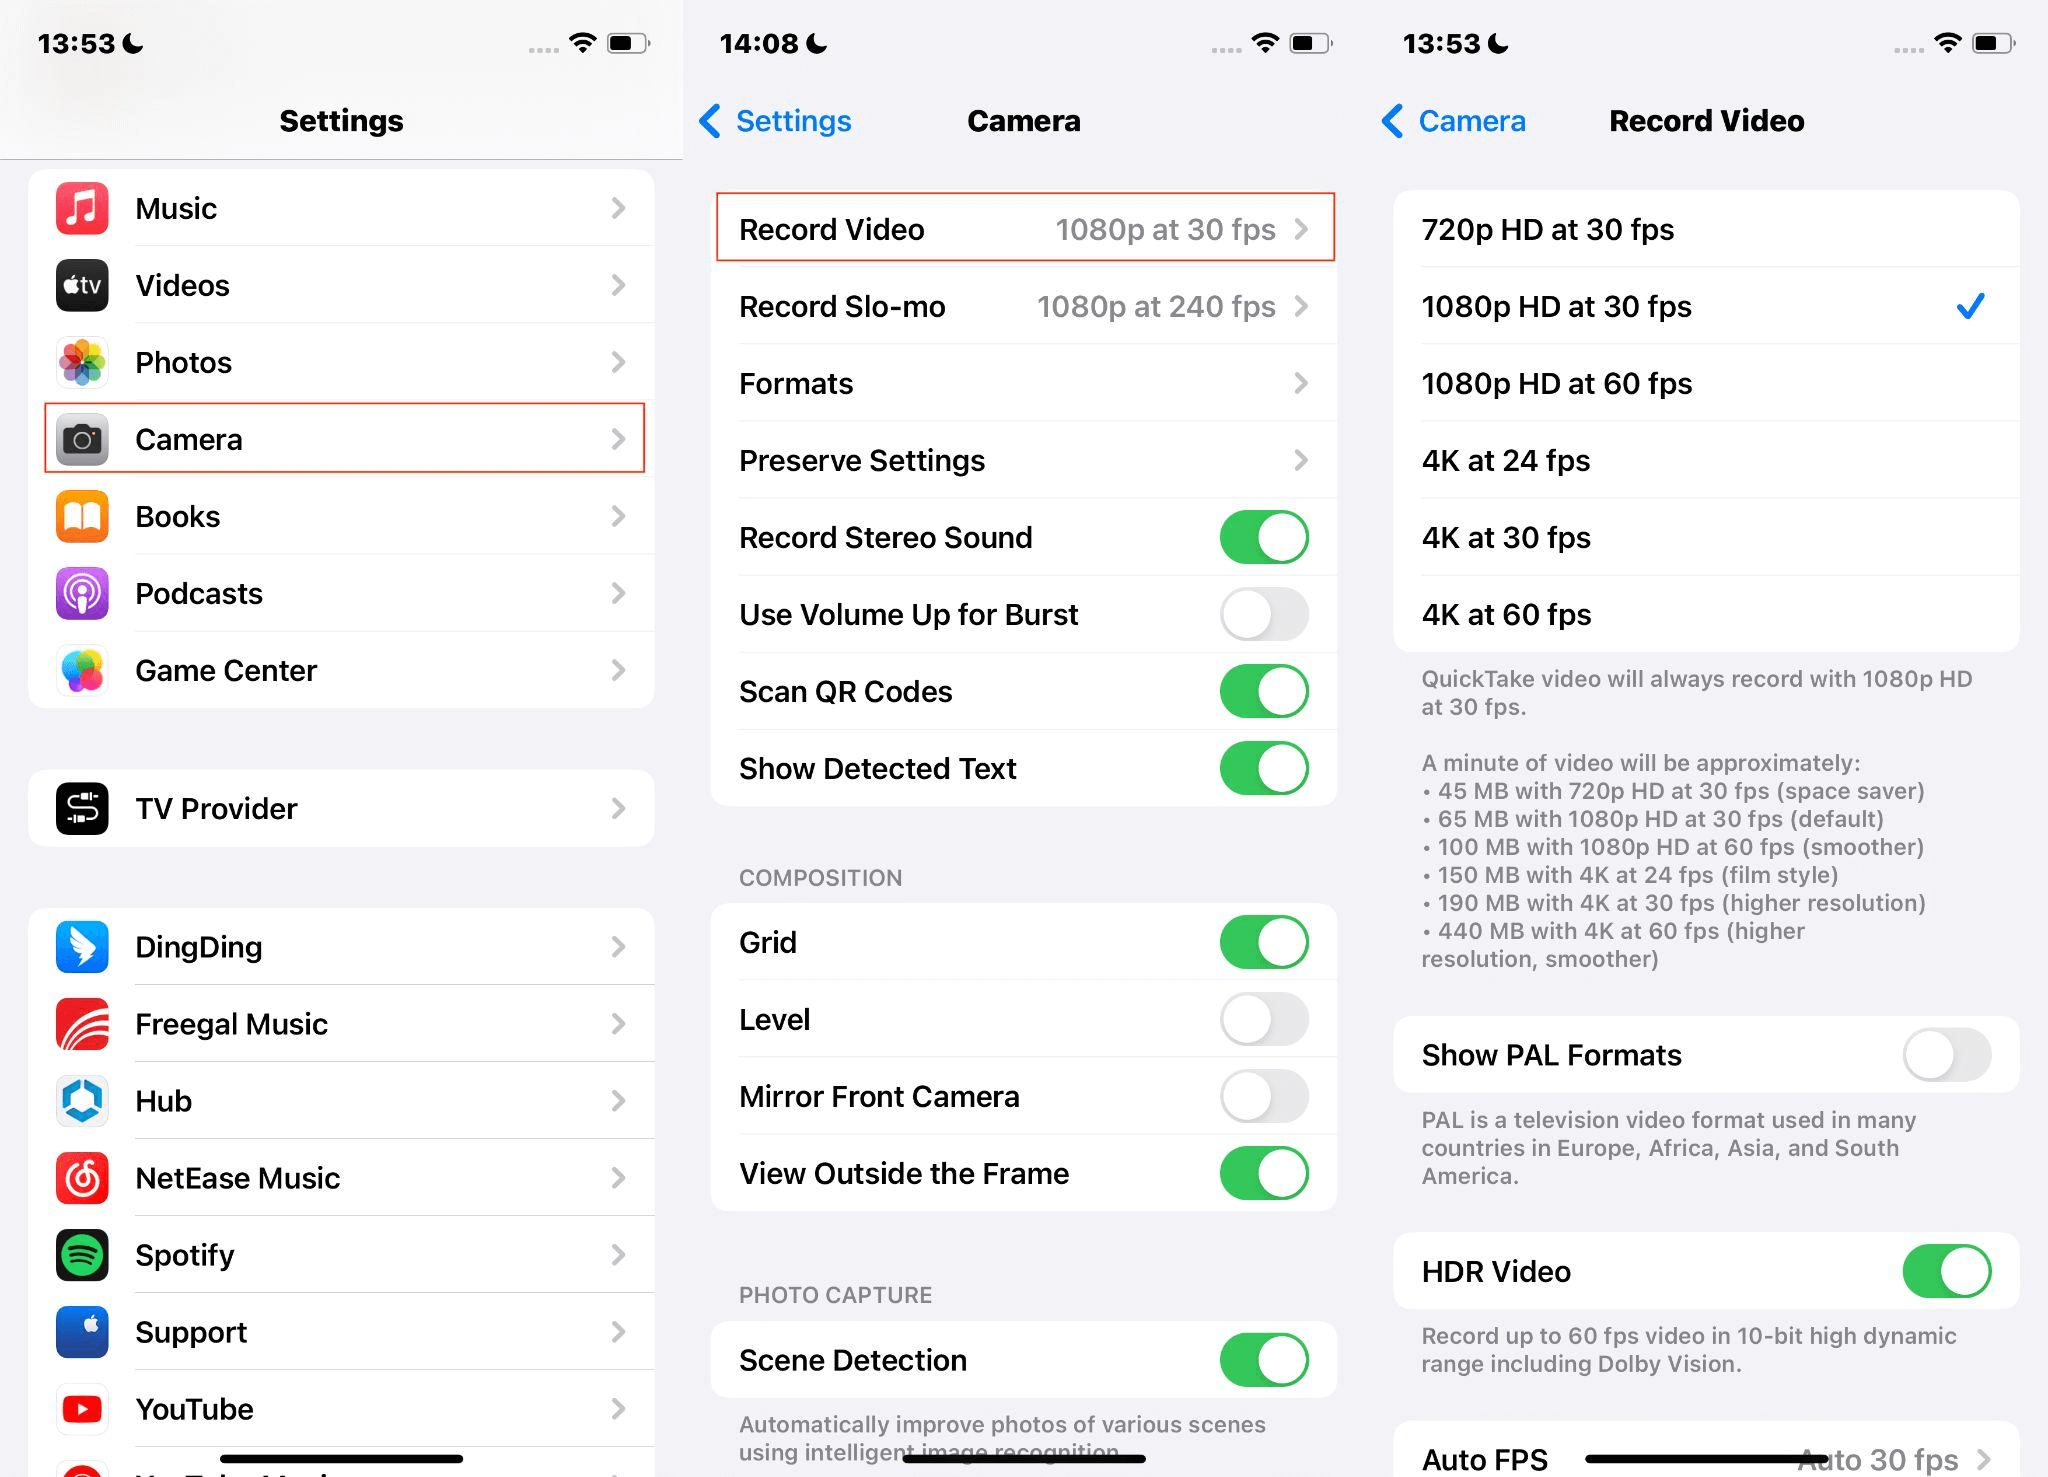
Tip 1: Boost Your Video Quality
By default, your iPhone captures video at 1080p HD at 30 FPS, which is adequate for most purposes.
However, you can enhance the quality:
Navigate to Settings > Camera > Record Video.
To achieve a cinematic aesthetic, select 4K at 24 FPS (depending on your iPhone model).
Tip 2: Enable Do Not Disturb Mode
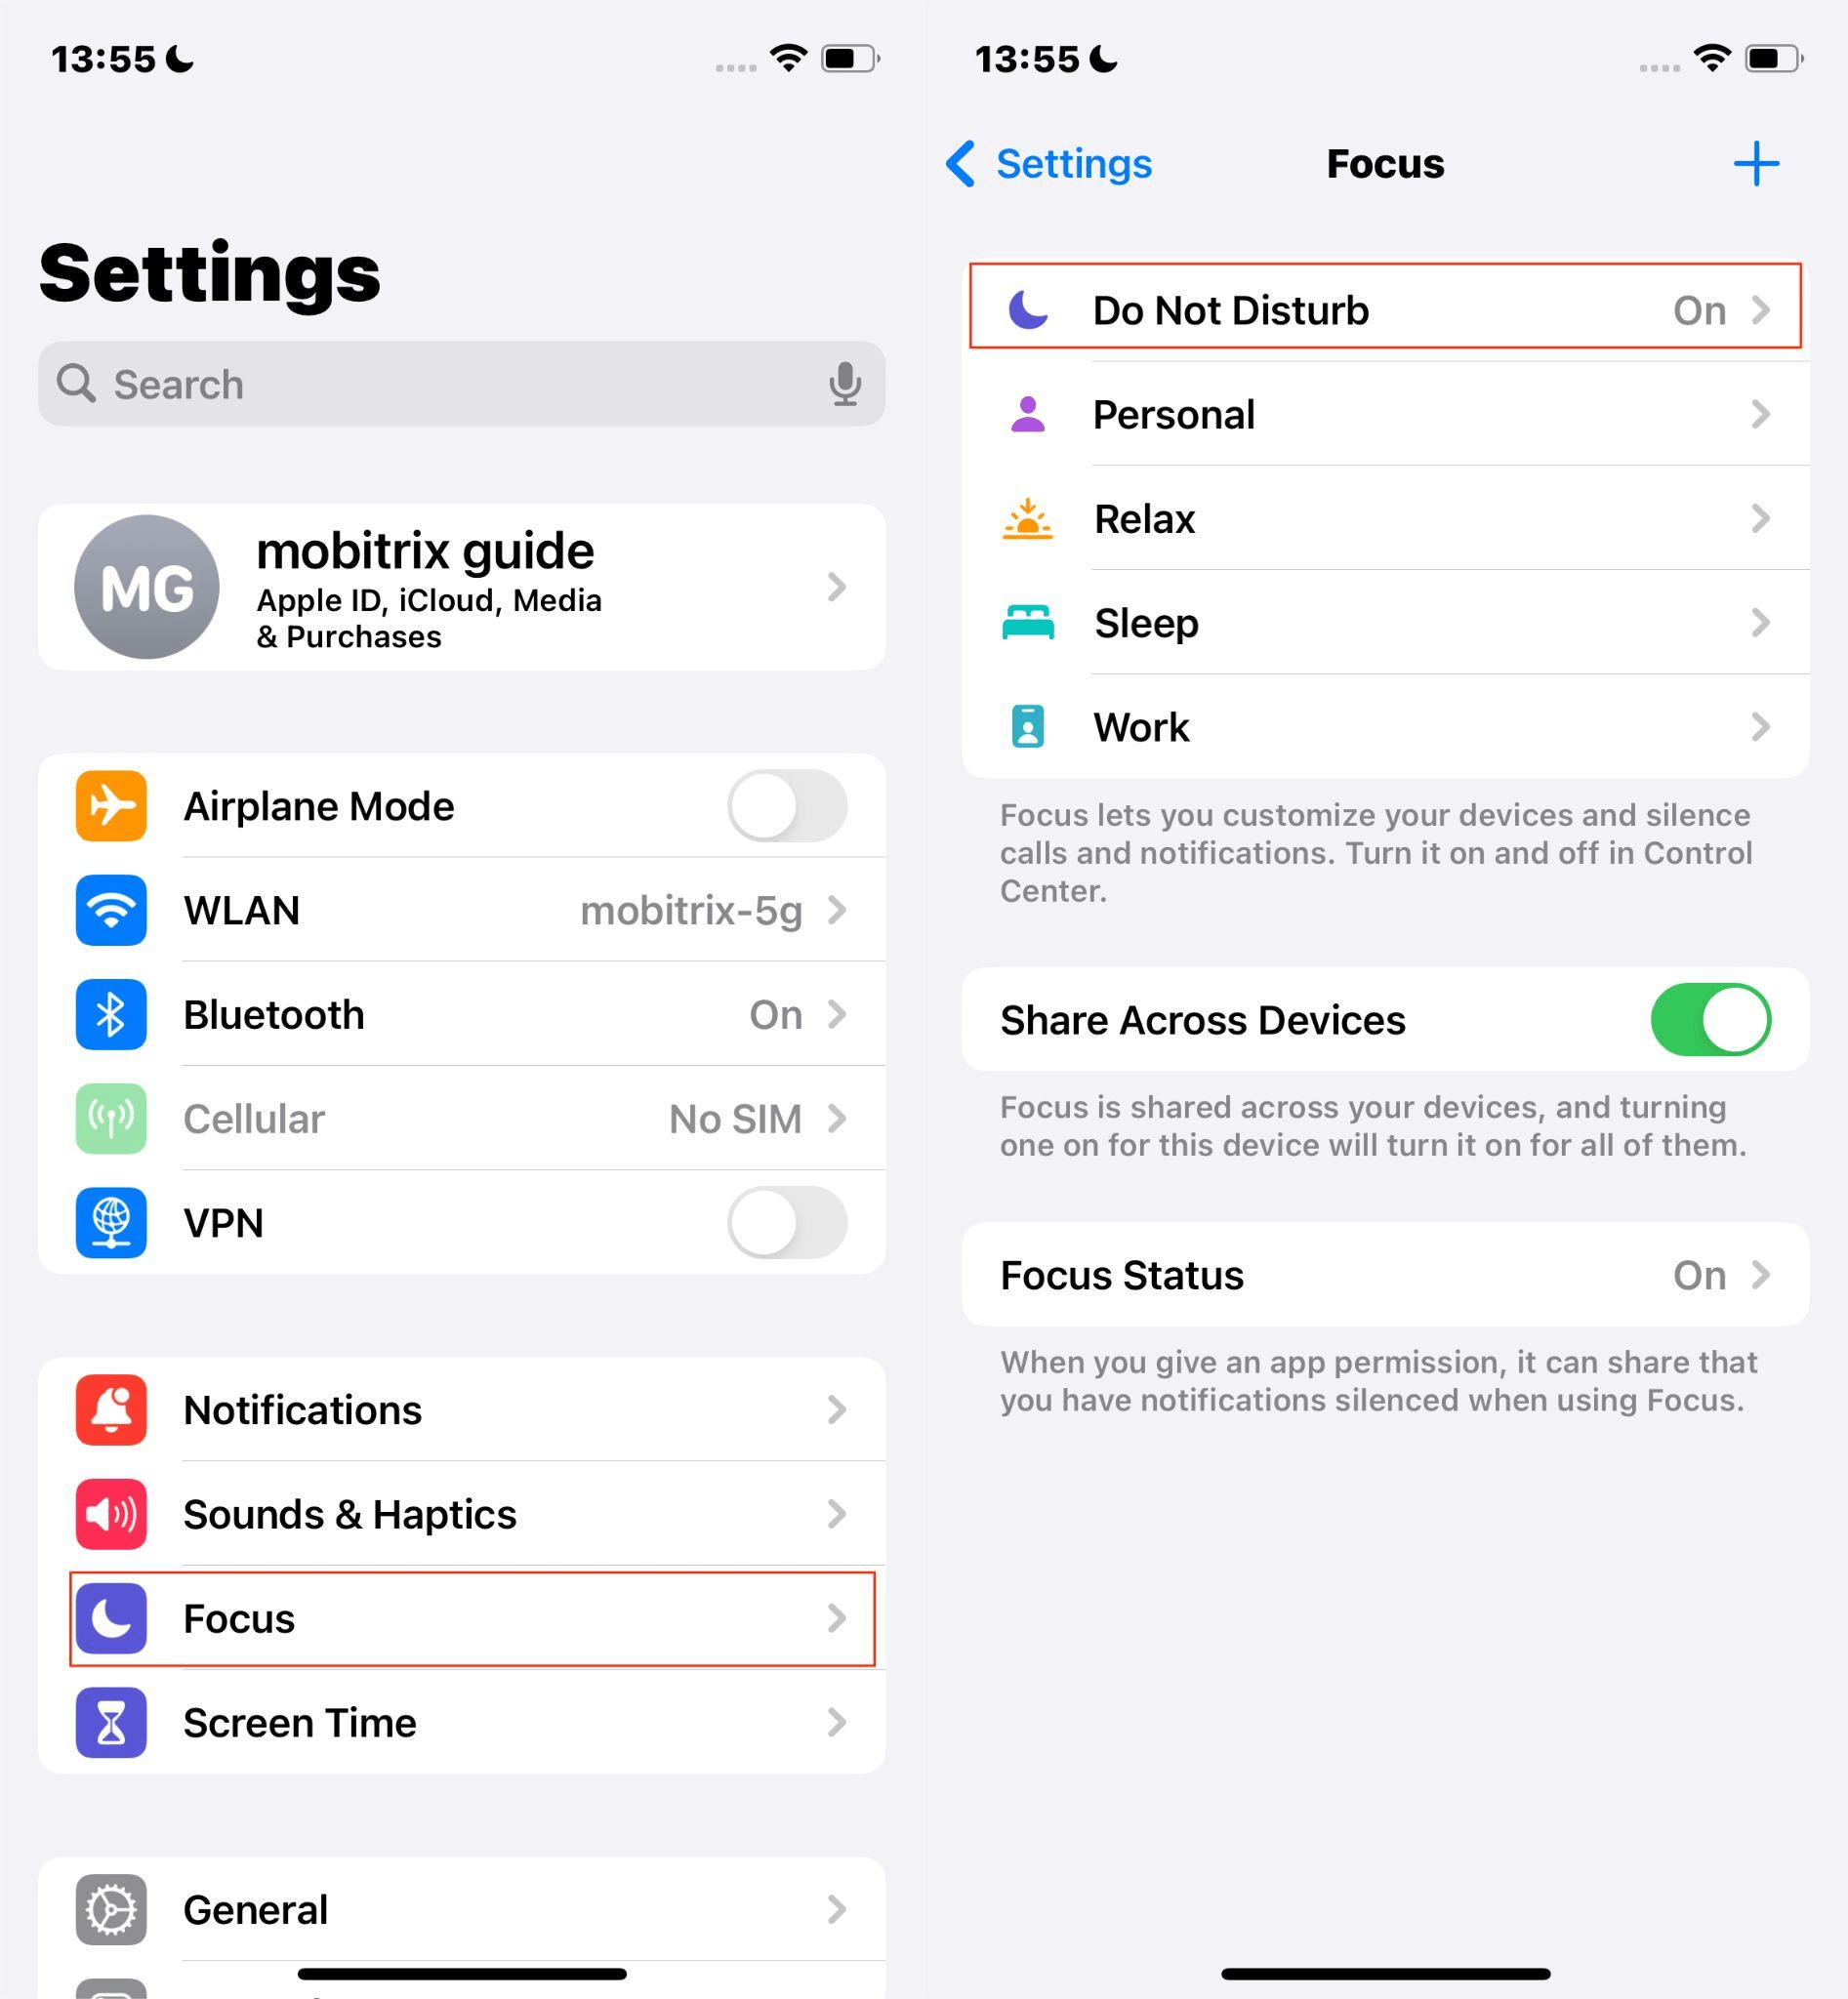
To ensure that your recording session goes smoothly and is not interrupted by incoming calls or notifications, you can turn on "Do Not Disturb" mode.
Step:
Open Settings >Focus.
Toggle on ‘Do Not Disturb.’
Tip 3: Enable Lens Correction
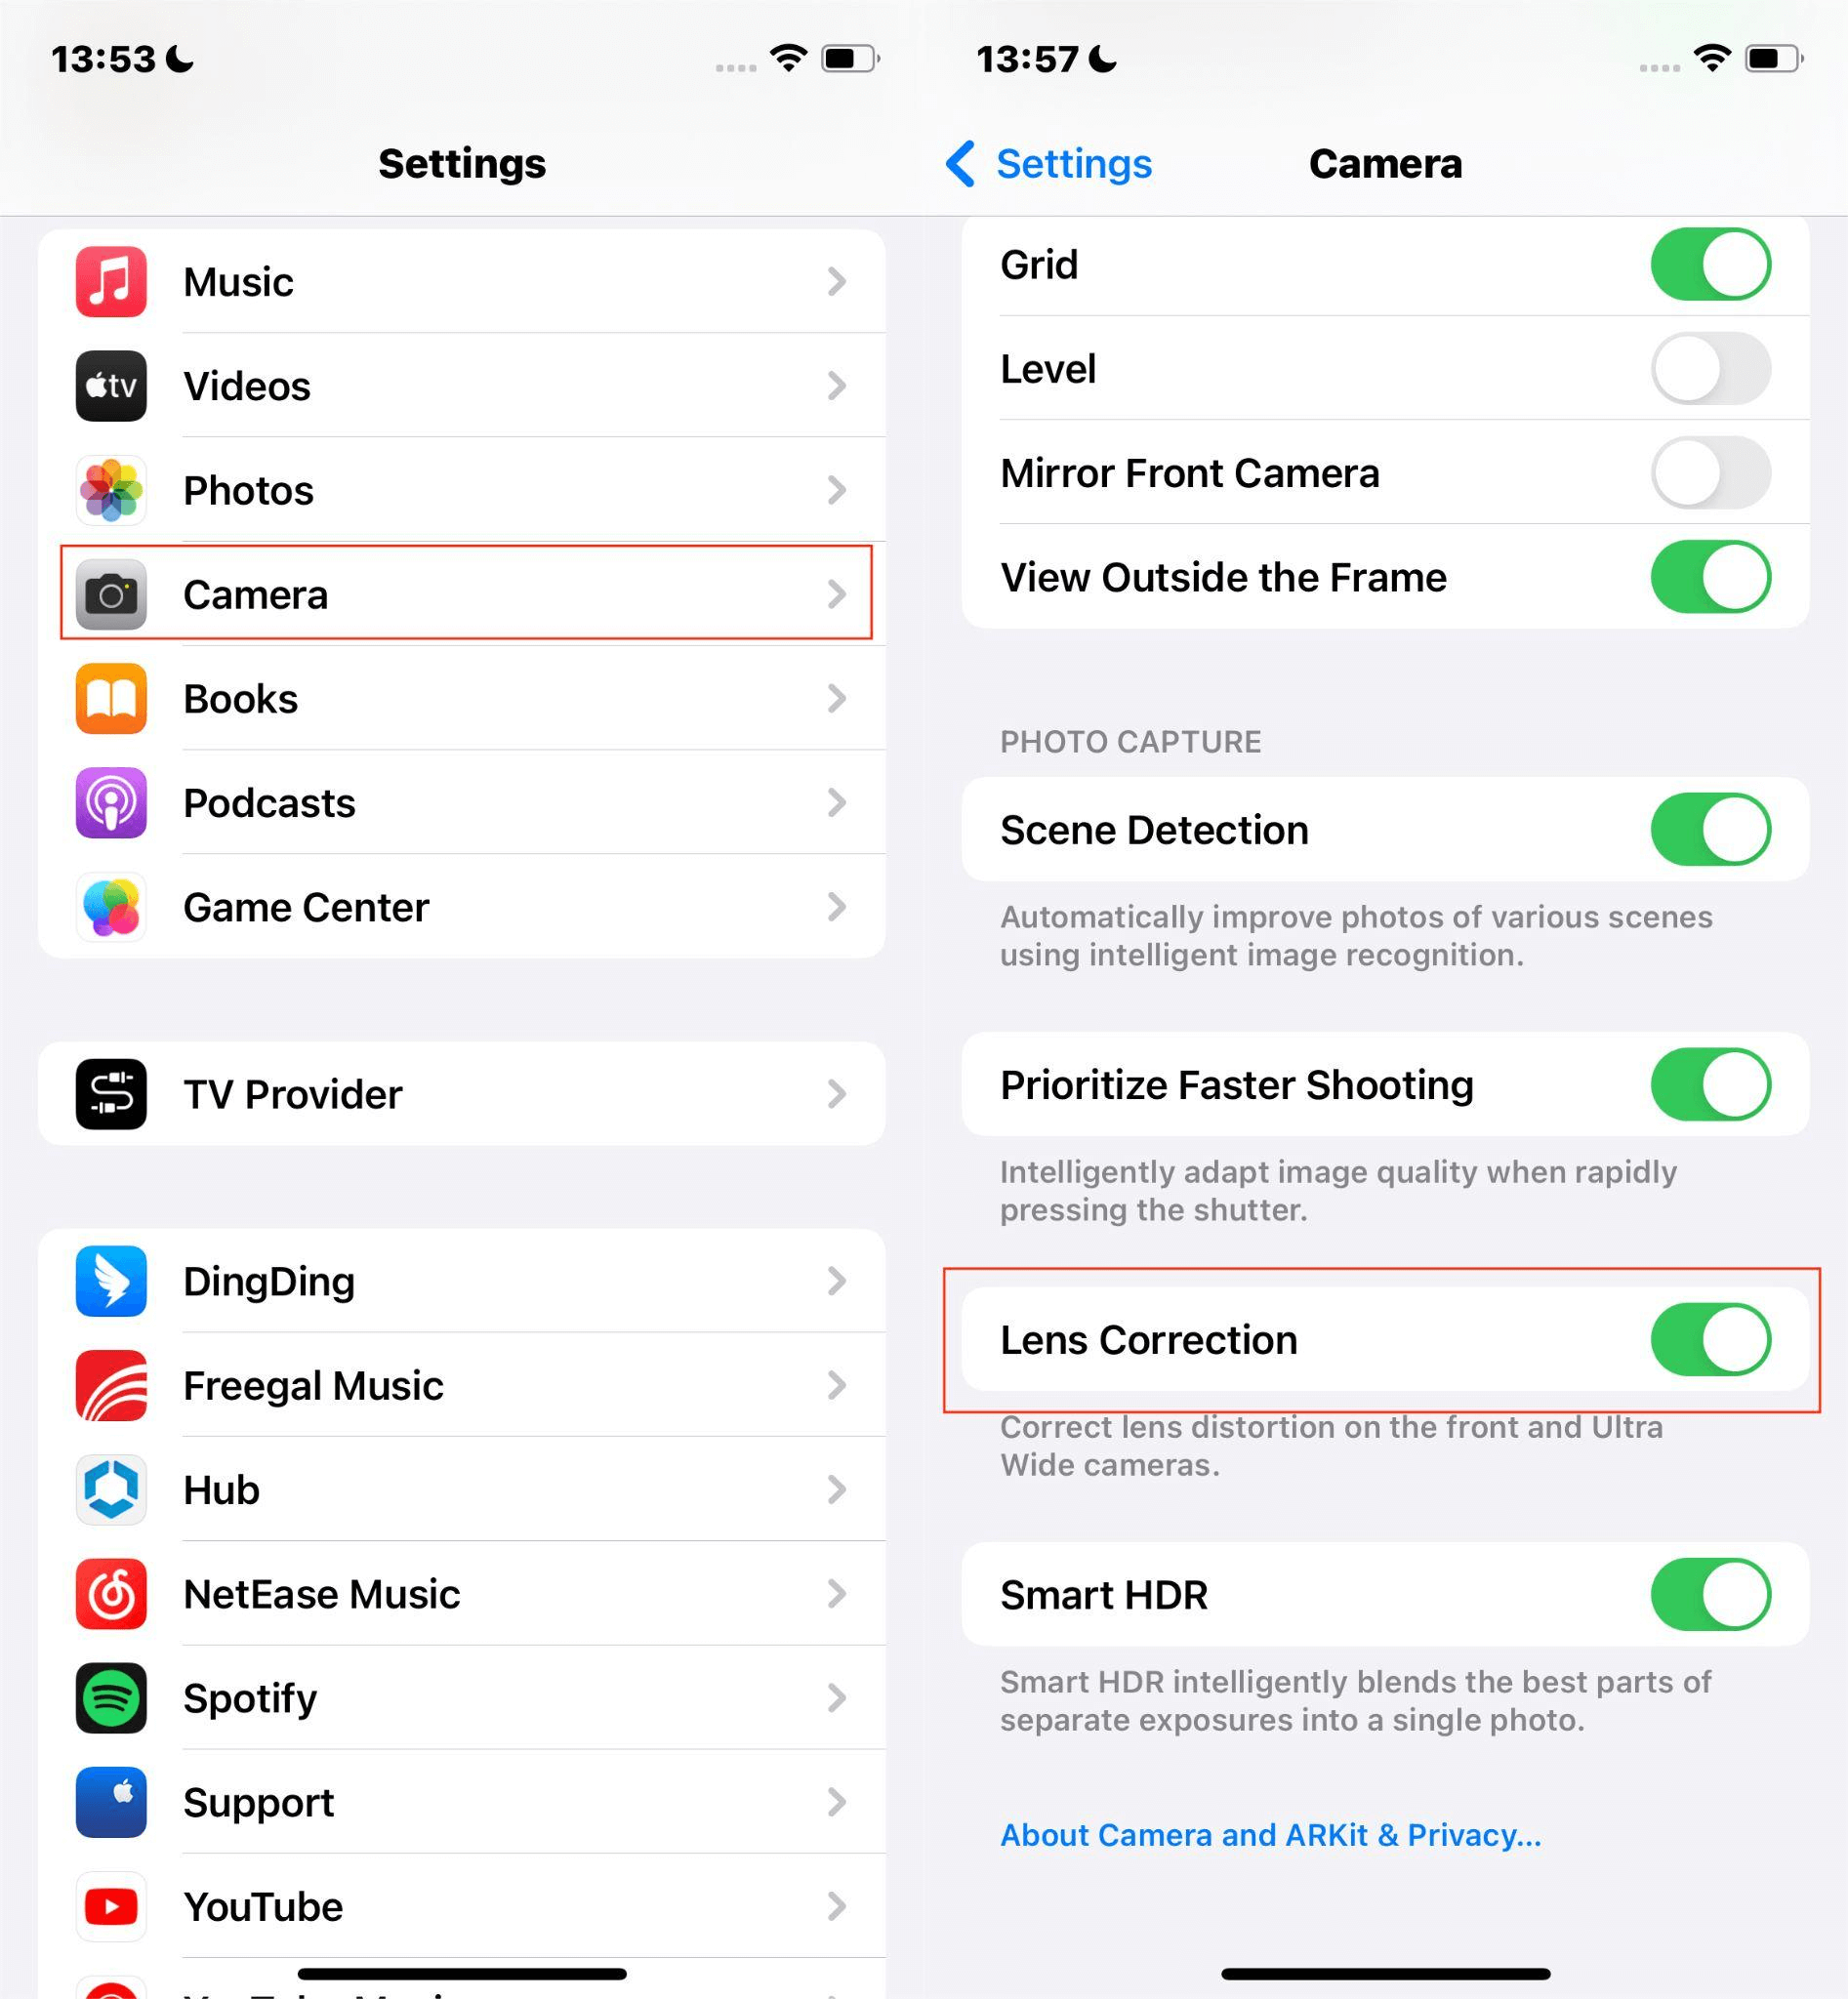
For videos using ultra-wide or front-facing cameras, enabling lens correction can detect and correct any distortion so your videos look more natural.
Steps to achieve it:
Go to Settings > Camera.
Scroll down and switch on ‘Lens Correction.’
Tip 4: Apple ProRAW
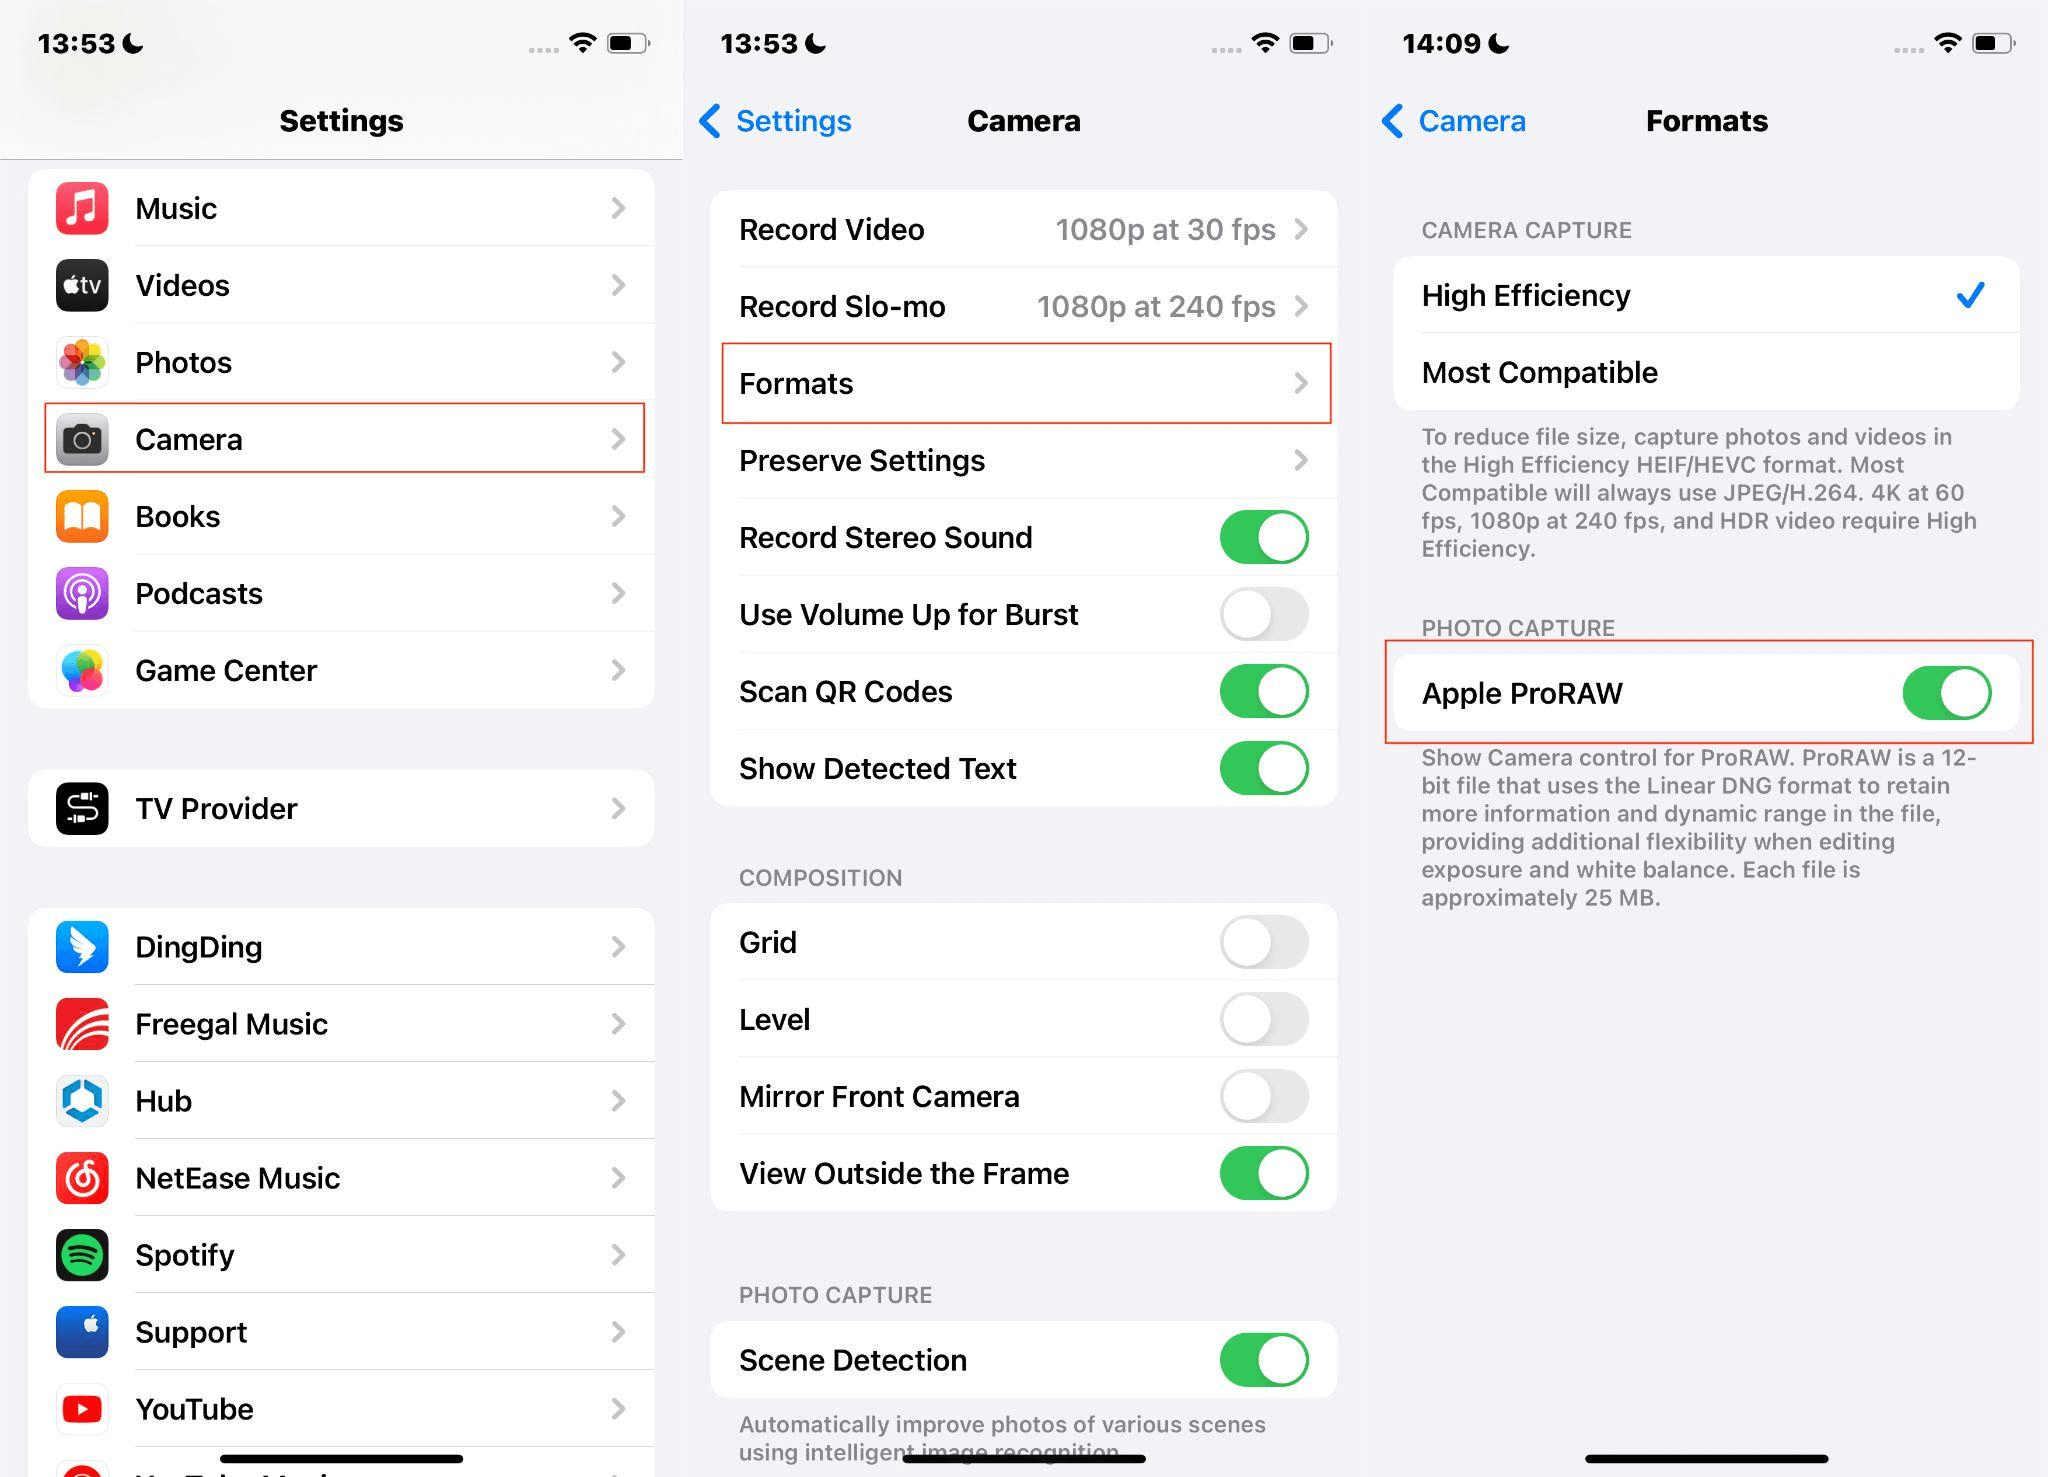
Apple ProRAW combines information from standard RAW formats with iPhone video processing, giving you greater flexibility when editing exposure, color, and white balance in video.
When you want to create professional-grade videos, you can turn it on for better video quality.
Step:
Navigate to Settings > Camera > Formats.
Enable ‘Apple ProRAW’.
Note: ProRAW files are larger; ensure you have sufficient storage space.
FAQs
Can I Edit Videos Directly on My iPhone?
Absolutely, the Photos app allows for basic edits or utilizes iMovie for a wider range of editing features.
Is There a Time Limit for Recording Videos on iPhone?
No, the duration of video recording is only constrained by the available storage space on your iPhone. When the video you record is long, you can try to get more storage space or shorten the video.
How Can I Improve Video Quality on My iPhone?
Optimize lighting conditions to ensure your video is well-lit.
Stabilize your device using a tripod or a steady grip to avoid shaky footage.
Select the highest resolution available in your camera settings to achieve enhanced video quality.

