[Solved] Discover How to Delete All Photos from Your iPhone

Bogged down by a deluge of photos on your iPhone? This could be decelerating your device's speed. . This is handy when timing matters more than applying the same speed setting to the entire file.
Although your iPhone comes equipped with a complimentary iCloud account, it provides a scanty 5GB of storage - probably insufficient for your extensive photo and video gallery. . The built-in setting is usually the safest place to start before you try extra tools.
Here's a quick guide on erasing all photos from your iPhone and purging your stocked iCloud gallery. If the menu looks different on your device, compare the software version before assuming the feature is gone.
Before You Delete
Make sure you back up any photos or videos you still cherish.
Remember, with iCloud Photos, deleting a photo or video on one device removes it from all other devices linked to the same Apple ID. If a step looks different on your device, the app version is usually the first thing to compare before assuming the feature is missing. Testing the change on a short clip first is a quick way to avoid re-editing a longer video from the start.
To see how much storage you have left on your device, go to Settings > General > Device Storage. You can choose to clear other types of files on iCloud to provide more space for picture storage.
Methods 1: Delete All Photos from the Photos App on iPhone
Follow these easy steps to erase all photos from the Photos app on your iPhone: so the next part of the process is easier to complete without backtracking. That matters when you only want one part of the video to play back slower while the rest keeps its normal speed. If the result still looks off, compare a built-in method with one app-based method so you can see which handles your clip more cleanly.
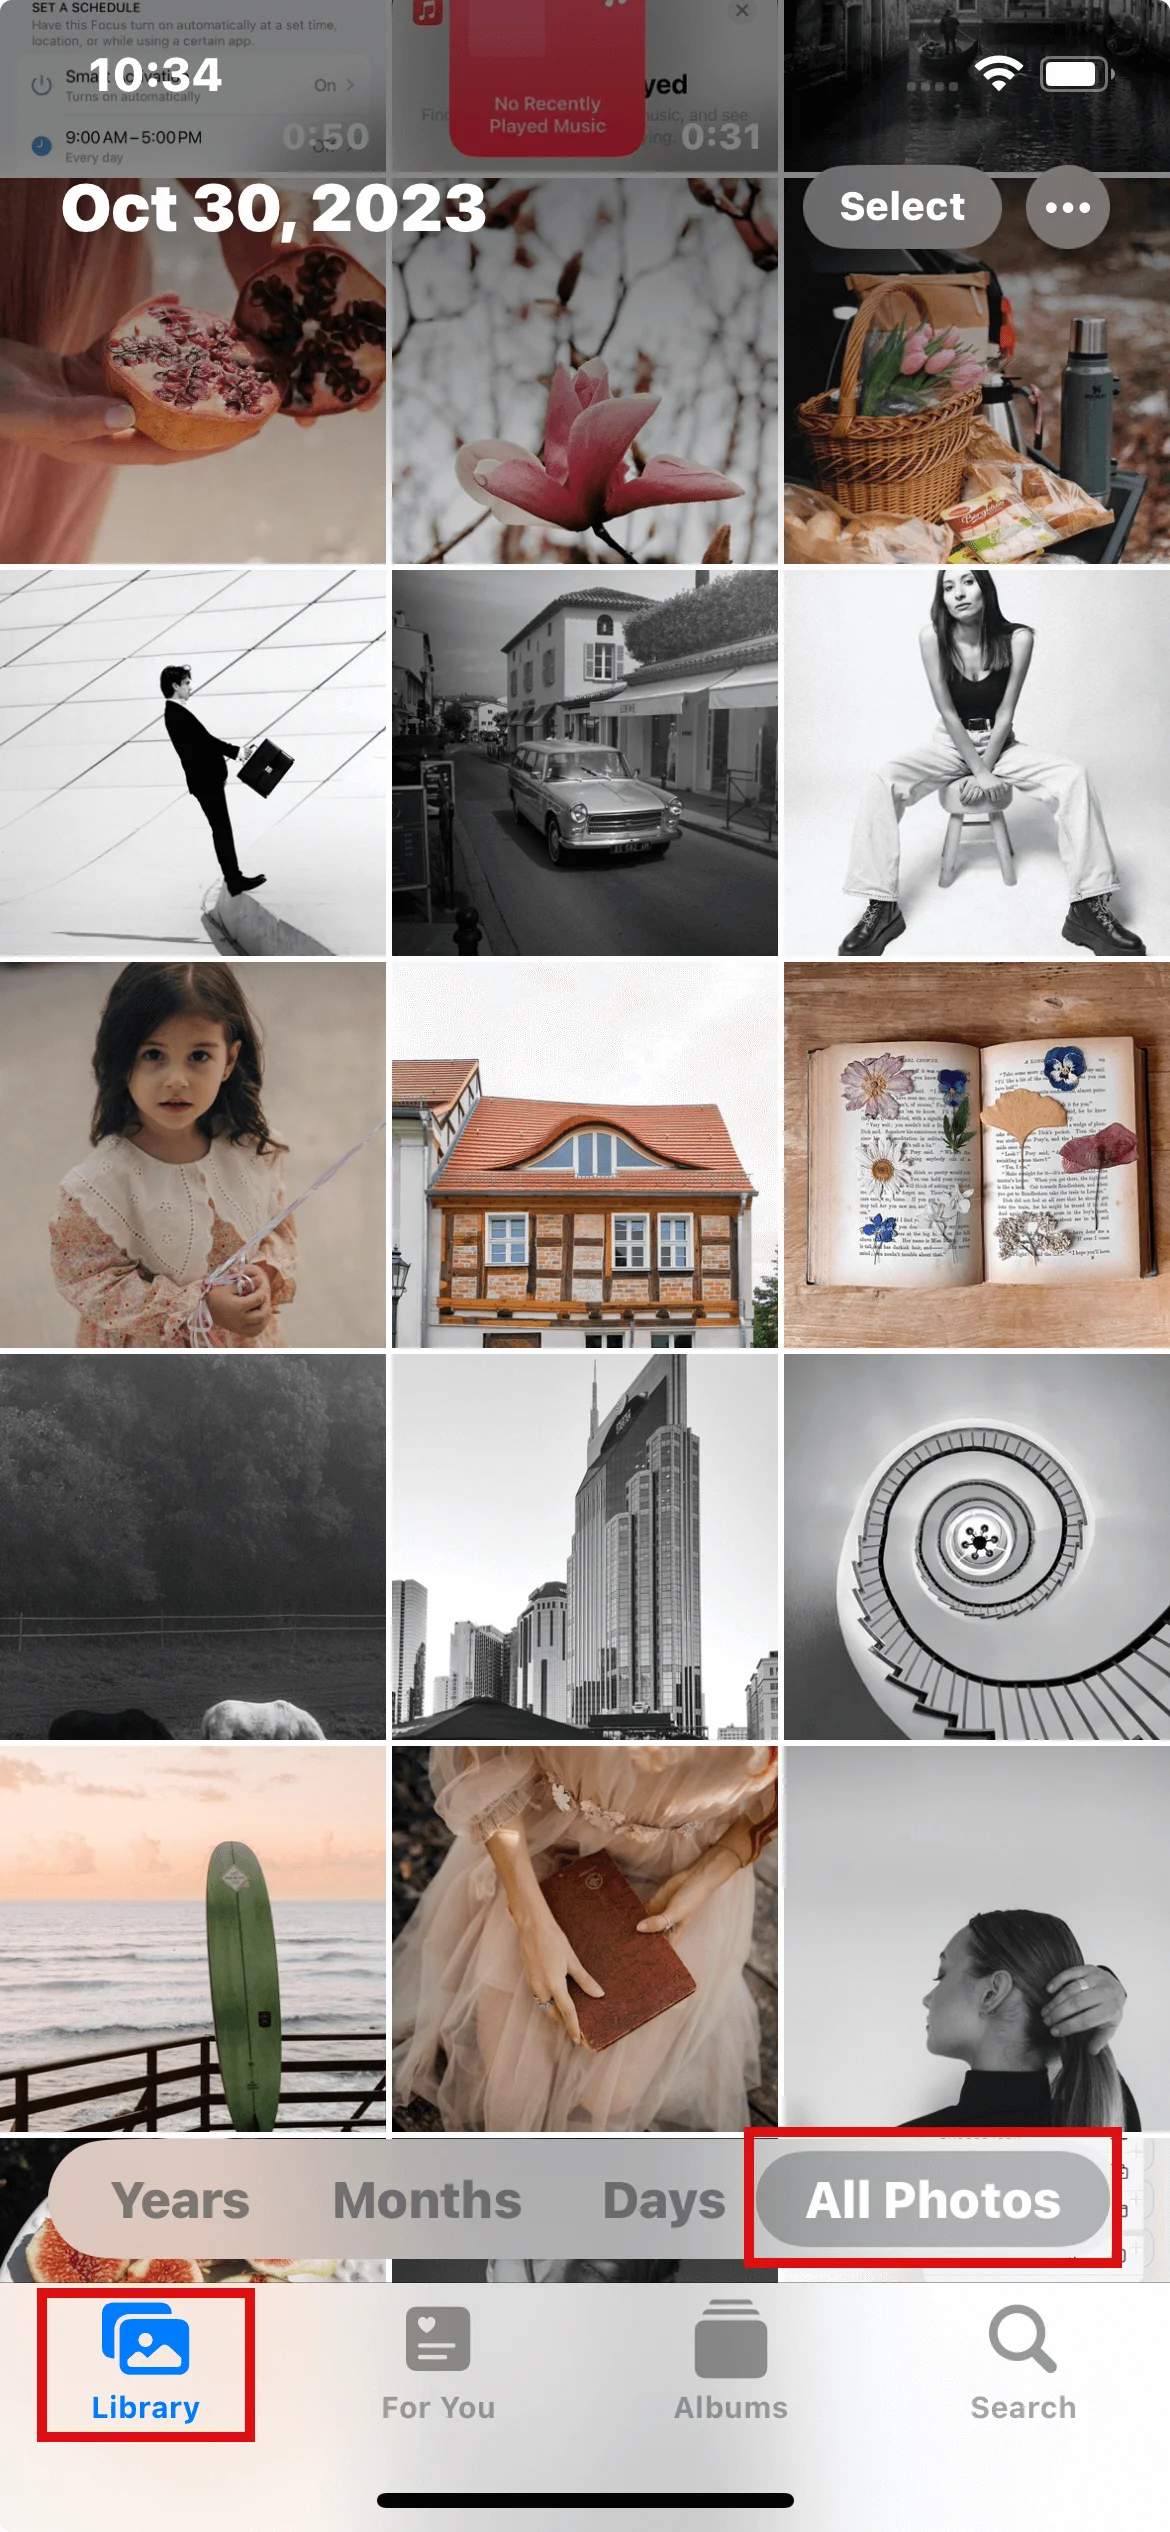
Launch the Photos app on your iPhone and click on 'Library' - you'll find it in the lower-left corner of the screen.
Tap 'All Photos' situated in the lower-right corner of your screen.
Hit 'Select' in the upper-right corner of your screen.
Gently tap and hold the last photo, then drag your finger straight up to the top of the screen. Avoid pressing too hard to prevent a photo preview.
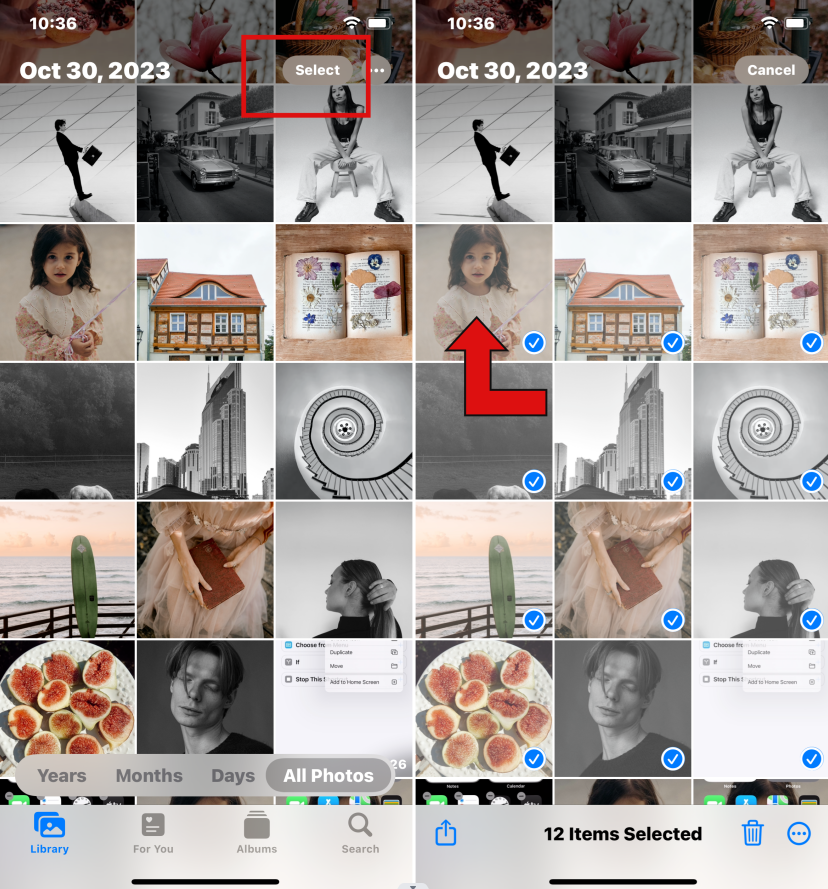
Note:Do not press too hard, or you will see a preview of the photo instead. It is easiest to drag your finger horizontally across the first photo and then drag it up to the top of your screen. A quick check of the device model, software version, and account state usually explains why the same menu looks different on another device. If the first method does not work, compare software version, device compatibility, and account status before repeating the same step.
Hit the 'Trash' icon located in the bottom-right corner of your screen.
Click 'Delete Photos'. The number of photos to delete will be indicated.
You'll get the message 'No Photos or Videos' once all photos are deleted. These photos will temporarily move to the 'Recently Deleted' album on your iPhone. Ignore it for 30 days and iOS will auto-delete them. Want to reclaim the space instantly? Clear out this album.
Method 2: Utilizing iCloud Photo Library
If iCloud Photos is enabled, it can expedite the multi-photo deletion process. Despite syncing with your iPhone, arranging this over your Mac at iCloud.com might be more comfortable:

Open iCloud.com and log into your account.
Select the photos to scrap.
Tip:Hold the 'Shift' key to select multiple photos.
After choosing all relevant photos, hit the 'Trash' icon.
Click again to confirm the deletion process.
Upon the next sync with your iCloud Photos, these selected images will be eradicated from your iPhone, giving you more iCloud storage space.
Method 3: Enlist Siri's Assistance
For those with Siri-enabled iPhones, leverage voice commands to eradicate multiple photos in a jiffy. Just activate Siri and instruct, "Delete [number] photos." Siri will ask for a deletion confirmation, and post-approval, photos will be scrapped from your phone. Convenient, isn't it? If the screen looks different on your device, compare software version, model, and account state first.
Method 4: Clear iPhone photos via PC
For Mac Users:
First, deactivate iCloud Photos sync. Connect your iPhone to your Mac.
Launch the Photos app if it doesn't pop up automatically. An overlay displaying your iPhone photos will appear.
Hold 'Command + A' to select all photos then hit 'delete'. Similar to the iPhone Photos app, these photos move to a 'Recently Deleted' folder.
Navigate to that folder, select all, and permanently delete all photos. Alternatively, you could use another macOS in-built app, Image Capture, to remove all iPhone photos. The steps are essentially identical.
Plug your iPhone into your Mac, launch Image Capture, select all photos, and tap the 'delete' icon. The photos will be permanently deleted.
For Windows Users:
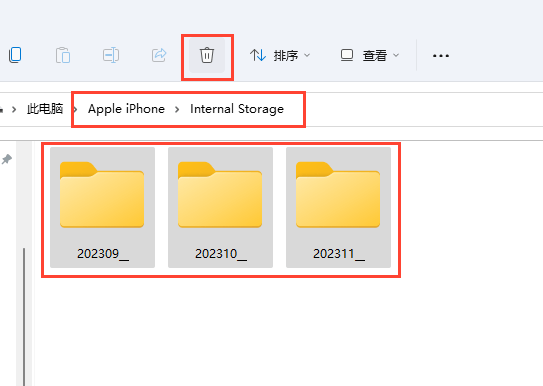
Plug your iPhone into your PC. Your iPhone will appear under 'devices' in Windows Explorer.
Open 'Internal Storage' within the iPhone folder, followed by the 'DCIM' folder. Here, you'll find all your iPhone photos.
Choose the photos to delete or press 'Ctrl + A' to select all, then right-click and opt 'delete' or press 'Shift + Del'. This action permanently deletes all selected photos instantly. Be extra cautious to prevent any regretful accidental deletions!
Method 5: Third-Party Apps
No doubt, numerous third-party apps promising easy photo management for iPhone abound. Their offerings range from simple web services, and browser extensions, to full-featured apps designed for several platforms. It is a useful fallback when the default iPhone editor does not give you enough control over the final clip.
But tread carefully. The problem extends beyond just violation of Apple's rules which can result in serious repercussions. The foremost worry here is the substantial security hazards tied to these third-party tools. They may expose your device to harmful malware or trigger unexpected data leaks. Intrusive ads, privacy invasions via tracking cookies, and potential misuse of personal details are additional risks lurking. A quick settings check usually saves more time than repeating the same action without changing the surrounding conditions.
So we advise against resorting to such apps. Instead, opt for a safer path - rely on Apple's native Photos app or iCloud for dependable photo management on your iPhone. That gives you another route if the built-in iPhone tools feel too limited for the result you want.
How to Delete Duplicate Photos and Videos?
Unclog your photo library by following these easy steps:
Launch the Photos app and tap 'Albums'.
Locate and tap the 'Duplicates' album under 'Utilities'.
Select 'Merge' to unify the duplicates.
Confirm by tapping 'Merge [Number] Items'.
When you merge duplicate photos, your phone compiles the best image quality and relevant information to retain one photo in your library, moving the other duplicates to your 'Recently Deleted' album. This 'Duplicates' album feature is available on iOS 16, iPadOS 16.1, and later. Note the detection of duplicates is automated and might take a bit of time.
How to Recover Deleted Photos from iPhone?
Methods 1: Retrieving Deleted Pictures on iPhone Using Photos App
Photos snapped using the Camera app automatically save in the Photos app. If a photo is erased, it shifts to the 'Recently Deleted' folder for a while, allowing you to restore it. This helps when you want to export the clip, send it quickly, and avoid another round of cleanup edits. If the process stalls, storage space, Wi-Fi stability, and available battery are usually the first three checks worth repeating.
Here's how you can bring back your memories:
Launch the Photos app. A slew of albums will be showcased, including 'All Photos', 'People', and 'Places' down to 'Recently Deleted'.

Open the 'Recently Deleted' folder. This displays the photos on the chopping block for final removal and the time left until they're permanently deleted. This process can last up to 30 days from the time they were deleted. (iOS 16 or later only)
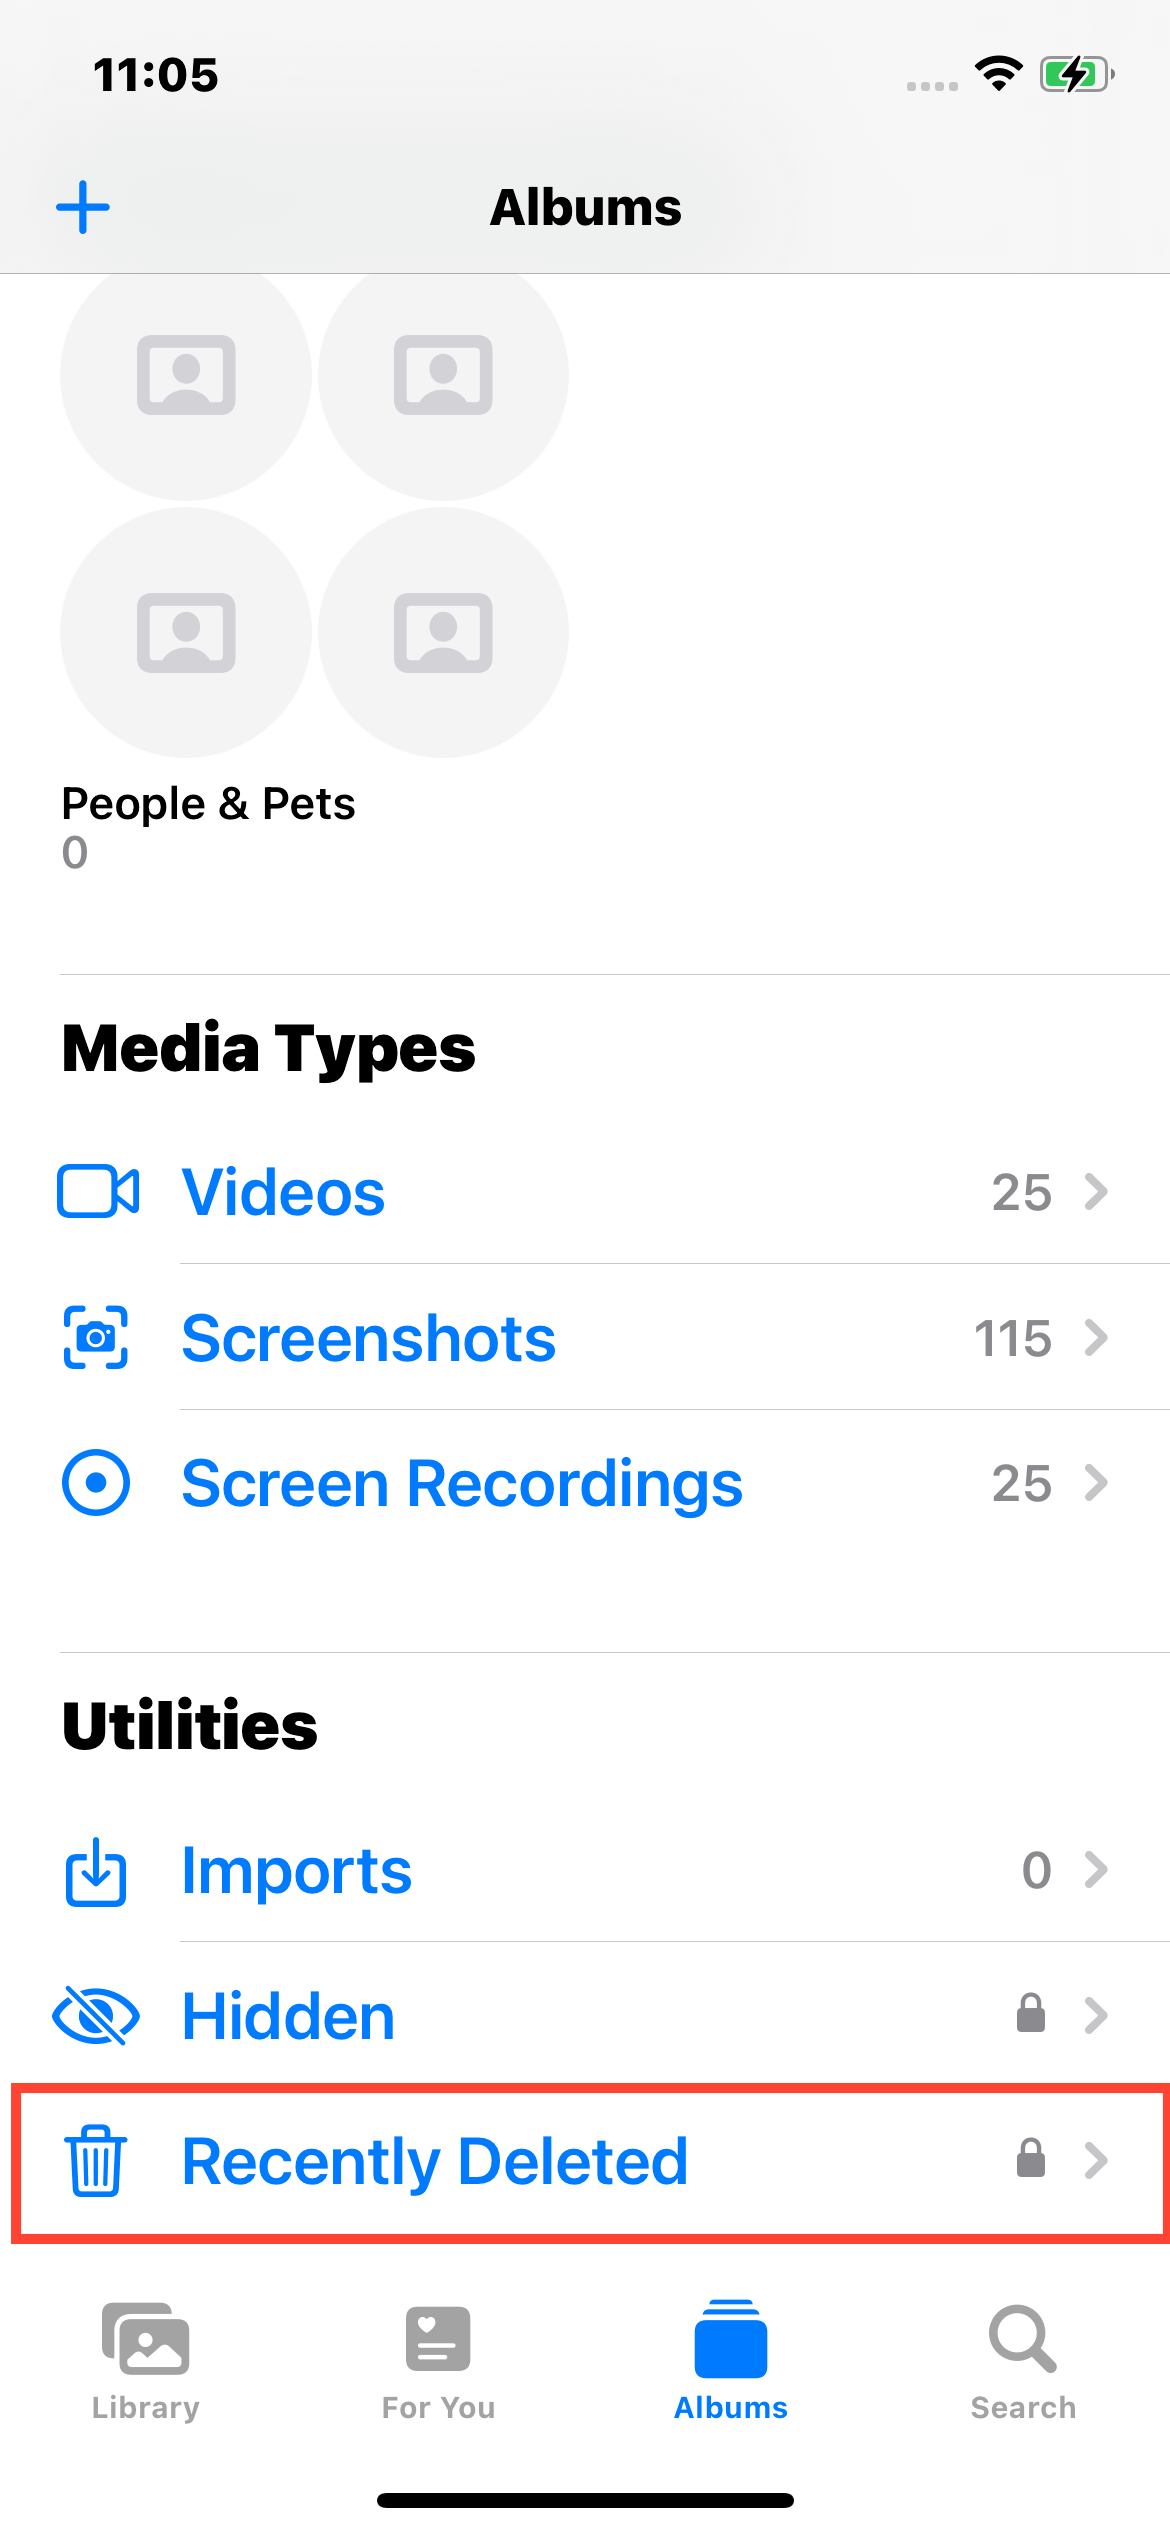
Authenticate the 'Recently Deleted' album using Face ID or Touch ID if prompted.
Tap 'Select' in the top-right corner.
Select the photo you wish to restore, then hit 'Recover'.
Tap 'Recover Photo' to return the photo to your Albums.
Methods 2: Retrieve Deleted Photos via iCloud
If the photo is not present in the 'Recently Deleted' area of Photos, it might still be recoverable via iCloud. Here's how to restore erased photos on your iPhone without having to back it up on a computer first:
Follow these steps:
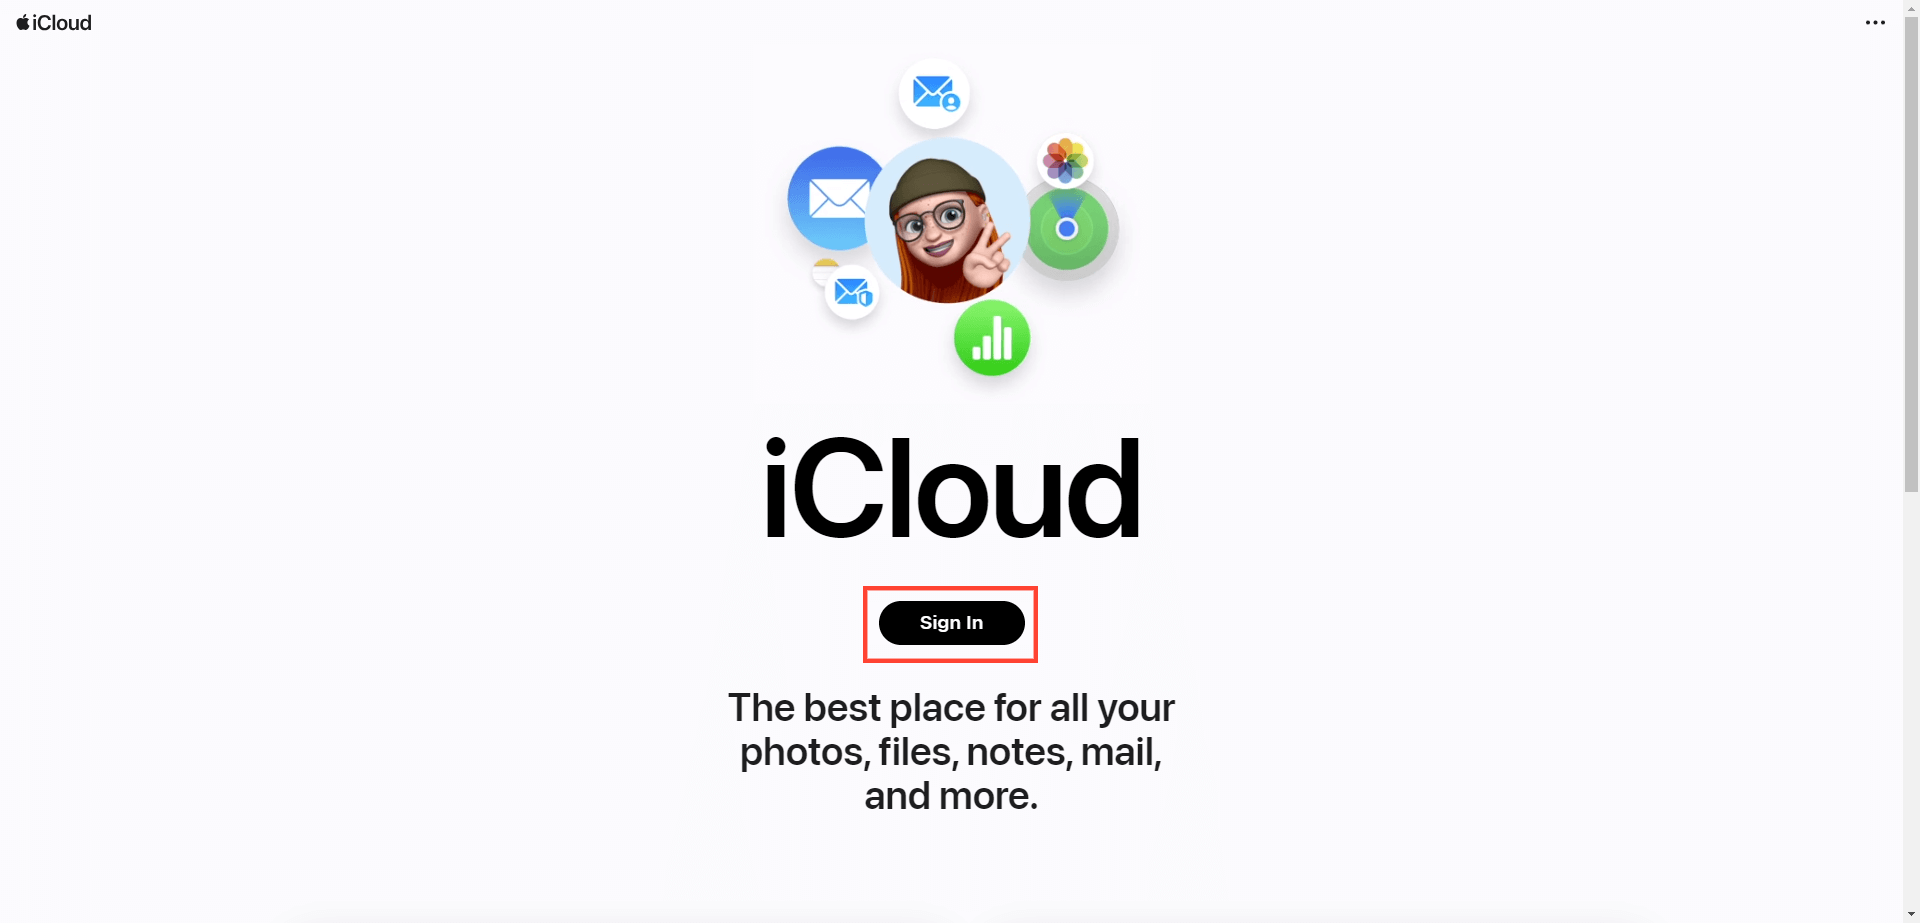
Hop on to https://www.icloud.com - this is your gateway to Apple's cloud services, offered at no cost.
Log in using your unique credentials.
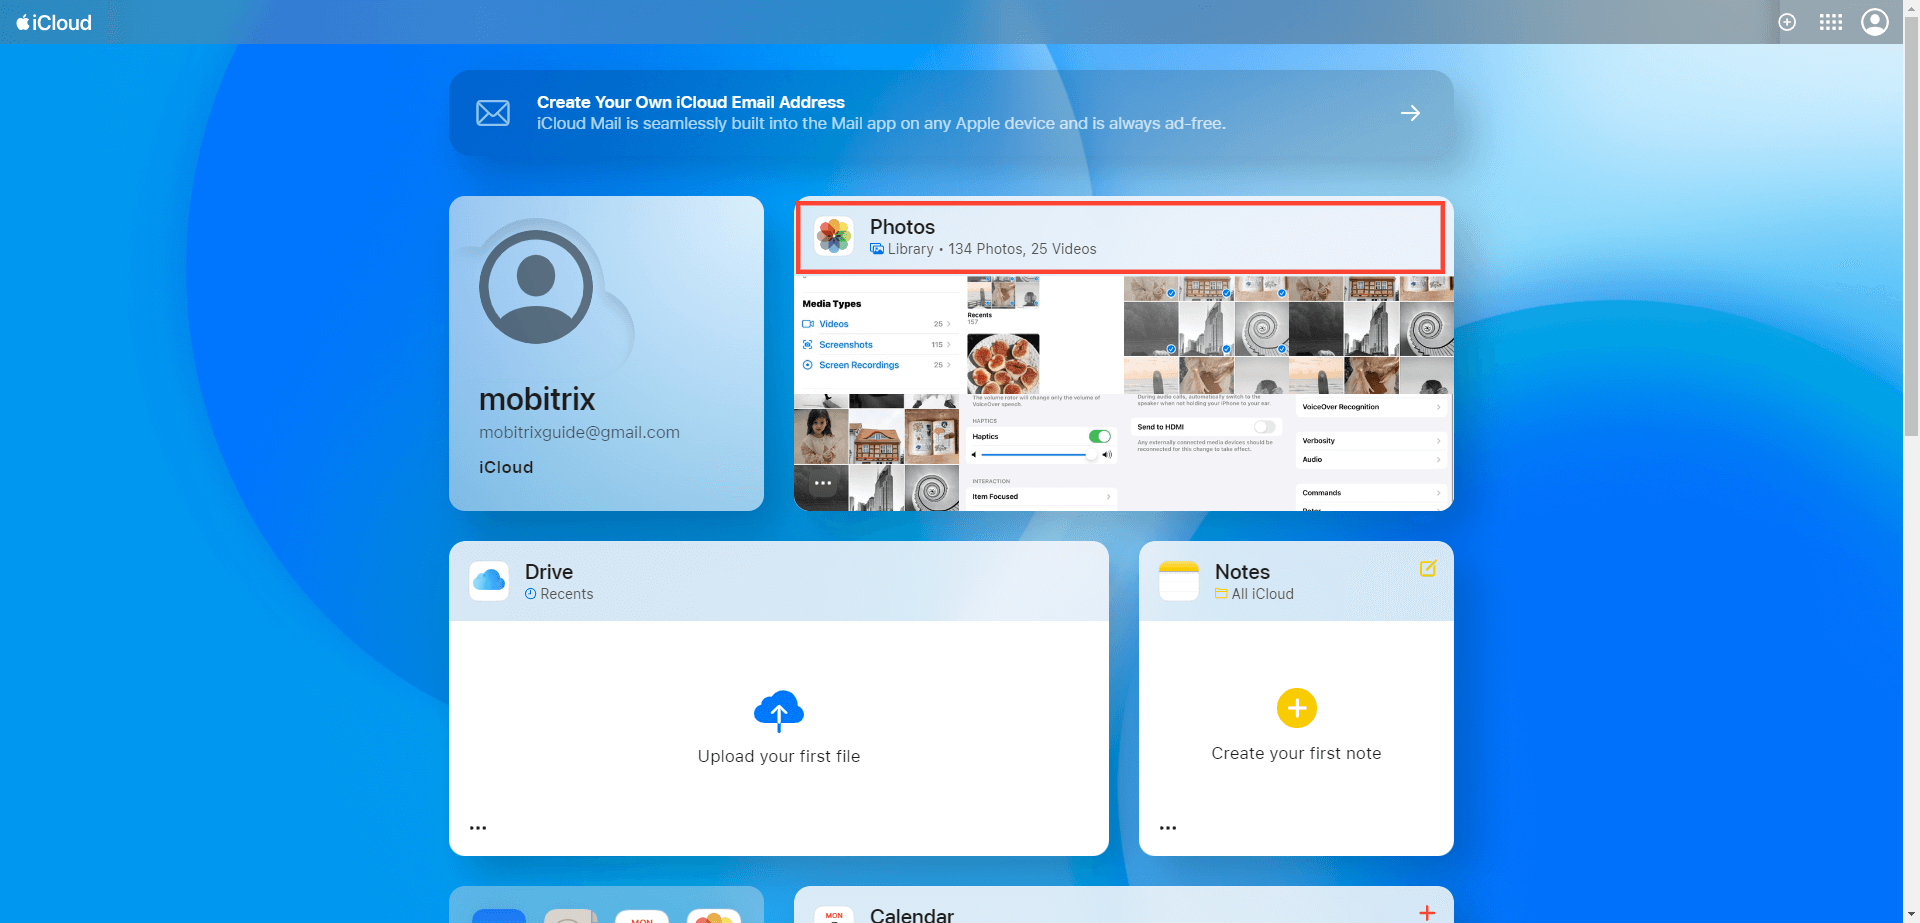
Once logged in, select 'Photos' from the array of options on the webpage.
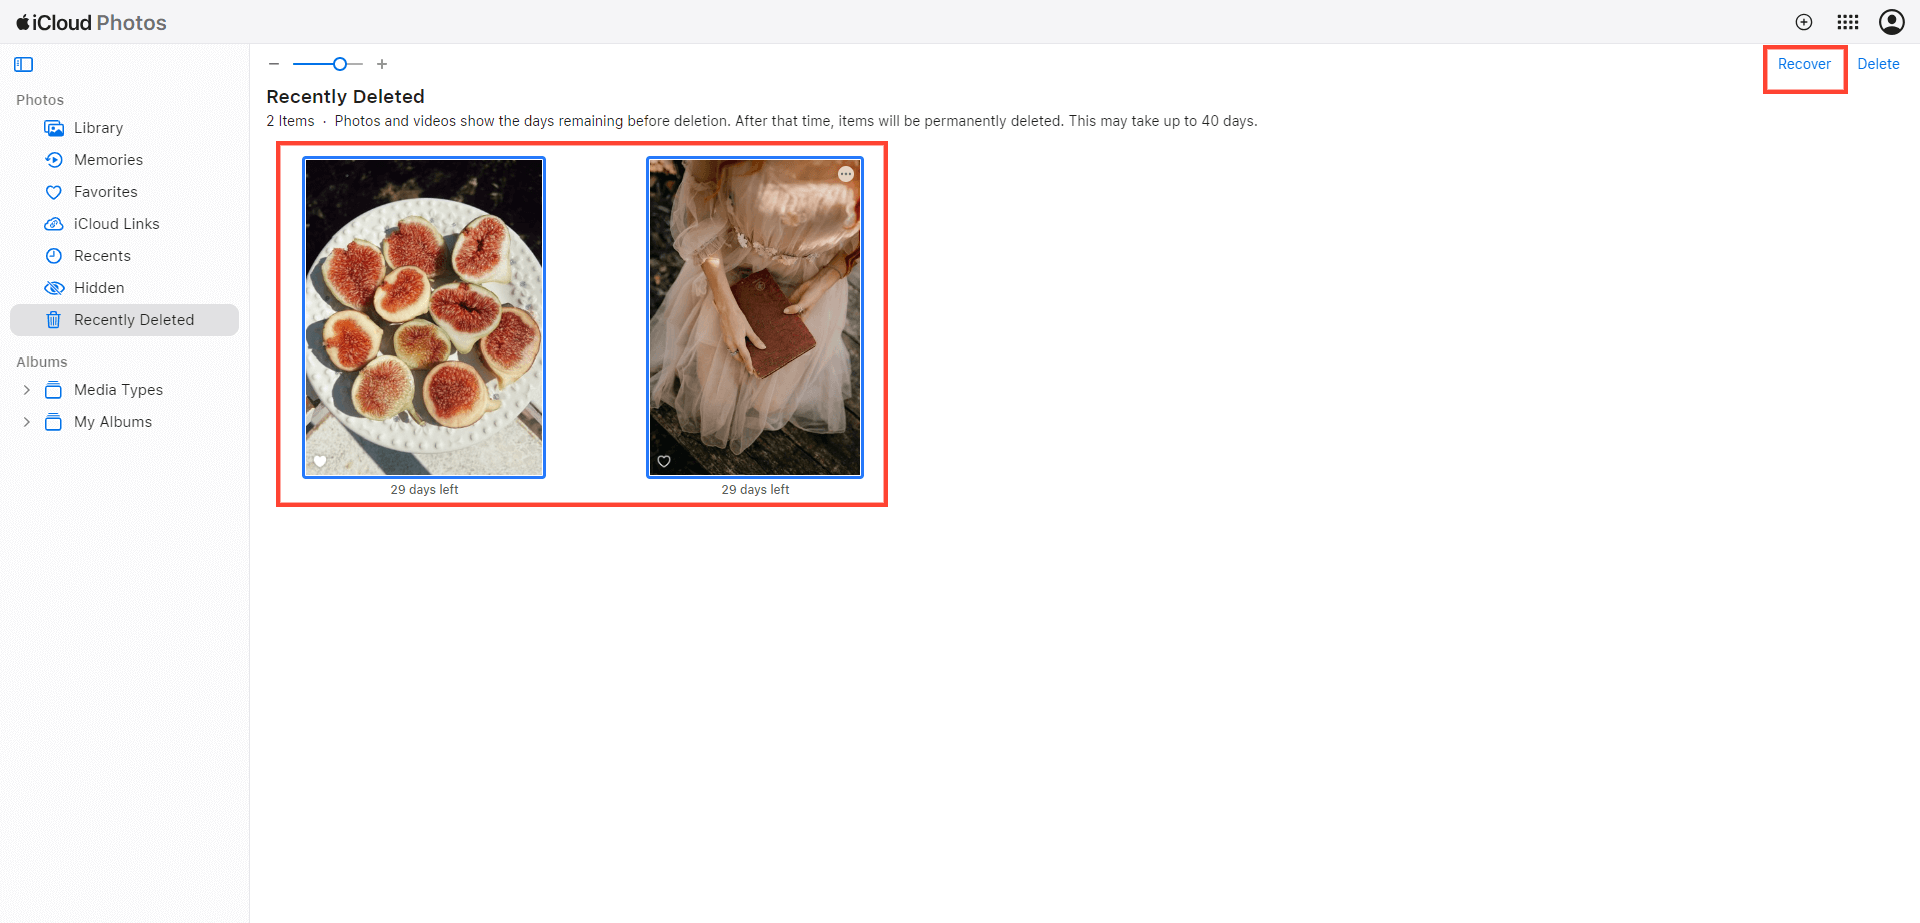
Open the 'Recently Deleted' album. A list of photos queued for deletion within the next 40 days (or less) will appear.
Choose the photo you wish to restore and tap 'Recover'.
It's back in your photo albums and will also be restored to your iPhone the next time it syncs with iCloud's services.
Methods 3: Retrieve Deleted Photos from an iPhone Backup
Backups can be your saving grace when it comes to retrieving deleted photos from your iPhone. When restoring photos from backups, keep in mind the age of the backup. Always opt for the most recent backup, but don’t entirely discard older ones. It’s wise to have multiple backups as a safety net should anything go askew with the primary backup.
Post-macOS Catalina, Finder is responsible for iPhone backups and recovery. If it's your first time restoring from an iPhone backup with Finder, relax - Apple designed this process to be straightforward.
Here’s how to recover lost photos from an iPhone backup:
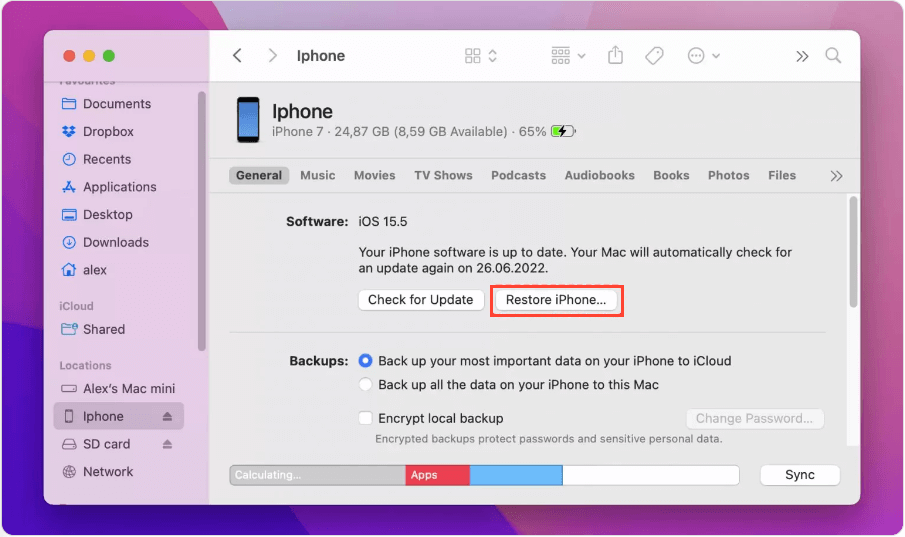
Extensively look through Finder.
Connect your iPhone to your computer.
From the list of locations on the left, choose your iPhone.
In the General tab, select the 'Restore iPhone' button.
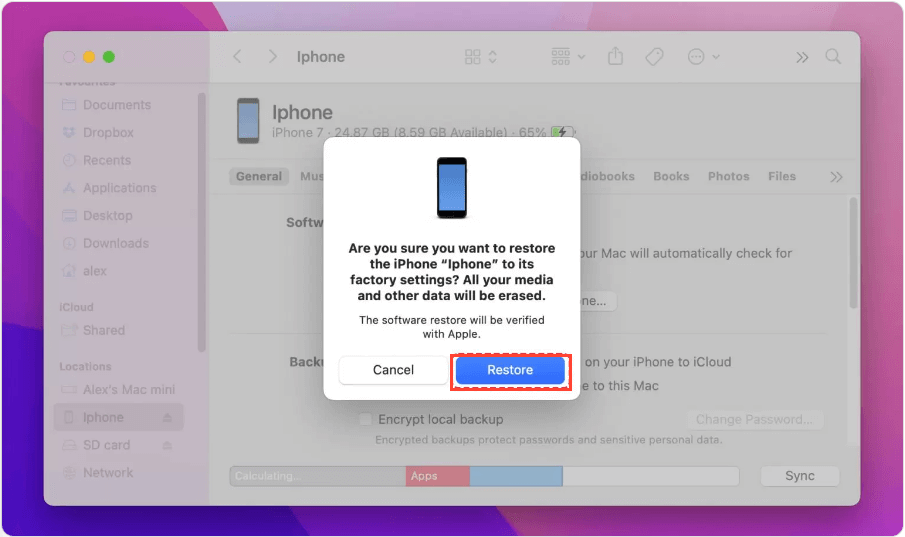
Let Finder perform a backup of your iPhone before initiating the restoration.
Hit the 'Restore' button to reaffirm your readiness to recover your iPhone from a backup.
FAQs
Q: Can I Delete Photos from My iPhone but Keep Them on Google Photos?
A: Yes, you can. Make sure your photos are backed up on Google Photos before deleting them from your iPhone.
Q: Can I Delete Photos from One Device but Keep Them on Another, Using the Same Apple ID?
A: Absolutely. By enabling 'Optimize iPhone Storage', you can maintain the full-resolution version in iCloud while storing a low-resolution version on your device.
Q: Can I Delete Photos from One Device but Keep Them on Another, Using the Same Apple ID?
A: You can enable the iCloud Photo Library with 'Optimize iPhone Storage' selected, or use a third-party cloud service to back up your photos.
Q: Why Does My iPhone's Storage Become Full Even After All Photos Are Deleted?
A: Storage can be occupied by apps, messages, emails, or cached files. You can check your storage usage in settings to determine what's consuming the most space.
