How to Fix iPhone Camera Not Working - The Essential Guide

Cameras help us take pictures and capture every moment, and when your iPhone camera is not working, this gets hindered. Why let an iPhone glitch hinder you from capturing your every moment? This guide will introduce how you can fix the iPhone camera not working in the simplest and easiest ways. Troubleshooting usually works best when you move from the simplest checks to the more disruptive fixes. If nothing changes after one step, move on to the next check instead of repeating the same action several times.
Part 1: Fix iPhone Camera When There Is a Software Issue
1. Deal with the Camera App
When the camera app fails to load correctly, the camera may open up but with a black screen. If this is the case, force the camera app to close by opening your home button, then swipe up the camera's interface to close it. After some time, re-open the camera app. That gives you another route if the built-in iPhone tools feel too limited for the result you want. That saves time because you can rule out the simplest causes before jumping into resets, restores, or hardware suspicion.
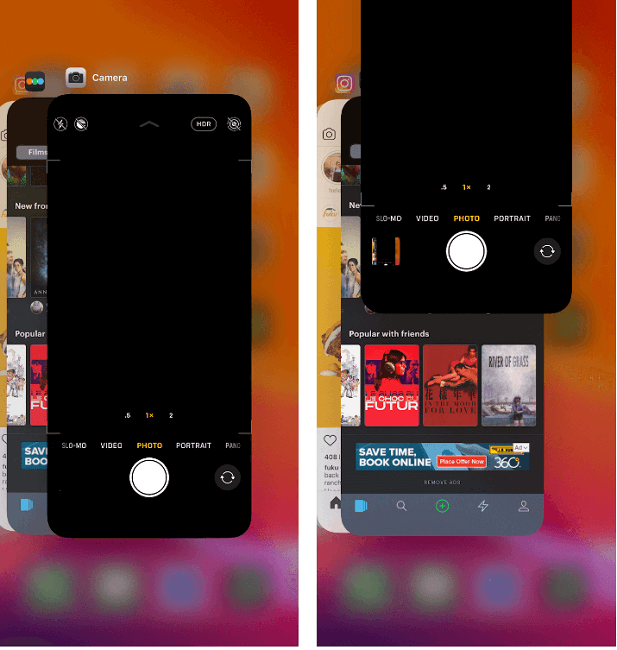
If you are using a third-party camera, avoid using it and instead use the default iPhone camera. Also, if you are trying to access the camera from other apps like Instagram, you need to permit it to use the camera features. If one step does not change the behavior, move on instead of repeating it several times.
i. Open Settings, then click the app so the next part of the process is easier to complete without backtracking. This is useful when the speed change should affect only one section instead of forcing the whole clip to slow down.
ii. Toggle on the access to camera option.
If you have some configuration apps installed, it could be restricting your camera.
i. Open Settings
ii. Click General > Profiles & Device management.
iii. Click the profile name.
iv. Under Restrictions, enable the camera by entering your passcode.
Your camera should now start working.
2. Switch the Camera
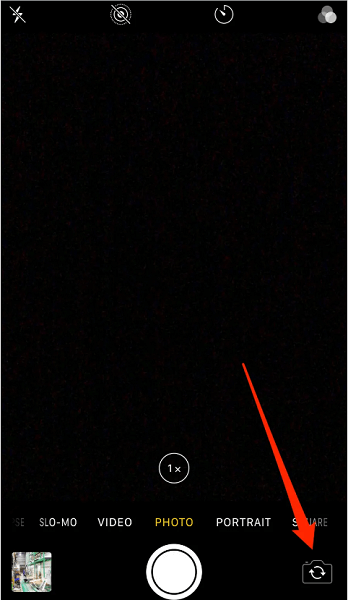
If your camera is displaying a black screen, you can shift between the front and rear camera. Open the camera and click the camera icon to switch to the rear camera so the document is captured clearly before you move to the next screen. After a few minutes, switch back to the front camera, and hopefully, it should now be working. If a step looks different on your device, the app version is usually the first thing to compare before assuming the feature is missing. Moving from the quickest checks to the more disruptive fixes usually makes it easier to spot which step actually changed the behavior.
3. Restart Your iPhone
If the iPhone has a minor software glitch, restart it to stop all services and hopefully fix the iPhone camera not working. Restart the iPhone by holding down the side lock button up to when the power off slider appears.
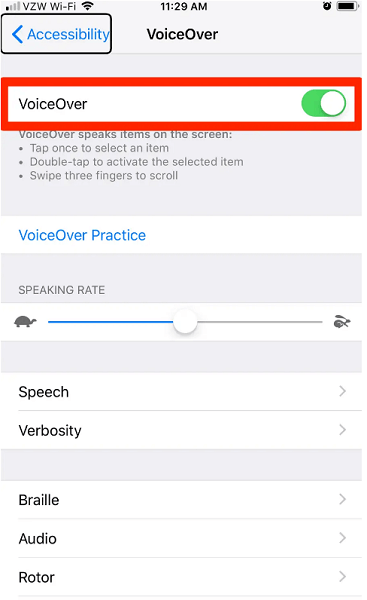
4. Turn Off the Voice-Over
In most cases, whenever the voice-over feature is enabled, most iPhone face issues with their camera. So turn off the feature to fix your iPhone camera not working.
i. Open Settings > General.
ii. Click Accessibility.
iii. Toggle off the VoiceOver tab.
5. Update the iOS System
A black camera screen can be due to a bug with the outdated iOS version. If your current iOS version is not the updated version, you need to update it.
i. Open Settings > General.
ii. Click Software Update.
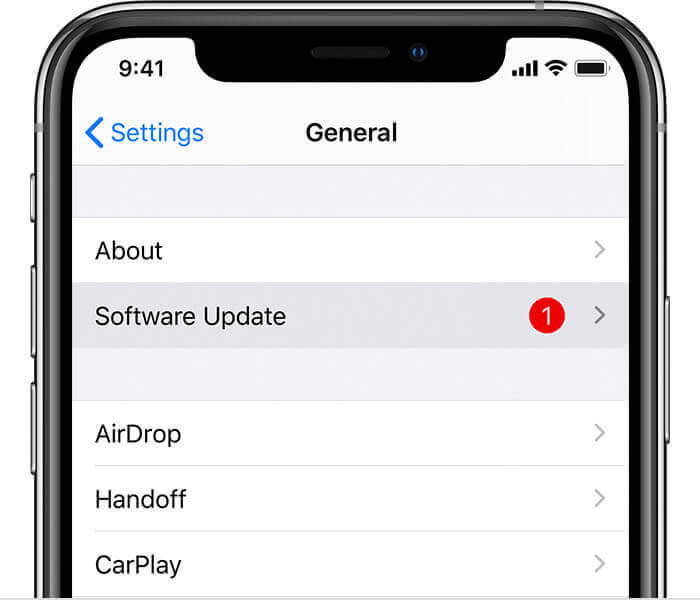
iii. If there is an available update, click Update & Download.
iv. Finally, click Install Now.
Once the latest iOS version gets installed, check your iPhone camera. If it's still not working, try other methods in the article.
6. Reset Your iPhone
Another way to fix your iPhone camera not working is by resetting your iPhone. To reset the iPhone, open Settings > general > Reset, then click Reset All Settings. Your iPhone will be restored to default settings, and the camera will be fixed in the process.

7. Set up Your iPhone as New
If restoring to default settings has not fixed your camera, you can try to set up the iPhone as if it were new. However, only proceed with the steps below if you have a backup as data will be wiped out, but you can restore from iCloud.
i. Click Settings > General.
ii. Click Reset.
iii. Click Erase All Content and Settings.

Your iPhone will then reboot with the camera fixed.
8. Put Your iPhone into DFU Mode
Using Device Firmware Update, you can fix the problem of the iPhone camera not working. How to enter DFU mode will depend on the model of your iPhone. Before you enter DFU mode, as highlighted below, ensure you have a backup.
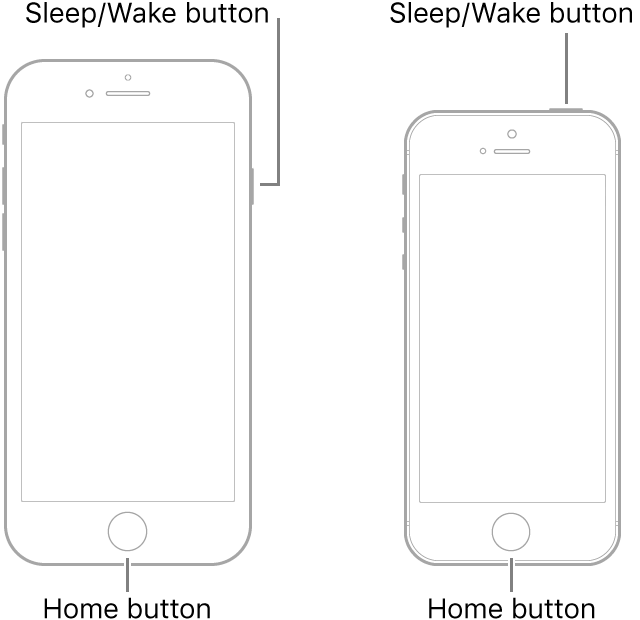
For iPhone 6S or earlier: Long press the Sleep button while pressing the home button for like 8 seconds, after which you release the Sleep button and not the home button. Keep pressing the home button up to when the computer recognizes your iPhone.
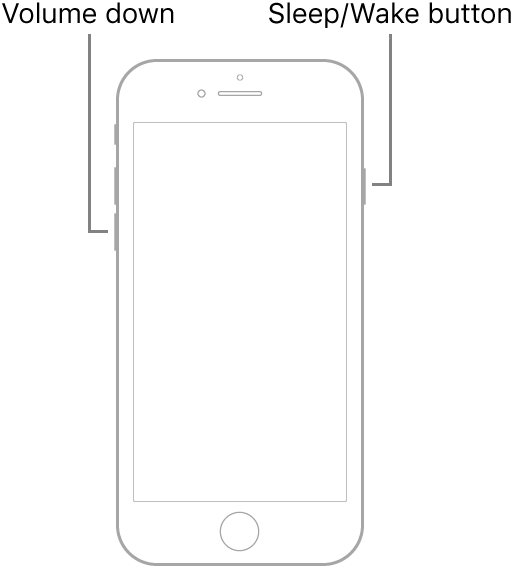
For iPhone 7 or iPhone 7 Plus: Long press the Side button while pressing the volume button for like 8 seconds, after which you release the Side button and not the volume button. Keep pressing the volume button until the computer recognizes your iPhone.
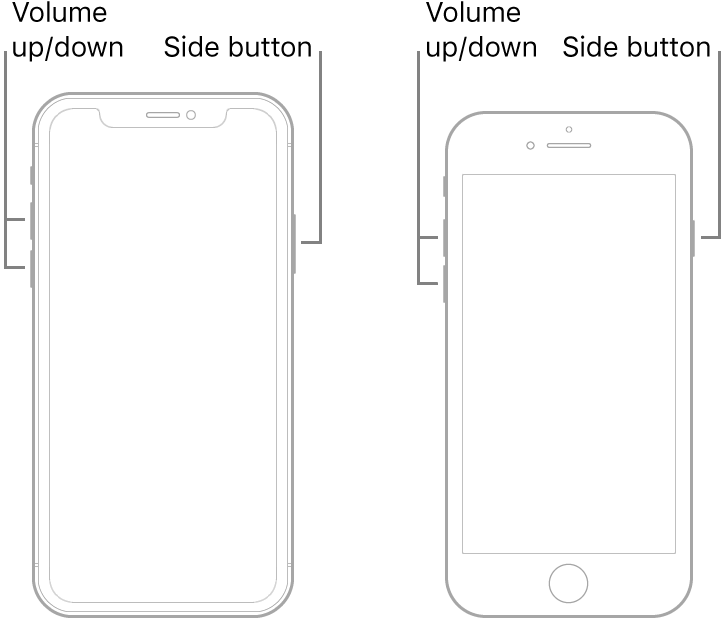
For iPhone 8 or newer: Press the volume up button, then release, do the same for the down volume button. Long-press the side button of the phone. Once you see a black screen, long-press the down volume button. Long press these buttons but release the Side button after 5 seconds while holding the volume down button.
Follow the instructions that will display on your screen to fix your camera so the document is captured clearly before you move to the next screen.
Part 2: Fix iPhone Camera When There is a Physical Issue
1. Check Your iPhone Case
Is your camera case well placed? It may sound obvious, but if your camera casing is not correctly placed, it may block the camera, resulting in a black screen. Try removing the casing and see if the camera is still black to determine whether or not the casing is the problem.
Also, if you are using a metallic or magnetic casing, remove it as it may be hindering the camera stabilization, especially on iPhone 7, 6, X, or later models. A quick check of the device model, software version, and account state usually explains why the same menu looks different on another device.
2. Clean Off the Lens
Debris or dirt may clog or block the camera leading to the iPhone camera not working. To wipe your camera lens, use a microfiber cloth and keenly wipe the camera to remove any dirt or debris affecting it.
3. Deal with the Flash
In some instances, you need to have the flash turned on before taking a picture to remove the darkness. There are three ways you can go about this.
a) Ensure the flash is turned on
If your surrounding has too much brightness, your camera flash if it's automatically set will not turn on. To resolve this, open the camera and tap the flash icon until it turns yellow.
b) Turn on/off the LED flashlight
If you have the flash turned on, but it still goes off when taking a picture, toggle it on and off to resolve this, as shown below.
i. Please turn on the flash by clicking on its icon from the control panel.
ii. After a while, please turn it off, then resume taking your picture.
c) Fix the flash
Your camera may also fail to work if the flash is out of sync. If this is the case, try the quick fixes below:
i. Clean the flash lens of the camera.
ii. Restart your iPhone
iii. Remove the iPhone's casing.
iv. Toggle the flash on and off.
v. Disable the camera location service. Open Settings > Privacy > Location Service and toggle it off so the next part of the process is easier to complete without backtracking. It gives you finer control when only one moment should stay slow and the rest of the recording should play normally.
4. Avoid Overheating
If your iPhone has been in use for an extended period, it may become overheated. This can impact the camera's functionality. To address overheating, turn off your iPhone and allow it to cool down for approximately 10 minutes before continuing to use it.
5. Contact Apple Support
If all the methods discussed in this post have not fixed your iPhone camera not working, you need to contact Apple Support. Apple will diagnose and fix the iPhone as it could be a hardware issue affecting the iPhone. Click https://support.apple.com/en-ke/contact to contact Apple support.
Summary
To capture those epic and memorable moments, you need your iPhone camera to be in good condition. When you face the iPhone camera not working problem, worry not as this guide offered you the several ways that you can use to fix this. several options were discussed, and depending on your iPhone model and the problem affecting it, you should find a method that works for you.
