How to Unlock a Disabled iPhone without iTunes in 4 Ways
Are you locked out of your iPhone by wrongly entering your passcode several times? Or has someone tried to force their way into your device? In such situations, the security feature disables the iPhone, which may create a nuisance in case of emergency calls and requirements. This article intends to guide you on how to unlock a disabled iPhone without iTunes in 4 ways. Scroll down to read more!
Do you have an iPhone that's locked to a specific carrier or network provider? It is possible to bypass the carrier lock on your iPhone so you can easily use another network on the device. Read the “Unlock iPhone Carrier” Guide to resolve this issue quickly.
Why Is Your iPhone Disabled?
Why is your iPhone showing iPhone is disabled? After 10 failed passcode attempts, iPhones will disable and lock users out.
There are many reasons why your iPhone could be disabled due to too many incorrect passcodes, including:
you traveled without your iPhone and forgot the passcode upon returning;
your child entered the wrong number too many times;
a friend confused your iPhone and entered his/her passcode into your iPhone
This feature, designed by Apple to protect you from thieves or hackers, isn’t going away. But there are solutions to accessing your iPhone again.
Why Not With iTunes?
Previously, iPhone users with disabled iPhones would go to iTunes for help to unlock their iPhones. However, iTunes has fallen out of favor with many users, due to the weight of the app and confusing features, not to mention that it is constantly crashing. Some users avoid iTunes altogether, and accessing it to unlock their iPhones just isn’t an easy solution.
There are plenty of ways to unlock a disabled iPhone without iTunes, here is how.
Method 1: Unlock the Disabled iPhone Via Mobitrix LockAway
The most straightforward and quickest method to unlock a disabled iPhone is through a specialized tool. Mobitrix LockAway- Unlock iPhone Passcode can bypass a forgotten passcode in as little as 20 minutes. With over a decade of experience in iOS breakthroughs, the Mobitrix R&D team guarantees the utmost privacy and security during unlocking. Plus, its user-friendly design ensures that even those without tech expertise can navigate it with ease.
Mobitrix LockAway can remove four different types of screen lock:
4/6-digit passcode
Touch ID
Face ID
Alphanumeric passcode
Turn to Mobitrix LockAway if:
You've forgotten your iPhone screen passcode.
Numerous wrong attempts result in the “iPhone is disabled connect to iTunes” message.
You've got a second-hand iPhone.
Your Face/Touch ID can’t work precisely.
Your iPhone's screen is damaged.
FREE DOWNLOADFREE DOWNLOADFREE DOWNLOAD
Advantages of Mobitrix LockAway:
No need for iTunes
It has a 99% success rate.
User-friendly: Simple click-through process, ideal for users without technical expertise.
Fast: Unlocking takes approximately 20 minutes. Mobitrix LockAway stands out as the top choice for those pressed for time.
Secure: Unlock your iPhone by yourself and 100% secure your privacy.
Extensive compatibility: It fully supports iPhone 5s to iPhone 16 and iOS 18 and earlier versions.
Steps:
Download and Install Mobitrix LockAway
Connect your disabled iPhone to the computer via a compatible USB cable.
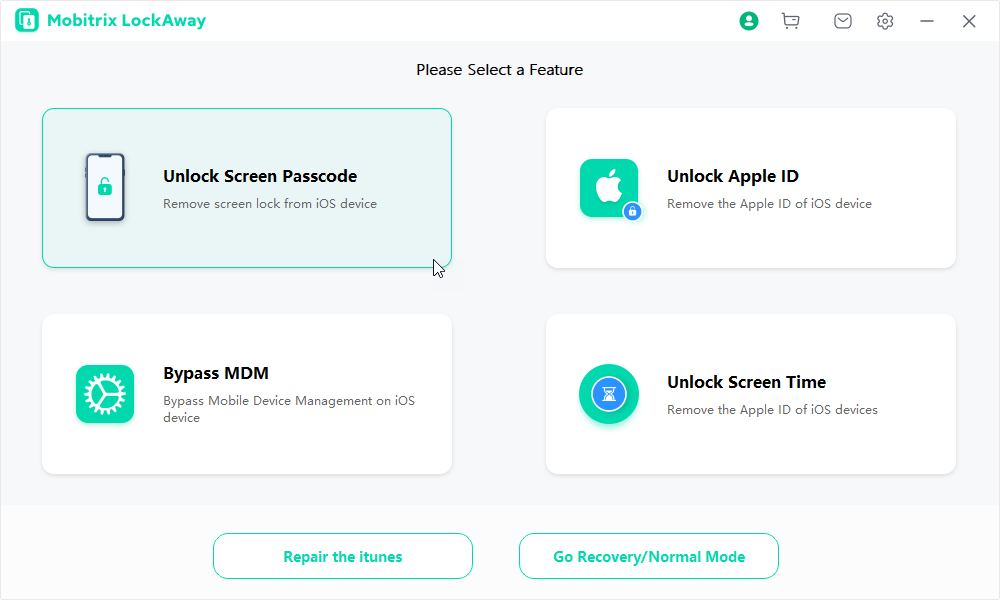
Select “Unlock Screen Passcode” from the primary interface.
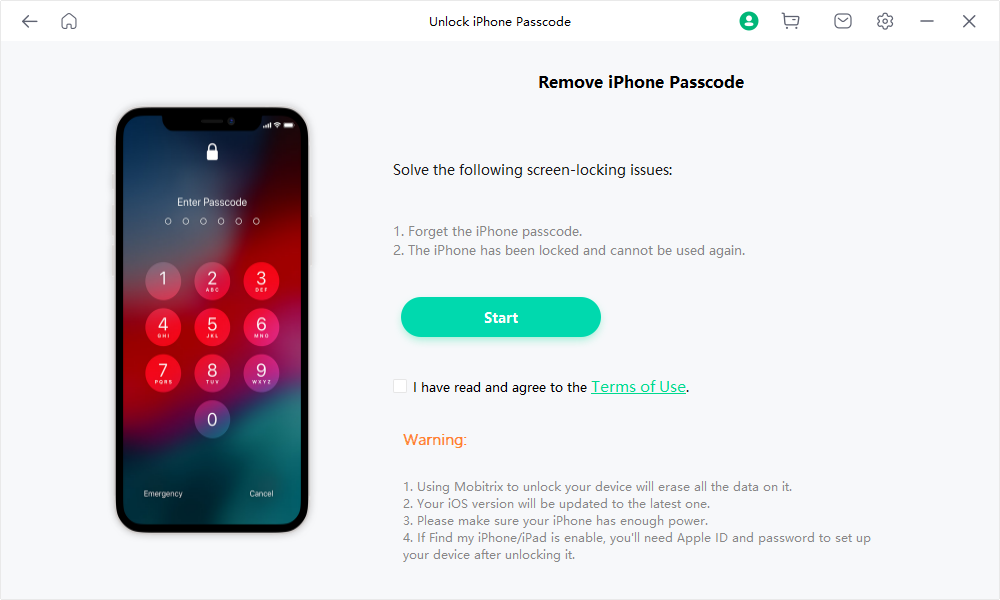
Click “Start” to remove the iPhone passcode.
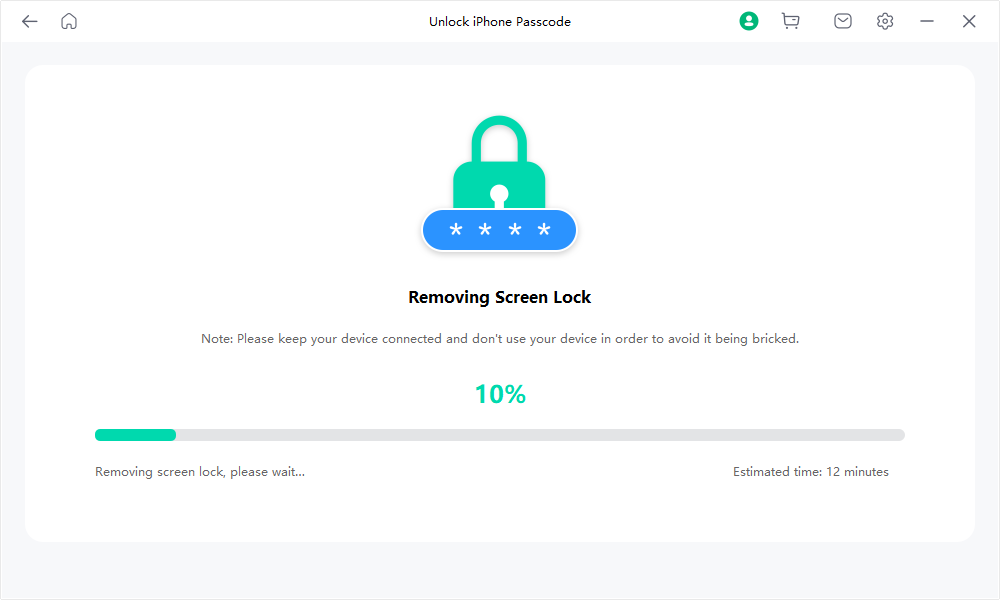
Your iPhone is now unlocked!
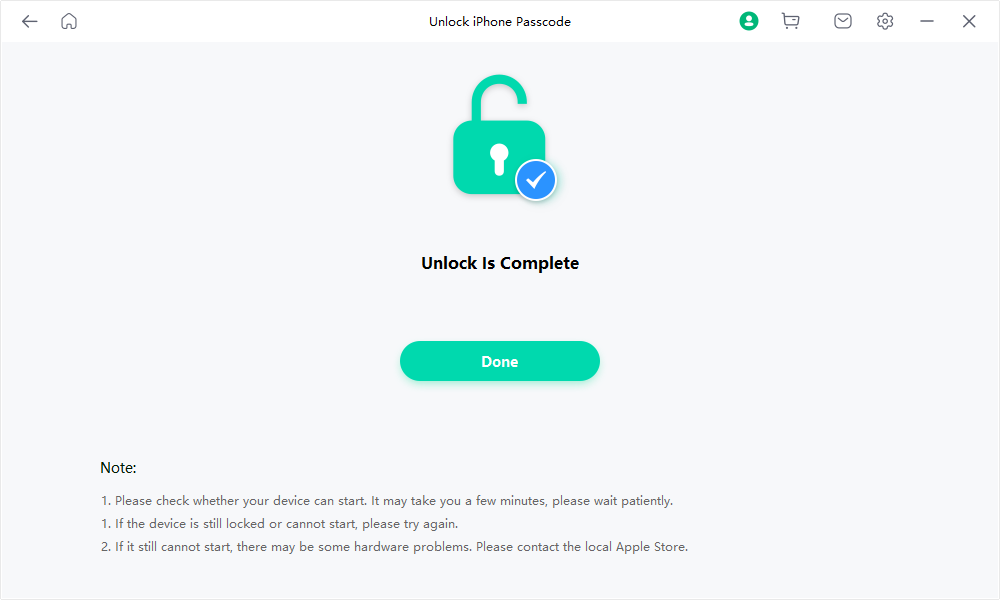
Mobitrix LockAway is very easy and effective. It is the fastest and most convenient approach if you need to regain access to your iPhone in a hurry.
There are two ways to use Find My iPhone to unlock a disabled iPhone without iTunes, one is direct with the app, and the other is with iCloud. Both methods are described step by step below.
Method 2: Unlock the Disabled iPhone Via the "Erase iPhone" Option
Apple introduced the "Security Lockout" feature starting with iOS 15.2. This function allows users to unlock their iPhones without needing a computer or iTunes.
If a wrong passcode is entered over seven times, the iPhone will show the "Security Lockout" screen, which offers an "Erase iPhone" option in its bottom right corner. Using this "Erase" option wipes out all data on the iPhone, including its passcode. Subsequently, users can set up their iPhone as if it were brand new.
Requirements:
This feature is only compatible with iOS and iPadOS 15.2 or newer.
A stable cellular or Wi-Fi connection is required to execute the reset.
Your disabled iPhone has enabled Find My and hasn't signed out of Apple ID.
You need to know your Apple ID credentials.
Steps:
Deliberately input the incorrect passcode seven times. Post the seventh attempt, the iPhone will navigate to the “iPhone Unavailable try again in 15 minutes” screen.
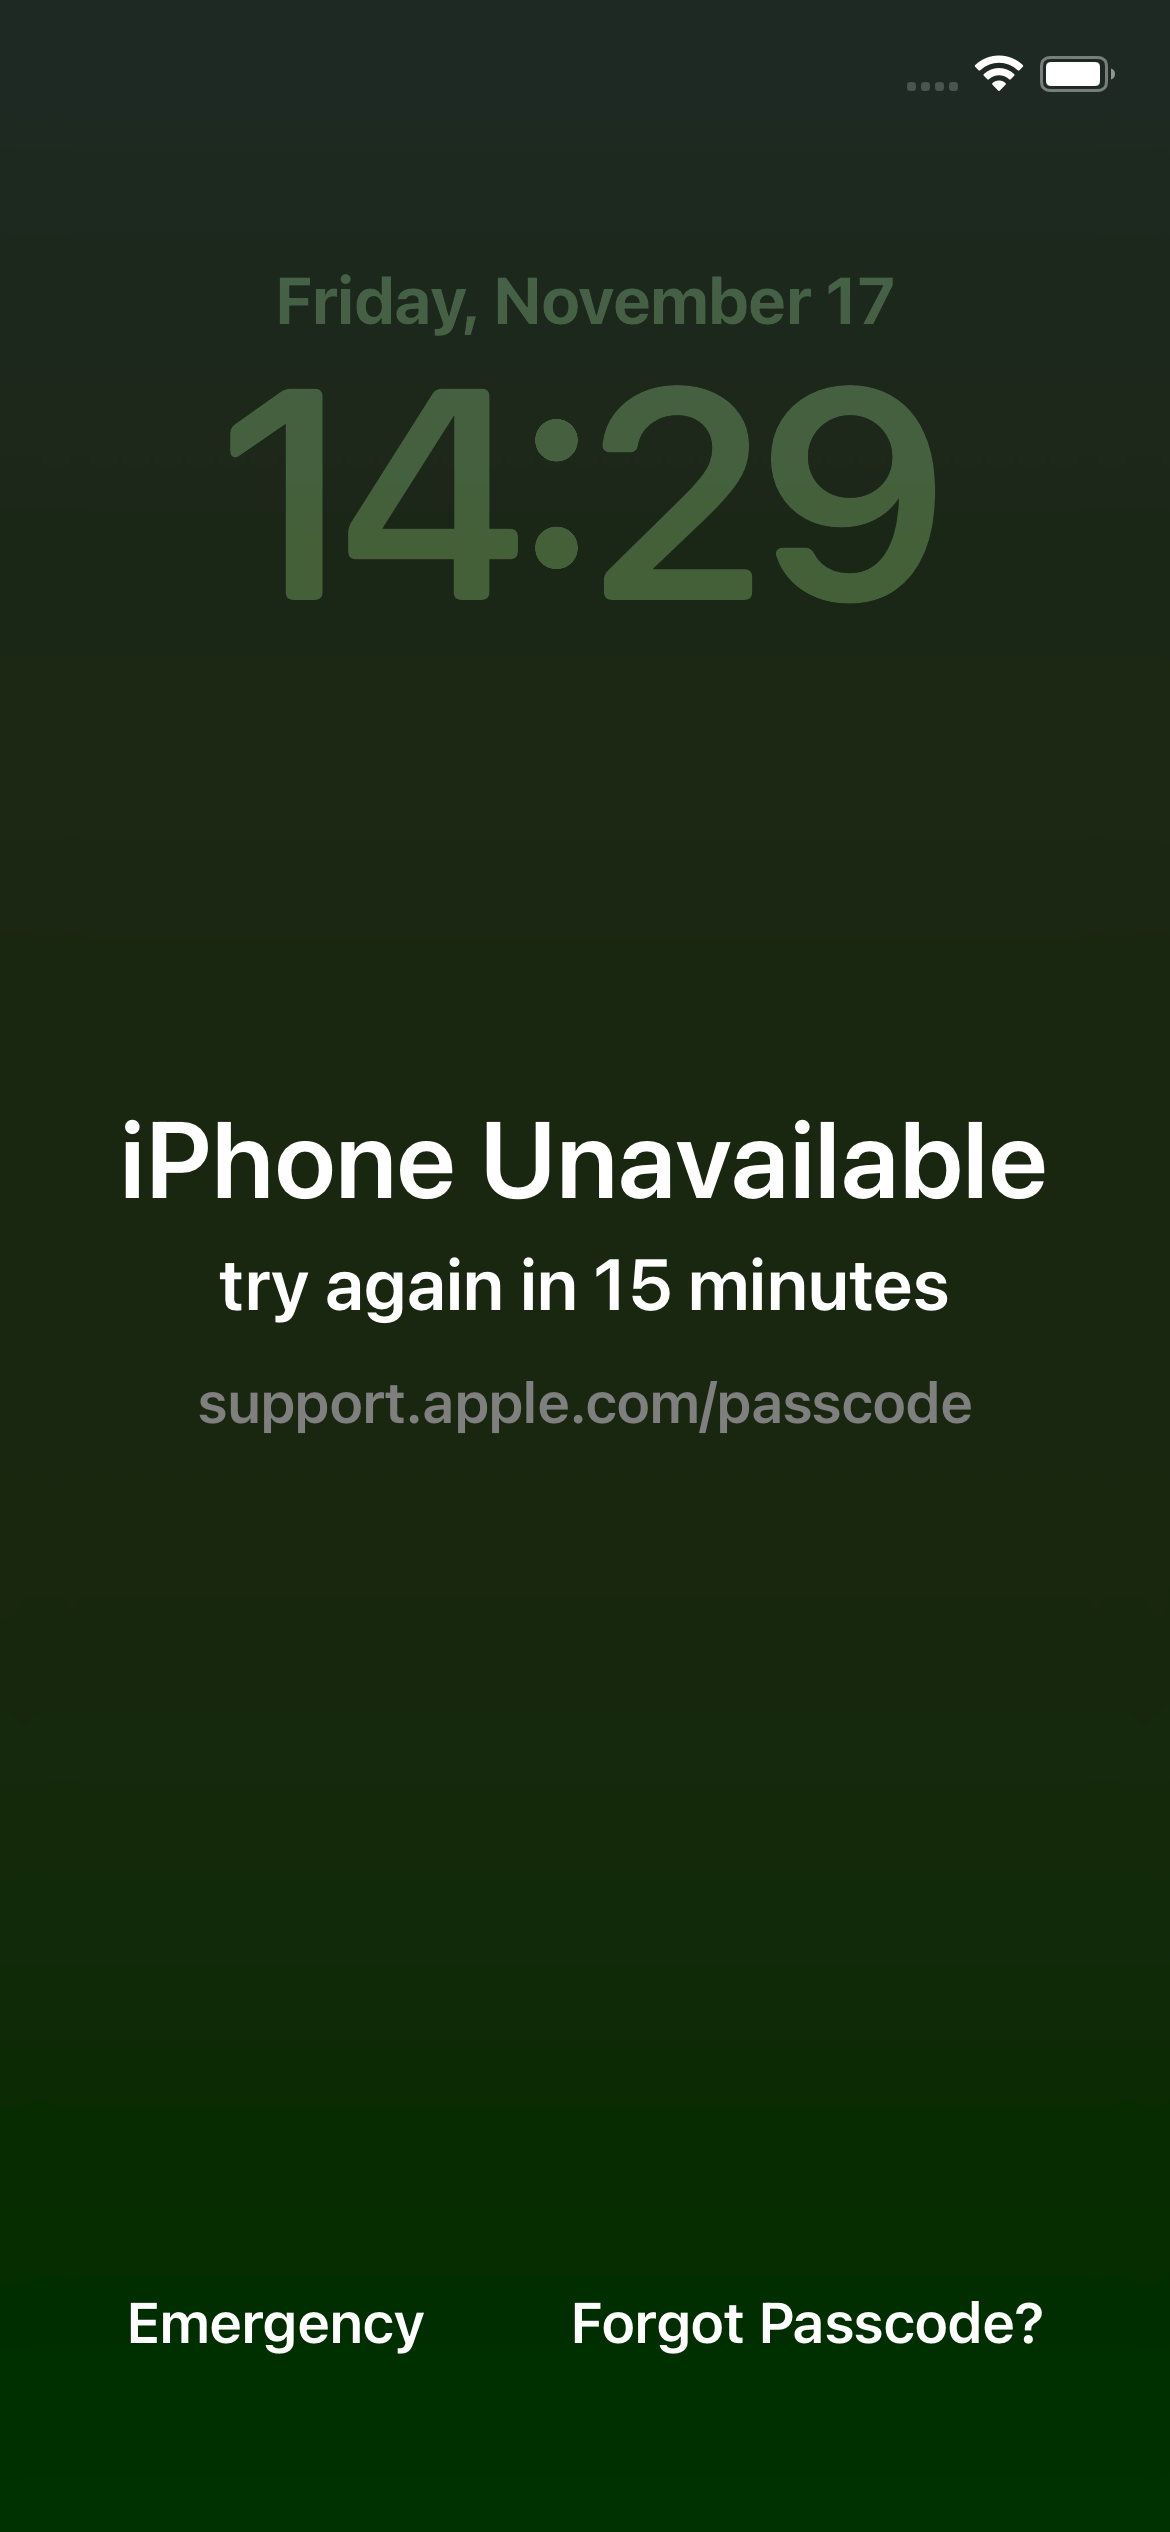
Tap the "Forgot Passcode?" option.
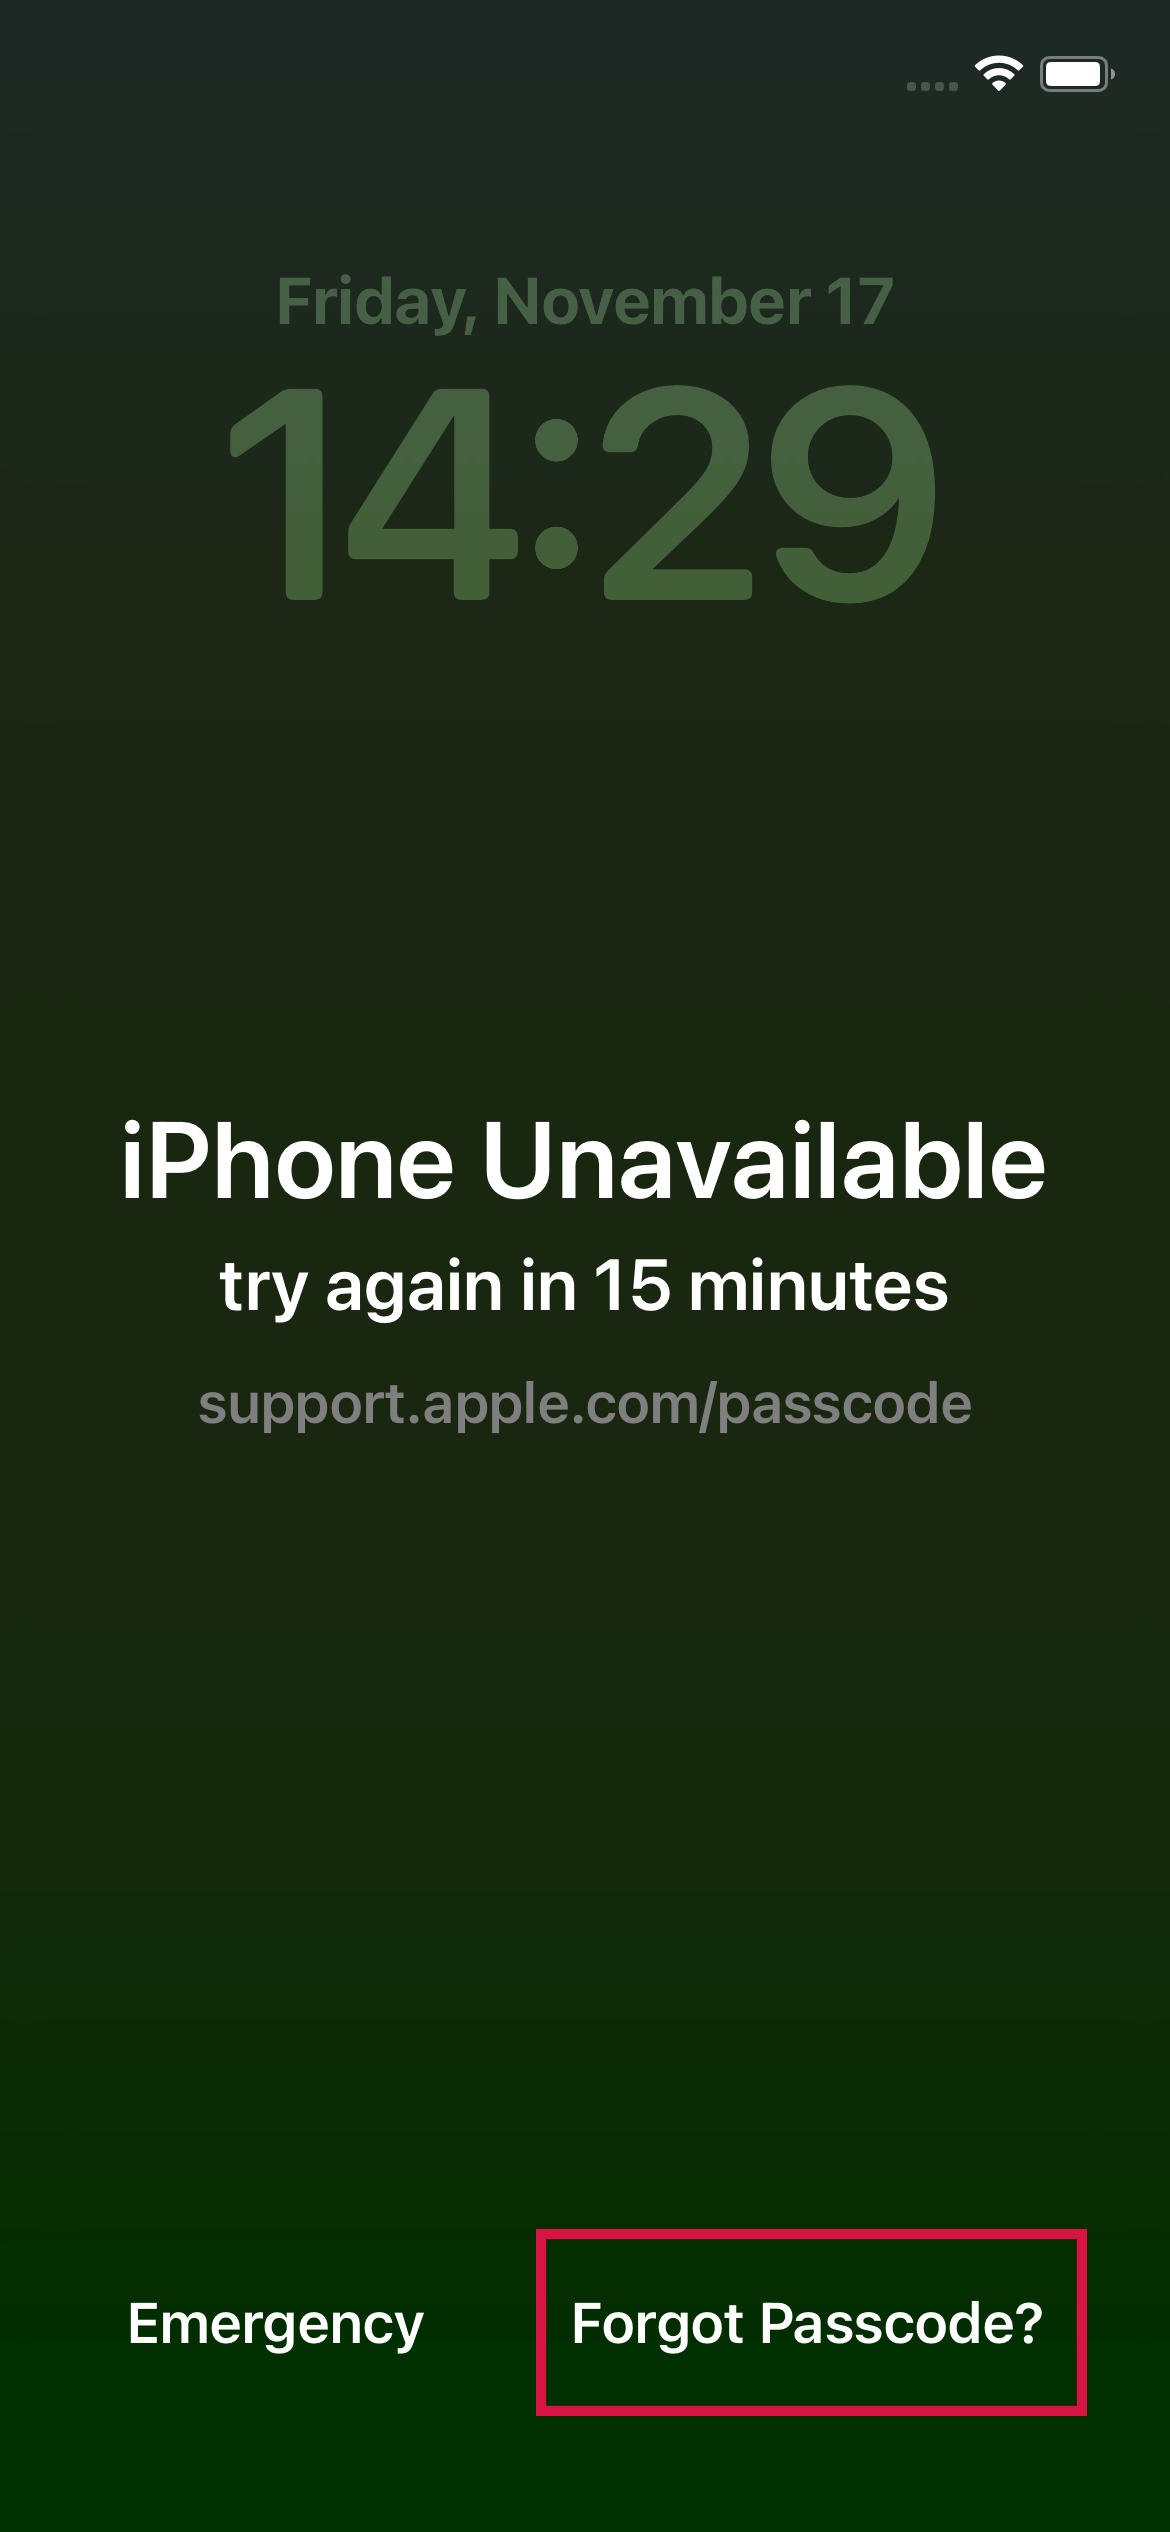
Press the "Start iPhone Reset" option, which leads to the "Sign out of Apple ID" screen. Enter your Apple ID password to begin erasing your iPhone.
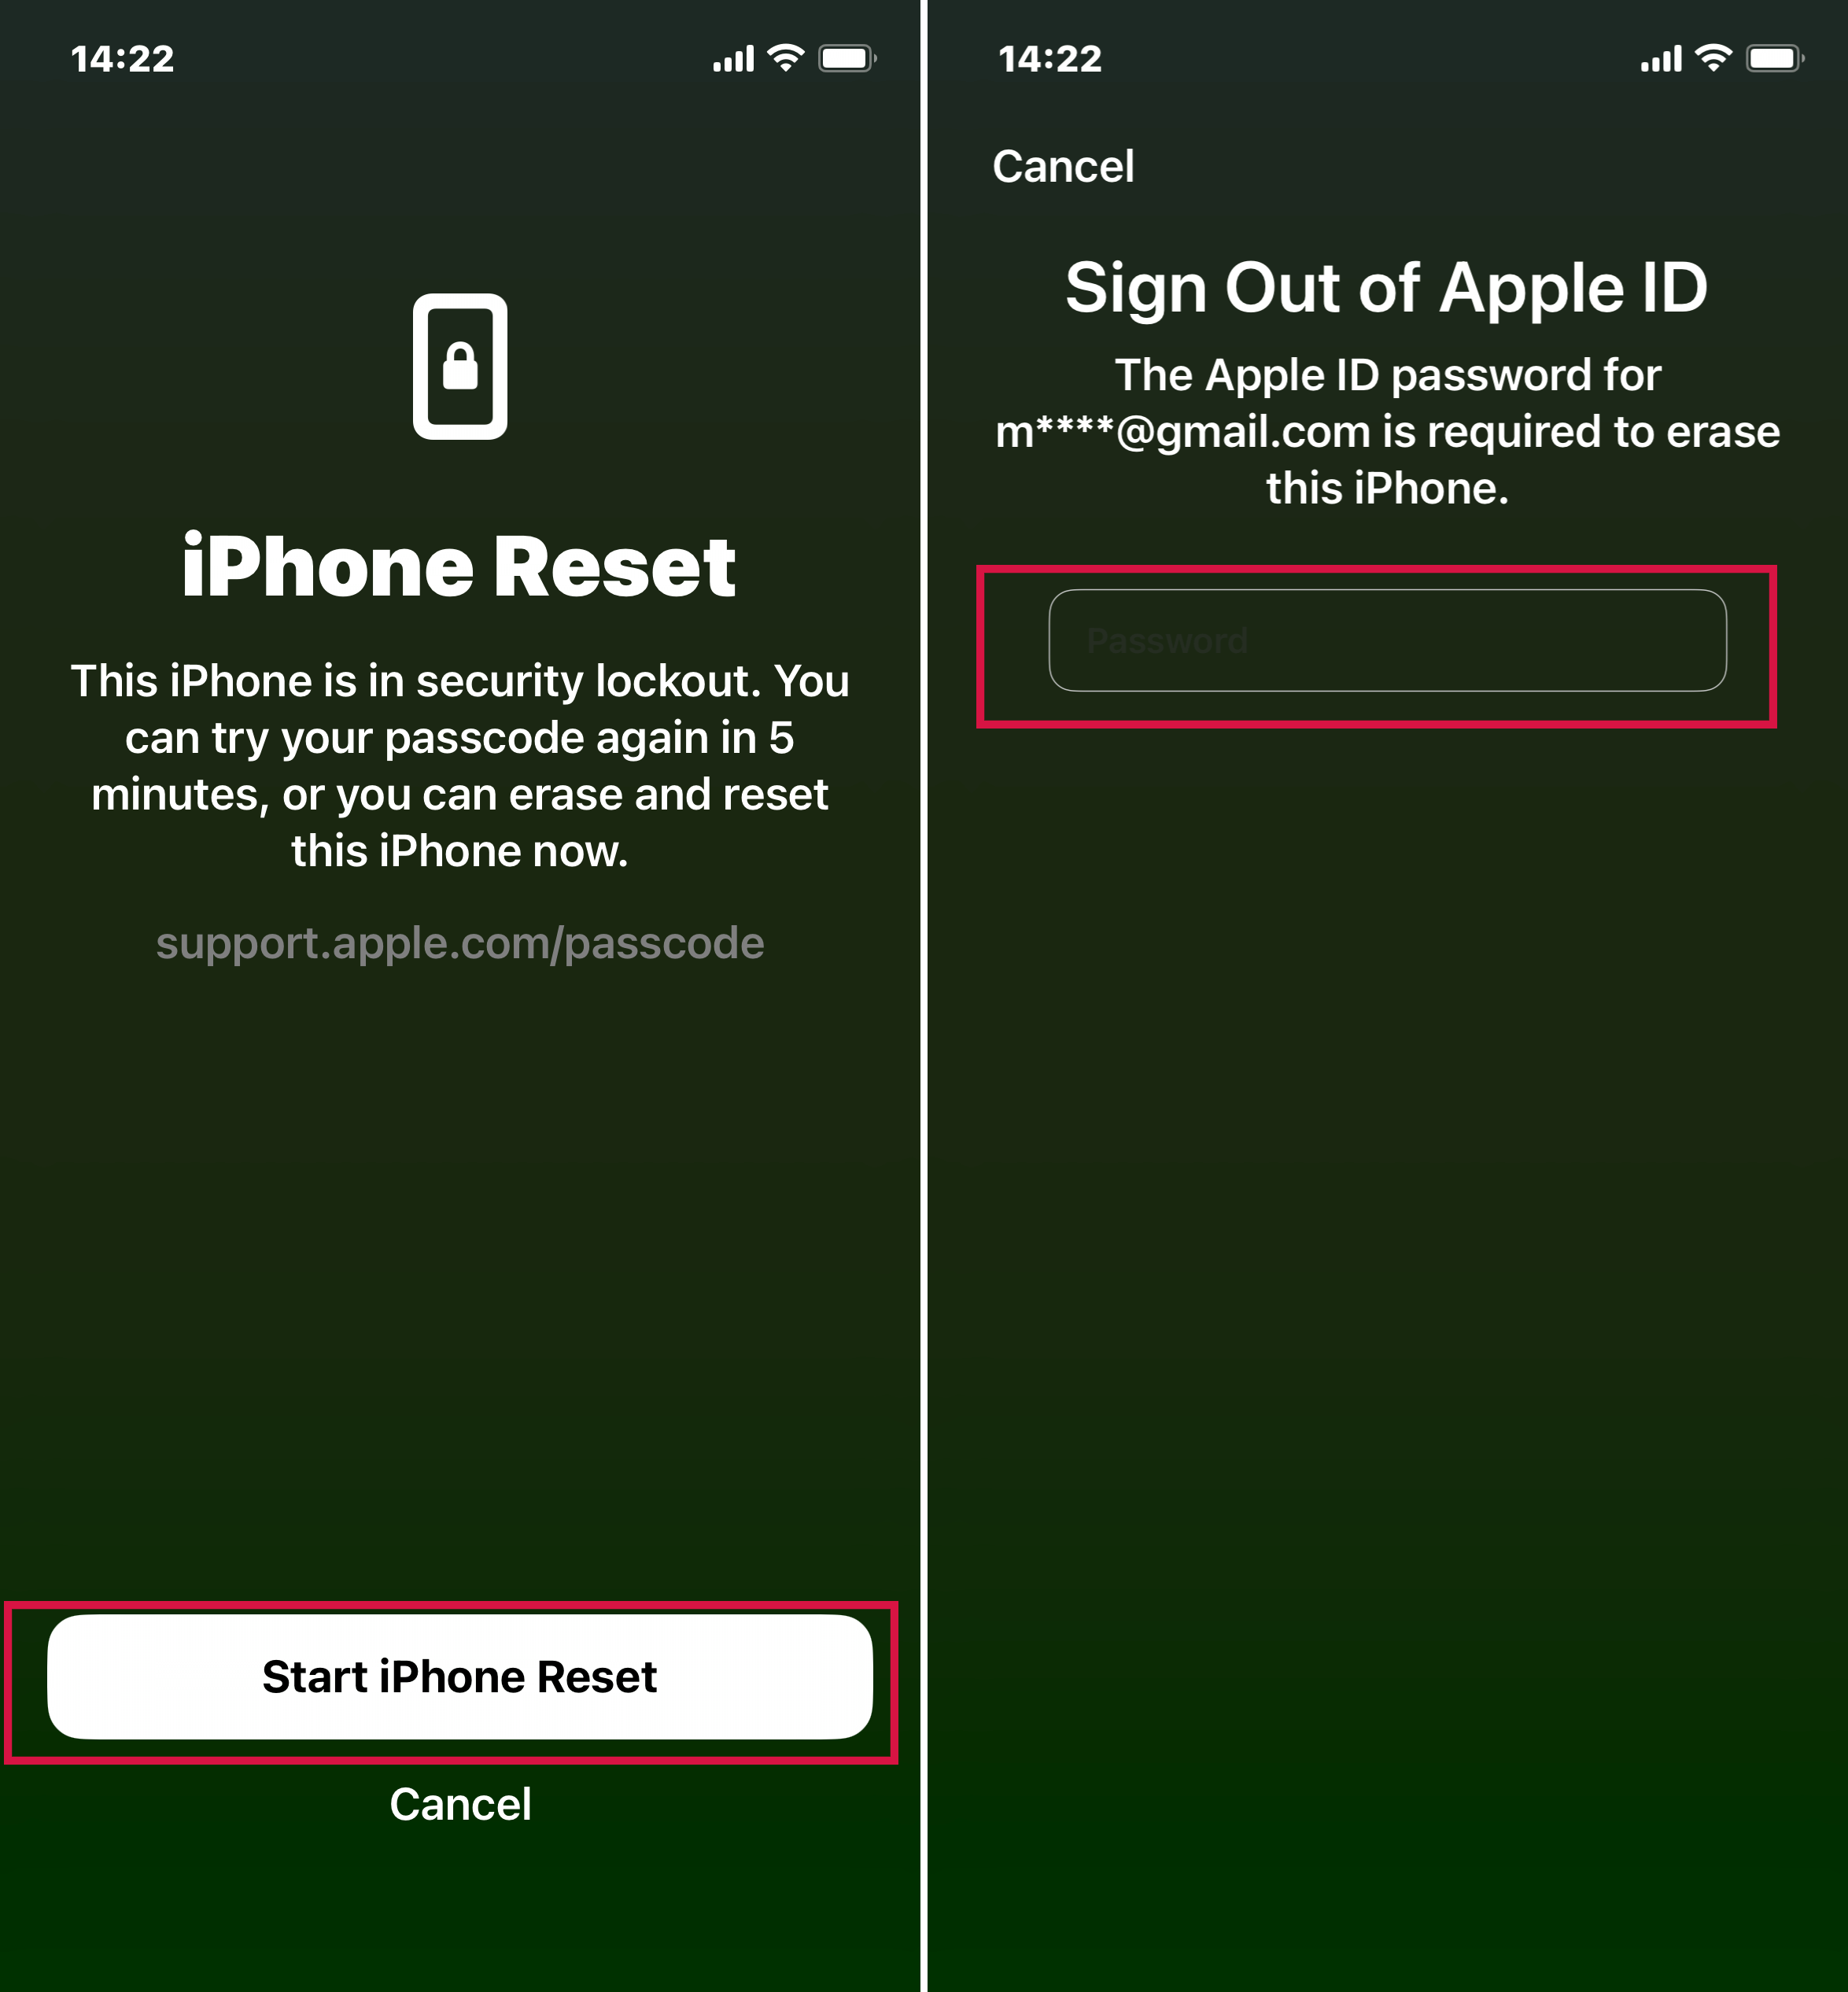
The erasure progress will be visible on the iPhone screen.
Once erasure concludes, the iPhone will automatically reboot. And now you can access your iPhone without passcode limitation.
Method 3: Unlock the Disabled iPhone Via Find My iPhone (App)
If you have access to another Apple device, either a friend’s iPhone or an iPad, then you can use the Find My App to unlock your disabled iPhone without a computer. Here is how:
Open the Find My on any other iPhone or iPad.
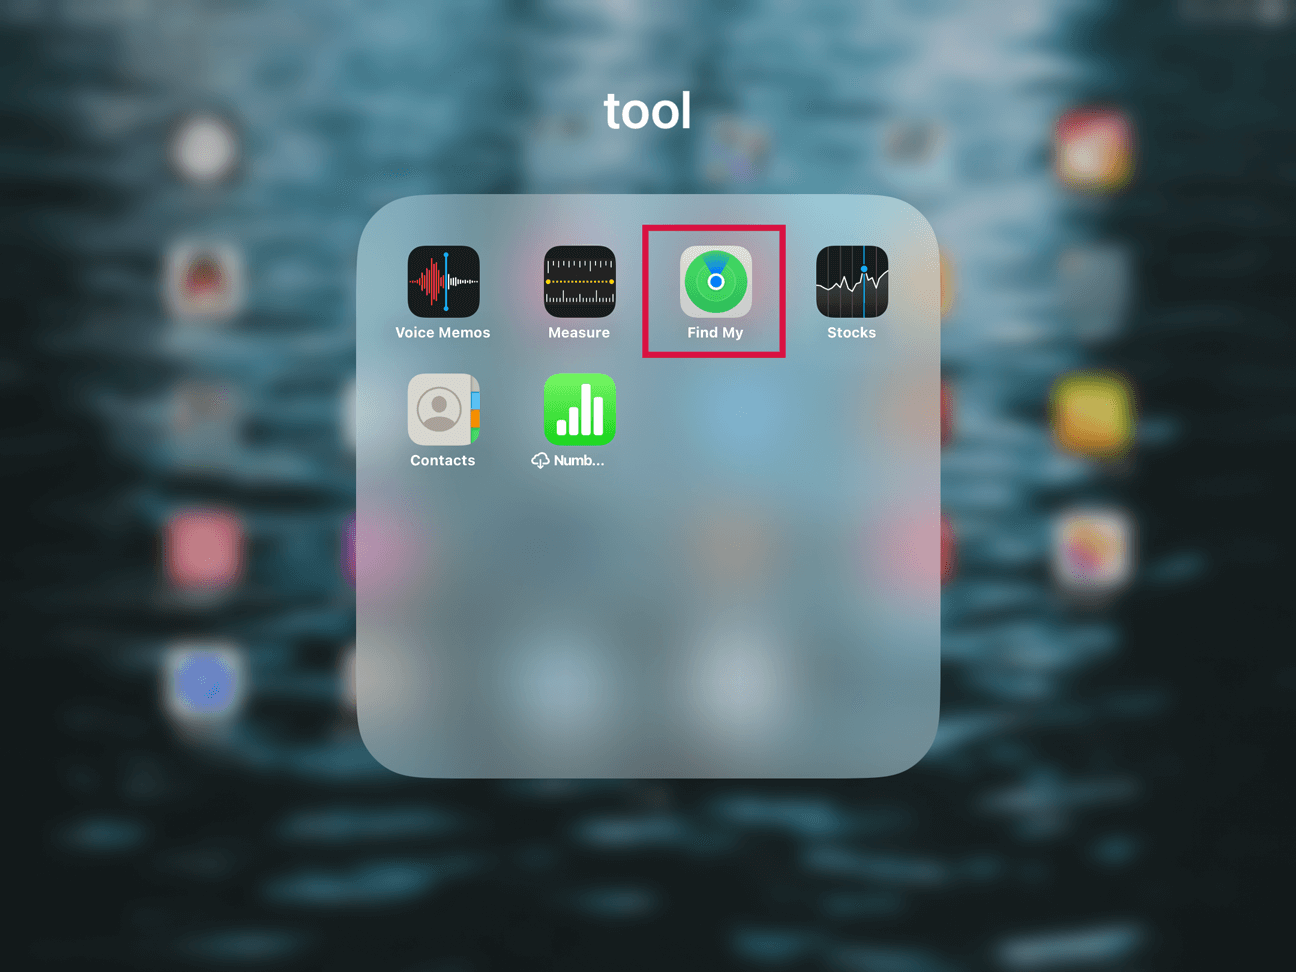
Input your Apple ID and password then tap Sign In.
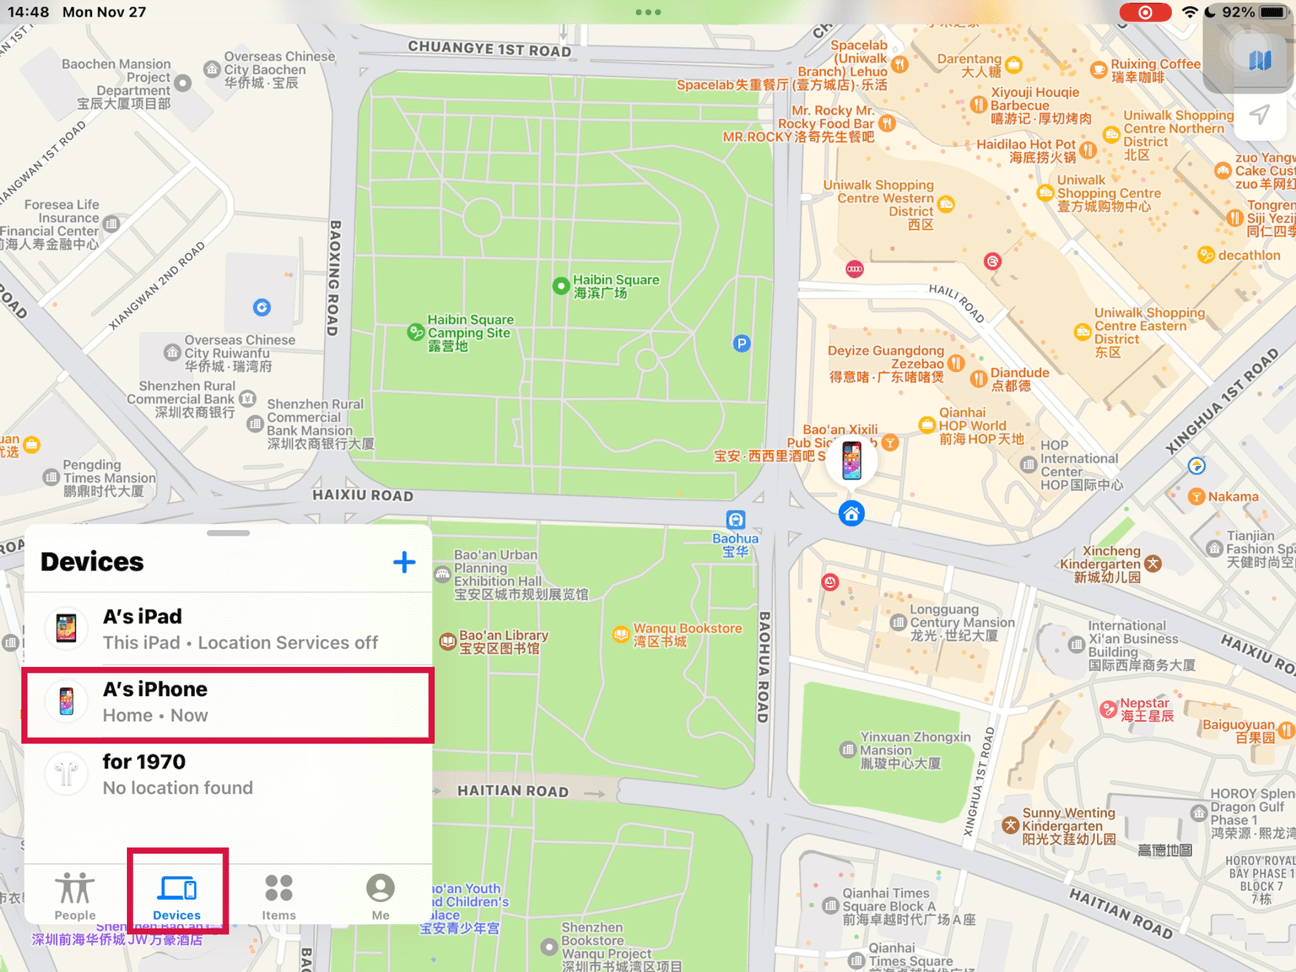
Tap Devices at the bottom and select your disabled iPhone from the list. (You will see your device icon on the map showing its current location)
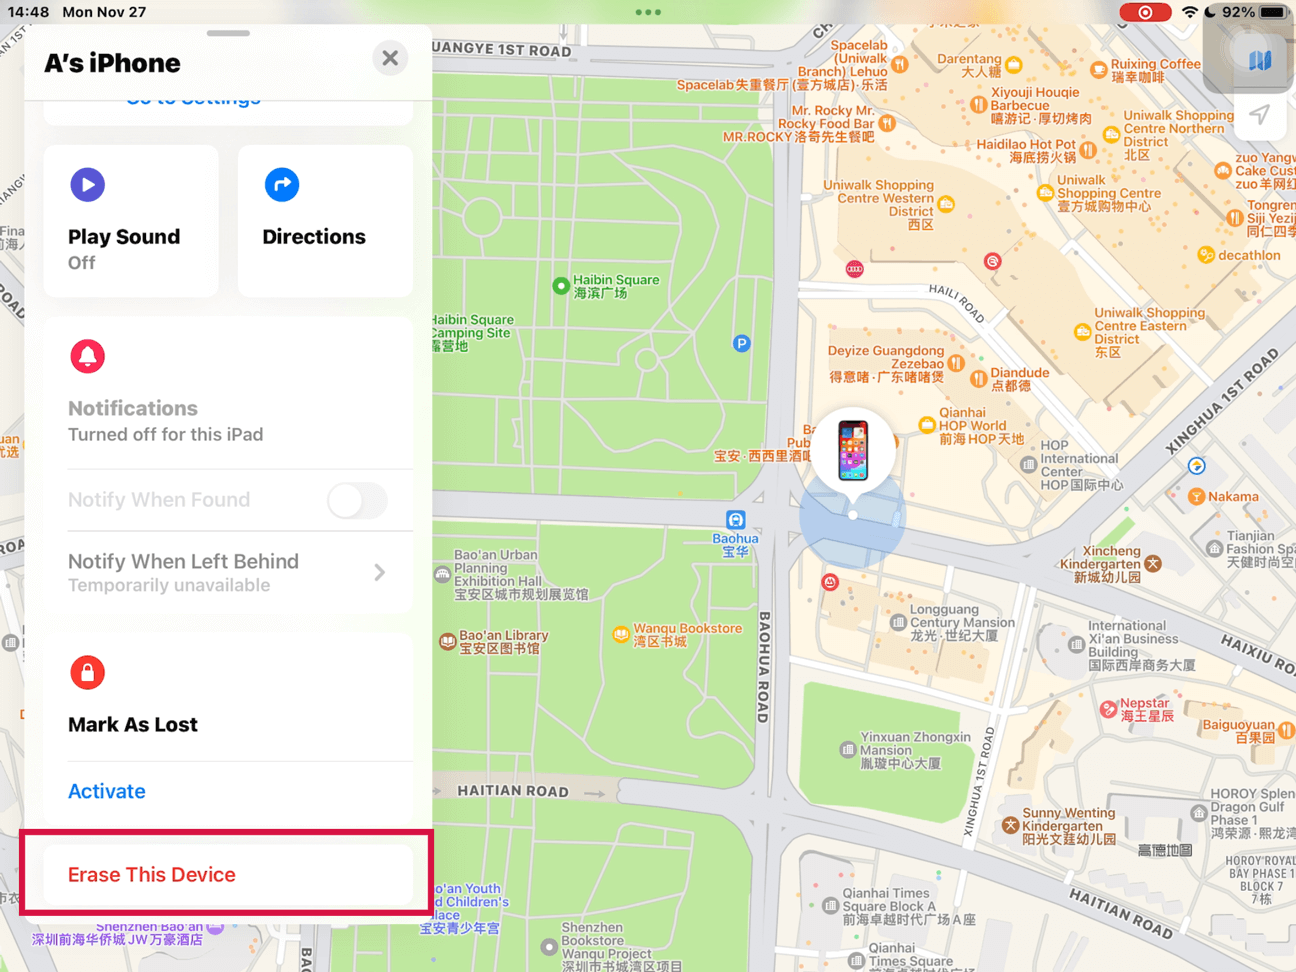
Tap Erase This Device on the next interface. (You will be required to enter your Apple ID password to continue)
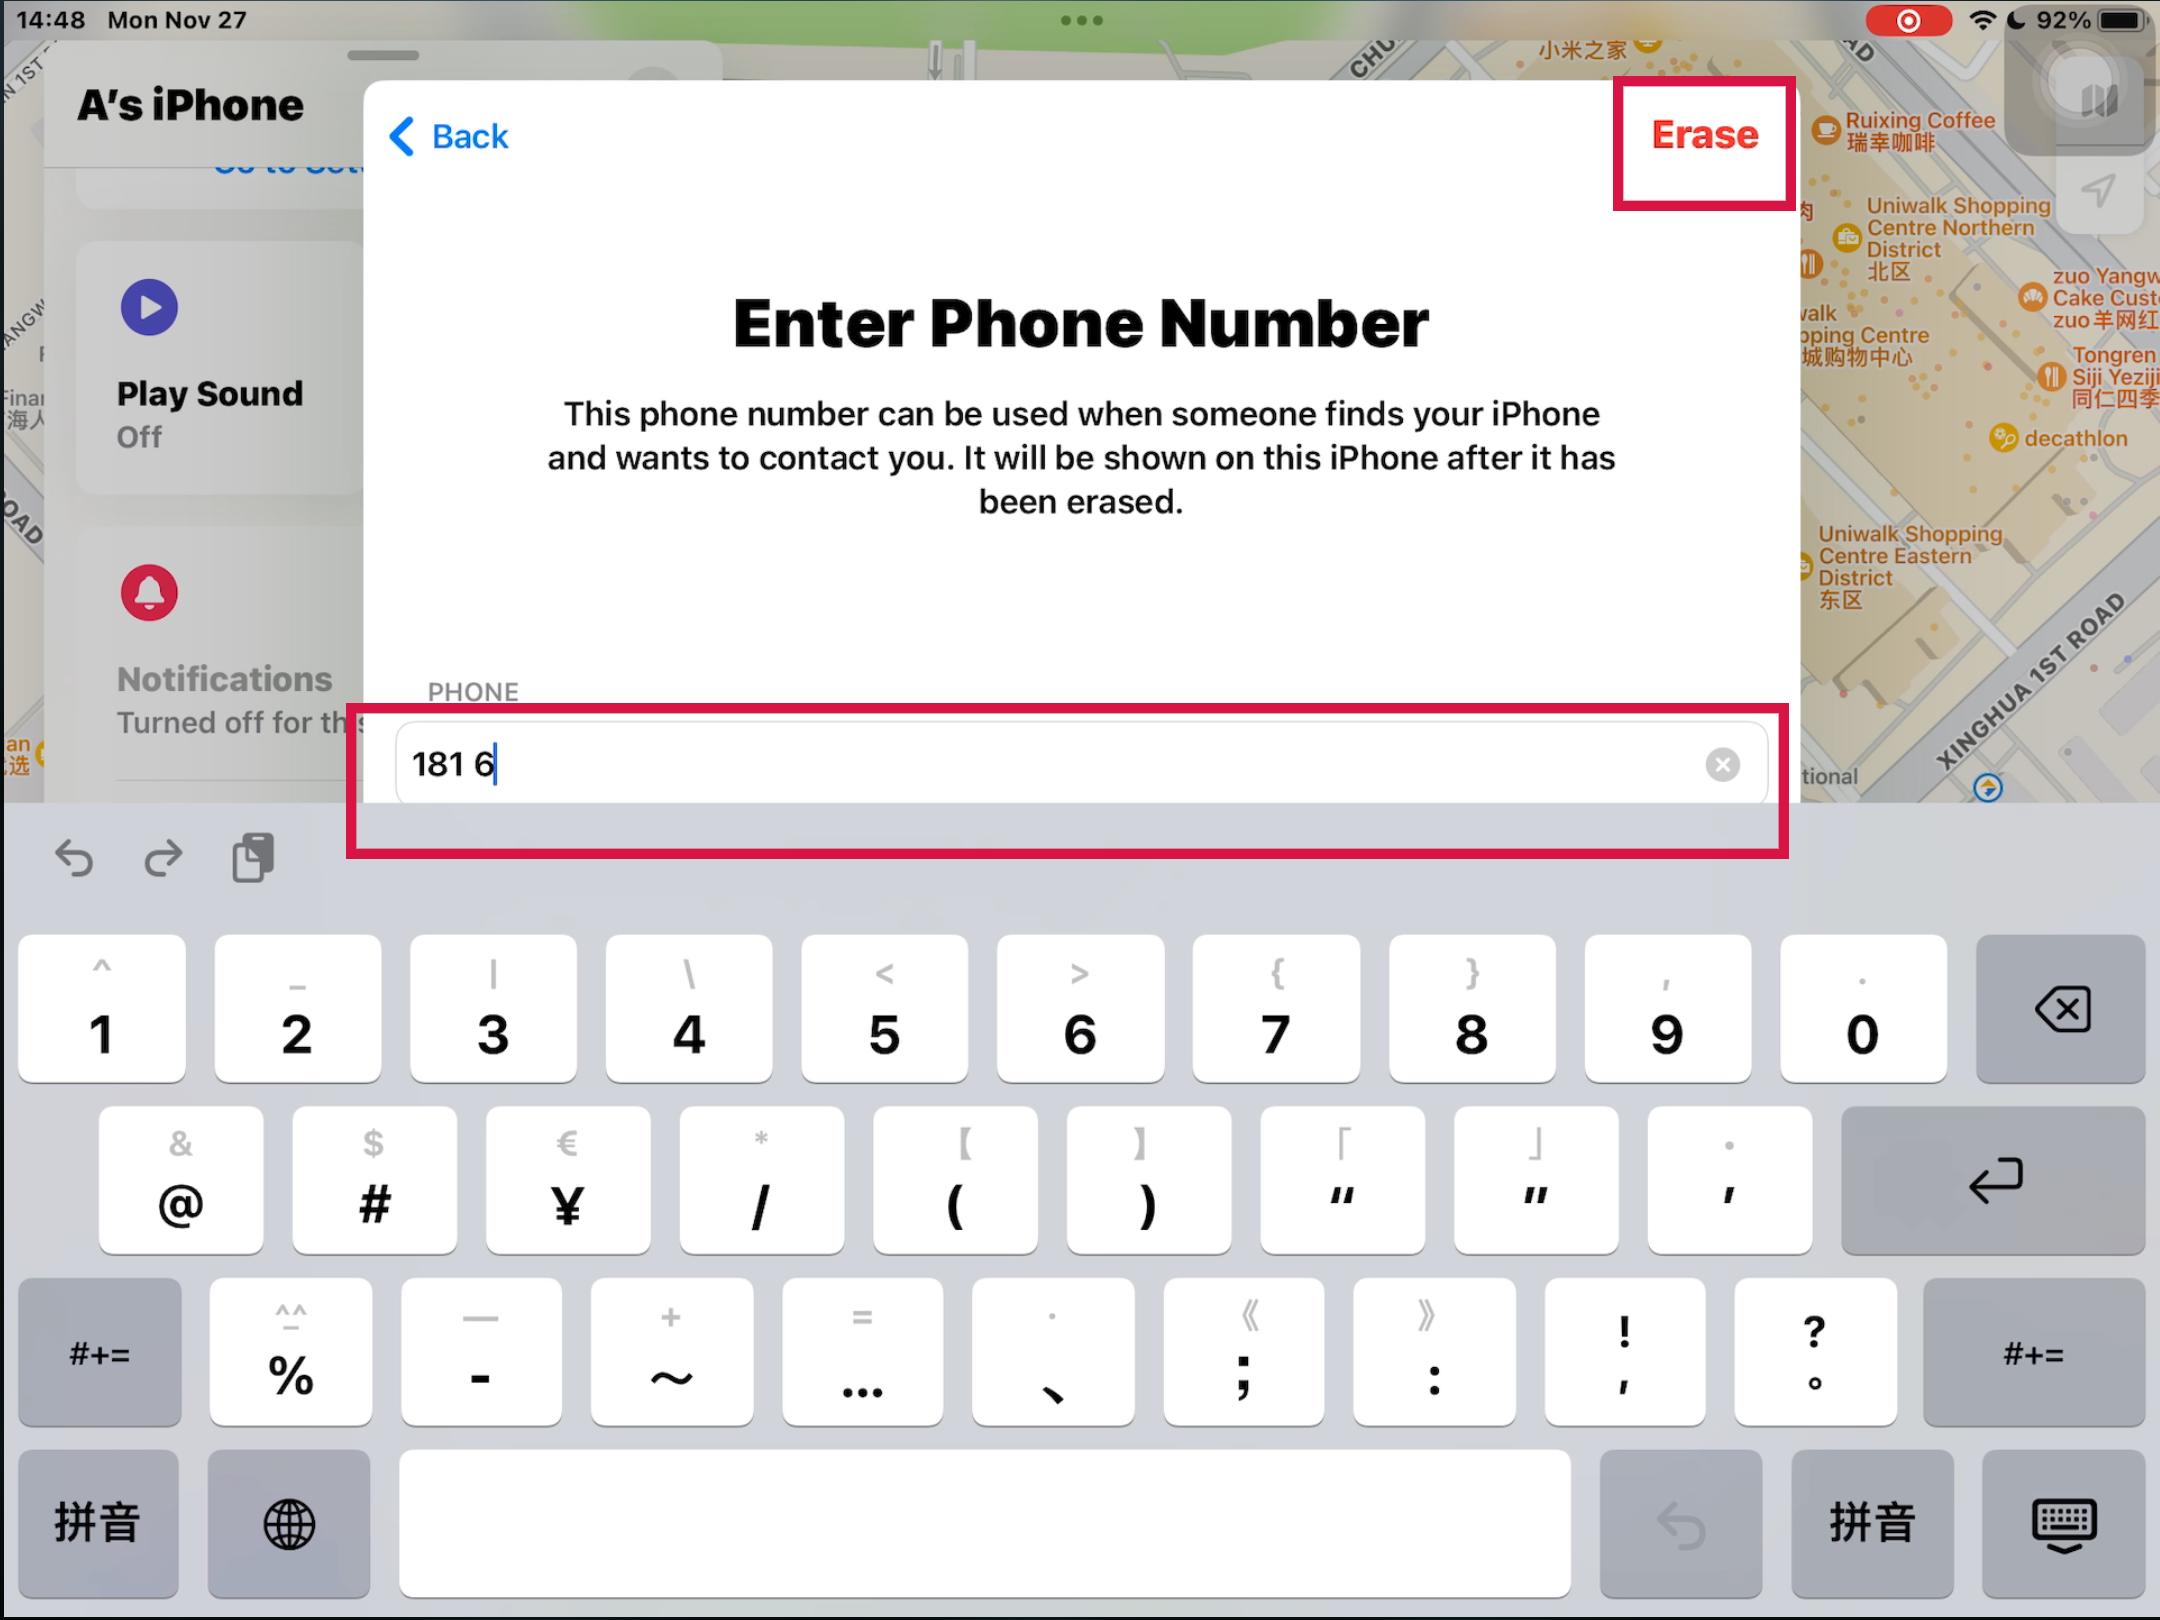
Input a phone number that you want to appear on the disabled iPhone screen after the process finishes and tap Erase.
Enter your Apple ID password and then tap Erase.
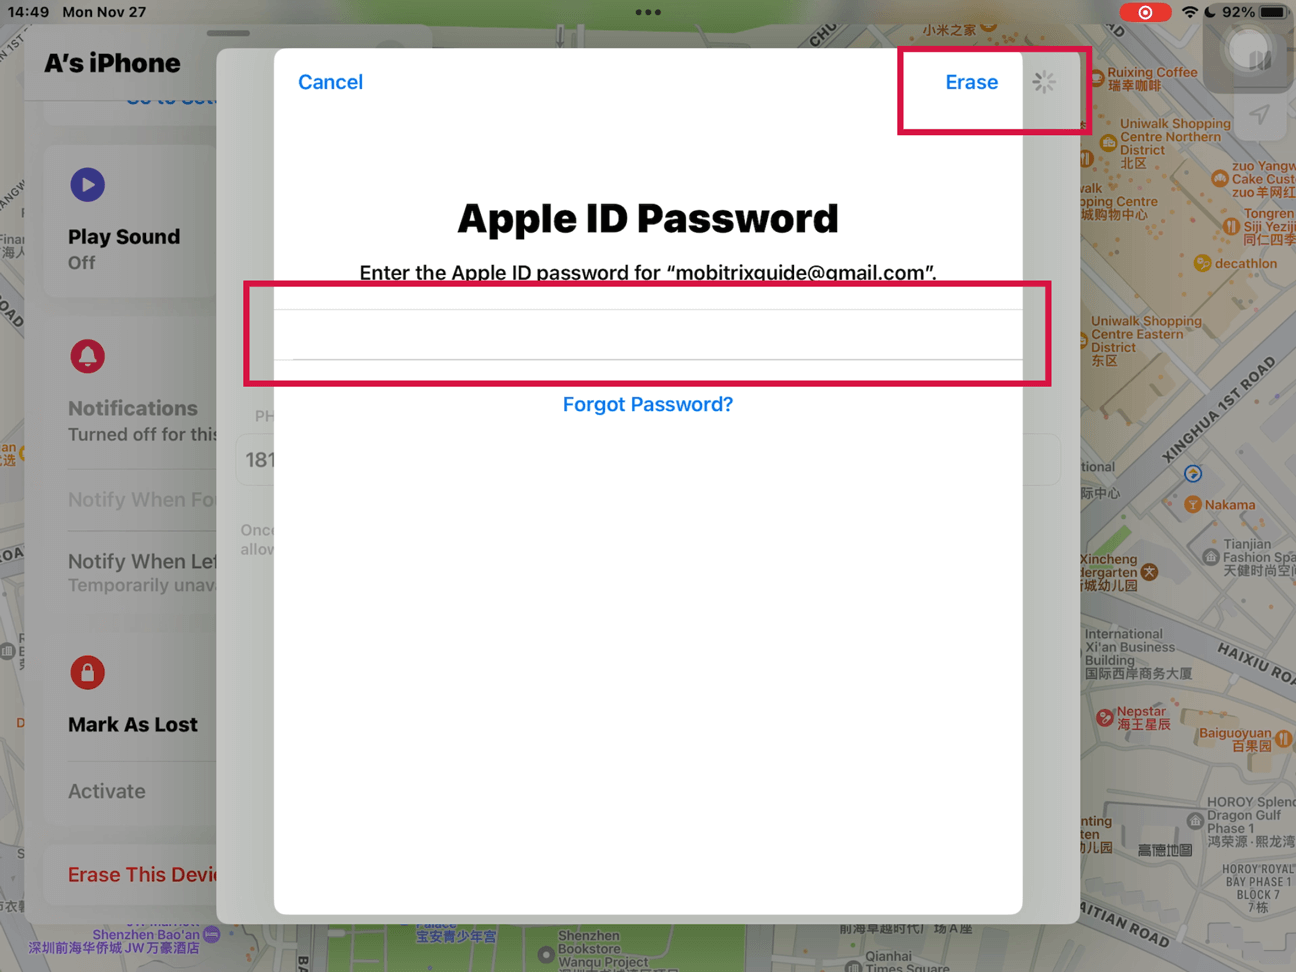
Your iPhone is now erased. Look for the progress bar on the disabled iPhone to see how it's going.
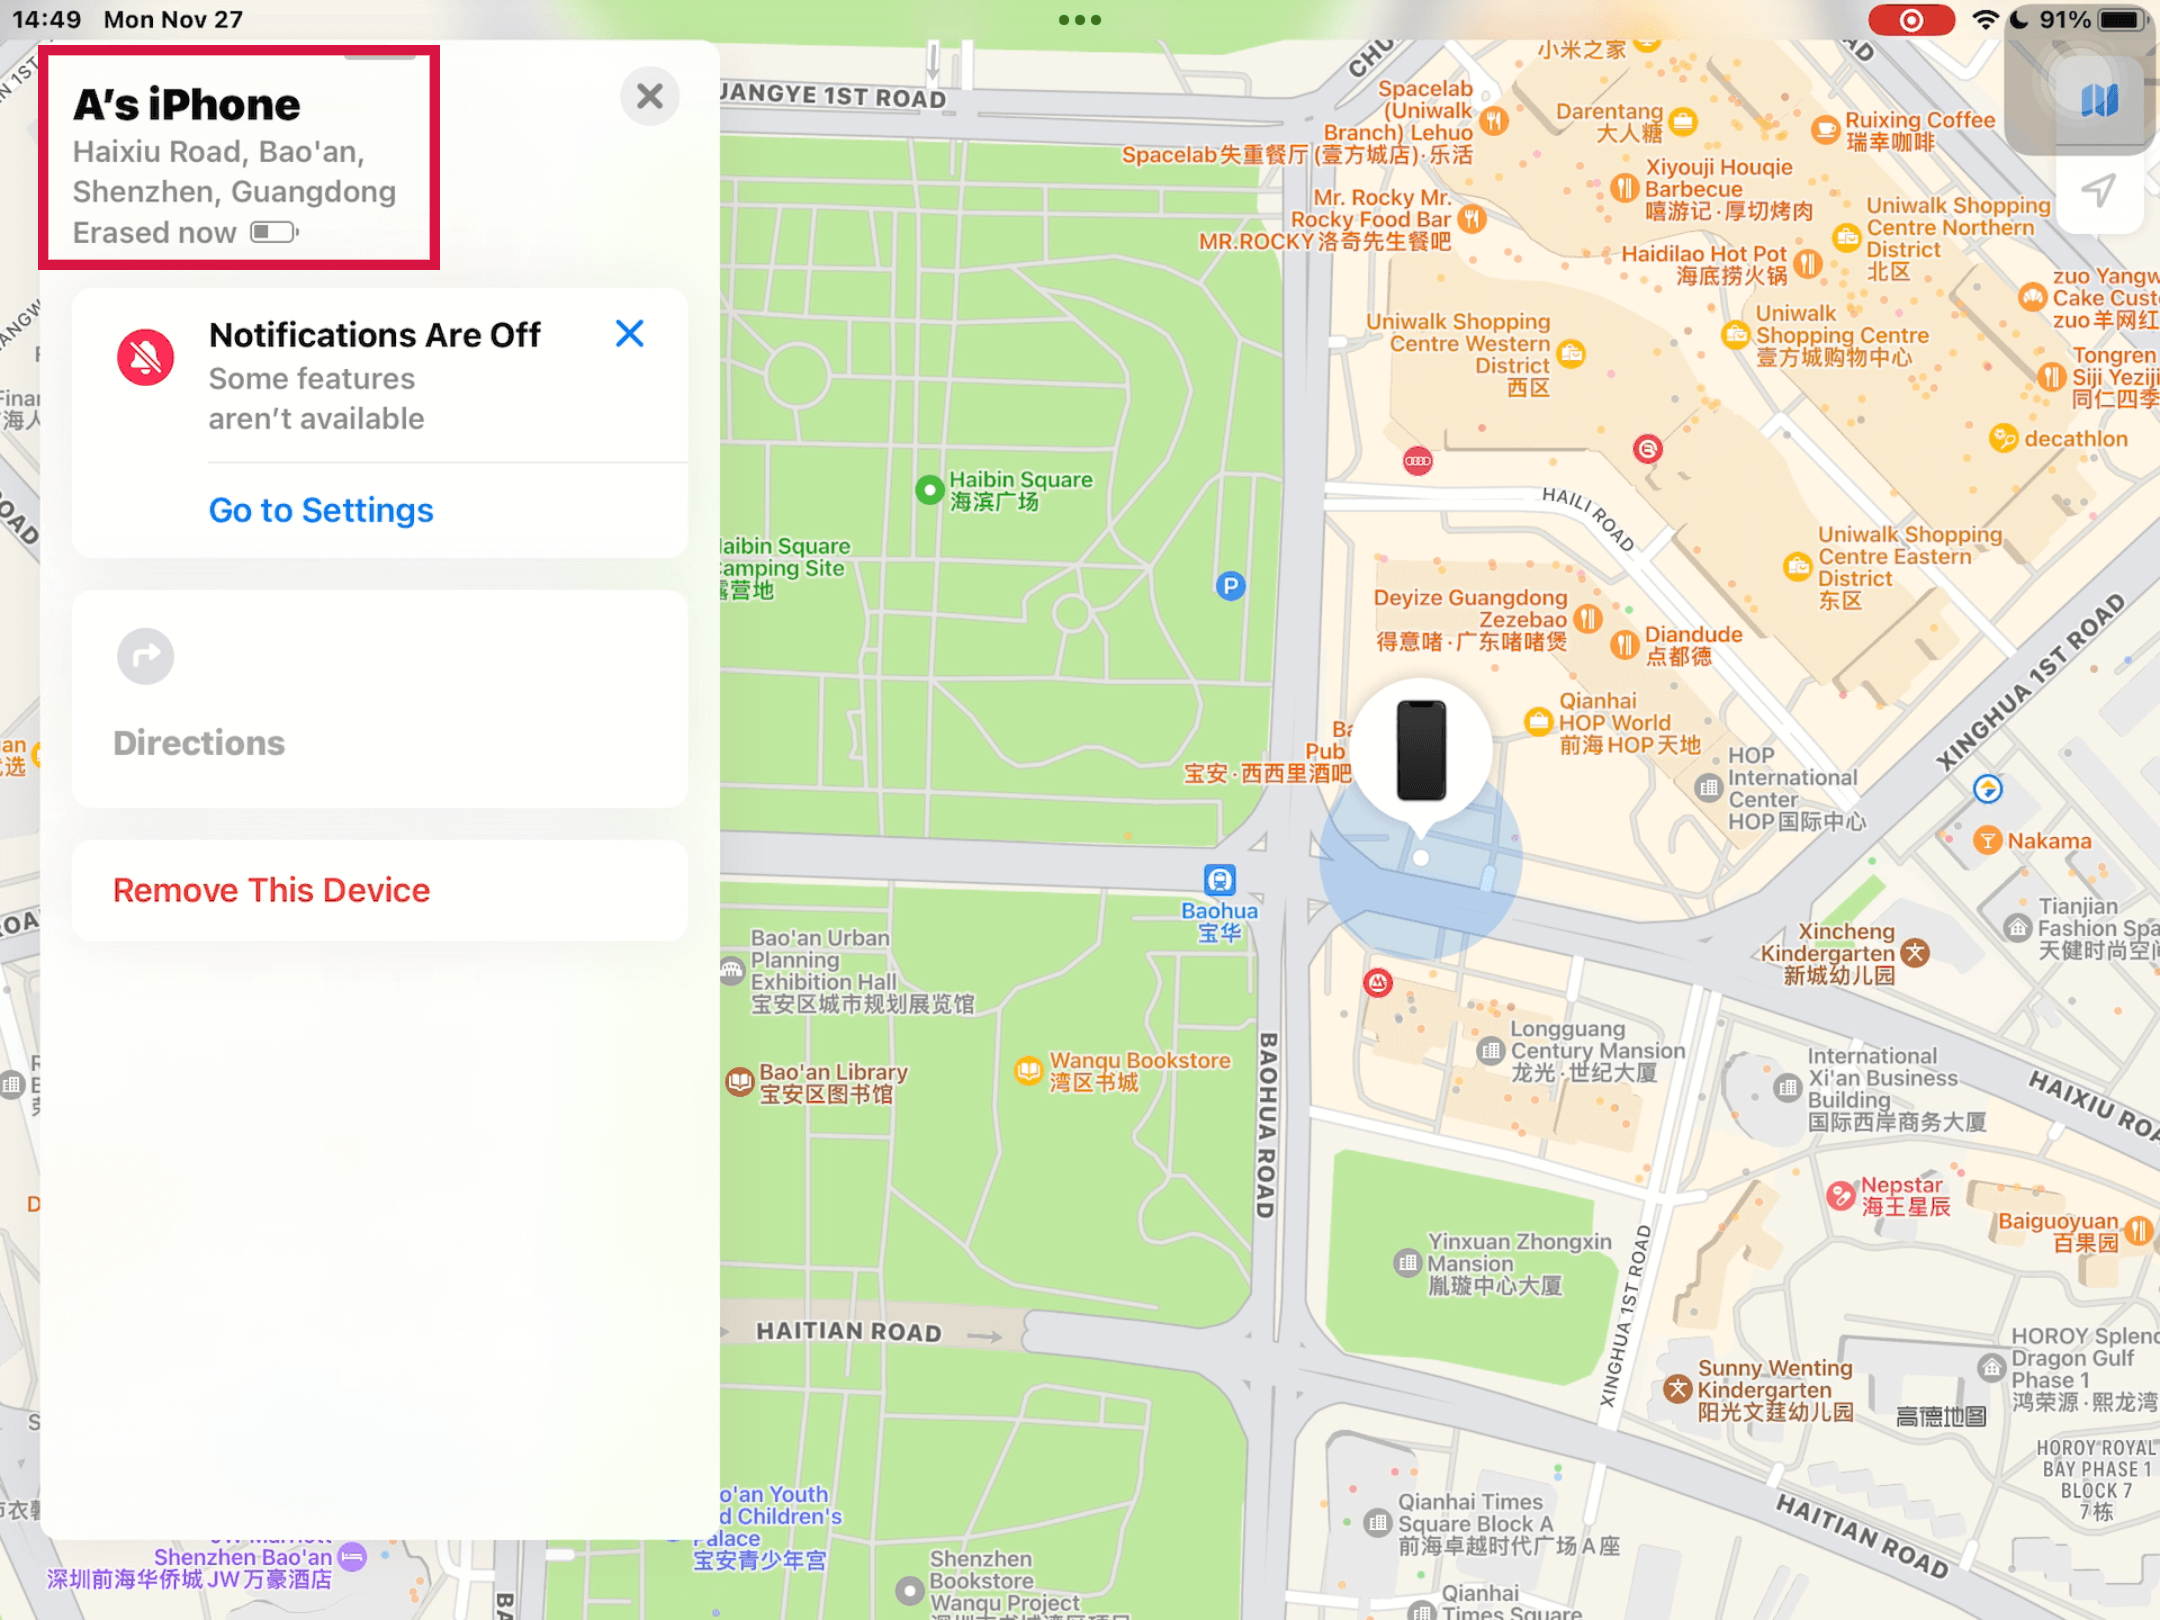
Wait for it to complete and the “Hello” screen to appear. Your iPhone will be unlocked, and you can set it up fresh.
Pros:
This is an approved, official way to reset a disabled iPhone
Easy to use, as long as you have access to another iOS device.
No need to download new software, as long as you have turned on Find My iPhone App previously
Cons:
You must use another iOS device, such as an iPad or iPhone. You cannot use this method with an Android iPhone or computer.
It will not work if you have never enabled Find My iPhone previously
You may lose some data if you have not backed up through iCloud recently
It may not work properly if your iPhone is not charged/the battery is dead
Method 4: Unlock the Disabled iPhone Via Find My iPhone (iCloud)
Find My is a free app and service to help track or trace your lost or stolen Apple devices. Additionally, Find My has an “Erase it with ease” function that you can use to unlock your disabled iPhone without iTunes. The Erase function deletes all the content, data, settings, and even the screen passcode you forgot. It allows you to set up the iPhone again.
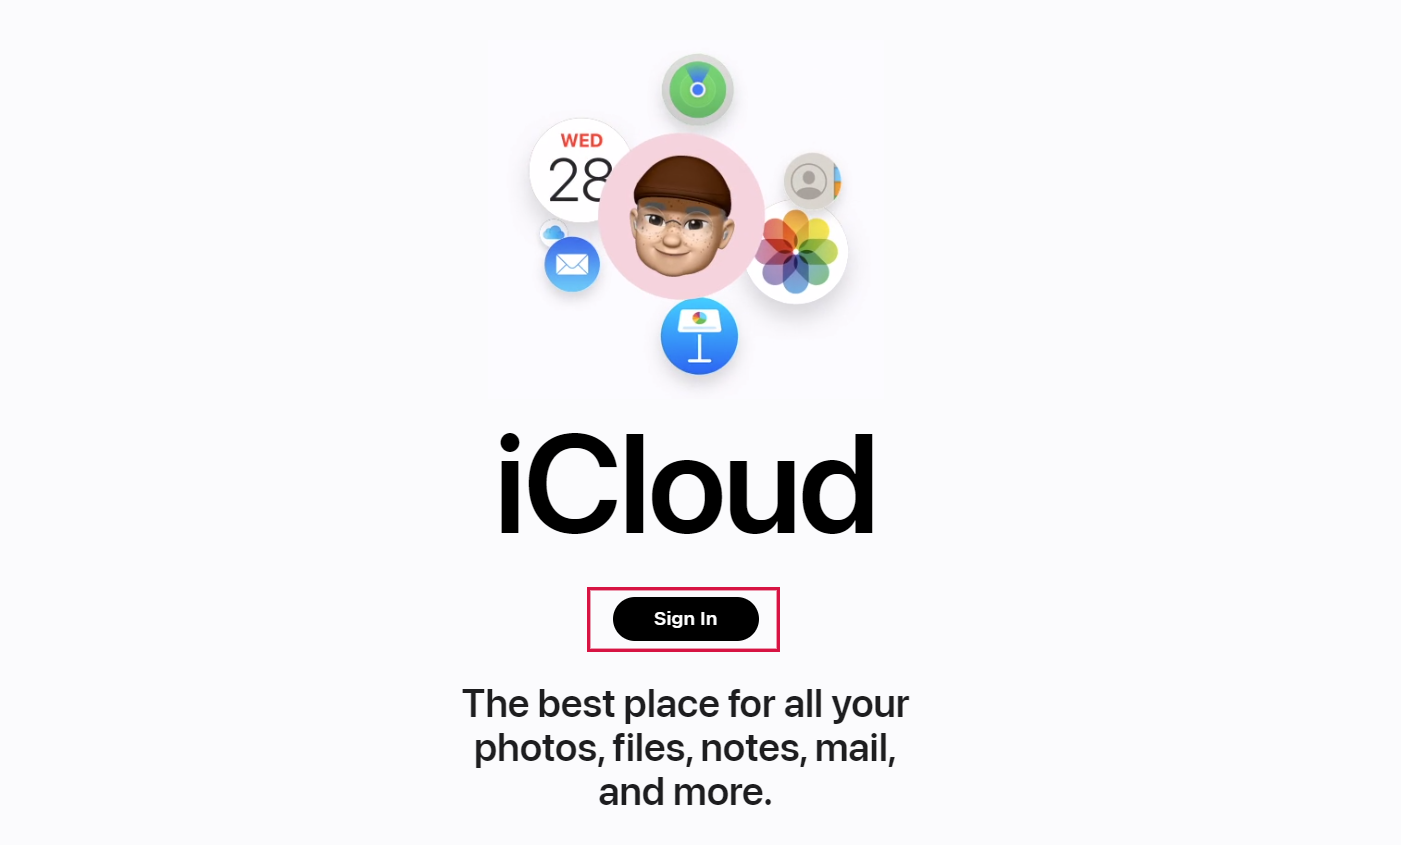
Visit the icloud.com website.
Enter your iCloud account credentials to Sign In.
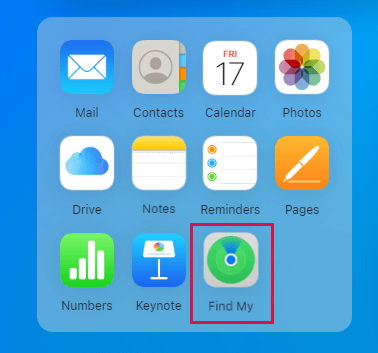
Navigate to Find My and open it.
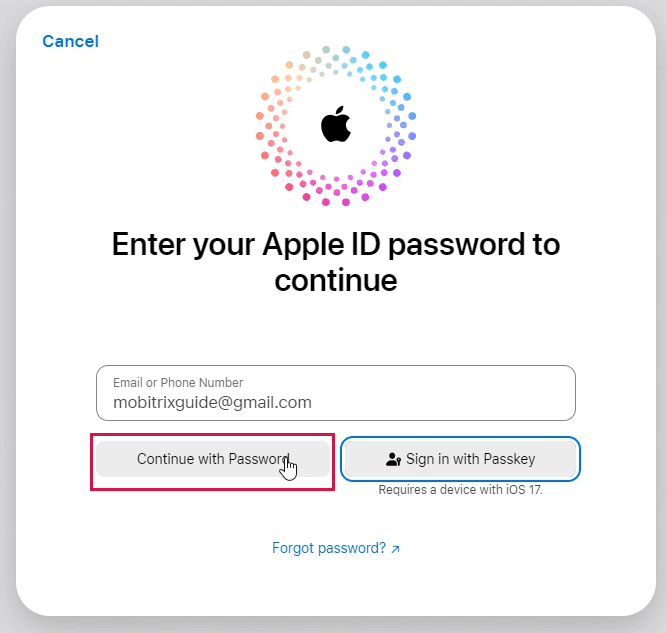
Input your Apple ID password again and tap Sign In .
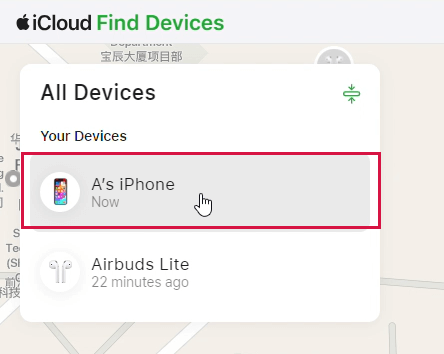
Click All Devices and select your disabled iPhone.
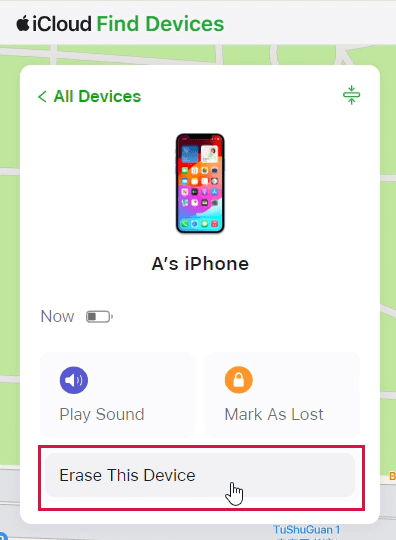
Click Erase This Device.
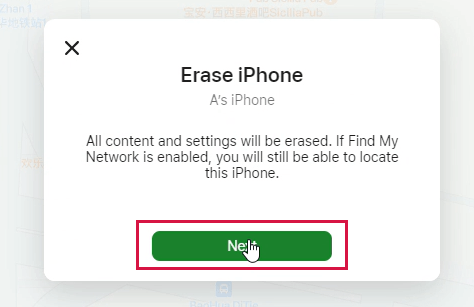
A new window will pop up—Click Next to confirm.
Enter the Apple ID email address and password linked to the locked iPhone to continue.
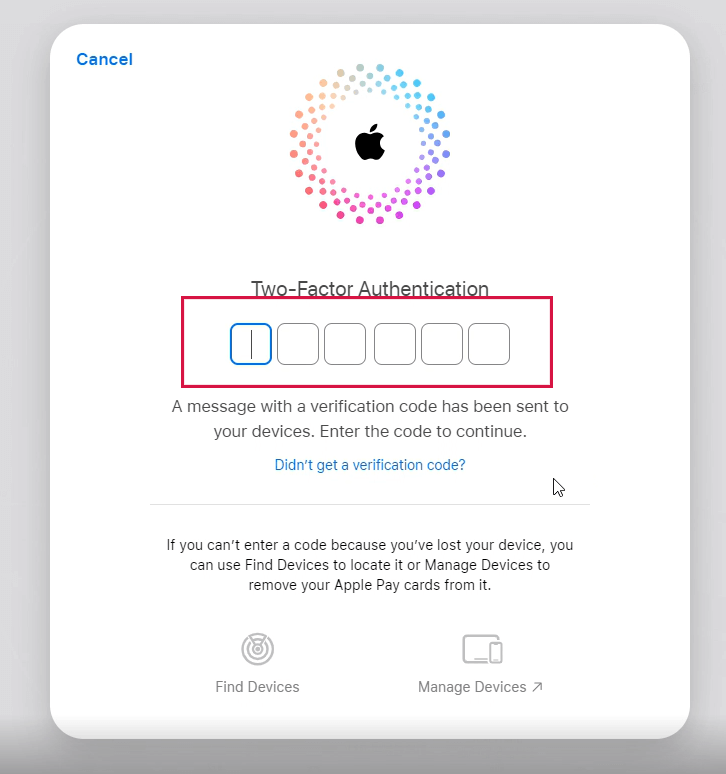
A verification code is sent to your trusted device then you can enter it in the fields provided. (If you don’t use Two-Factor Authentication, you won’t see this step)
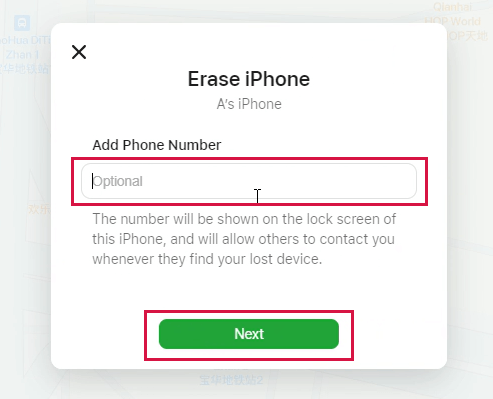
Add your phone number to get a notification after your iPhone has been erased. Click the Next button.
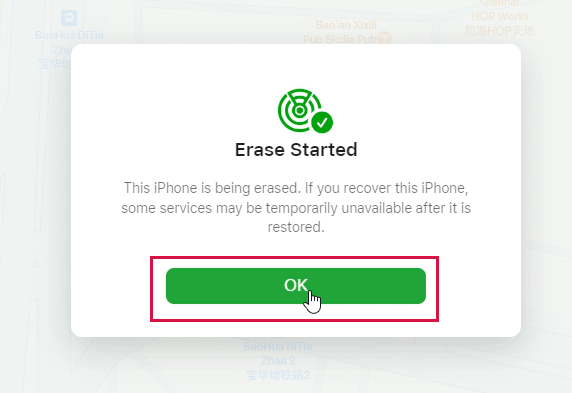
You will see a prompt saying “Erase Started” on the iCloud website. Also, a progress bar with the Apple logo will appear on your iPhone display. (If it is not connected to the internet, it won’t get erased until the next time it is online.)
Wait for the erase process to finish and your iPhone to restart. Swipe up to reset the iPhone. If you see the “iPhone Locked to Owner” message, input your Apple ID and password. Click Next, and you will have unlocked your iPhone. You can proceed to make a new passcode.
Pros:
Using Find My iPhone with iCloud is an easy and official way to unlock a disabled iPhone for free
It is convenient, there is no need to download software.
Cons:
You may have to solicit the help of a friend for their iPhone or iPad.
If you have never turned on your Find My iPhone App, then this method will not be an option for you.
You may lose some data if you have not backed up through iCloud recently
It may not work properly if your iPhone is not charged/the battery is dead
Method 5: Unlock the Disabled iPhone Via Siri
Siri, your iPhone’s personal assistant feature can do much more than just tell you the weather - it can also help you unlock a disabled iPhone! It is generally considered a type of loophole and isn’t an official method approved by Apple.
Requirement: This method only works with iPhones that run on iOS 8.0 through to iOS 10.1, devices using other systems will not have this option.
Here is how to use the Siri bug to unlock your disabled iPhone without iTunes:
Turn on Siri, and ask the time in order to turn on your iPhone’s iOS clock.
Tap the clock when it appears on your screen and select the “+” to add a new clock.
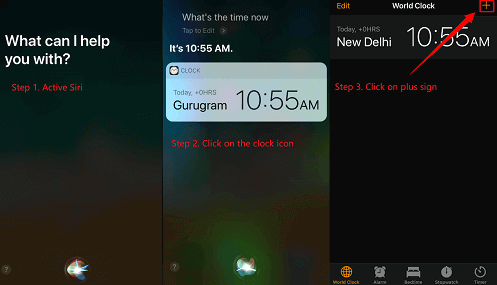
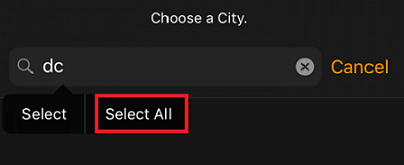
A new screen will appear and ask you to choose a city - type anything at all in this space.
Double-tap whatever you have written and “Select All”.
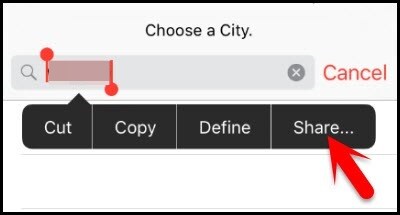
When options appear (Cut/Copy/Define/Share), choose “Share”.
Another window will appear, select the “Message” icon, when the New Message appears, type anything in the “To:” field.
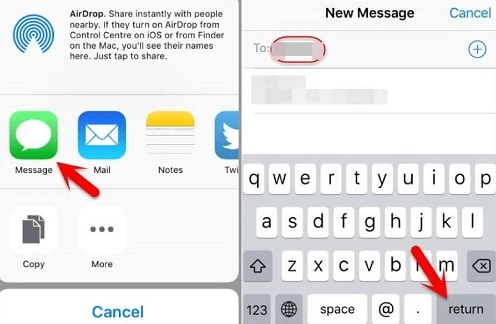
Select “Return” on your keyboard (the reverse arrow, not the swipe-screen).
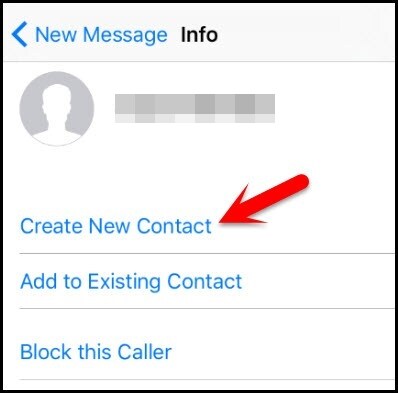
Whatever you have typed should be highlighted in green. Tap “+” for this text. From the options presented, select “Create New Contact”
Now, select “Add Photo”, then “Choose Photo”
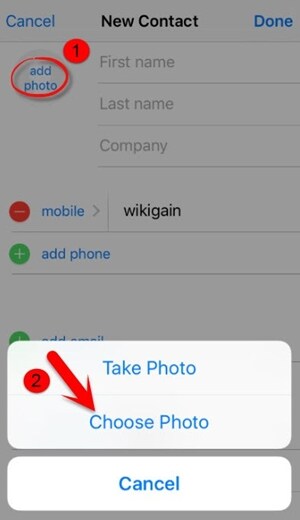
This will open your photo albums, and in doing so unlock your disabled iPhone.
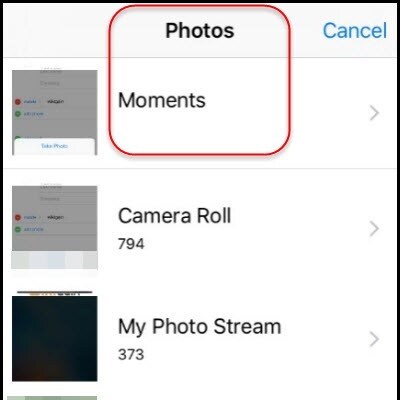
Return Home and make a new passcode that you will remember
Pros:
This option is free
It unlocks your disabled iPhone without losing data
If you follow the steps exactly, it will unlock your iPhone easily
Cons:
This method only works for iPhones running on iOS 8.0 – iOS 10.1. It will not work with other systems.
It is not an official option approved by Apple
As it is a loophole, Apple may fix this function and it will not be available in the future
Method 6: Unlock the Disabled iPhone Via Finder On Mac
If you have a Mac computer that runs on macOS Catalina, you have another option available to unlock your disabled iPhone. Finder is a feature that can unlock a disabled iPhone, as an alternative to iTunes.
To use this method, you need to have your iPhone with you and connect it to your Mac with a USB cable.
Note: this option works only with Mac computers running on macOS Catalina, not other systems.
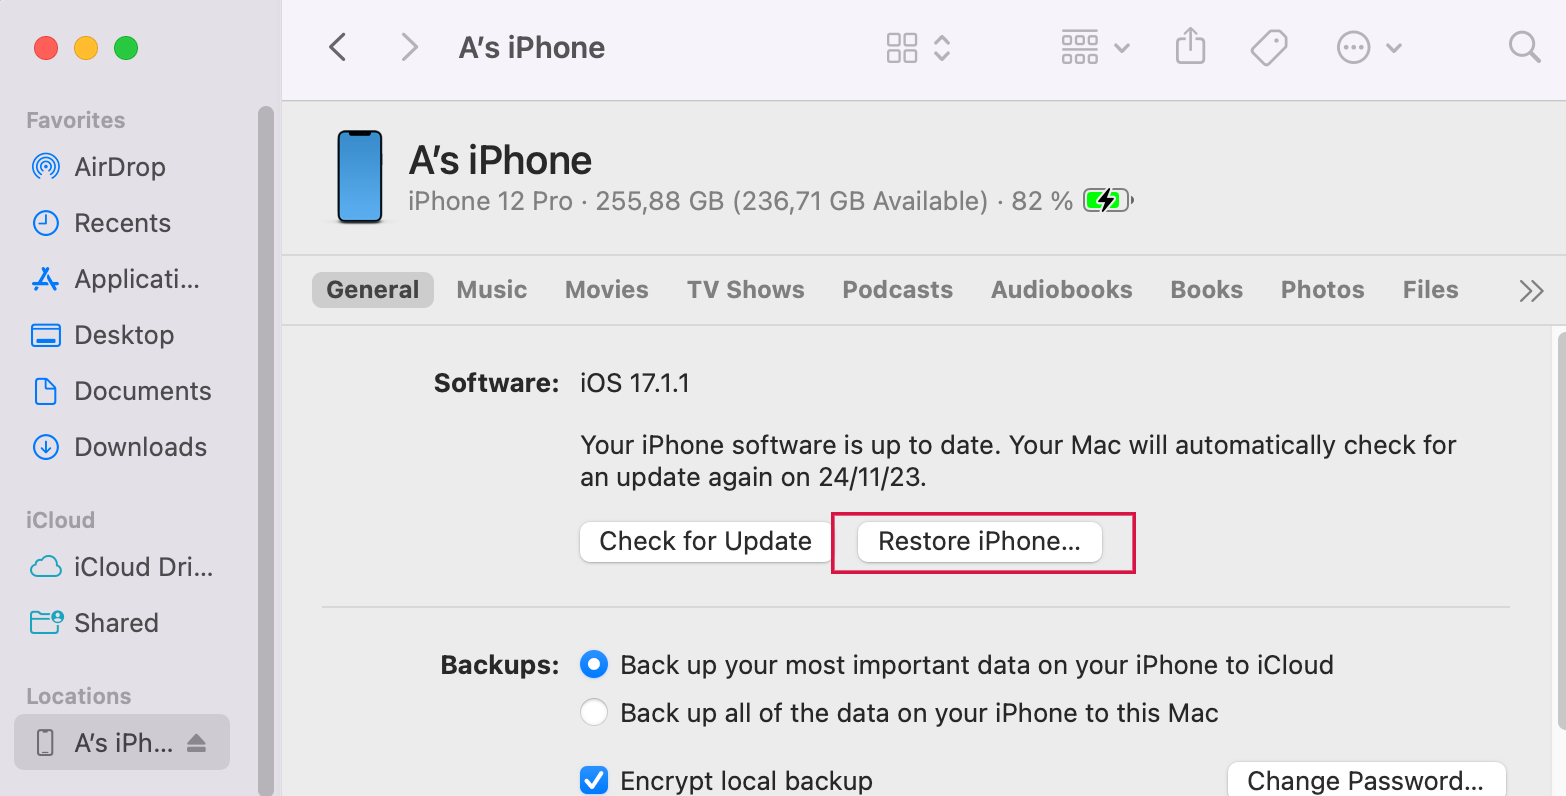
Connect your iPhone to your Mac computer with the USB cable.
Open Finder
When the recovery mode screen appears, start Recovery Mode
Then select “Restore”
When the restoration is finished, you may log in to iCloud and restore with your most recent backup
Pros:
Using Finder with MacOS Catalina is an official way to unlock disabled iPhones for free
It is a simple method with few steps
Cons:
This option only works if you have a macOS Catalina. It will not work with other computers or other systems.
Tips: Restore the data and settings after erasing iPhone
After removing the passcode, you can restore your data through backups on iCloud.
FAQs
I've forgotten my iPhone passcode, and my iPhone is now disabled. Can I use my Apple Watch to unlock it?
No. If your iPhone is disabled because you've entered the wrong passcode too many times, your Apple Watch won't be able to unlock the iPhone directly. The iPhone will require you to either wait for a period of time (which increases with each failed attempt) or reset the device if it's permanently disabled.
Can I Really Unlock a Disabled iPhone Using TikTok Methods?
There's a buzzing trend on TikTok that claims iPhones can be unlocked with a calculator or even a camera. However, tests have shown that these methods are not feasible.
Firstly, the idea of unlocking an iPhone with a calculator. No! Once your iPhone screen is locked, your operational options are limited. While you can swipe down to access the Control Center for specific settings, there's no magic button in the calculator to bypass security.
Camera Unlock? No! iPhones might appear to unlock when accessing the camera, but this is just Face ID at work. Some Androids might have vulnerabilities via the camera, but iPhones don’t.
In summary, while these TikTok videos are making waves, it's essential to approach them with skepticism. iPhone's security mechanisms are robust and not easily bypassed by these alleged methods.
How can I back up my iPhone if it’s disabled?
If your iPhone is disabled, you won’t be able to back it up directly. Nevertheless, if you had set up iCloud Backup earlier, it might have automatically saved your data. Once your iPhone is unlocked, you can use these backups for restoration.
Is there a way to unlock my iPhone and keep my data intact?
If you've previously backed up your iPhone, you can retrieve your data by restoring from that backup post-unlocking. But without a backup, the restoration process will lead to the loss of your data.
Also Read :
Summary
There are several ways to unlock a disabled iPhone without iTunes. Some are official methods, such as with iCloud, while others make use of a loophole with Apple’s Siri feature. However, the fastest way, with the fewest amount of steps involved, is to use Mobitrix LockAway. If you’re in a hurry and worried about losing data, try using LockAway to restore a disabled iPhone safely and quickly.

