User Guide of Mobitrix LockAway
New to Mobitrix LockAway? We will take care of you. Click here to know how to set up the software and complete the process.
Jailbreak the iOS Device on Windows
- Part 1: Burn jailbreak tool into USB flash drive.
- Part 2: Start to Jailbreak with USB flash drive.
- Part 3: How to boot a jailbreak system?
Burn jailbreak tool into USB flash drive
Checklist before you jailbreak the iOS device on Windows.
- Ensure your computer runs Window 7 or later, 32 or 64 bits.
- One USB flash driver with at least 2GB capacity.
- Download rufus-3.1.1.exe and checkn1x-1.1.7.iso.
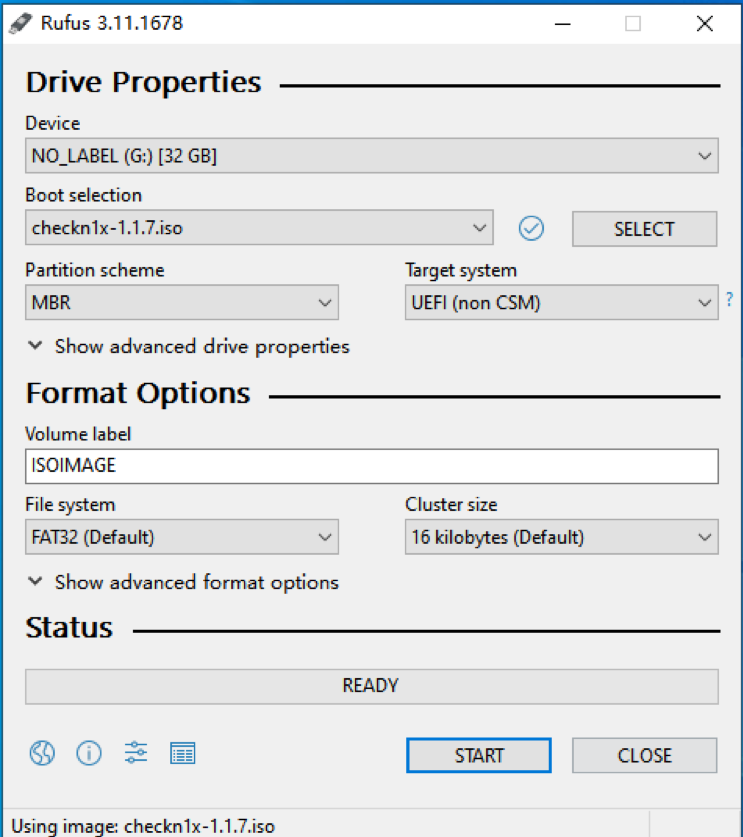
Prepare to burn the checkn1x ISO file to USB flash drive.
Step-by-step guide for the Jailbreak on Windows.
Step 1: Insert the USB drive into your Windows PC.
Step 2: Download Rufus and then click the icon to Rufus.
Step 3: Click the “SELECT” button to find the downloaded checkn1x ISO file. Keep defaults setting and click "START" button.
Step 4: When you see pop-up message, you will need to for format the USB drive at this step (please back up your USB drive if necessary). Select "Write in DD Image mode" and click "Ok" to continue.

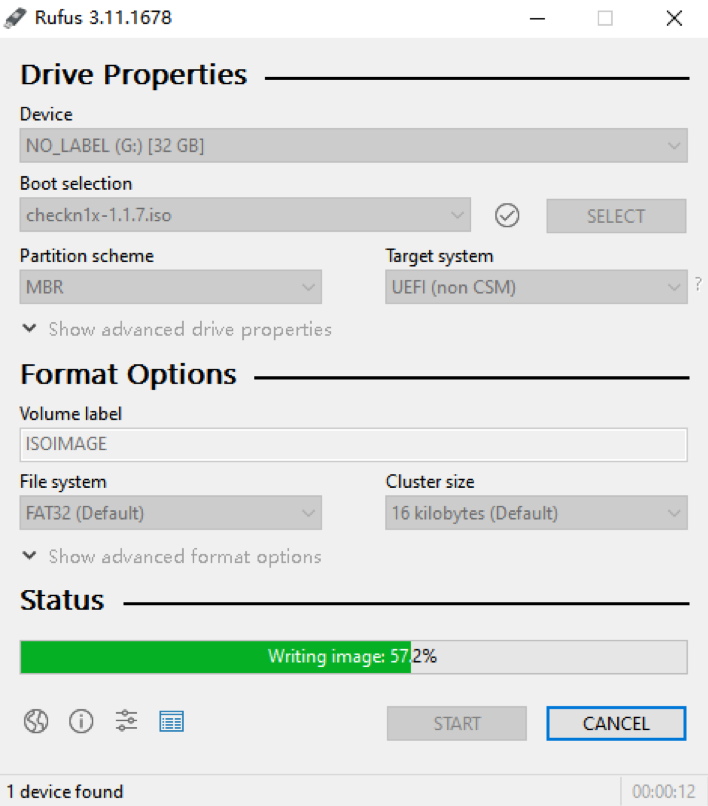
Step 5: Please wait for 2 to 3 minutes. Rufus is now burning checkn1x ISO file to your USB drive.
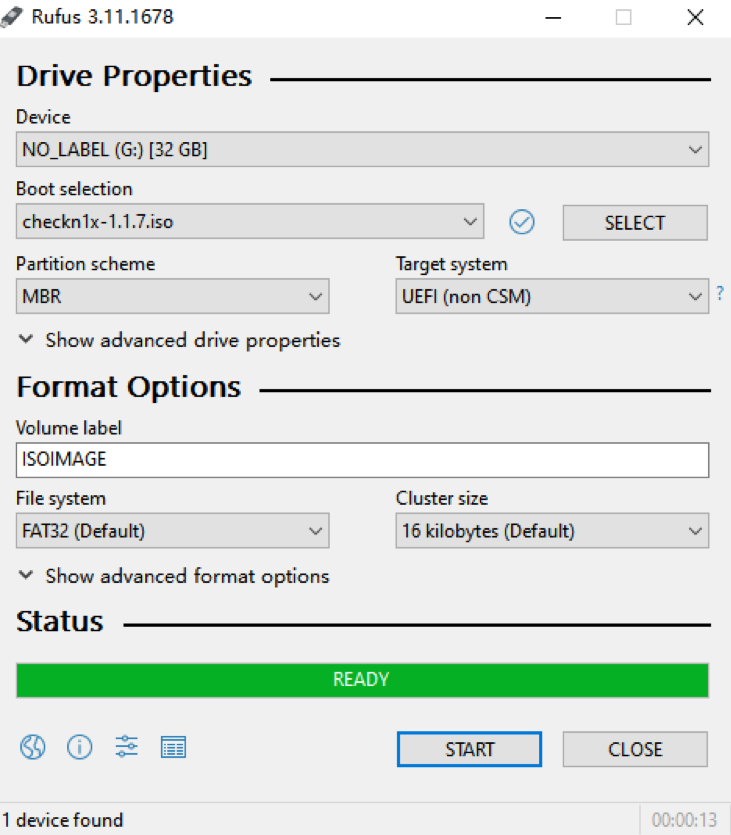
Step 6: After the burning process completed, click the "CLOSE" button.
- Please remove and re-insert the USB drive once you have burned the checkN1x ISO file. Or Windows might not recognize your USB drive.
Start to Jailbreak with USB flash drive.
Insert the USB flash drive you burned into your PC.
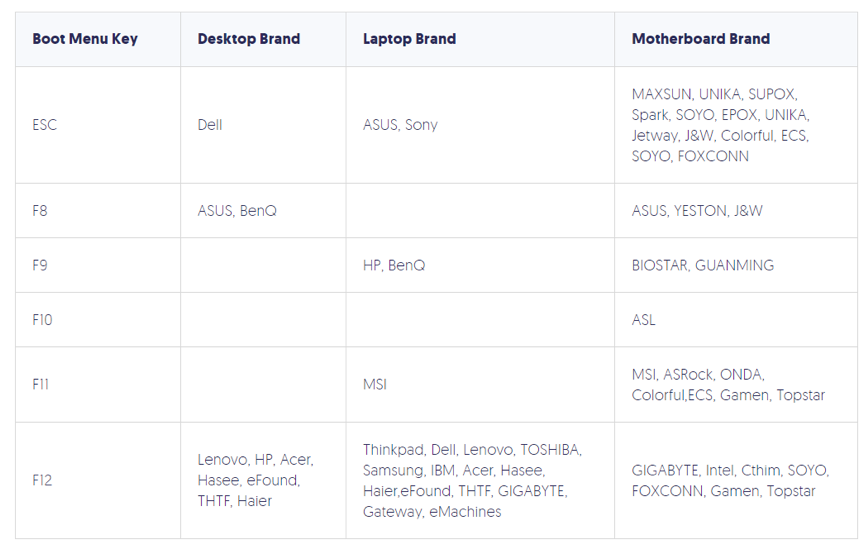
Step 1: Restart your computer. During the restarting, keep press F12 before entering the system (Boot Menu).
- For most computer brands, the shortcut key is F12 to enter the "Boot Menu". If F12 is doesn’t work, please check the following "Boot Menu" shortcut list.
- If you cannot boot your system properly, please refer to "How to boot a jailbreak system".
- If you tried the above instruction and still cannot enter the "Boot Menu", you may enter the COMPUTER BIOS/UEFI and modify the system Boot Settings in Linux Checkra1n environment.
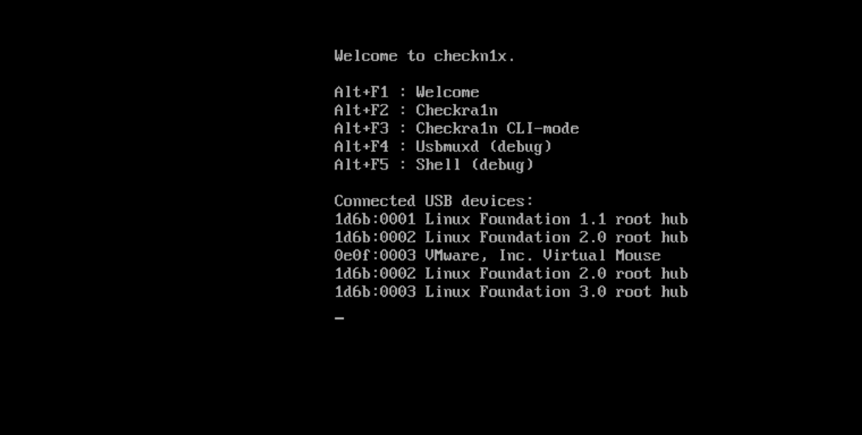
Step 2: In the startup window, select the USB flash drive which has checkn1x ISO file on it.
Step 3: After booting via USB drive, you will need to press Alt+F2 to launch Checkra1n.
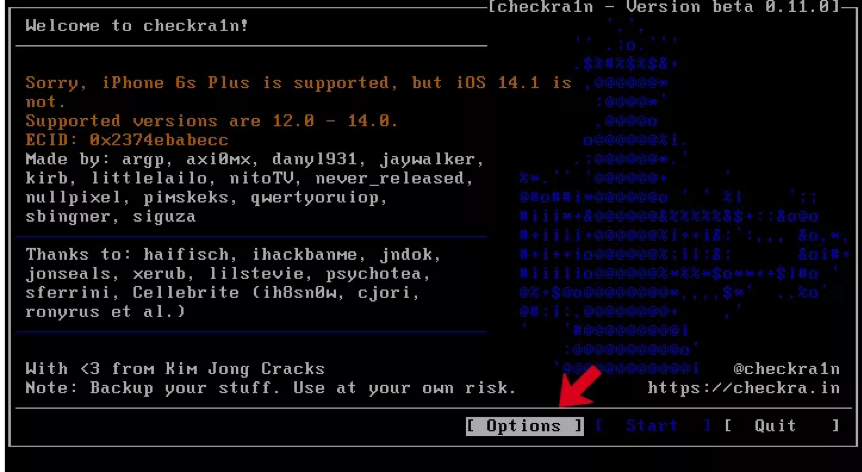
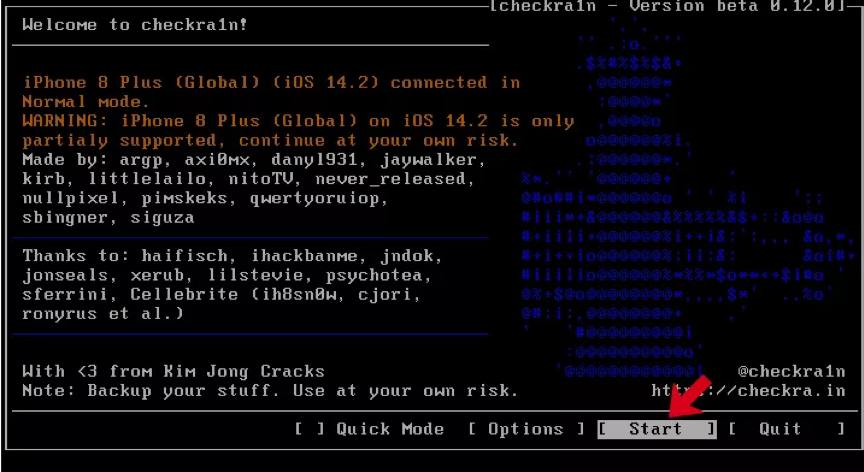
Step 4: Please launch Checkra1n and then connect your iOS device to PC. Using arrow keys from the keyboard to select "Options" and press Enter key to configure the jailbreak tool.
Step 5: In the "Options" menu, using arrow keys from the keyboard to select “Allow untested iOS/iPadOS/tvOS versions” and press Enter key to select it.
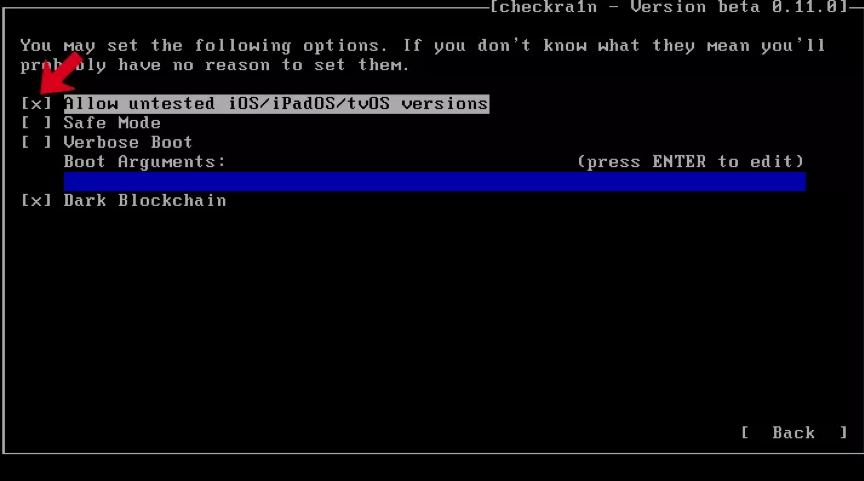
Step 6: Go to "Skip A11 BPR check" and press Enter key to select.

- If you have an iPhone 8/8 Plus/ X with iOS 14 system, you need to check "Skip A11 BPR check" box.
- You cannot jailbreak an iPhone 8/8 Plus/ X which running iOS 14(with lock screen passcode). If your device has lock screen passcode, please first update of the firmware, and then re-try the jailbreak process.
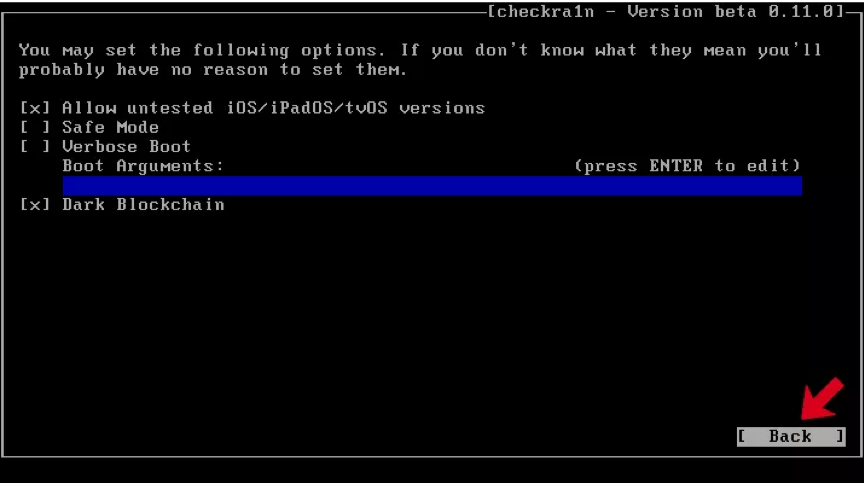
Step 7: Select "Back" button and press Enter key to return the main menu.
Step 8: Click the "Start" button and press Enter key to jailbreak your iOS device.
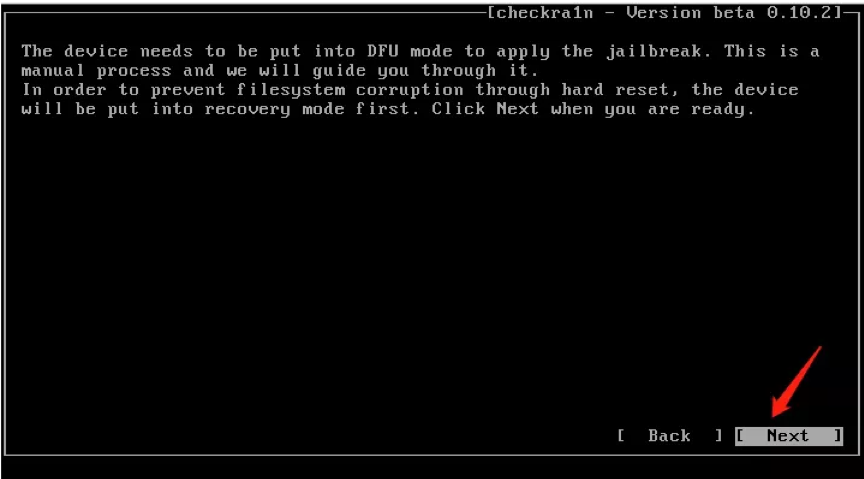
Step 9: CheckN1x requires the DFU mode of your device during the jailbreak. Please select "Next" and follow the guide to enter DFU mode.
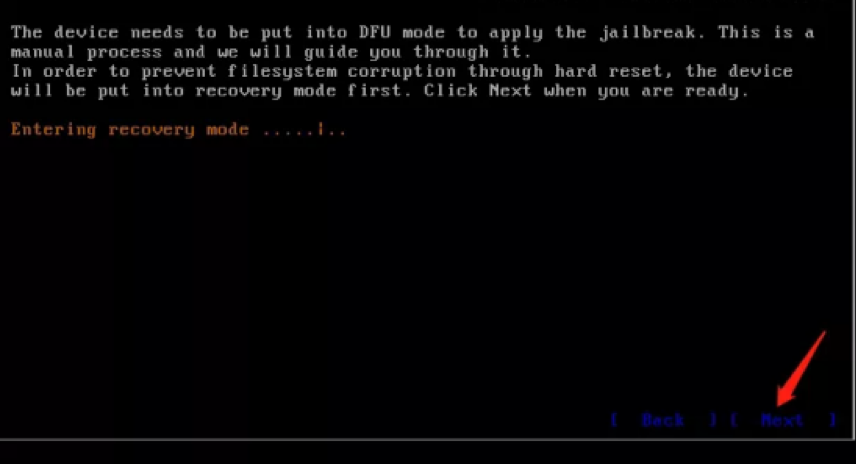
Step 10: Select "Next" option and Checkn1x will automatically set your iOS device into recovery mode.
Step 11: Select the "Start", and then follow the instructions on Checkn1x to enter DFU mode of your iOS device.
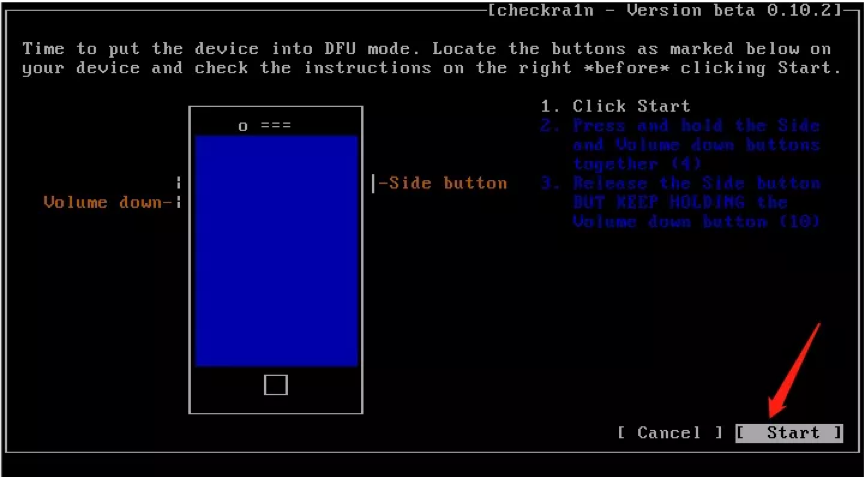
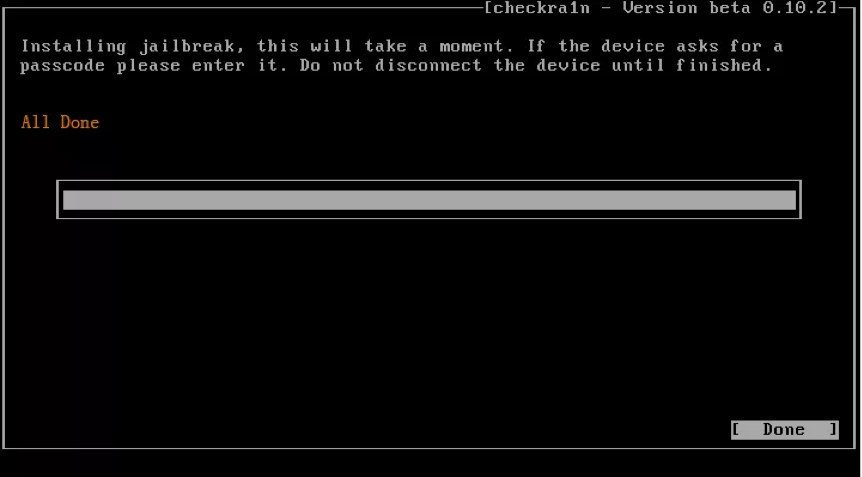
Step 12: Once you enter DFU mode, Checkn1x will automatically jailbreak your device. Please select "Done" and unplug the USB drive after the jailbreak process completed.
- If you get stuck during the jailbreak:
Change a different USB drive and re-do the jailbreak.
Restart your iOS device and PC. Re-try the jailbreak followed by the instruction above. - If jailbreak failed:
Re-inset your iOS device to another USB port and try it again. - iPhone 8/8 Plus/X in iOS 14 system and above:
You need to first find the “activation lock” screen (by rooting your device), and then jailbreaking your device.
How to boot a jailbreak system?
Enter the COMPUTER BIOS/UEFI and modify the system Boot Entry Settings in Linux Checkra1n environment.
PC with UEFI/BIOS firmware
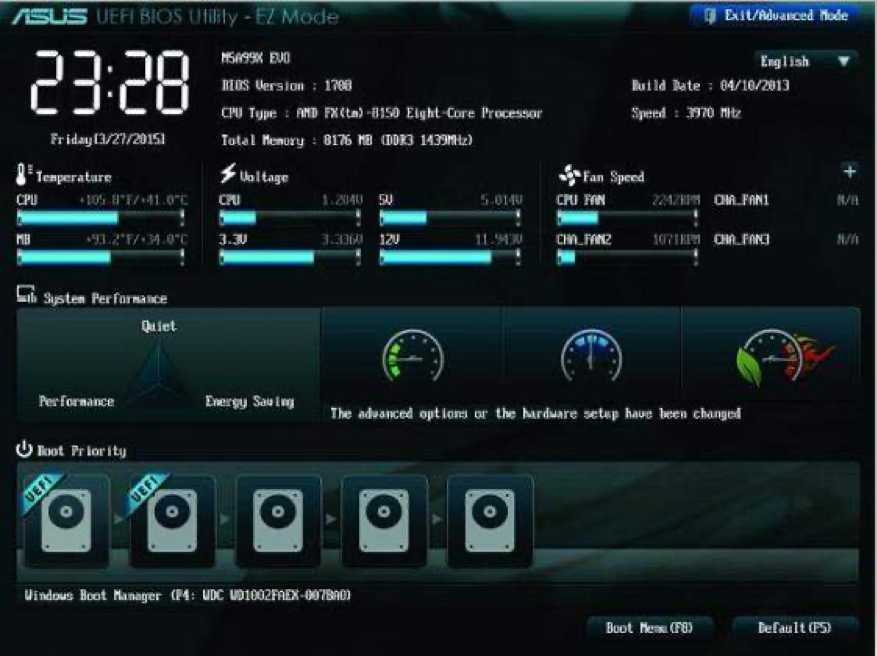
We will take ASUS frame as an example. Power-on your PC and press UEFI key (F2/DEL) to enter “UEFI BIOS Utility” menu.
Step 1: Click "Exit/Advanced Mode" and press OK to confirm your action.
Step 2: Select “BOOT” in the sub-menu and find the "Boot Option Priorities". Under this section, choose "Boot Option #1" and press Enter key to select.
Step 3: On the pop-up windows, choose "USB flash drive" and press Enter key from your keyboard to confirmed.
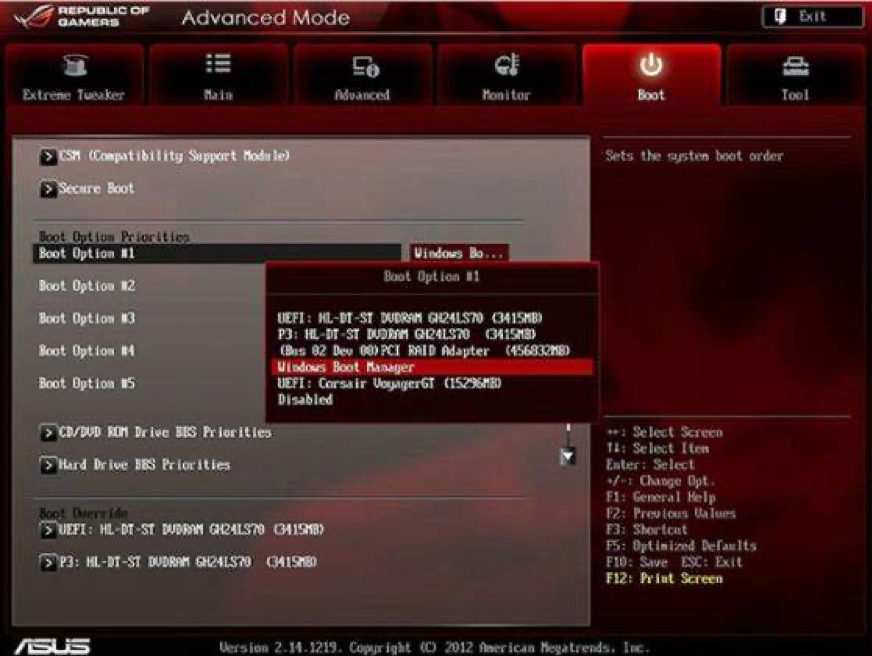
- In this step, you will need to choose the USB drive with burned ISO file.
Step 4: Press “F10” key and save all changes.
PC with BIOS firmware
For Windows PC with BIOS.
Step 1: Insert the USB drive.
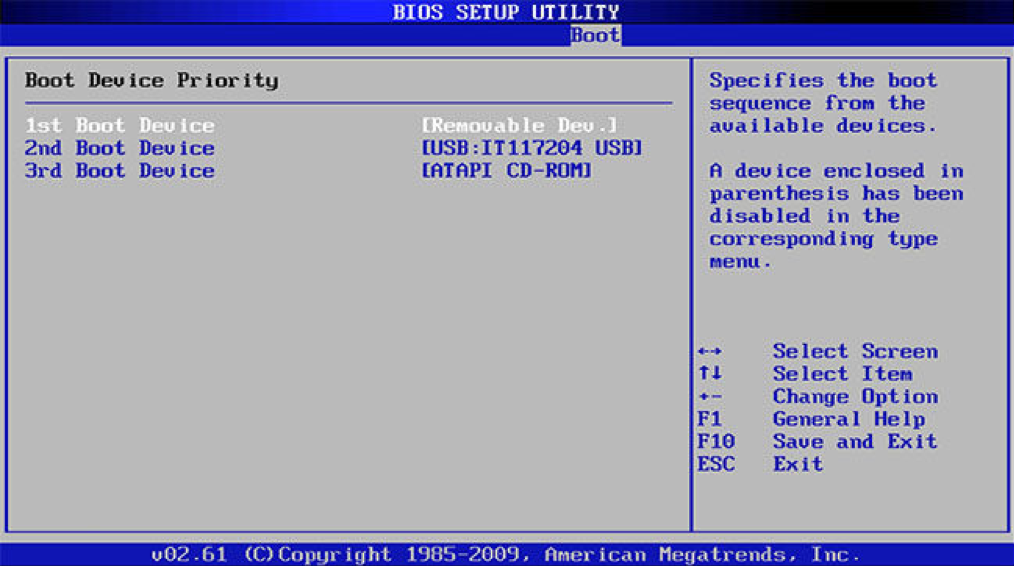
Step 2: Restart your PC and press BIOS key (F2/Esc/DEL) to enter "Profiles Setup Utility".
Step 3: Go to "Boot Choice" section and choose "Boot Device Priority". Choose "USB booter or USB HDD" as "1st Boot Device".
Step 4: Lastly, Press “F10” key from the keyboard to save all changes.