
Have you just been hit with the "Verification failed. There was an error connecting to your Apple ID" message while trying to log into iTunes or the Apple Store? I experienced it recently too and it completely ruined my mood. Fortunately, I know exactly how to solve the problem. Read on. I will show you multiple methods to solve this error in no time. Troubleshooting usually works best when you move from the simplest checks to the more disruptive fixes.
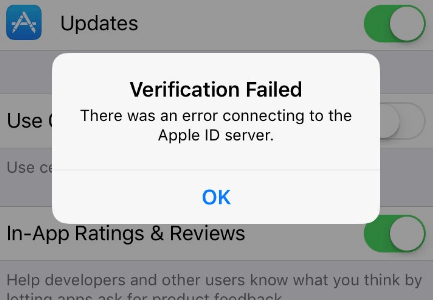
Error connecting to Apple ID server
What Does Apple ID Verification Error Mean?
Usually, it means that, for some reason, your iPhone can’t connect to Apple’s iCloud verification servers. This could be because Apple’s servers are temporarily down or there’s an issue with your iPhone such as time, poor connection, location settings, etc. If one step does not change the behavior, move on instead of repeating it several times.
This error message is more common than you think, so don’t be alarmed. Simply carry out the methods below and you would get a solution. If a step looks different on your device, the app version is usually the first thing to compare before assuming the feature is missing.
Check The Status of Apple Server
Sometimes, the Apple server can be unavailable either due to maintenance or for other reasons, and this causes an error message to pop up when you try to connect to Apple’s ID server. A quick check of the device model, software version, and account state usually explains why the same menu looks different on another device.
This is why you should always confirm first that all Apple services such as Apple Fitness+, Apple News+, iCloud., etc., are functioning and active. You can visit apple.com/support/systemstatus to find out the services that are available in realtime.
If the problem is from Apple’s servers, then it isn’t your fault. Just be patient and retry once Apple servers are back online.
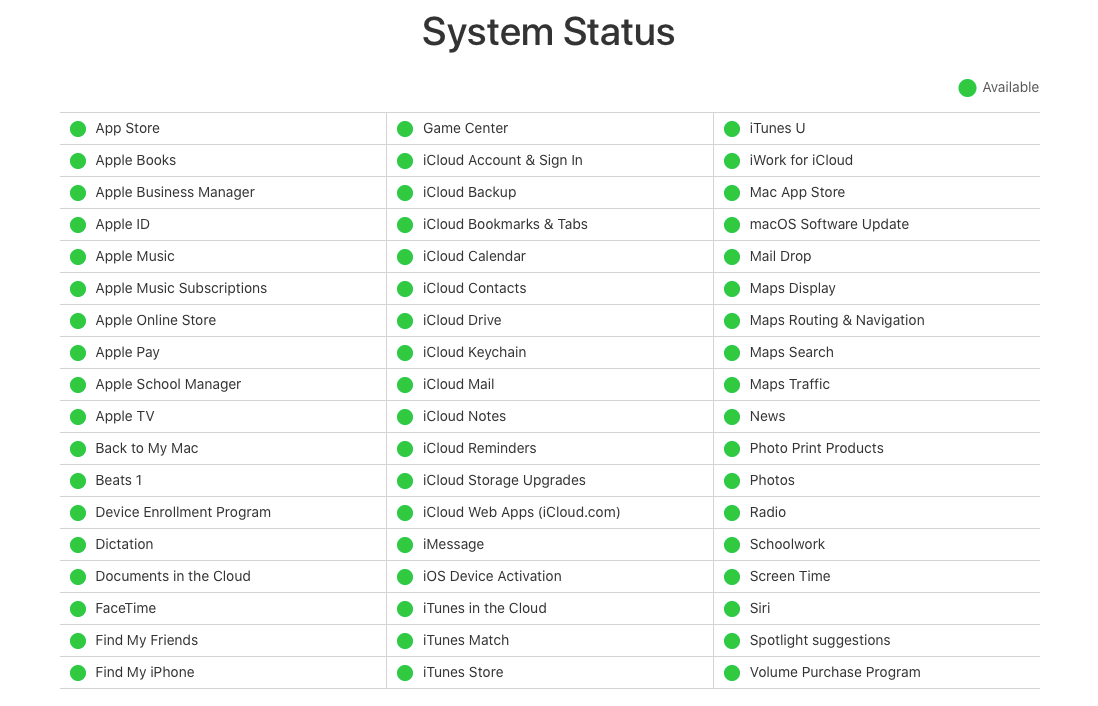
Check Apple server status
Inspect Your Network
Another cause of the error could be poor network or that your Settings app, through which you connect to Apple’s servers, can’t access WLAN and mobile data. This sometimes happens after an iOS update. It is a useful fallback when the default iPhone editor does not give you enough control over the final clip.
You can confirm this by going to theSettingsapp >Wi-Fi (WLAN)>Apps using WLAN and Mobile Data.If the Settings app access has been disabled, you can simply turn it back on. If you use cellular data, try switching to Wi-Fi or a different hotspot. That gives you another route if the built-in iPhone tools feel too limited for the result you want.
To test whether the problem is from your network, you can check your WiFi connectivity by loading any website of your choice on the internet. If it takes a while to load, then it's a sure sign that your internet connection isn't strong. You could also visit https://www.speedtest.net to check your iPhone’s WiFi speed on your browser.
If that’s the case, try rebooting the wireless router you're connected to. Under WLAN in the settings app, tap the current Wi-Fi and select "forget," then reconnect to the Wi-Fi. If the problem isn’t solved, you may need to switch to another Wi-Fi connection.
Turn off VPN
If after the above checks, you’ve discovered that your network isn’t the source of the problem, you should try turning off your VPN. This restricted network could be responsible for the error message because a VPN reroutes and encrypts your connection, which could affect your connection to your Apple ID.
A simple way to resolve this is by turning off all VPN settings on your iPhone. Follow these steps to do so: so the next part of the process is easier to complete without backtracking. That matters when you only want one part of the video to play back slower while the rest keeps its normal speed.
- Open the Settings app on your smartphone.
- Select General
- Select VPN and turn it off.
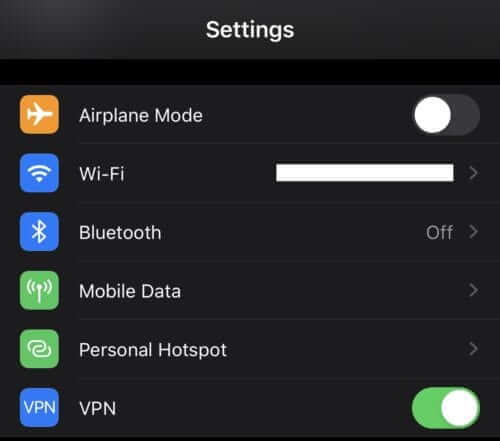
Turn off VPN on your iPhone
Reset Network Settings
The error could also be due to cached data stored up from your network usage, or your network settings are no longer compatible with your recent update.
By resetting your network settings, such issues will be fixed and the error message should stop appearing. But note that you will lose your current network settings, Wi-Fi password, and saved networks in the process. Here are the steps if you still wish to go ahead:. That makes it easier to keep a copy of the edited result and post it right away from the same device.
- Open theSettingsapp on your iPhone/iPad so the next part of the process is easier to complete without backtracking.
- Go toGeneraland scroll down till you arrive atResetso the next part of the process is easier to complete without backtracking.
- SelectResetand chooseReset Network Settingsfrom the available options so the next part of the process is easier to complete without backtracking. You may be required to input your Wi-Fi password to complete this step. This is useful when the speed change should affect only one section instead of forcing the whole clip to slow down.
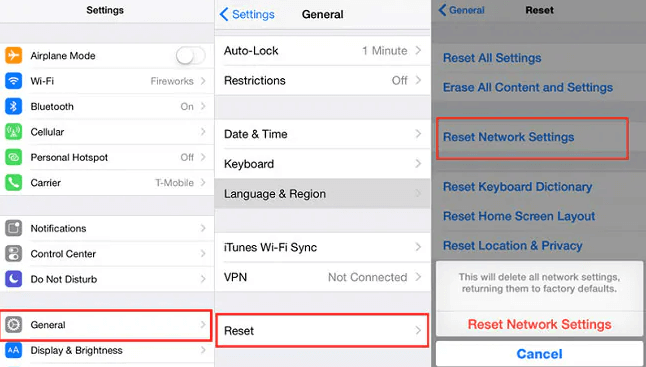
Reset network settings on an iPhone
Once the reset is finished, proceed to restart your device and check to see if the problem has been solved.
Get a Verification Code from Apple
If the verification error occurred due to a temporary glitch or because your iPhone couldn’t sync with Apple’s servers, then signing in from iCloud on another device is a way out.
But you will need to generate a verification code from Apple to do this. This code is what you'll use to confirm your login. Follow these steps to generate a verification code so the next part of the process is easier to complete without backtracking. It gives you finer control when only one moment should stay slow and the rest of the recording should play normally.
- Open theSettingsapp and go toApple ID so you can confirm the device is tied to the correct account before you continue.
- Select Password and Security
- click GetVerification Code. Usethe code generated to sign in to your Apple ID account through iCloud so you can make changes before exporting the final version.

Get a verification code from Apple
Sign out of Apple ID and Retry Login
Once you've confirmed that the issue isn't with Apple servers and your network connection is strong enough, you might need to simply sign out of your Apple ID and sign back in. This way, any minor glitch or bug leading to the error message might be erased.
Here are the steps to signing out of Apple ID
- Open theSettingsapp on your iPhone and click your name at the top so the next part of the process is easier to complete without backtracking.
- Scroll down to the end and selectSign out.
- A pop-up will appear asking you to save a copy of your data locally on the phone. SelectKeep a Copyso the next part of the process is easier to complete without backtracking. Nonetheless, if you don’t, the data will still be accessible from iCloud. This helps when you want to export the clip, send it quickly, and avoid another round of cleanup edits.
- tap Signout soyou can make changes before exporting the final version. Then choose to sign back in with your Apple ID.
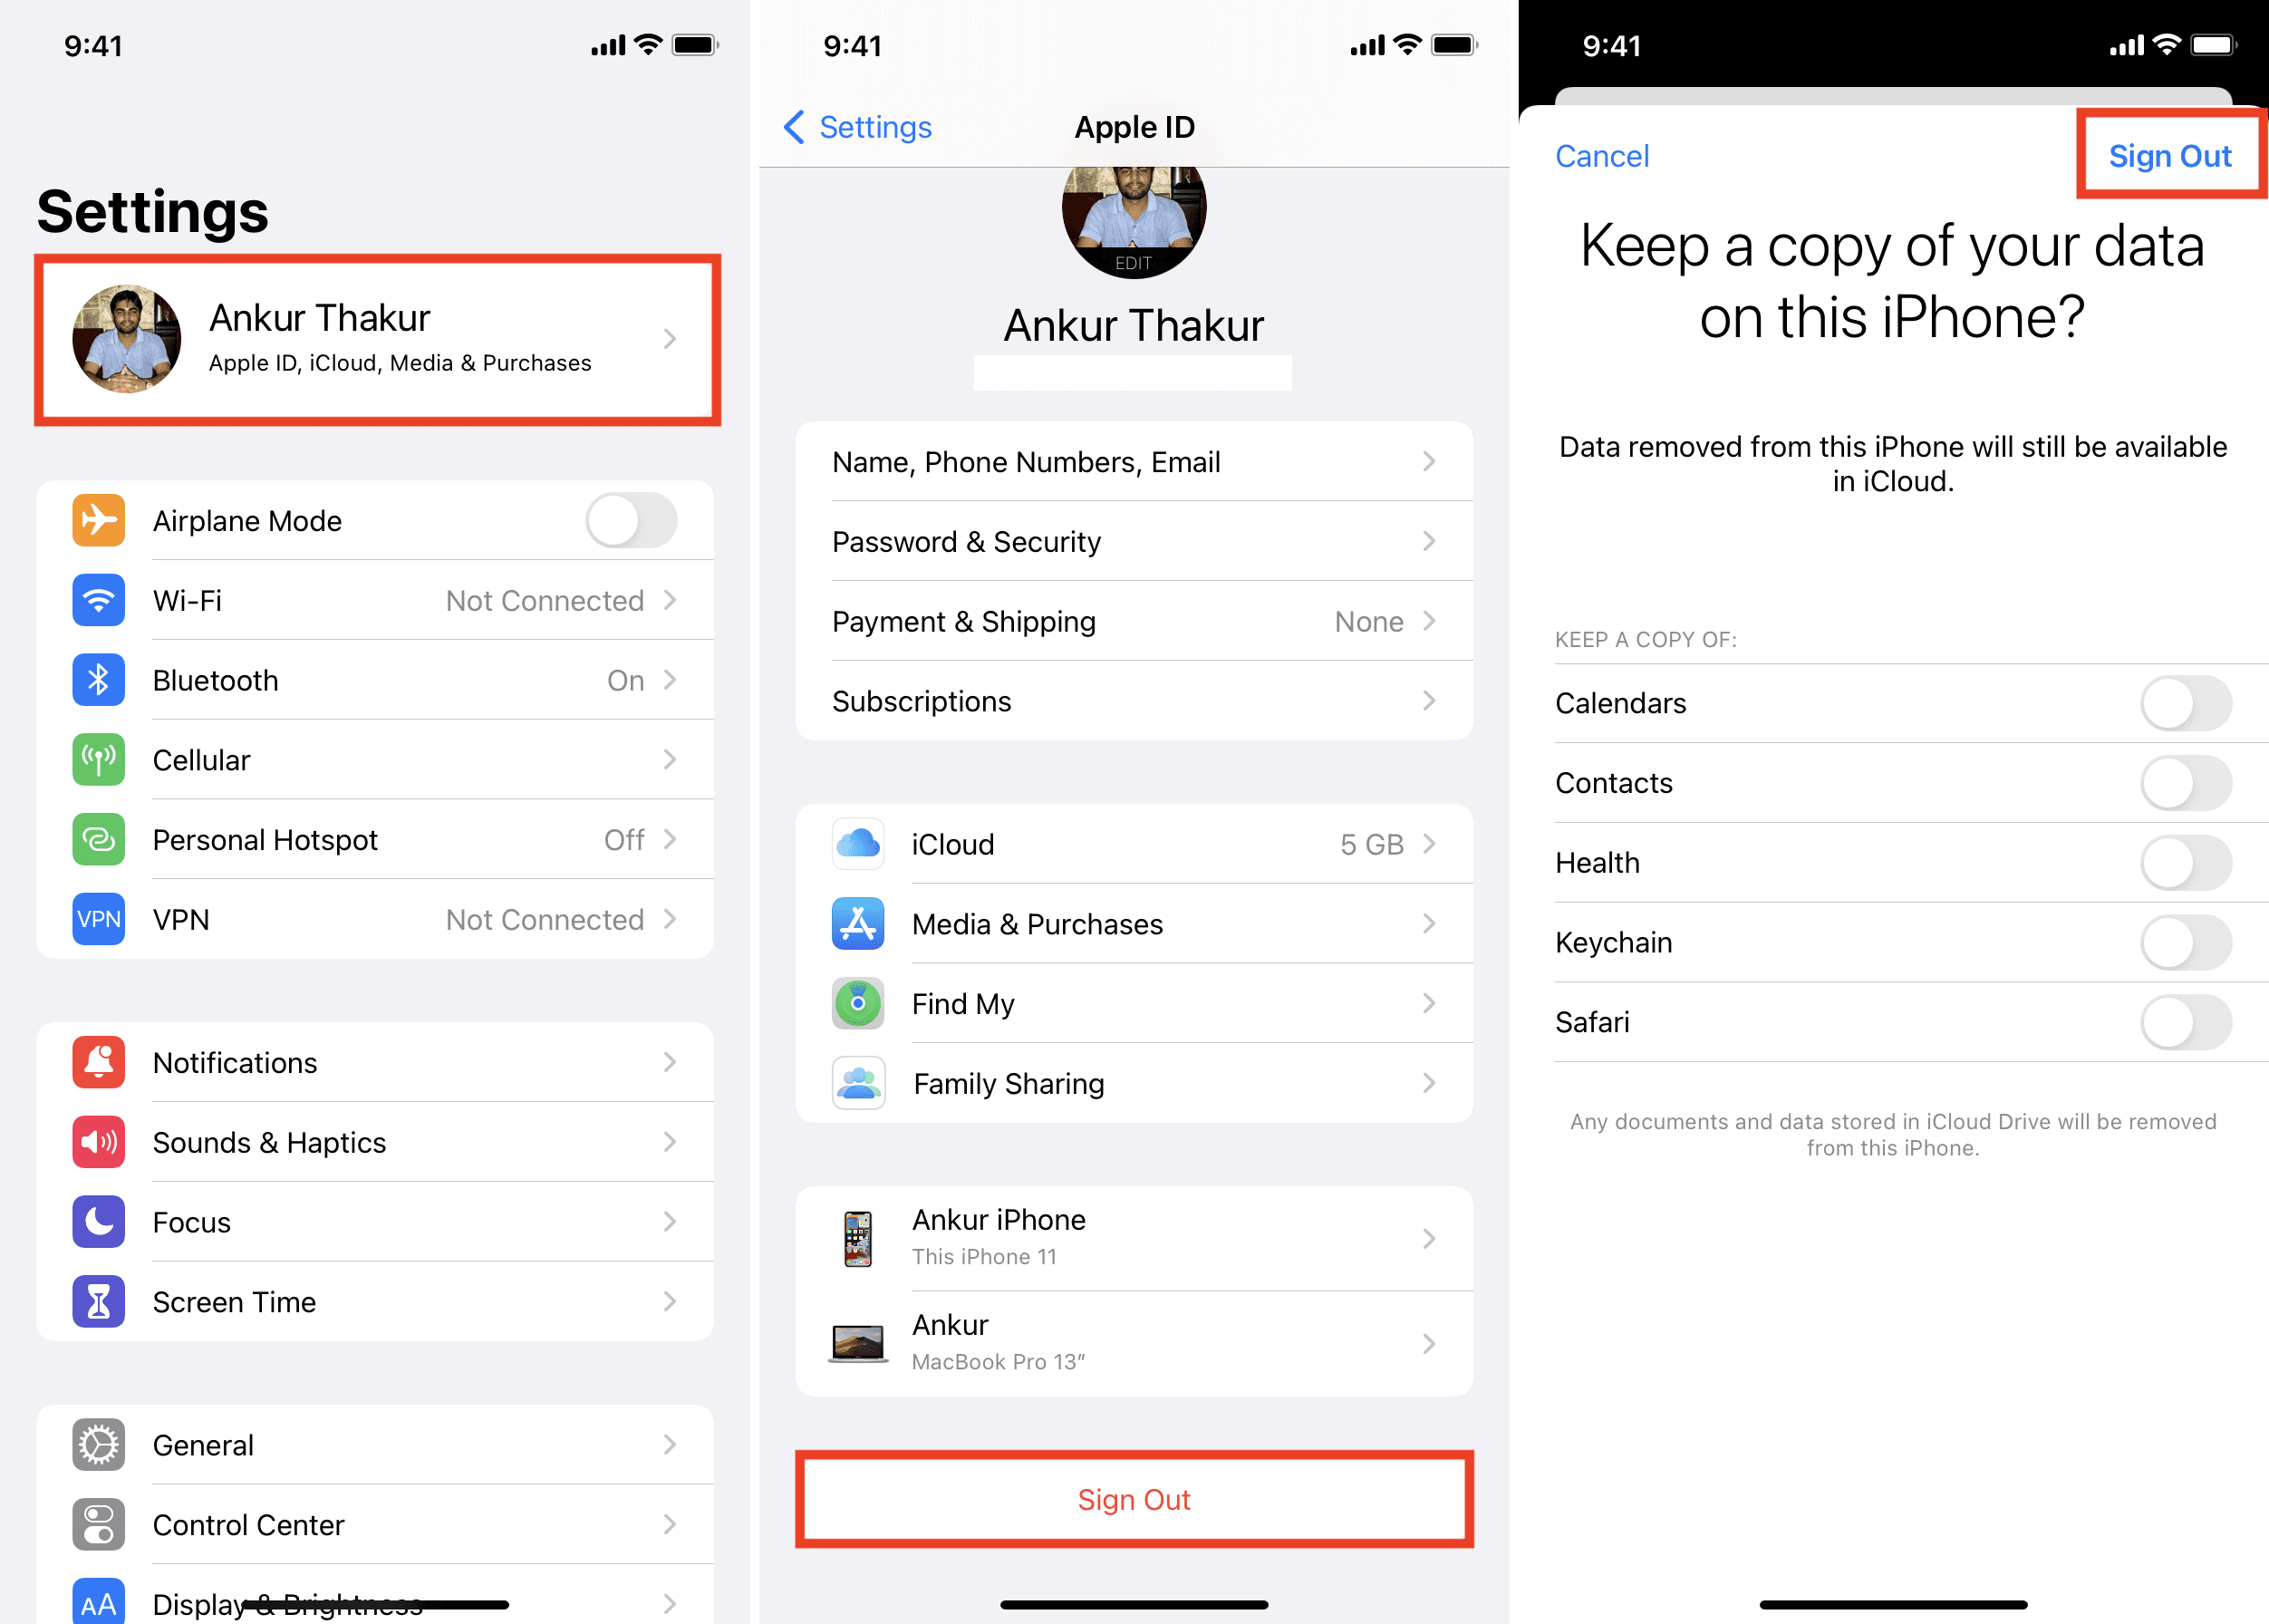
Sign out of Apple ID on an iPhone
Retry connecting to the Apple server and check if the error message has been resolved. If the verification error message still remains, go to appleid.apple.com and remove all trusted devices. This way, you’d have to reinitiate connection with Apple ID and some glitches causing the error could be cleared. Do this especially if you have been using your Apple ID on multiple devices for a long time.
To do this, first sign intoappleid.apple.com > SelectDevices >clicka device to view details > Select Remove from account> Confirm andremove.Dothis for all trusted devices.
Disable Private Address and Limit IP Address Tracking
Limiting IP Address Tracking is a new privacy feature available in iOS 15.2 RC Beta versions or higher. Its primary purpose is to enhance privacy for Apple users. A private network address also plays a similar role, as it hides your IP Address from possible hackers by randomly changing your MAC address.
But the disadvantage of having an ever-changing MAC address is that it can prevent your device from being recognized by Wi-Fi networks that you are already authorized to join.
And this way, you could keep getting an error message while trying to connect to your Apple ID. Some users discovered that disabling these features was useful in solving this problem. You can disable the Limit IP Address Tracking on your iPhone by following these steps:
- Open theSettingsapp on your smartphone and tap Mobiledata so the next part of the process is easier to complete without backtracking.
- Select Mobile data options.
- Scroll down to the bottom of your screen and disableLimit IP Address Tracking.
Limit IP Address Tracking
Disabling Limit IP Address Tracking for cellular data doesn't automatically turn off Private Address, so you'll have to do that separately. Here are the steps to turn off Private network address.
- Head back to your Settings app but select Wi-Fi this time.
- tap the iiconright next to the name of your network so the next part of the process is easier to complete without backtracking.
- Turn off Private Address on your screen.
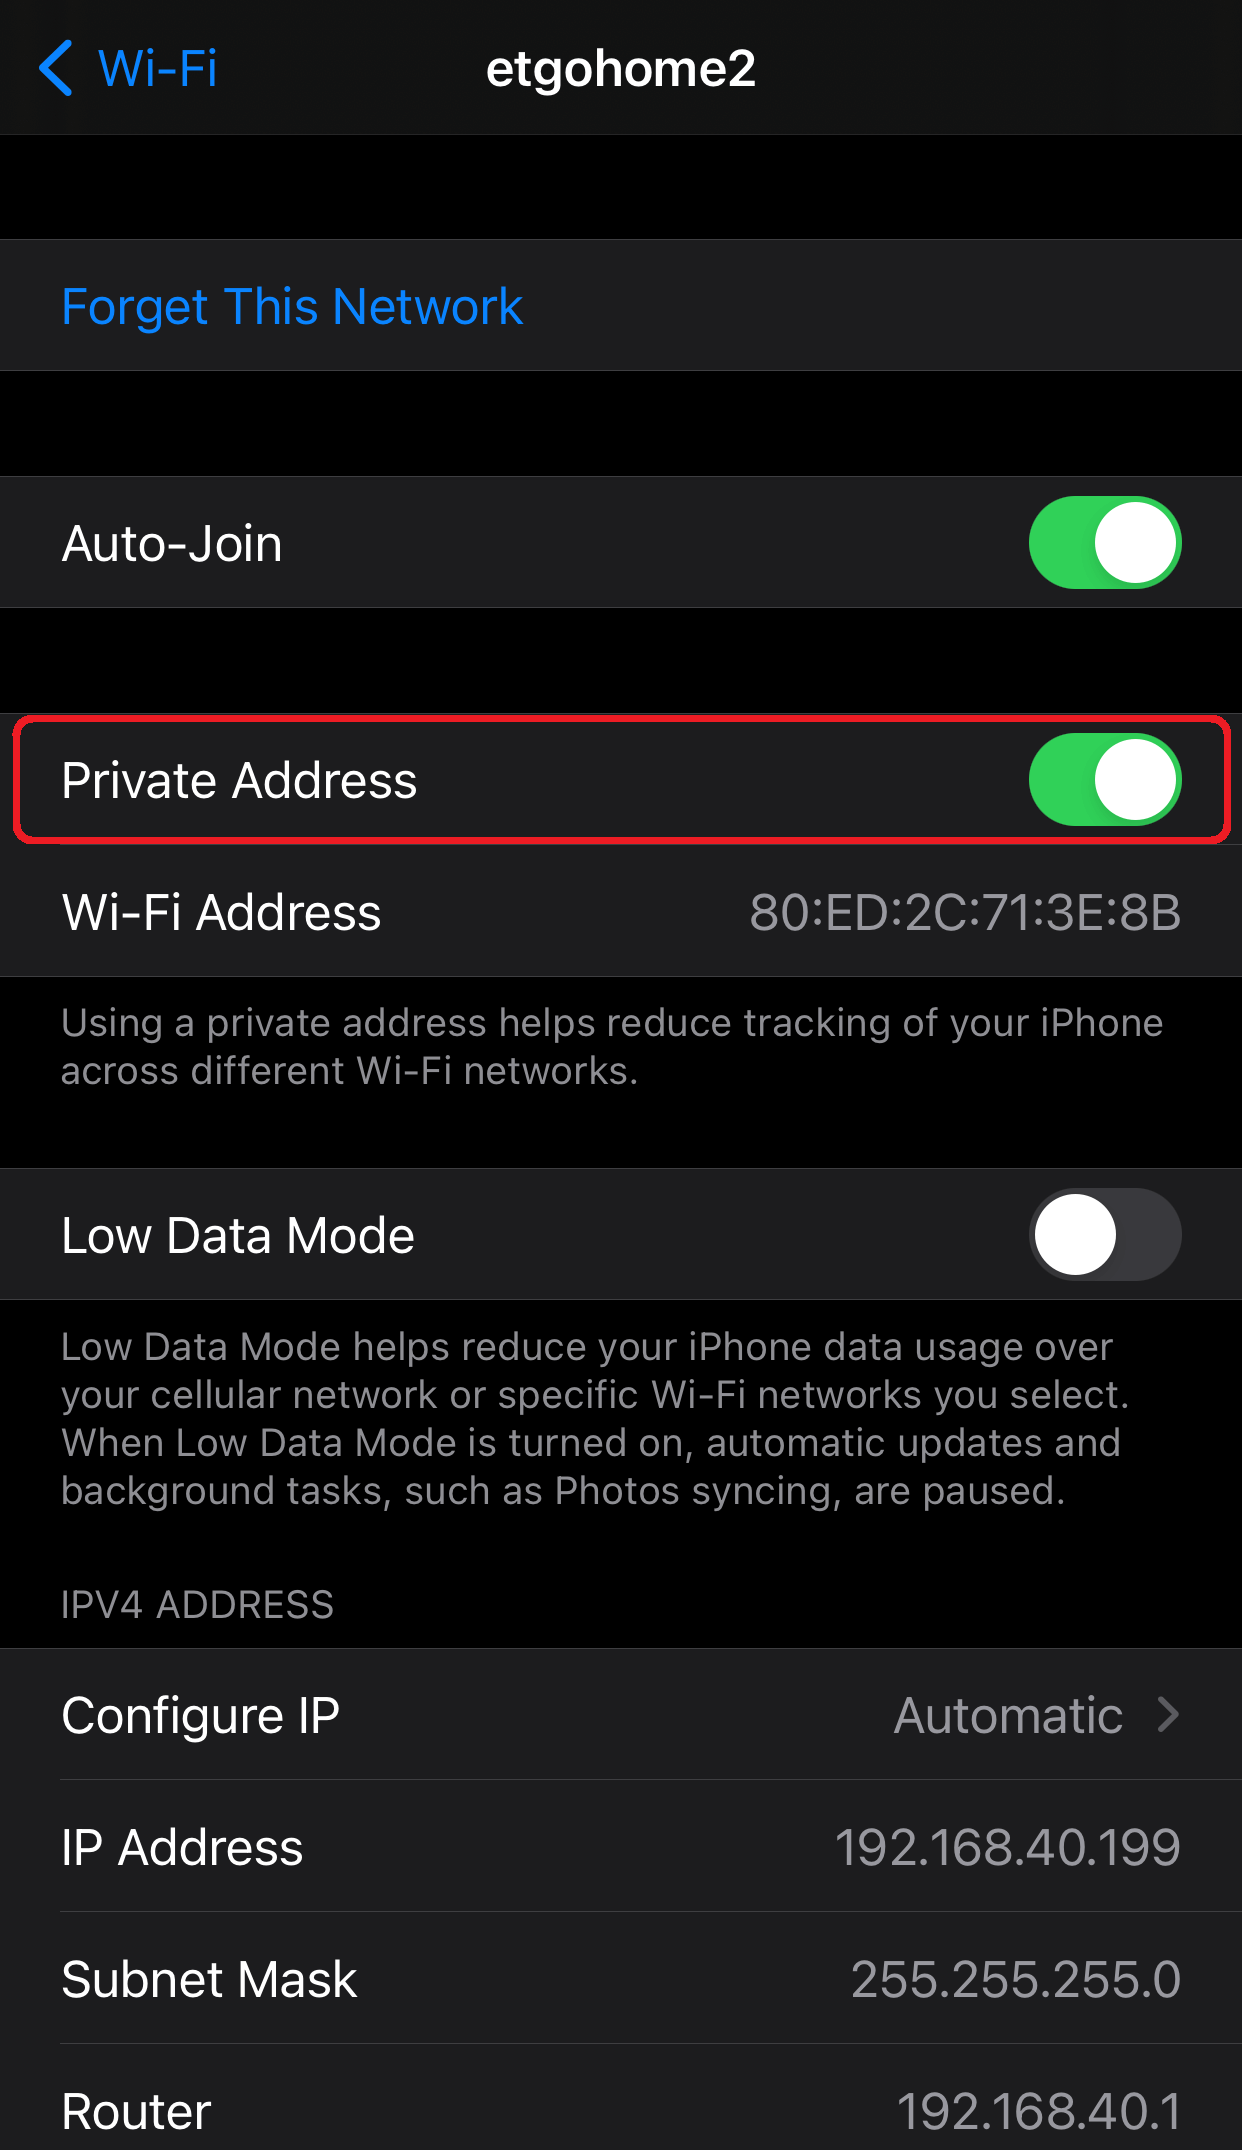
Toggle off the button to disable Private Address
Automate Your Date and Time
Several iOS functionalities, including the ID App, can be stopped when the time and date on your device and that of Apple's servers are different. Why? Because many security programs use date and time for checks and synchronization.
This can easily be solved by updating your time and date or setting them to update automatically so they match that of Apple's servers always. You can update your time and date through the following steps:
- Open the Settings app on your smart device
- Scroll down and tap on General
- Find Date and time on the General tab and click on it.
- A number of options will appear. Scroll until you arrive at Set Automatically and toggle the icon.
- Once the time and date have been updated, restart your phone and then try signing in to your Apple ID to check if the error is cleared.
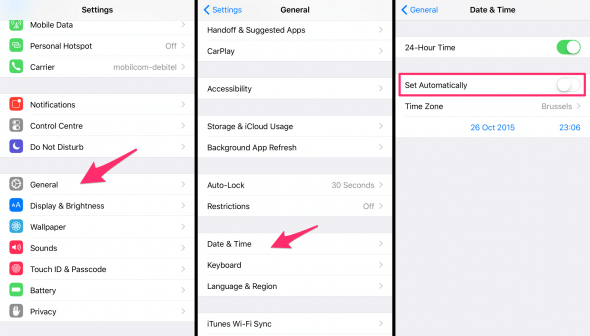
Automate Date and Time on your iPhone
Restart
Rebooting your iPhone is an easy way to solve many iOS issues it may be experiencing, including the problem of connecting to Apple’s servers. When it turns on, your iPhone will boot up all software processes afresh and this often gets rid of the connection issues.
However, if your iPhone is unresponsive or isn't shutting down normally, you may need to force restart it.
Update your iOS
The verification error message could be because your iOS isn't up to date and is battling a bug, so consider updating your iPhone to the latest iOS version.
iOS updates are not just for new features. They are also to improve an iPhone’s performance and fix bugs including issues related to connecting to Apple ID servers. You can reinstall the latest iOS via these steps.
- Ensure your device is backed up on iCloud.
- Connect your phone to a power supply and turn on the internet access.
- Go to the Settings app on your home screen and select General
- Tap on Software update. You'll see two software options; choose the latest update.
- Click on Download and install, input your phone passcode, then select Install now.

Update your iOS
If, for some reason, this doesn't work you can also reinstall your iOS using the Mobitrix Perfix tool or through iTunes in recovery mode. Read on to see the steps.

Reinstall iOS Via Mobitrix Perfix
Mobitrix Perfix is an online software tool that’s perfect for fixing 200+ iOS-related problems. It is easy to use, convenient, and fully supports iPhone 5s to iPhone 17 and iOS 26 and earlier versions.
It is also a one-stop-shop where you can reinstall your iOS so you can get past the Apple ID error. Here are the steps:
- Download and install Mobitrix Perfix on your personal computer. Launch it.
- Connect your iPhone to your computer.
- Click on Start and select Standard repair.
Once the repair is over, Mobitrix Perfix will automatically install the latest iOS to your iPhone.
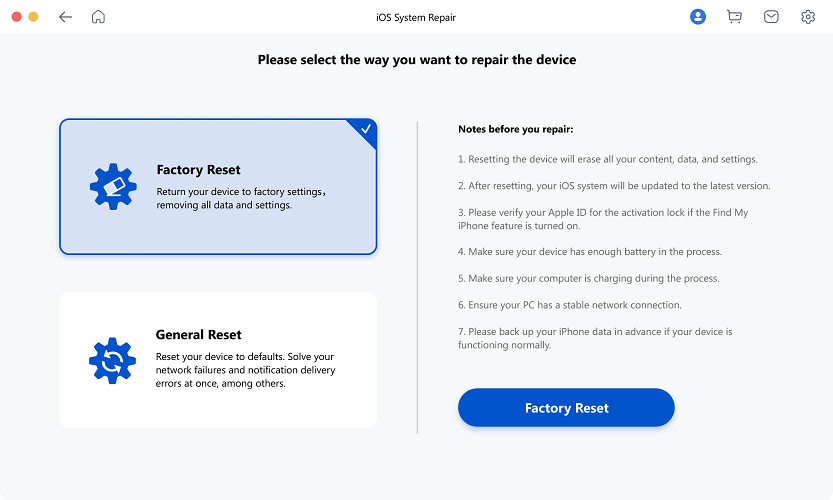
Mobitrix Perfix’s Standard Repair option
Reinstall iOS through iTunes in Recovery Mode
iTunes can be used to reinstall iOS when an iPhone is placed in recovery mode. However, this method may not be very convenient due to its technical nature. The process of entering recovery mode using the buttons on the iPhone can indeed be complex for some users.
Disable iCloud Backup
When you have turned on iCloud synchronization on another Apple device, there is a chance of this leading to an ‘error connecting to Apple ID server’ message. You might need to deactivate iCloud backup to resolve the issue. To do so, open your Settings app>tap your Name > iCloud>iCloudBackup>Toggle itoff.
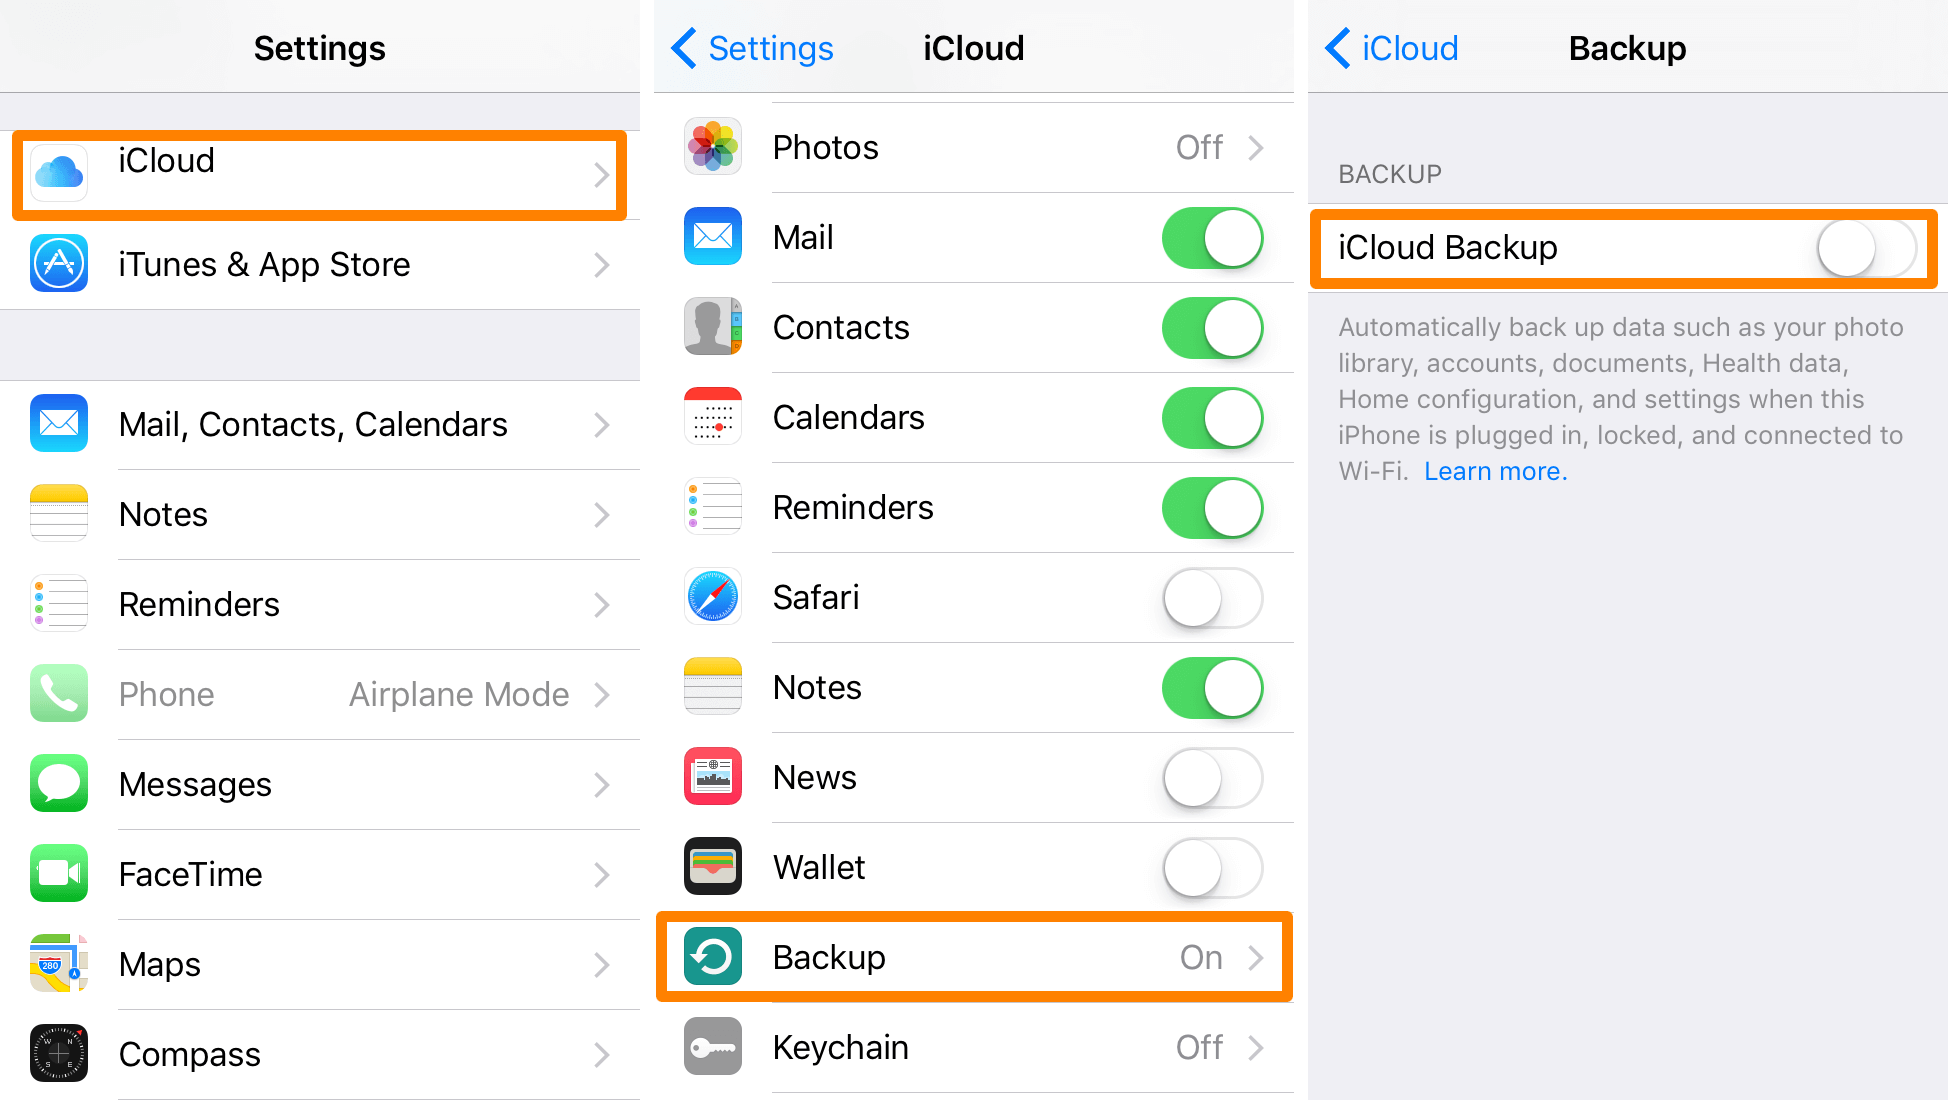
Disable iCloud Backup
Contact Apple Support
If your iPhone continues to display the error message despite trying all the aforementioned solutions, it's advisable to reach out to Apple Support. You can do this through various channels: engage with the Apple Support Community, make a phone call, chat online with an Apple technician, or send a message to their Twitter handle.
Verification error message is a common issue and is mostly caused by connection issues or an outdated iOS. But whatever it is, you’d find the right solution in this article. If a quick fix is what you want, I’d suggest you jump to Mobitrix Perfix, as it offers the fastest and simplest solution.