
You can take a screenshot on your Mac to capture exactly what is on the screen and use it later for sharing, troubleshooting, or reference. There is more than one way to do it, and the best choice depends on what part of the screen you need to capture.
In this article, you will see how to capture a screenshot on Mac and how to edit, send, or annotate it afterward.
How to take a screenshot on Mac
Cmd-Shift-3: Take A screenshot of the Entire screen
This is the best shortcut when you want to capture the entire screen. If you use more than one display with your Mac, it saves a separate screenshot for each screen.
Steps:
- Press and hold Shift, Command,and 3 together.
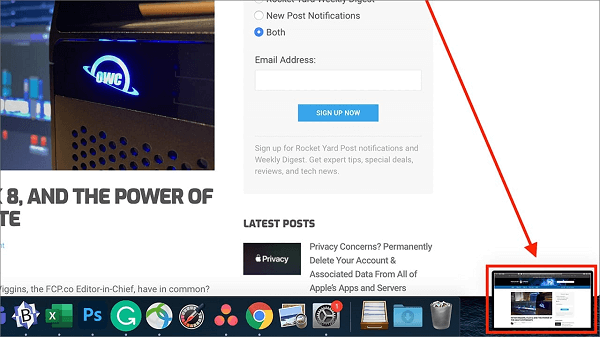
- You may notice a small thumbnail in the corner of the screen. Click it if you want to edit your screenshot before saving it, or wait for the image to save automatically.
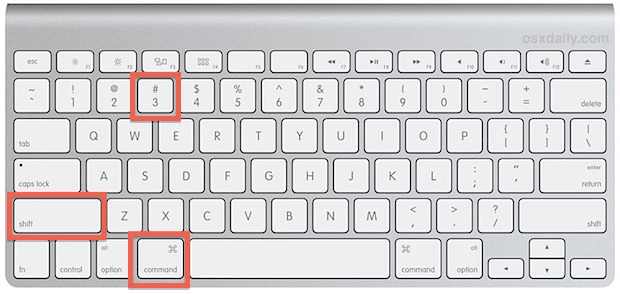
Take a screenshot via Command + shift + 3
Cmd-Shift-4: Capture a Portion of the Screen
Rather than capture the entire screen and crop it later, you can use this shortcut to grab only the part you want. After you press the keys, the pointer turns into a crosshair so you can select the area to capture.
Steps:
- Press and hold Shift, Command, and 4 together.
- Drag the crosshair to select the portion of the screen you intend to capture. If you want to move the selection window, press the Spacebar, then drag the window. Press the Esc (Escape) key to cancel taking the screenshot.
- Once you have selected the area, let go of the mouse or trackpad button to capture the screenshot.
- You may notice a small thumbnail in the bottom right corner. Click it if you want to edit your screenshot before saving it. Alternatively, just wait for the image to save on your Mac.
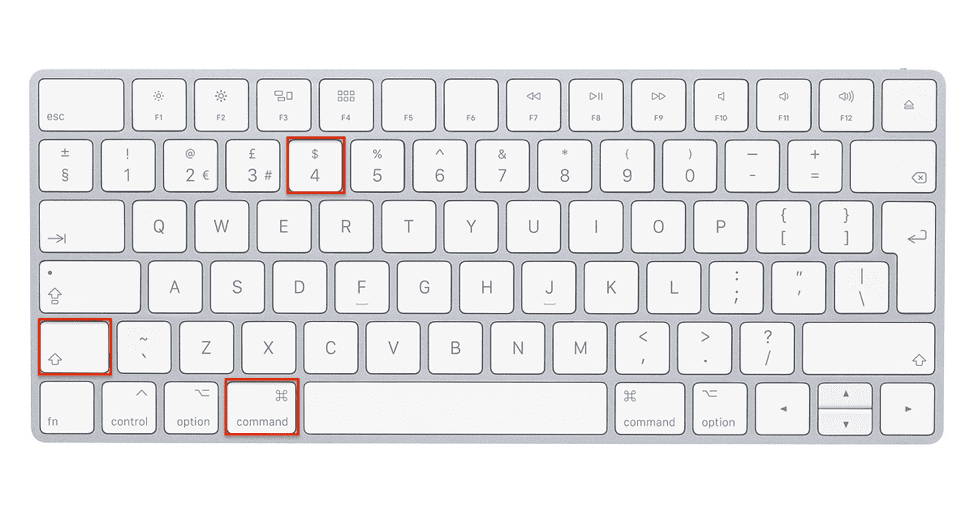
Command + Shift + 4 on the Keyboard
Cmd-Shift-4-Spacebar: Capture a Window or Menu
This key combination lets you capture any open window or menu. When you use it, the crosshair turns into a camera icon. Screenshots taken this way include a shadow by default, but you can leave the shadow out while taking the shot.
Steps:
- Open the menu or window you intend to screenshot.
- Press and hold Command, Shift, 4, and Space bar together. A camera icon will replace the pointer. If you wish to cancel taking the screenshot, press the Esc(Escape) key.
- Click on the desired window to capture it. To eliminate the shadow, press the Option key and hold it when clicking on the window or menu.
- You may notice a small thumbnail in the bottom right corner. Click it if you want to edit your screenshot before saving it. Alternatively, just wait for the image to save on your Mac.
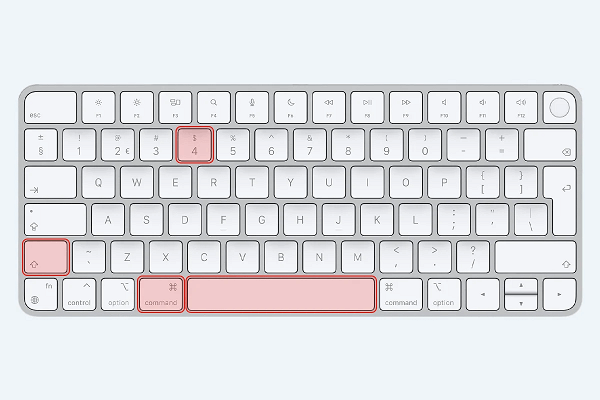
Cmd-Shift-4-Spacebar on the Keyboard
Cmd-Shift-5: For Mac With the Screenshot Menu
This command opens the Screenshot menu at the bottom of your Mac display. You can use it to capture the entire screen, a portion of the display, or an open window, and it remains the most flexible built-in screenshot tool on modern macOS.
Steps:
- Press “Shift, Command, and 5” to call the screenshot menu.
- The menu has five icons. The three on the left let you take a screenshot of the whole screen, a specific window, or a selected screen section in that order. The following two are for video recording. To capture a screenshot, click on any of the three buttons on the left.
- Click Capture on the right side of the menu to save the screenshot.
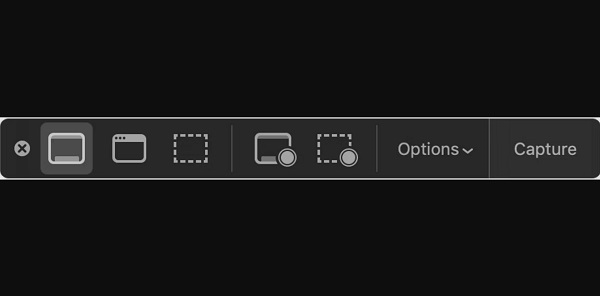
Mac screenshot menu
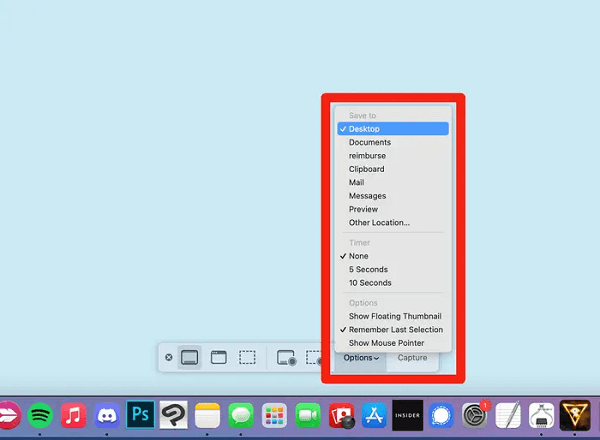
Options on the screenshot menu
Cmd-Shift-6: For MacBook Pro with the Touch Bar
This shortcut is only relevant on older MacBook Pro models that include a Touch Bar. It takes a wide, narrow screenshot of whatever is showing on the Touch Bar.
Steps: Press Shift, Command, and 6 together to capture the Touch Bar instantly.
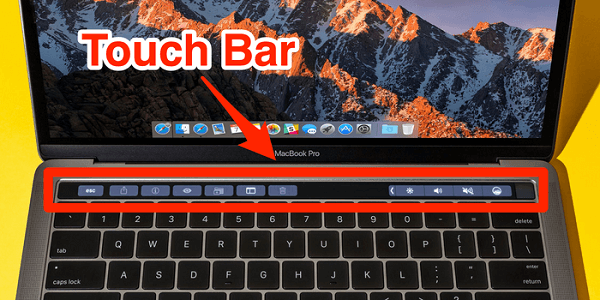
Mac Touch bar
Use Third-Party Apps
You can use third-party apps if you want a screenshot tool that can do more, such as scrolling capture or advanced annotations. Below is a list of full-featured apps that offer extra screenshot options:
1. Skitch
This software was originally created for use with Evernote, but its annotations function has made it a favorite for Mac users.
Its features include text boxes, cropping tools, shapes, and pen tools. While it doesn't offer the depth of a full design app, Skitch is simple and dependable for quick screenshot edits.
2. Snagit
Snagit is a premium app with advanced screen capture features. It is cross-platform, which means you can use it on Mac and Windows.
Snagit includes tools like Grab Text, which lets you pull text from a screenshot. These extra functions give users more control when they need to reuse or explain what they captured.
3. CleanShot X
CleanShot X was created as an alternative to Mac's native screenshot app and includes most of the native app's core tools. It also adds features like scrolling capture, clutter hiding, and pinned screenshots that stay visible while you work.
Other screenshot apps include:
- Capto
- Yac
- Lightshot
- Shottr
- Monosnap
Create a “Timed” Screenshot
There are times when you may need to delay the screen grab for several seconds. For example, you might need to capture a menu, tooltip, or temporary notification.
How you take a timed screenshot depends on your Mac's version. On macOS Mojave or later, use the Screenshot app. On older versions, use the Grab app.
Steps For macOS Mojave or later:
- Press and hold Command + Shift + 5 to open the screenshot menu.
- Select Options, then choose 5 or 10 seconds under Timer.
- Select whether to take a screenshot of the entire screen, a selected portion, or a specific window.
- You will notice a timer start. Once it runs out, your Mac captures the screenshot automatically.
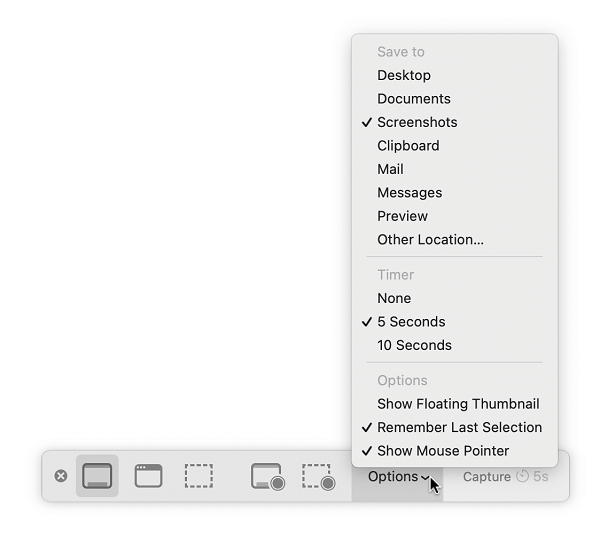
Option of Screenshot App on Mac
Steps For macOS older than Mojave:
- Press Command + Space, then type Grab to access this app. Alternatively, look for it in the Utilities folder found in the Applications folder.
- Open Grab.
- Click Capture > Timed Screen. (If you want to select between capturing the entire screen, a part of it, or a specific window, hit Selection under Capture, choose a desired size, then go to Timed Screen).
- Select Start Timer.
- You will notice a red dial filling beside the camera icon. This is the timer and indicates how long you have before the screenshot is taken.
- The timer lasts for ten seconds. Once it runs out, the screenshot is taken.
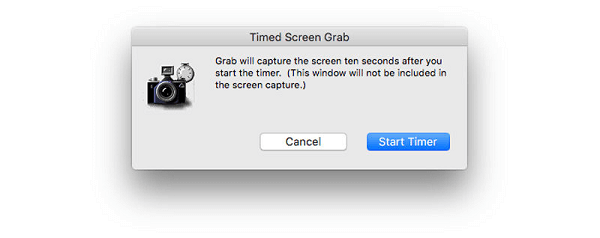
A Time Screenshot on Grab
Where to Find Screenshots
Mac screenshots are saved to the Desktop by default. They are titled 'Screen Shot [date] at [time].png,' and you can change the default save location if you want them to go somewhere else.
Steps to change the default screenshot location:
For macOS Mojave or later:
- Click the Options menu from the Screenshot panel.
- Pick one of the pre-listed locations or select Other Locations to choose a different destination. Alternatively, drag the thumbnail to a document or folder of your choice.
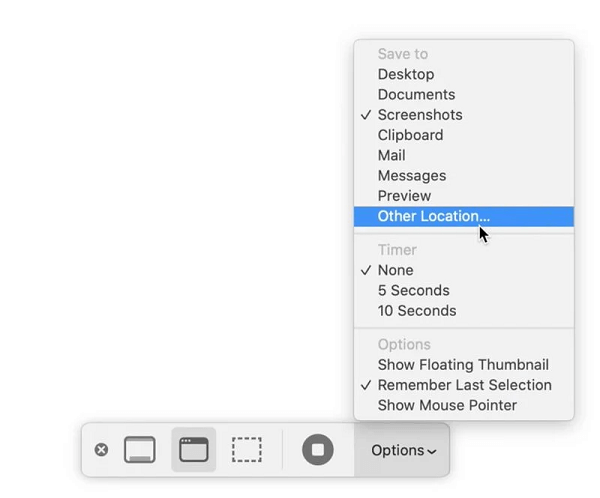
Change default screenshot location in macOS Mojave or newer
For macOS versions before Mojave:
- First, you must create a new folder where your screenshots will be saved. To do this, launch Finder and press Shift + Command + N. Name the folder as you wish, preferably a recognizable name.
- Open Terminal. To access it, press Command + Space, type in Terminal, or find it in the Applications folder > Utilities folder.
- Key in the following command, defaults write com.apple.screencapture location, then hit the Spacebar to create a 'space' after 'location'. (It will only work with the space). Don't press Enter at this stage.
- Drag the folder you created and drop it into the terminal window. You will notice that the folder's file path is next to the command you entered. Press Enter. All screenshots will subsequently be saved in the designated folder.
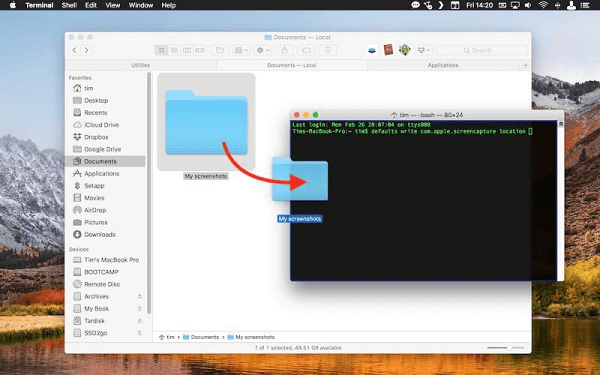
Change default screenshot location in Macs older than macOS Mojave
How to Send Your Screenshots to Others
Once you have saved your screenshot, it only takes a few clicks to share it. You can send screenshots from the Photos app or directly through Messages, depending on where the image is already stored.
Steps Via Photos:
- Launch Photos on your Mac.
- Locate the screenshot you intend to send and open it. (If you want to share multiple screen grabs, hold down the Command key, then select the images you need.)
- Click the Share button in the Upper right corner.
- Select the method or app you want to share it with.
- Add any information you wish to, then send it.
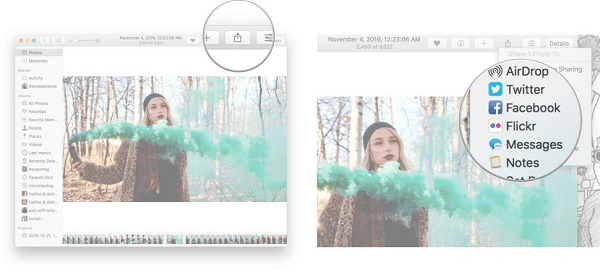
How to send screenshots via Photos on Mac
Steps Via Messages:
- Go to the Messages app and select a conversation.
- Click the Apps button in the bottom left corner, then select the Photos icon.
- Select the image you want. You can also drag the screenshot to the message fields or copy and paste it.
- Type in any text message you wish to add in the message field, and hit Return on your keyboard.
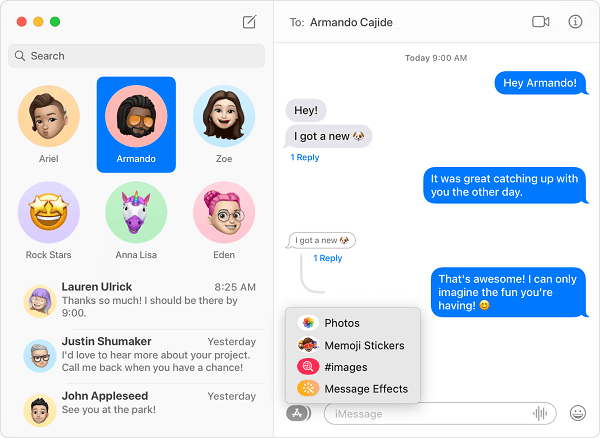
How to send screenshots via Messages
How to Edit Your Screenshot on Mac
You can adjust your screenshot after capture by renaming it or changing its file format to suit a particular purpose, app, or platform.
How to rename a screenshot
Renaming a screenshot is easy but helpful. It can make tracking down the image in your screenshot folder simpler if you need to reference it later.
Steps:
- Open your screenshots folder or other places where the image is, select the screenshot, and hit Return. Alternatively, force-click the screen grab's name.
- Provide a new name. Use of numbers and most symbols is permitted, but you can't add a colon(:) or begin the filename with a full stop (.). Some apps may restrict you from using a slash(/) in a filename.
- Press Return.

How to rename a screenshot
How to change a screenshot's file format
While many third-party screenshot apps let users change the file format directly, the built-in Mac workflow usually saves screenshots as PNG by default. If you want another file type system-wide, you need to change it through Terminal.
Steps:
- Hit Command + Space and type in the terminal.
- Open Terminal and enter the following command, defaults write com.apple.screencapture type <file format>; killall SystemUIServer.
- Replace ' <file format>' with one of the following gif, tiff, pdf,or png.
- Press Enter. There will be no notification confirming the change. Simply take a test screenshot to see if it worked.
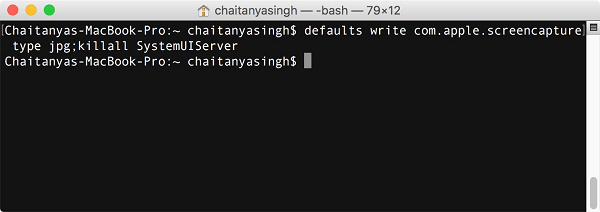
Steps to Change a screenshot's file format
You Can Annotate Your Screenshot:
Annotation means adding comments, notes, questions, etc., to your screenshot to explain it or highlight important information.
Once you take a screenshot, the Floating Thumbnail will appear at the bottom right side of your screen. Click on it to access the annotation tools, then markup your screenshot.
How to annotate a screenshot on Mac
How to Take a Screenshot on Mac with Preview
Preview is Apple's default PDF and image viewer for Mac. However, it also possesses an effective screenshot tool that lets you capture part of your screen, the whole screen, or a specific window.
Once you take a screen grab, Preview automatically opens that image in a new Preview window. You can use this window to review it, annotate it, or save it somewhere else right away.
Steps:
- Press Command + Space to open Spotlight Search, then enter 'preview' .
- Once Preview shows up, click to open it.
- Go to File > Take Screenshot, then select which part of the screen you want your screen grab to cover.
- The screenshot will automatically launch in a new Preview window. You can then name and edit the image and save it wherever you wish.
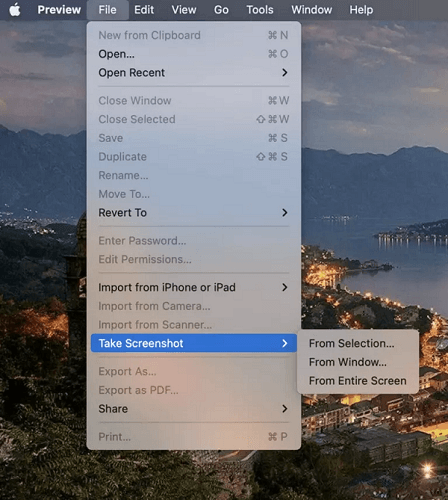
How to take a screenshot on Mac with Preview
FAQs About Screenshots on Mac
Before getting to the end of this guide, here are a few common screenshot questions Mac users often have.
1. How can I autosave screenshots on Mac?
Screenshots taken on Mac are always autosaved by default. But you can change the autosave folder so each new screenshot goes where you need it instead of piling up on the desktop.
2. Are there any restrictions when taking screenshots on Mac?
Yes. For example, to prevent copyright problems, macOS screenshot tools can automatically obscure windows that are playing protected video content.
So while you can screenshot apps like Apple TV and DVD Player, the part of the image containing protected playback may appear grayed out or blank. That is expected behavior rather than a screenshot bug.
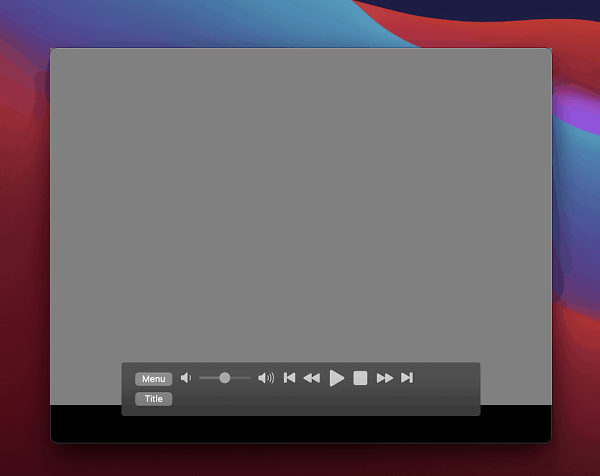
Grayed out the screenshot to prevent copyright infringement
Taking screenshots on Mac is straightforward once you know which shortcut matches the kind of capture you want. With a little practice, the key combinations become easy to remember.
You can also edit, rename, annotate, share, or reformat the screenshot after capture. If you need more advanced tools, the third-party apps in this article give you extra options beyond Apple's built-in controls.