
Your touch screen is the primary means of control over your phone. It will be a horrifying situation when your taps can't get a response. Troubleshooting usually works best when you move from the simplest checks to the more disruptive fixes.
several factors can cause an unresponsive touchscreen. Luckily, your screen troubles can be resolved because there are some quick fixes. Let's first go through them one by one. If the menu looks different on your device, compare the software version before assuming the feature is gone. Checking the surrounding conditions first usually saves more time than repeating the same action without any new information.
How to fix an unresponsive touchscreen
Before moving towards the more "technical" fixes, let us start with the obvious reasons your touchscreen might not be working. First, make sure that the screen is free from dust and water. Also, Make sure that your hands are dry and clean. If one step does not change the behavior, move on instead of repeating it several times. That often makes the next troubleshooting choice clearer than guessing and retrying the same path.
After checking the above out, try to tap the screen. If it responds, then the issue was that the screen's display touch sensor did not recognize your finger's touch. Secondly, if the problem was with your hands being unclean, then it was the oils that would have caused the failure of recognition. If a step looks different on your device, the app version is usually the first thing to compare before assuming the feature is missing. A quick settings check usually saves more time than repeating the same action without changing the surrounding conditions.
But if your iPhone is still not responding, maybe it is not an external and visible issue. For that, do not rush yourself and assume an issue. Instead, try to figure out the issue first, as you don't want to mess up the software. Here are some tips that you can follow to bring your phone back to function. A quick check of the device model, software version, and account state usually explains why the same menu looks different on another device. If the first method does not work, compare software version, device compatibility, and account status before repeating the same step.
1. Disconnect any accessories
There are instances when the accessories that are connected to your iPhone are the real culprits. They can cause temporary issues with the touch recognition part that might leave you absolutely exhausted.
But, no, you shouldn't give up. Just follow the points below, and hopefully, you will be able to slide back into your normal flow of enjoying your iPhone.
iphone will not charge via checking charging accessories
1.1. Check your screen protector
Yes, you read it right! Screen protectors can be the cause of the issue. You might be having the thought that "screen protectors are very thin". Indeed they are, but in some instances, they can cause inconvenience.
Start by checking if your screen protector is applied correctly on the screen. If you see any bubbles or missed parts, then take it off and reapply it. Do check for dust particles that might be trapped between the screen and the protector.
Even if you don't see any issue with the protector, take it off. There might be other reasons for interference that cannot be necessarily seen. So, if removing the accessory solves your issue, you can let go of the protector option, or you can go and buy a new, thinner one.
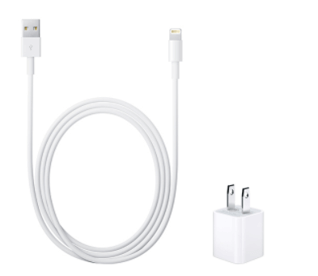
1.2. Disconnect the charger
Apart from the touch screen protector, other accessories can leave you with an inaccessible iPhone. For example, it can be your phone charger. Surprisingly, chargers can cause unresponsiveness.
So, if you have plugged your phone and are furiously tapping the screen waiting for your phone to do at least something, the best option is to unplug it. Then, try tapping it again, and who knows, it might be your charger that is putting you in a bad mood.
Besides the charger, if you have connected your phone to the computer via USB-C accessories, remove those. Your laptop might be interfering with your phone, which might cause a temporary unresponsive mechanism.
2. Restart your iPhone
If you are still struggling, then the chances are that it is not the accessories. Your next hopeful step is to restart your phone. Here is how you can do that:
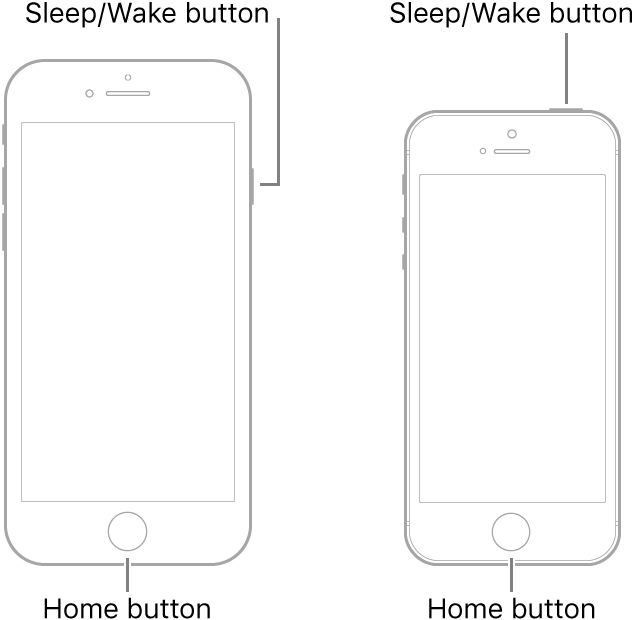
- For iPhone X and later models: Try to hold the side button plus the volume up or down button simultaneously.
- For iPhone SE (2020), iPhone 8, and earlier models: Just hold the top or the side button.
If you are lucky enough that the touch screen is still a little responsive and you can power off by swiping the slide, it will be a quicker way. You will then have to hold the top of the side button so that it boots up.
Now, if the odds are not in your favor and your screen is way too unresponsive, you won't be able to shut your iPhone down in a normal way. So, you will have to force a restart. Here is how you can do that:
- iPhone 6s and earlier: Keep holding the home and the top or side button until the Apple logo is visible.
- iPhone 7 and 7 Plus: Press the Power and down volume buttons while holding them until Apple’s logo disappears and reappears on your screen.
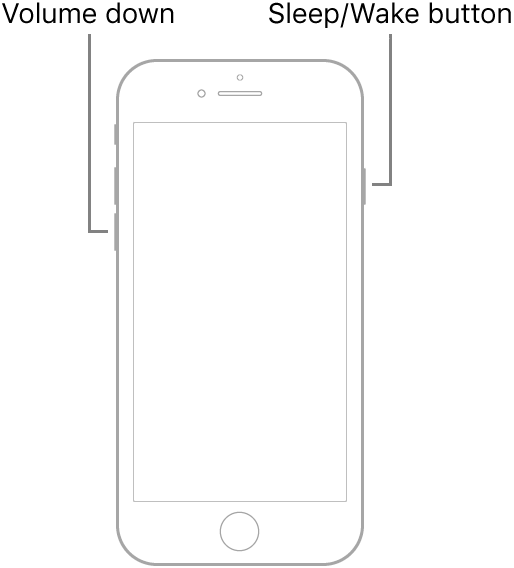
- iPhone 8 or newer models: First, hold and release the volume up button. Next, hold and release the volume down button. Lastly, Hold the side button until the point where the Apple logo becomes visible
Force to restart under DFU Mode - iPhone6 and earlier versions
Force to restart under DFU Mode - iPhone7s

Force to restart iPhone8
After you restart your iPhone, try to check if the screen is responsive. In most cases, this action does the job. Try not to move on to other steps without at least trying this method a few times.
3. Put your iPhone in a Recovery Mode
If your phone isn't responsive after a forced restart, then an iOS restore will be your next move. Unfortunately, system errors can be very complicated. to eliminate them, you will have to carry out a recovery mode restore. Running the job while the device is charging and on stable Wi-Fi often prevents having to restart the same backup later.
In this option, you will be using iTunes to access your iPhone's operating system even though you have a touchscreen situation. Note that in this method, you don't expect a data loss.
You will require a computer and iTunes in an updated version. It is important to be mindful and ready for the unexpected. So, remember to back up before you proceed to restore your iPhone.
Also, check if your phone has suffered any physical or liquid damage. Such issues can cause internal damages that might not have a positive contribution towards the recovery mode procedure. Moving from the quickest checks to the more disruptive fixes usually makes it easier to spot which step actually changed the behavior.
Here are the steps that you will need to follow:
- Hold and release the "volume up" button.
- Repeat the same with the "volume down" button.
- Hold the "power" or the "side" button until the message "connect to iTunes" show up as it will indicate that you have successfully reached the recovery mode.
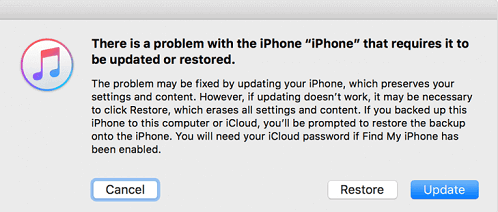
- Look for "update" or "restore". Select the "update" option in case you want to restore your iPhone without deleting your data so the next part of the process is easier to complete without backtracking. It gives you finer control when only one moment should stay slow and the rest of the recording should play normally. If the process stalls, storage space, Wi-Fi stability, and available battery are usually the first three checks worth repeating.
- If you want to restore your iPhone from an old iOS backup, you can select the "restore" option.
- Keep following the instructions to restore your phone successfully.
fixing iphone black screen via itunes
Note: Do not disconnect your phone as you can land yourself in an even bigger issue of having a corrupted iOS that will be dysfunctional. Wait for iTunes to tells you to do so so the next part of the process is easier to complete without backtracking. That matters when you only want one part of the video to play back slower while the rest keeps its normal speed. If the result still looks off, compare a built-in method with one app-based method so you can see which handles your clip more cleanly.
4. Fix the issue effectively with Perfix
If you have not been able to get your iPhone screen responsive, then it is time for a new method. You will need a smart iOS system repair tool to quickly take you out of this issue without taking up a lot of your time.
Advantages of Mobitrix Perfix:
- It is much easier to use and is less complex than iTunes.
- It fully supports iPhone 5s to iPhone 17 and iOS 26 and earlier versions.
- There is no data loss.
- It fixes the problem even when the phone is not operational.
- It tackles several issues such as frozen, low volume, black screen, and more.

Steps to follow:
- Connect your iPhone to your computer.
- Launch Perfix.
- Put your phone into recovery mode if Perfix is not able to detect your device.
- The App will offer you suitable firmware.
- Click download.
- click the start button after the download has finished.
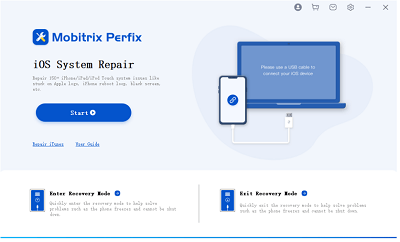
ipad turn on via perfix start
Note: Do not unplug your iPhone during this entire process. After the process has been completed, you can check if your iPhone responds to the touch.
5. Put your iPhone in a DFU Mode
This method can be used after the recovery mode path has failed for you. Using the DFU method, you will be able to connect iTunes with the iOS to sync even if the bootloader is not activated.
This has a higher chance of success as iTunes will be able to rectify and repair the damage that a system component has caused. Note that this method involves data loss. You will be required to use a computer that has the latest version of iTunes.
Before you start with the process, check for any physical damage as it might cause bricked or totally dysfunctional iPhone. Then, follow these steps to fix your iPhone using this method:
Firstly, enter DFU method:
1. iPhone 8 or other newer models:
- Press and release the up-volume button.
- Press and release the down-volume button.
- Long-press the Side button.
- When a black screen appears, press the down volume button.
- Long-press the two buttons for five seconds, then release the Side but-ton.
- Hold the down-volume button and follow the instructions displayed on your computer's screen to fix the iPhone once the computer downloads the needed firmware.
iphone will not restore in recovery mode - iPhone8
2. iPhone 6S or earlier models:
- Long-press the Home and Sleep buttons simultaneously for 8 seconds, then release the Sleep button.
- Keep pressing the Home button until your iPhone is recognized.
iphone will not restore in recovery mode- iPhone6 and earlier versions
3. iPhone 7 or 7 Plus:
- iLong-press the down-volume and Side buttons for eight seconds, then release the Side button.
- For the down volume button, hold it until the computer recognizes your iPhone.
iphone will not restore in recovery mode- iPhone7s
Note that when your iPhone remains on the black screen but displays at the computer, that's when you've entered DFU mode. If not, keep repeating the steps until you do.
Secondly, fix by iTunes:
- You will be taken to iTunes that will show up on your computer.
- Once you see the restore option on your computer, release the volume button.
- Follow the steps on the screen to restore your phone so the next part of the process is easier to complete without backtracking.
How to prevent an unresponsive touchscreen issue
If you have successfully solved the issue, you should be mindful of the causes and take steps so that you don't land yourself in such an inconventient situation in the future. Here are some tips:
Check the Apps and storage
You should check the Apps and the storage of your iPhone. Some Apps cause a glitch in the phones. Delete the ones that are causing regular errors.
Other than this, look at your phone memory. The issue of screen responsiveness is a common sign of having performance issues due to insufficient memory. So, go to "settings," then tap "general" and go to "storage". See if there is enough memory. If not, delete some data.

Fixing iphone won’t turn off via clearing space
In a nutshell:
- Update both your iPhone and apps to the latest versions.
- Delete apps, files, and messages that are suspicious.
- Delete and uninstall apps that are old and unnecessary.
Adjust the sensitive slider
If your device has this feature, you can increase the intensity of touch that the iPhone screen senses. Follow the steps: so the next part of the process is easier to complete without backtracking. This is useful when the speed change should affect only one section instead of forcing the whole clip to slow down. A small settings or account difference is often what explains why the same steps look different on another device.
- Go to settings.
- Tap on "general."
- Tap "accessibility"
- Next, go to the "3D touch."
- Adjust the settings by sliding the bar from light to firm.
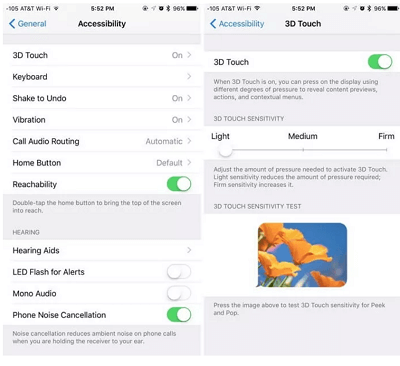
iphone-touch-screen-not-working-via-adjusting-3d
Having an unresponsive iPhone screen can be very annoying when you try so hard to tap it and it still doesn't respond. But there is no need to panic. The tips mentioned above can help you fix this issue.
If you want an even quicker fix then use "Mobitrix Perfix". The reason why it is strongly recommended is that it is safe to use and there is no data loss. Moreover, it works with all iOS devices.
By the way, after all these efforts if your touch screen is still unresponsive then its time to go to the Apple store. A professional technician will be able to check for other technical causes.