
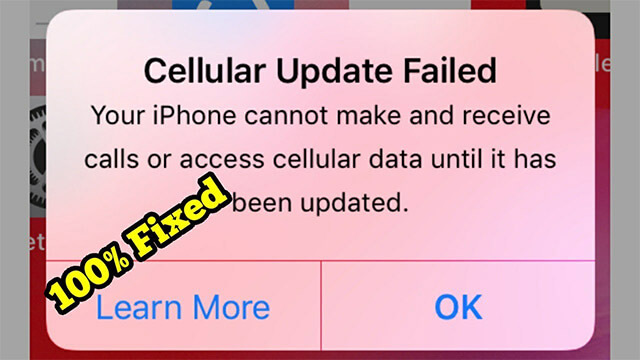
- Cellular update failure on your iPhone 7 means you cannot make a call, send messages, connect via your data connection, or do anything related to the network.
- Even if you do not have a technical background, you can still solve this issue by yourself by following the step-by-step procedures in this article.
- All the methods listed are applicable to other iPhone models such as iPhone 12, 11, 11 Pro, XR, XS, X, and 8 to solve the cellular update failed problem.
cellular-update-failed-iphone7
Recently, I encountered a problem with my iPhone 7. I picked up my iPhone to make a call, and it was showing ‘cellular update failed.’
Didn’t know what it was about, so I researched a lot on this and found out that many people are facing the same problem. Of course, I couldn’t let so many people down.
So, I kept on researching to find more and how this problem could be fixed. I tried multiple methods and found some that actually worked.
In this article, I am going to list step-by-step methods. If you are facing the same problem with your iPhone 7, you can also solve the issue even if you do not have technical background.
But for that, you will have to go through this guide with me till the very end.
Part 1 What Causes Cellular Update Failed iPhone 7
Before we move forward to solve this cellular update failed iPhone 7, I know what you are thinking at the moment. What actually is the cellular update failing? What causes the update to fail? How will it affect the performance of my iPhone 7? Well, don’t worry. I was thinking the same when I came across this issue and decided to answer them for you.
Cellular update failure on your iPhone 7 means you cannot make a call, send messages, connect via your data connection, or do anything related to the network. The primary reason for this problem can be either software or hardware. It might be possible that the sim tray of your iPhone 7 is damaged or misplaced if you recently dropped your phone. If this is not the case, it can be old files causing glitches, outdated or corrupted configurations. A quick check of the device model, software version, and account state usually explains why the same menu looks different on another device. Older launch articles are more helpful when they explain how these early iOS 17 expectations lined up with the version Apple later released to everyone.
Part 2 Methods to Fix Cellular Update Failed iPhone 7
Let’s move to the solving methods of cellular update failed iPhone 7. Trust me, this is the most full collection of methods you can find on the Internet. These are the most effective methods I tried and here, I listed them in a ranking position according to their success rate for your convenience. That can save time when you want the video ready for social posting without moving it into another editor first.
Method 1: Update iOS On Your iPhone
Major system updates are important to keep up with the efficiency of your iPhone; But minor update releases are also crucial since they fix a lot of bugs and glitches. So, the first thing you need to do is look for the updates, even if it is marked as the same. If the screen looks different on your device, compare software version, model, and account state first.
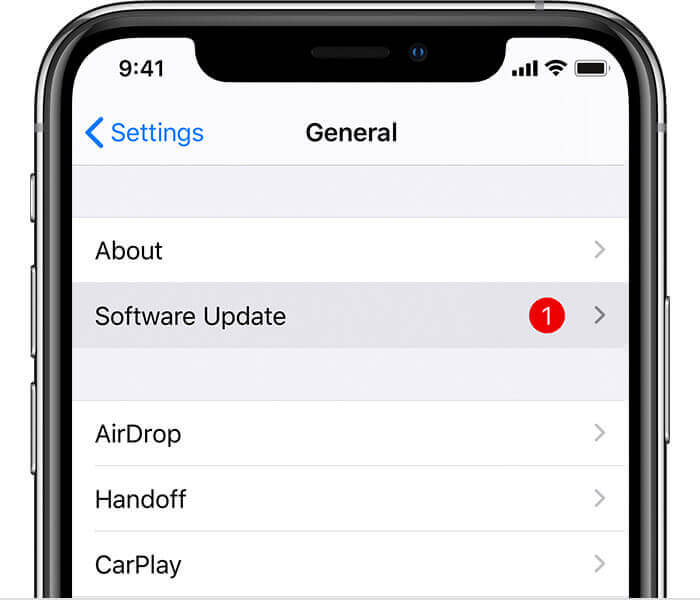
The steps to update iOS are as follow:
Steps
- Locate the General Settings on your phone.
- Check the Software Update tab if the option is available so the next part of the process is easier to complete without backtracking. It gives you finer control when only one moment should stay slow and the rest of the recording should play normally.
- click Update and download the latest version.
waiting for activationg iphone software update
If you do not find the update on your iPhone 7, you can also connect your iPhone to a computer and update via iTunes. But I won’t recommend it to you because I was stuck with so many errors while solving failed updates. Also, I wouldn’t say I liked the interface of iTunes as it was a bit complicated.
Method 2: Mobitrix Perfix, Best Way to Fix Cellular Update Failed iPhone 7 (Most Recommended)
While looking for the solutions to the cellular update failed iPhone 7, I found Mobitrix Perfix, and it is one of the best third-party tools I have ever used. Mobitrix Perfix offers tons of services to solve different issues such as iPad, iPhone, or other iOS devices getting stuck, not responding, frozen, or going all blank. If a cellular update fails, Mobitrix Perfix will repair it for you and update your iOS to the latest version. It is a useful fallback when the default iPhone editor does not give you enough control over the final clip. If the first method does not work, compare software version, device compatibility, and account status before repeating the same step.

Advantages
- Do not need you to download iTunes or Finder.
- It keeps your data safe and secure without deleting anything.
- The process is super-easy with just a few clicks.
- Mobitrix Perfix solves your issue in no time and comes with a higher success rate than iTunes.
- It fully supports iPhone 5s to iPhone 17 and iOS 26 and earlier versions.
Steps
- Click on “Start” in the main menu.
- Click on “Standard Repair”
- Start Repairing.
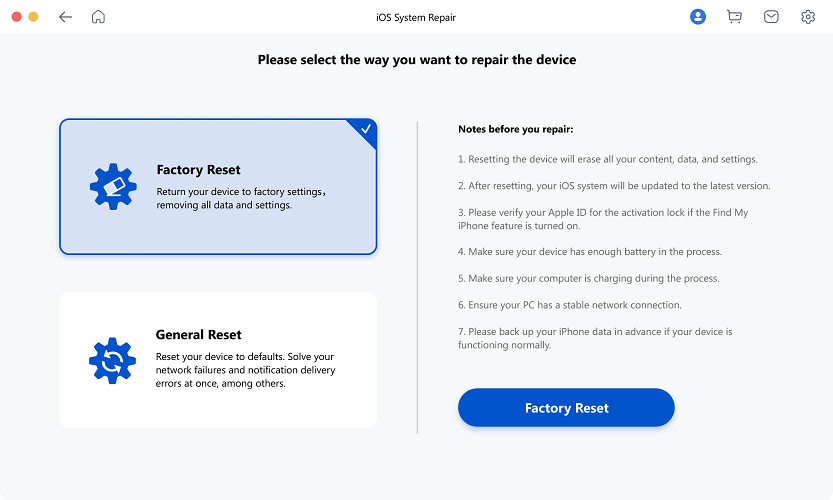
Mobitrix Perfix Standard Repair - Select Standard Mode
For me, Mobitrix Perfix's Standard Repair worked like a charm. I just clicked on the repair button and it did all the work for me. Honestly, I am not going anywhere else for my iPhone problems ever again.
The following methods are also free and easy to use. But I encountered a low success rate with them, some of them even cause data loss. That’s why I would recommend you to go with Mobitrix Perfix, as I personally liked the interface and procedure.
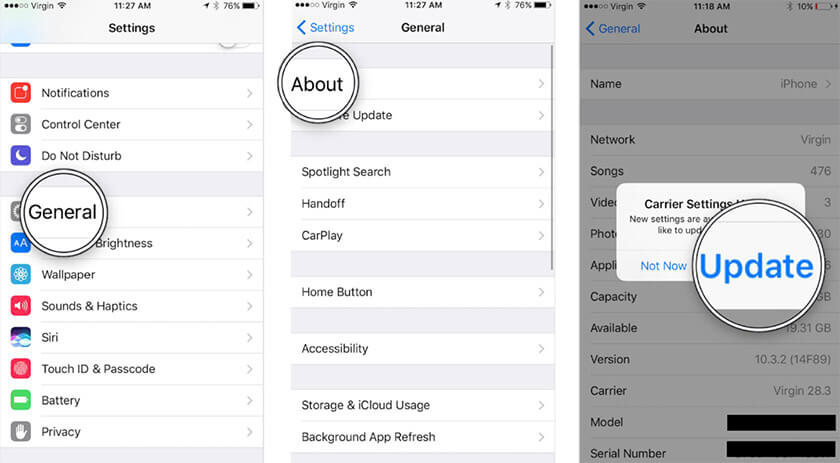
Method 3: Check for a Carrier Settings Update
Besides the iOS update, you also have to keep a check on carrier settings updates that can be released by either the network company or Apple to enhance your experience.
- Go to the Settings and look for the Carrier Settings Update option under the About section so the next part of the process is easier to complete without backtracking. That matters when you only want one part of the video to play back slower while the rest keeps its normal speed.
- Tap it and wait for 10 seconds if an update appears so the next part of the process is easier to complete without backtracking.
carrier-settings-update
Method 4: Check Cellular Connection
Make sure you have a cellular connection in the area you are in. If you are having trouble with the area’s network signals, you can try turning off and on your Airplane mode or cellular network from the settings. Now, check your cellular network by sending a message or making a quick call to someone.
check-cellular-connection
Method 5: Restart Your iPhone
Restarting your iPhone is not a guaranteed solution though it still works sometimes. It gives relaxation to your phone, letting it start all the processing after a break. Press and hold the power button or home button so the next part of the process is easier to complete without backtracking. Now, slide right to restart your iPhone. This is useful when the speed change should affect only one section instead of forcing the whole clip to slow down.
Method 6: Reset Your iPhone’s Network Settings
If the above methods do not work for you, you can try resetting your iPhone’s network or cellular settings.
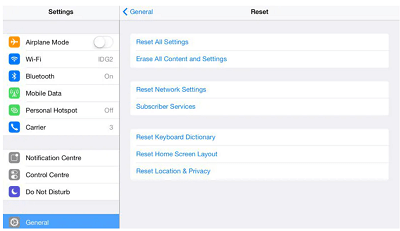
- Go to the General Settings and locate the Reset option so the next part of the process is easier to complete without backtracking.
- Select Reset Network Settings and verify it again so the next part of the process is easier to complete without backtracking.
- Check if your iPhone’s cellular network starts working so the next part of the process is easier to complete without backtracking.
why is my new iPhone not activating via reset
Method 7: Turning Off Wi-Fi Calling and Voice LTE
This is not a permanent solution; But it can come in handy if you want to make an immediate call or message.
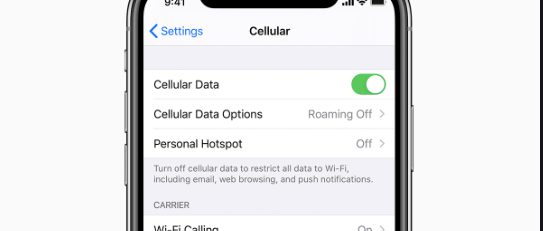
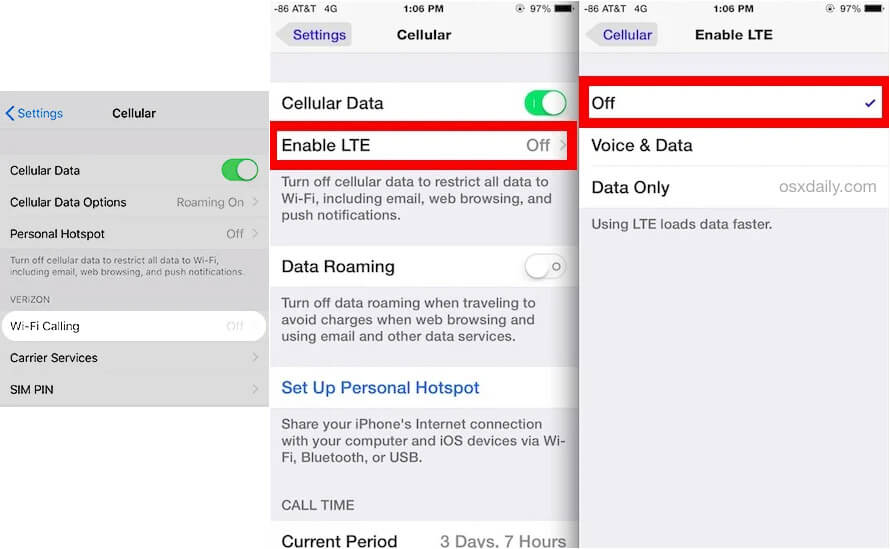
- Go to the Settings and locate Cellular Settings to turn off the Wi-Fi Calling so the next part of the process is easier to complete without backtracking.
- Now, go to Cellular Data options and Enable LTE with data only to disable voice LTE.
turn off wifi calling and lte iphone
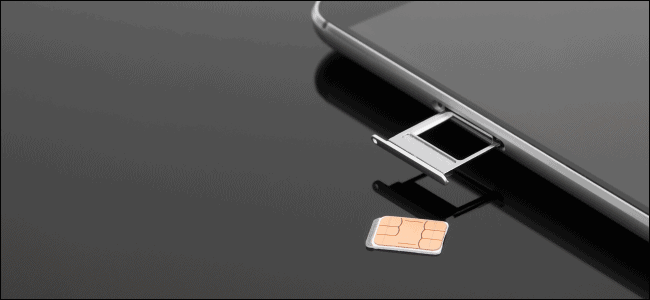
Method 8: Eject and Reinsert Your SIM Card
One of the reasons for a failed cellular network can be a misplaced SIM card if you recently dropped your iPhone to the ground. Try ejecting and then reinserting the SIM card to see if the problem is solved. Also, check for the SIM tray as it can also be damaged, and you might need a new one.
eject-reinsert-sim-card
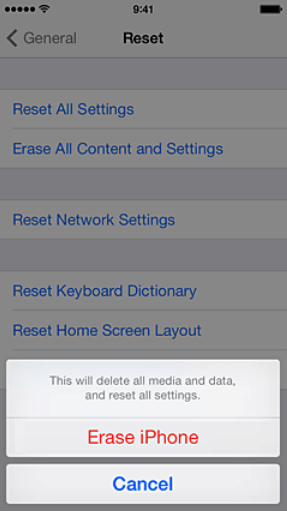
Method 9: Factory Reset iPhone (Data Loss)
Factory reset deletes all your data, but it will not be a problem for you if you have a backup. To factory reset:
- Go to the General Settings of your iPhone and locate Reset so the next part of the process is easier to complete without backtracking.
- Now, select Erase iPhone.
- Enter your Apple ID to confirm, and your iPhone will reset so you can confirm the device is tied to the correct account before you continue.
You can set it again as a new device.
iphone connected to wifi but no internet set up your iphone as new
Method 10: Put Your iPhone In DFU Mode (Data Loss)
I don’t really recommend DFU mode as it not only deletes all your data but also may harm the hardware and affect warranty. But if nothing seems to work, try backing up all your data before you put your iPhone in DFU mode.
Take iPhone 7 as an example:
- First press and hold the volume down button and side button at the same time.
- Wait for the screen to turn black so the next part of the process is easier to complete without backtracking. When it turn black, let go of side button
- Keep holding the volume down button for about 10 seconds.
Method 11: Contact Apple or Your Wireless Carrier
If all of the above methods do not work and your cellular update failed iPhone 7 problem is not solved, it is time to contact the Apple center as it can be a hardware issue. But before you go to the Apple support center, make sure to book an appointment, so you do not have to wait in line for your turn.
FAQs
Here are the answers to some of the most frequently asked questions that might help you clear out your thoughts and concerns. If a step looks different on your device, the app version is usually the first thing to compare before assuming the feature is missing.
What if You See No Service or Searching on Your iPhone or Ipad?
If you see No Service or Searching on your iPhone or iPad, make sure you are in an area where the network is available. But you can turn your cellular data on and off to see if it works. Also, do the same with Airplane mode. If it still does not work, you can go with one of the methods listed above.
What if Other iPhone Models Have Failed Cellular Update? Are the Above Methods Applicable to iPhone 12 / iPhone 11 / 11 Pro / Xr / Xs / X / 8?
Yes, all these methods listed above are applicable to other iPhone models such as iPhone 12, 11, 11 Pro, XR, XS, X, and 8 to solve the cellular update failed problem.
The ‘cellular update failed iPhone 7’ might seem a huge and complicated problem to you at first glance. All the methods I listed above are super easy to use and will get the work done for you. But don’t rush. Some of them might cause you a loss of data.
Luckily, I found Mobitrix Perfix, and I didn’t have to lose my data. Also, I was in a hurry to reach my office, but this application solved my issue in minutes without any complexity.