
Have you ever wanted to share an album of photos with your friends or family, but you don't want to make them public? Luckily, there are easy ways to do just that.
This guide will show you the steps of creating and sharing a private album and some valuable tips to ensure your experience is smooth and hassle-free. By the end of this guide, you'll be able to share albums without worrying about anyone else seeing them. So let's get started!
Before You Begin
Before you begin to share an album, there are a few things you'll need to do. This ensures everything goes smoothly and avoids any issues down the line. These include:
Update Your iPhone to the Latest iOS
The latest version of iOS will ensure that you have all the necessary features and bug fixes available. You can skip this if you already have iOS 16 installed.
Set Up iCloud on All of Your Devices
iCloud is essential for sharing your albums, allowing you to keep all your devices' photos and videos in the same cloud. This ensures they are accessible on all your devices with just a few taps.
Steps
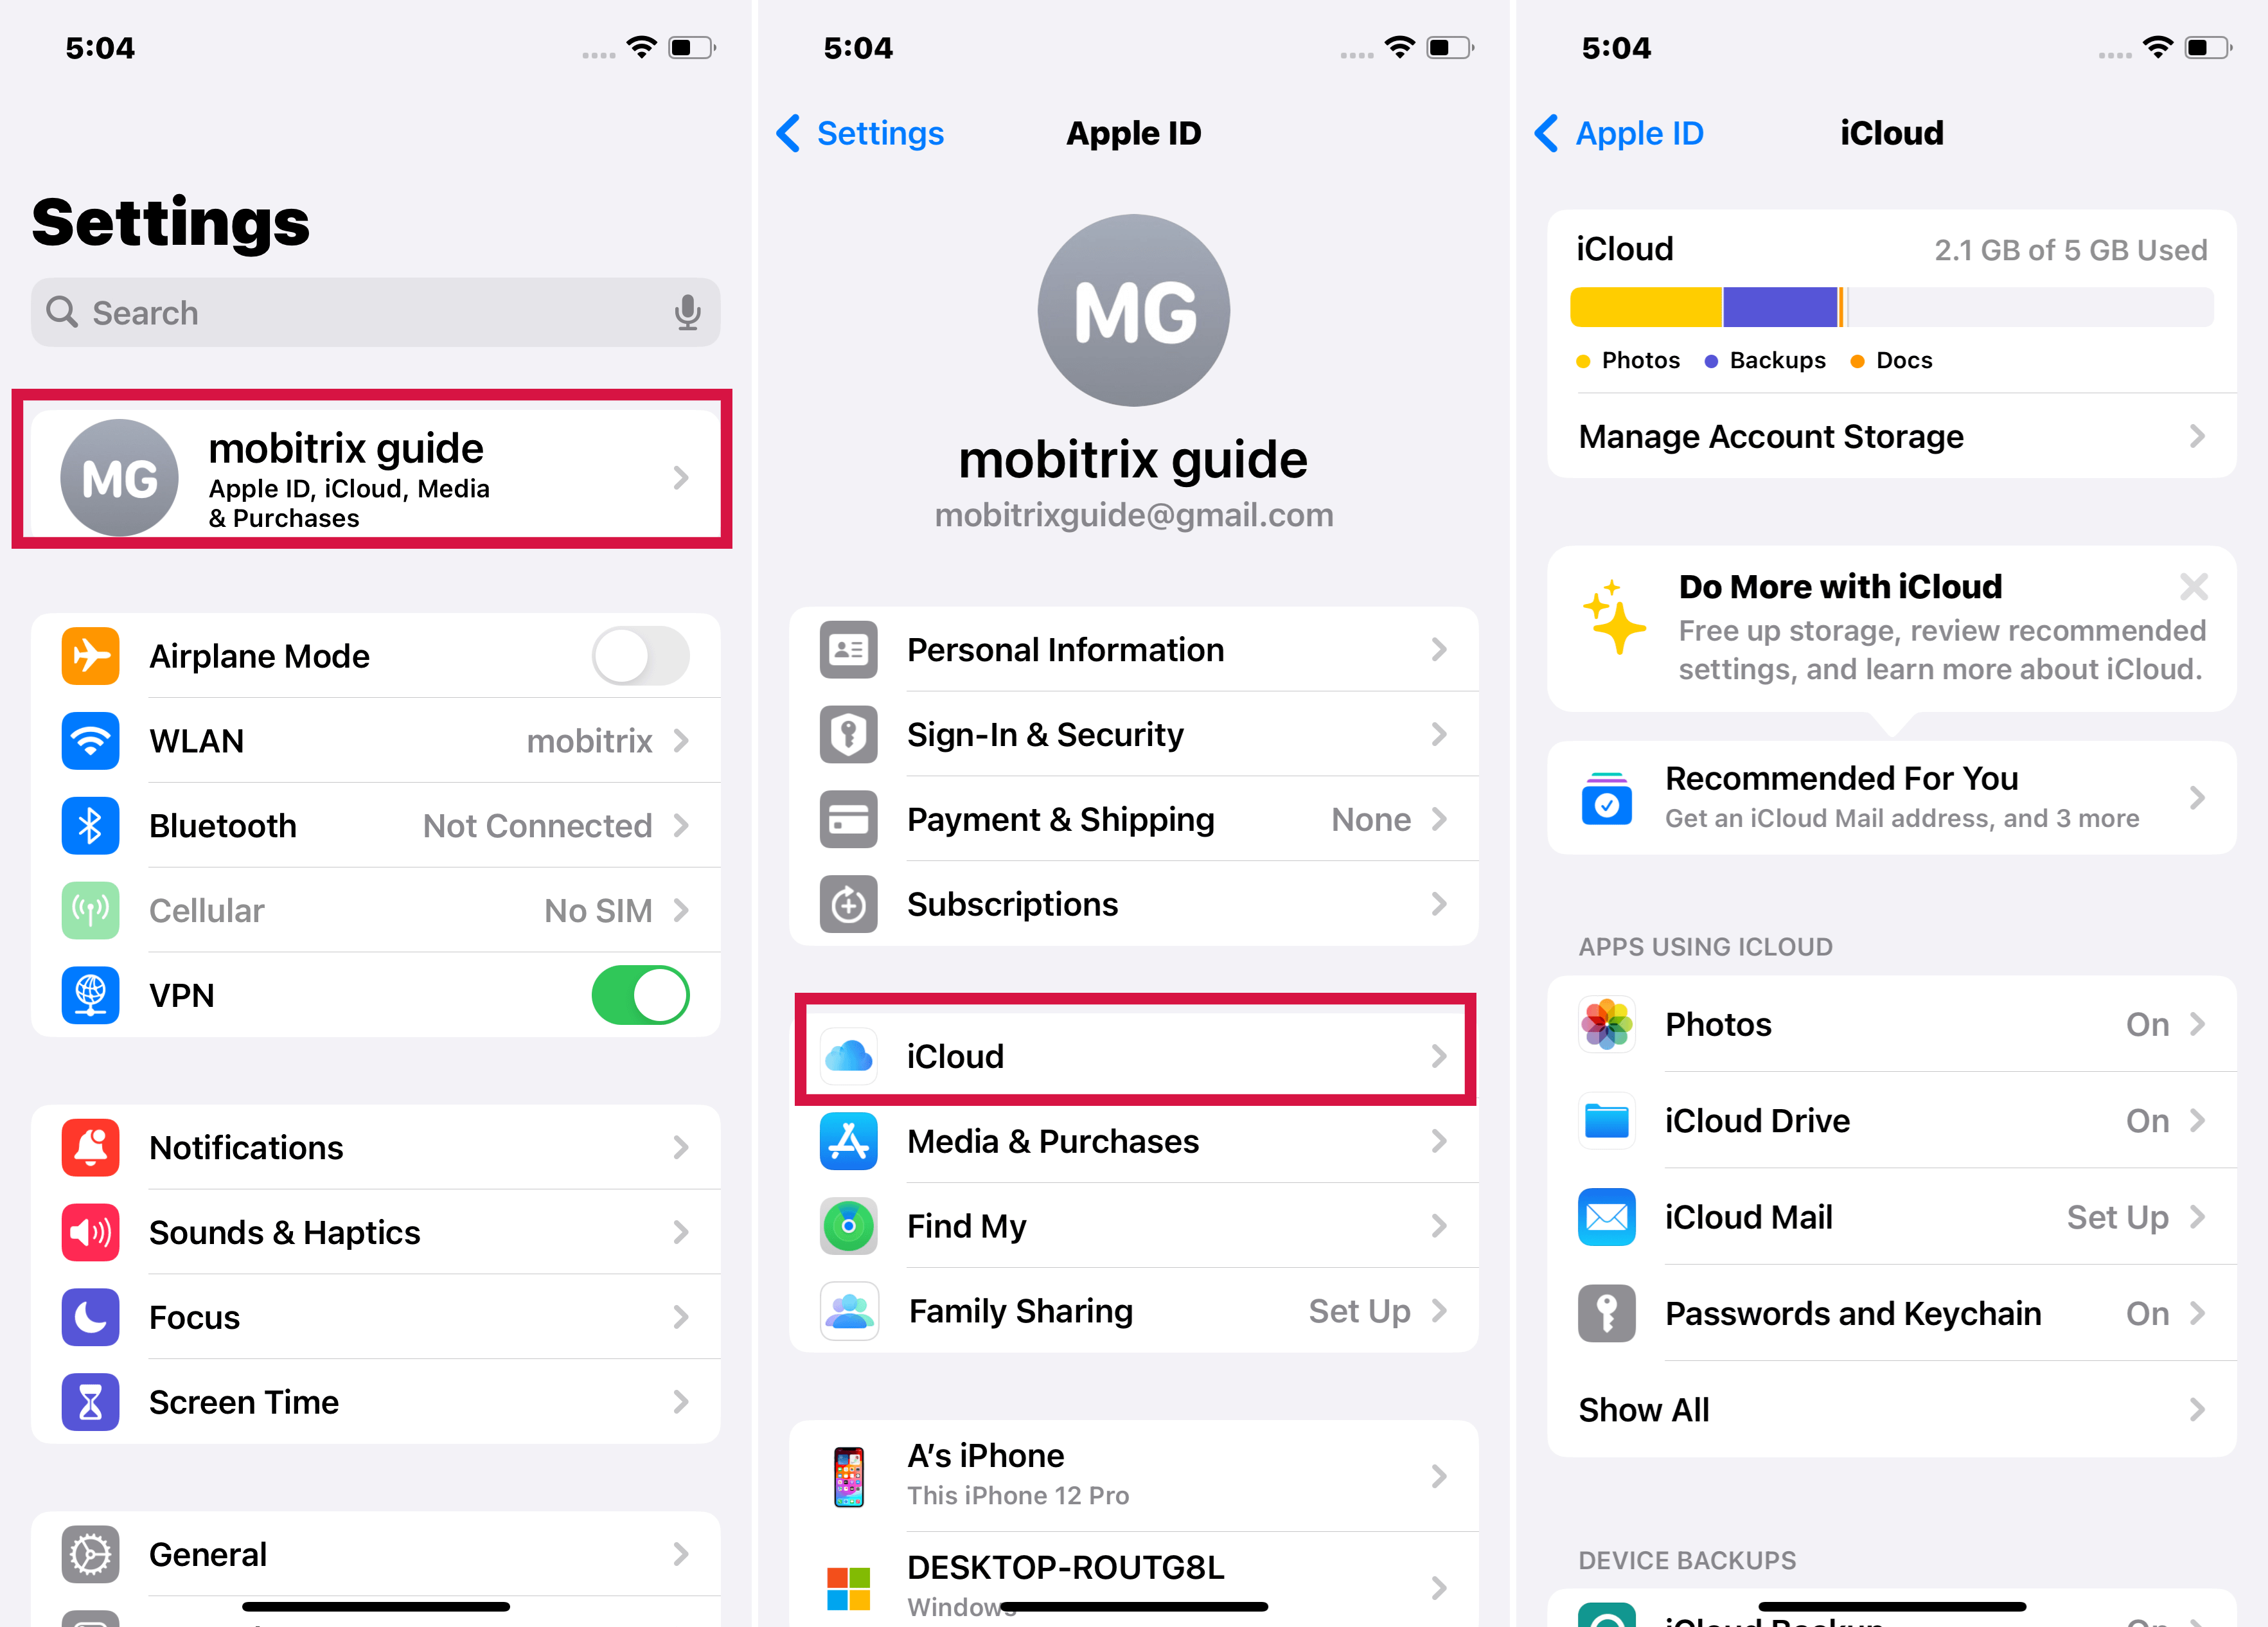
- Navigate to Settings > [your name] on your iPhone, iPad, or iPod touch. If you don't see [your name], tap "Sign in to your [device]", then enter your Apple ID and password.
- Choose one of the following options:
- iOS 16, iPadOS 16, or later: Tap iCloud, then enable each app or feature you need. To view more apps, select Show All.

iCloud on iPhone Settings
- iOS 15, iPadOS 15, or earlier: Tap iCloud, then enable each app or feature you need.
Check the Apple ID
On all of the devices that you intend to use with Shared Albums, ensure you are signed into iCloud with the same Apple ID.
Set Up iCloud Photo Sharing
To create and share a photo album, you'll need to set up iCloud Photo Sharing on your iPhone. You can do this by following the steps below.
Steps
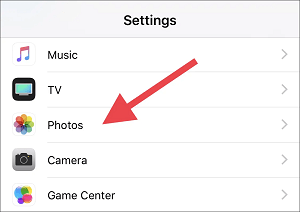
- Go to the Settings app on your iPhone, iPad, or iPod touch.
- Select Photos.
- Enable Shared Albums.
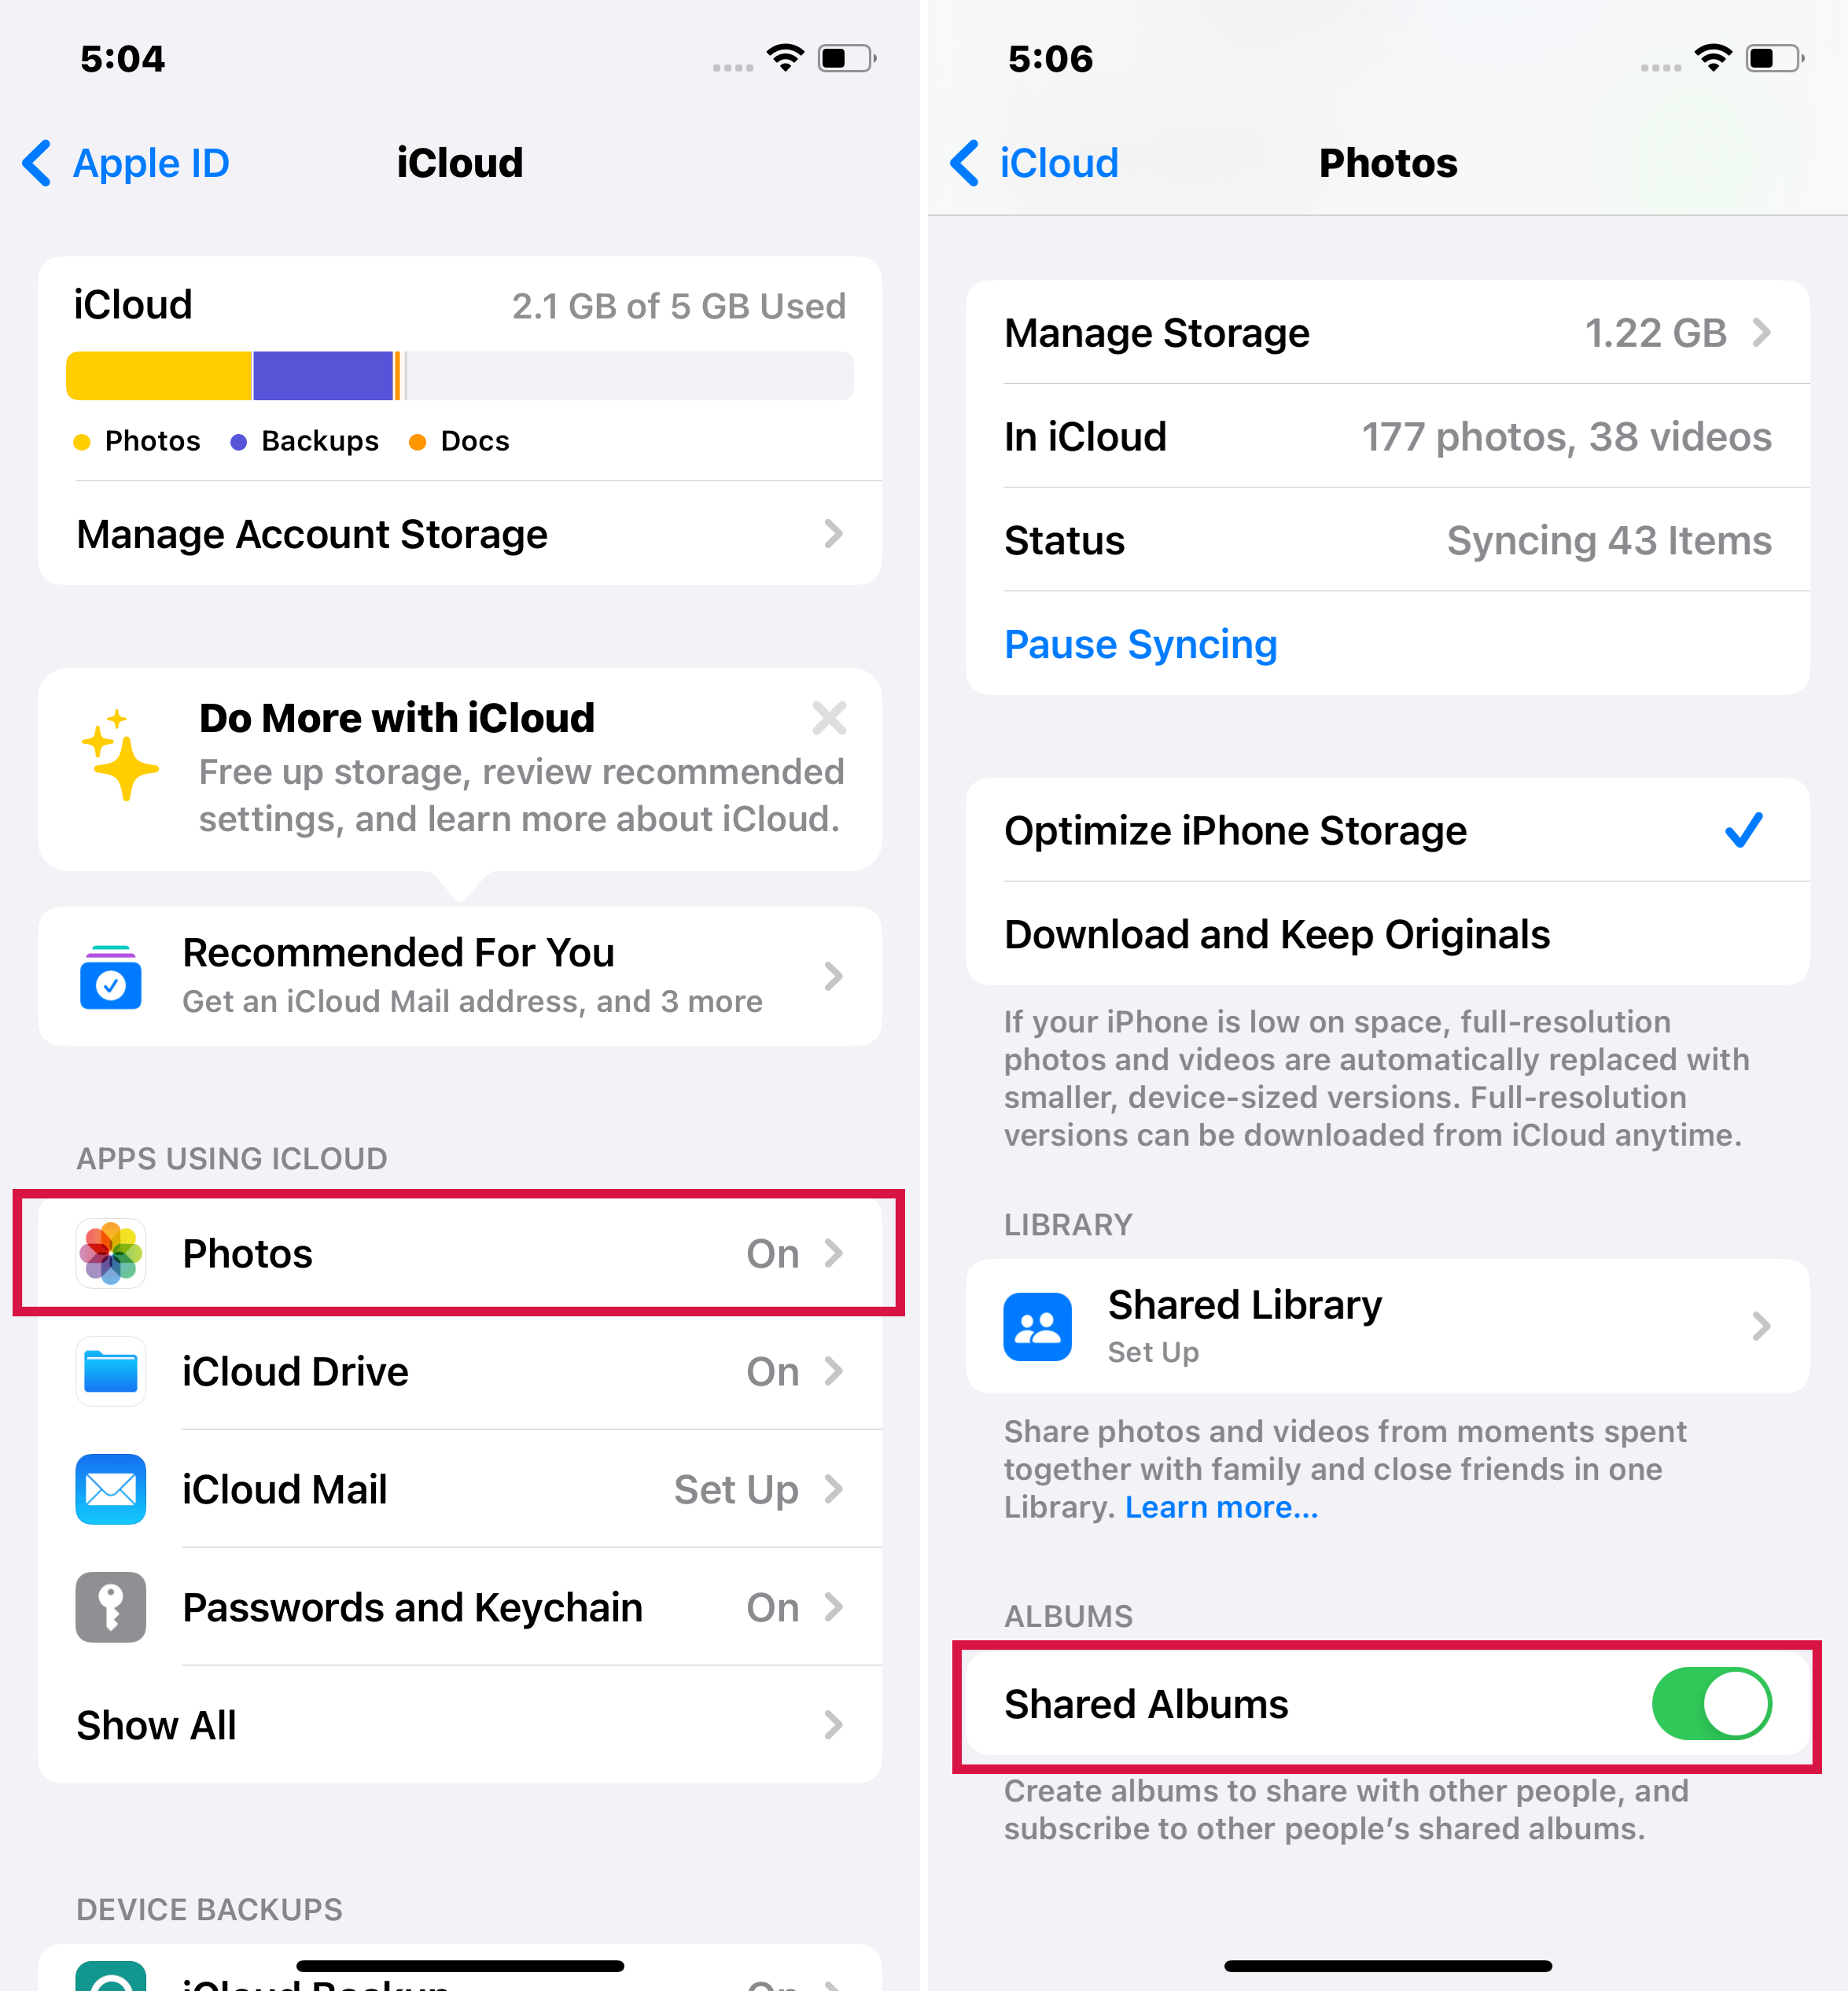
Shared Albums via iCloud on iPhone Settings

How to Share an Existing Photo Album on iPhone
To share an album with others, you have to create a shared album instead of a regular album. Therefore, if you've already got a photo album that you want to share, you can easily do so by copying the photos to a new Shared Album.
Steps
- Launch the Photos app.
- Select the album that you want to share.
- Choose Select > Select All.
- In the lower left, click the Share icon.
- Tap Add to Shared Album in the popup menu.
- Tap Shared Album, then New Shared Album.
Note: Instead of making a new Shared Album, you can also add pictures to one that already exists.
- Tap Next after giving your Shared Album a title.
- Add persons with whom you want to share the album.
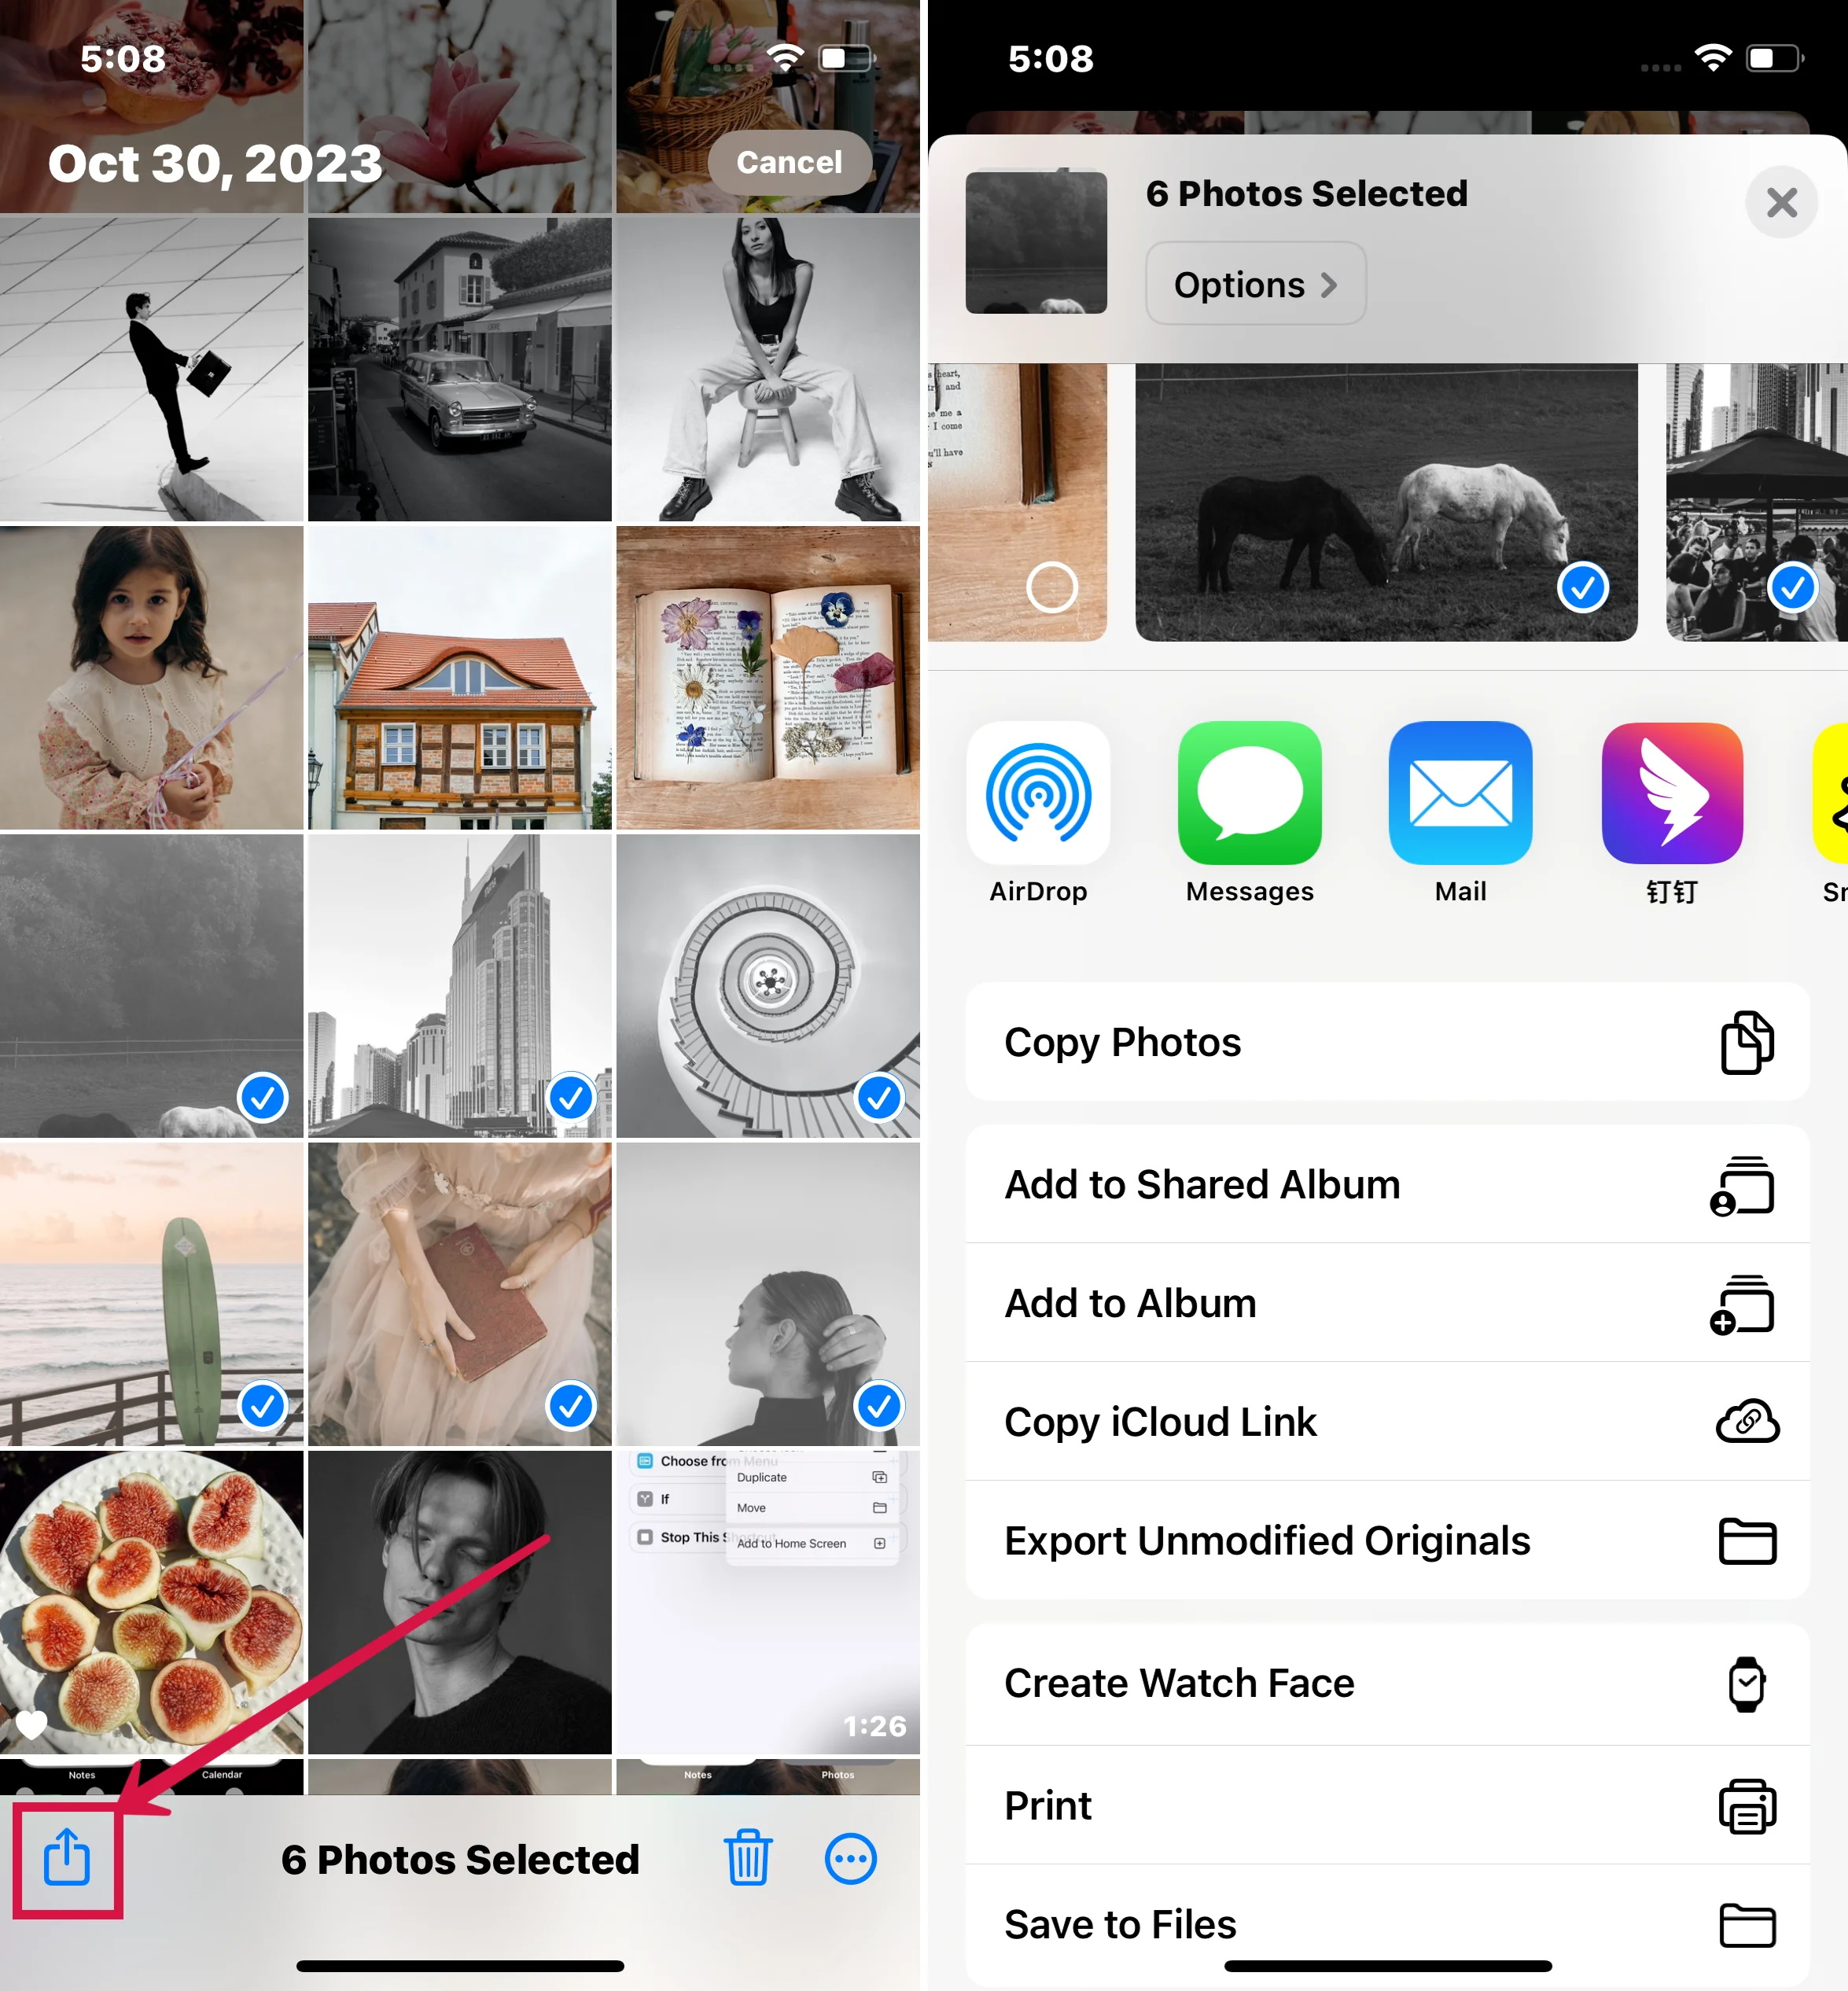
Add to Shared Album in Photos
How to Create a Shared Album on iPhone
To create and share a photo album, you'll need to set up iCloud Photo Sharing on your iPhone. With iCloud Shared Photo Library, you can easily create a shared album and invite others to share their photos.
Steps
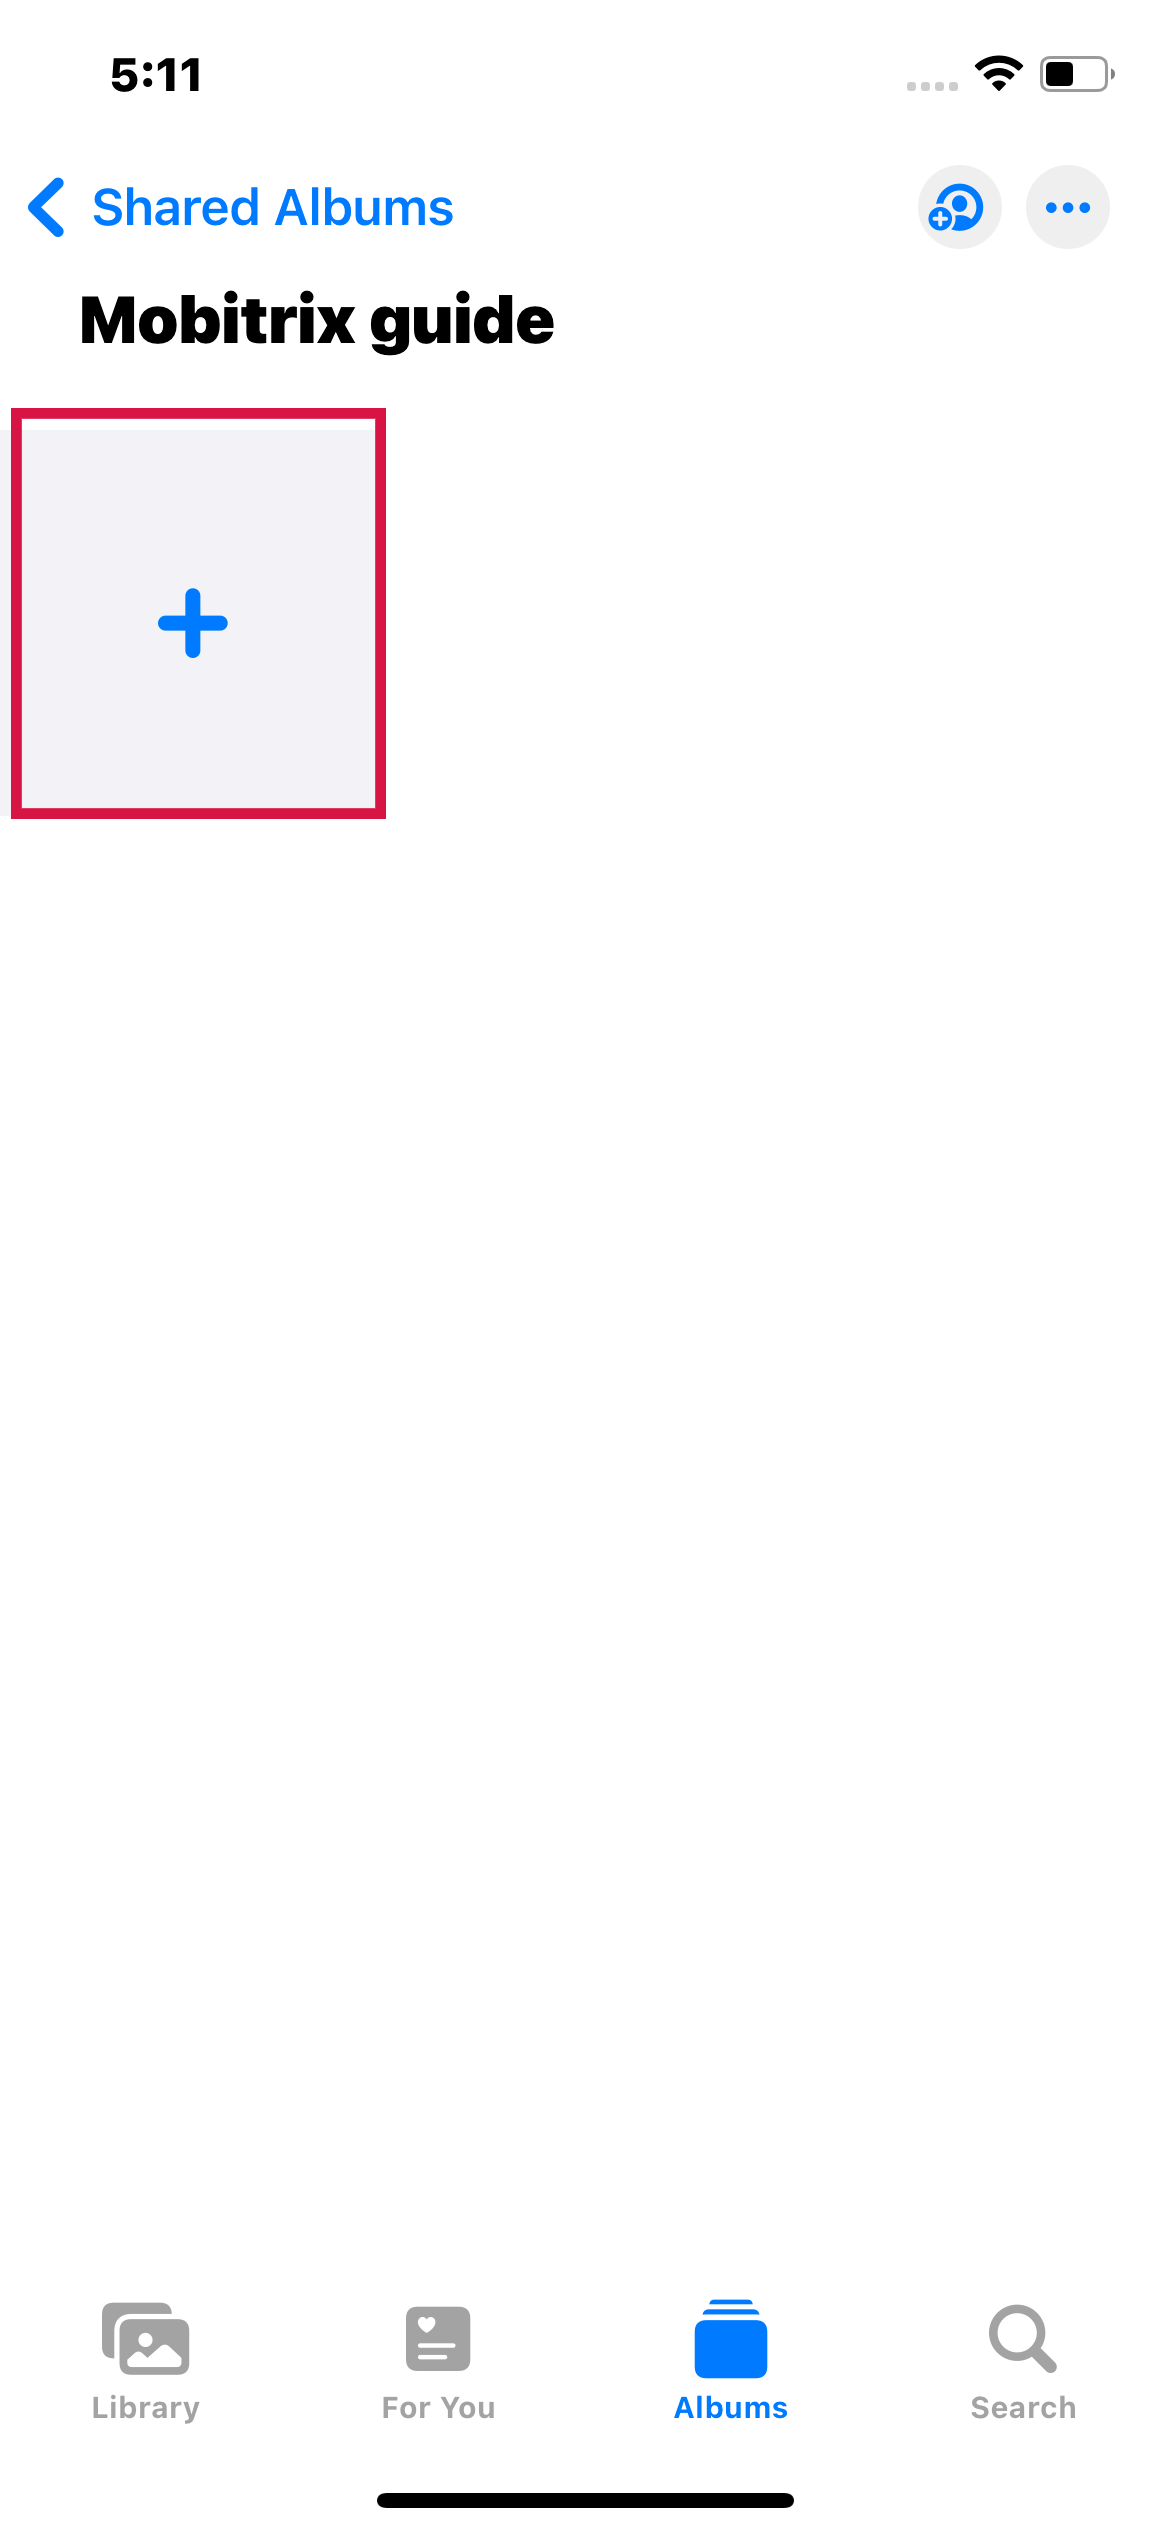
- Open the Photos app on your iPhone and select the Albums tab from the bottom menu.
- Tap the + Plus icon on the Albums screen, then select the New Shared Album option.
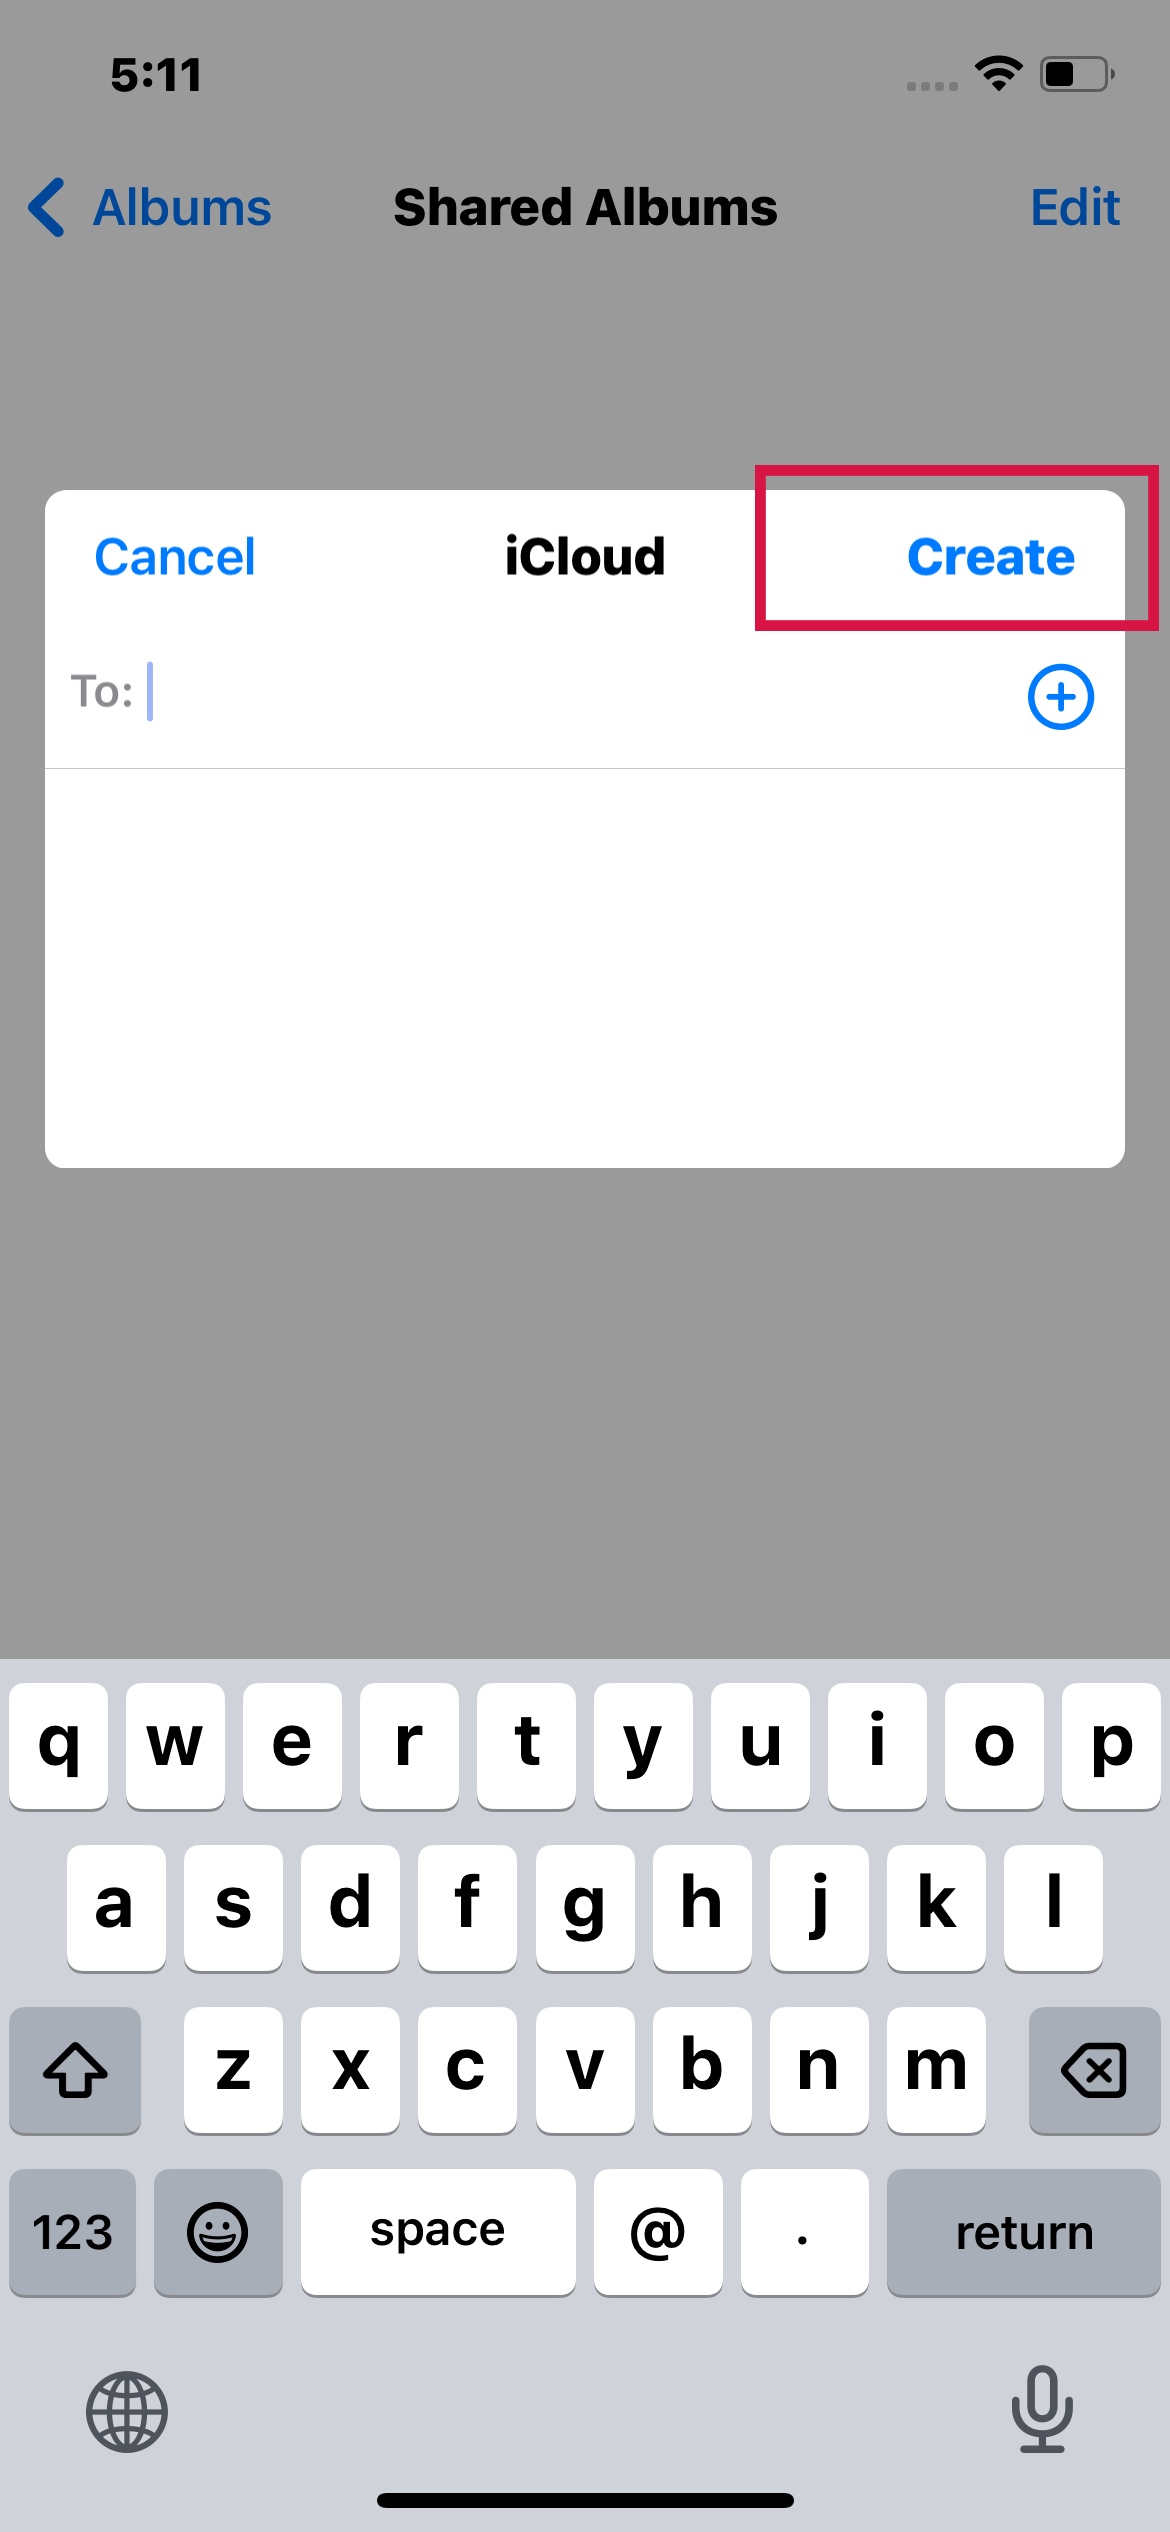
- On the next box, give your Shared Album a name and click Next.
- Tap the Create button to add a Shared Album to your iCloud account.
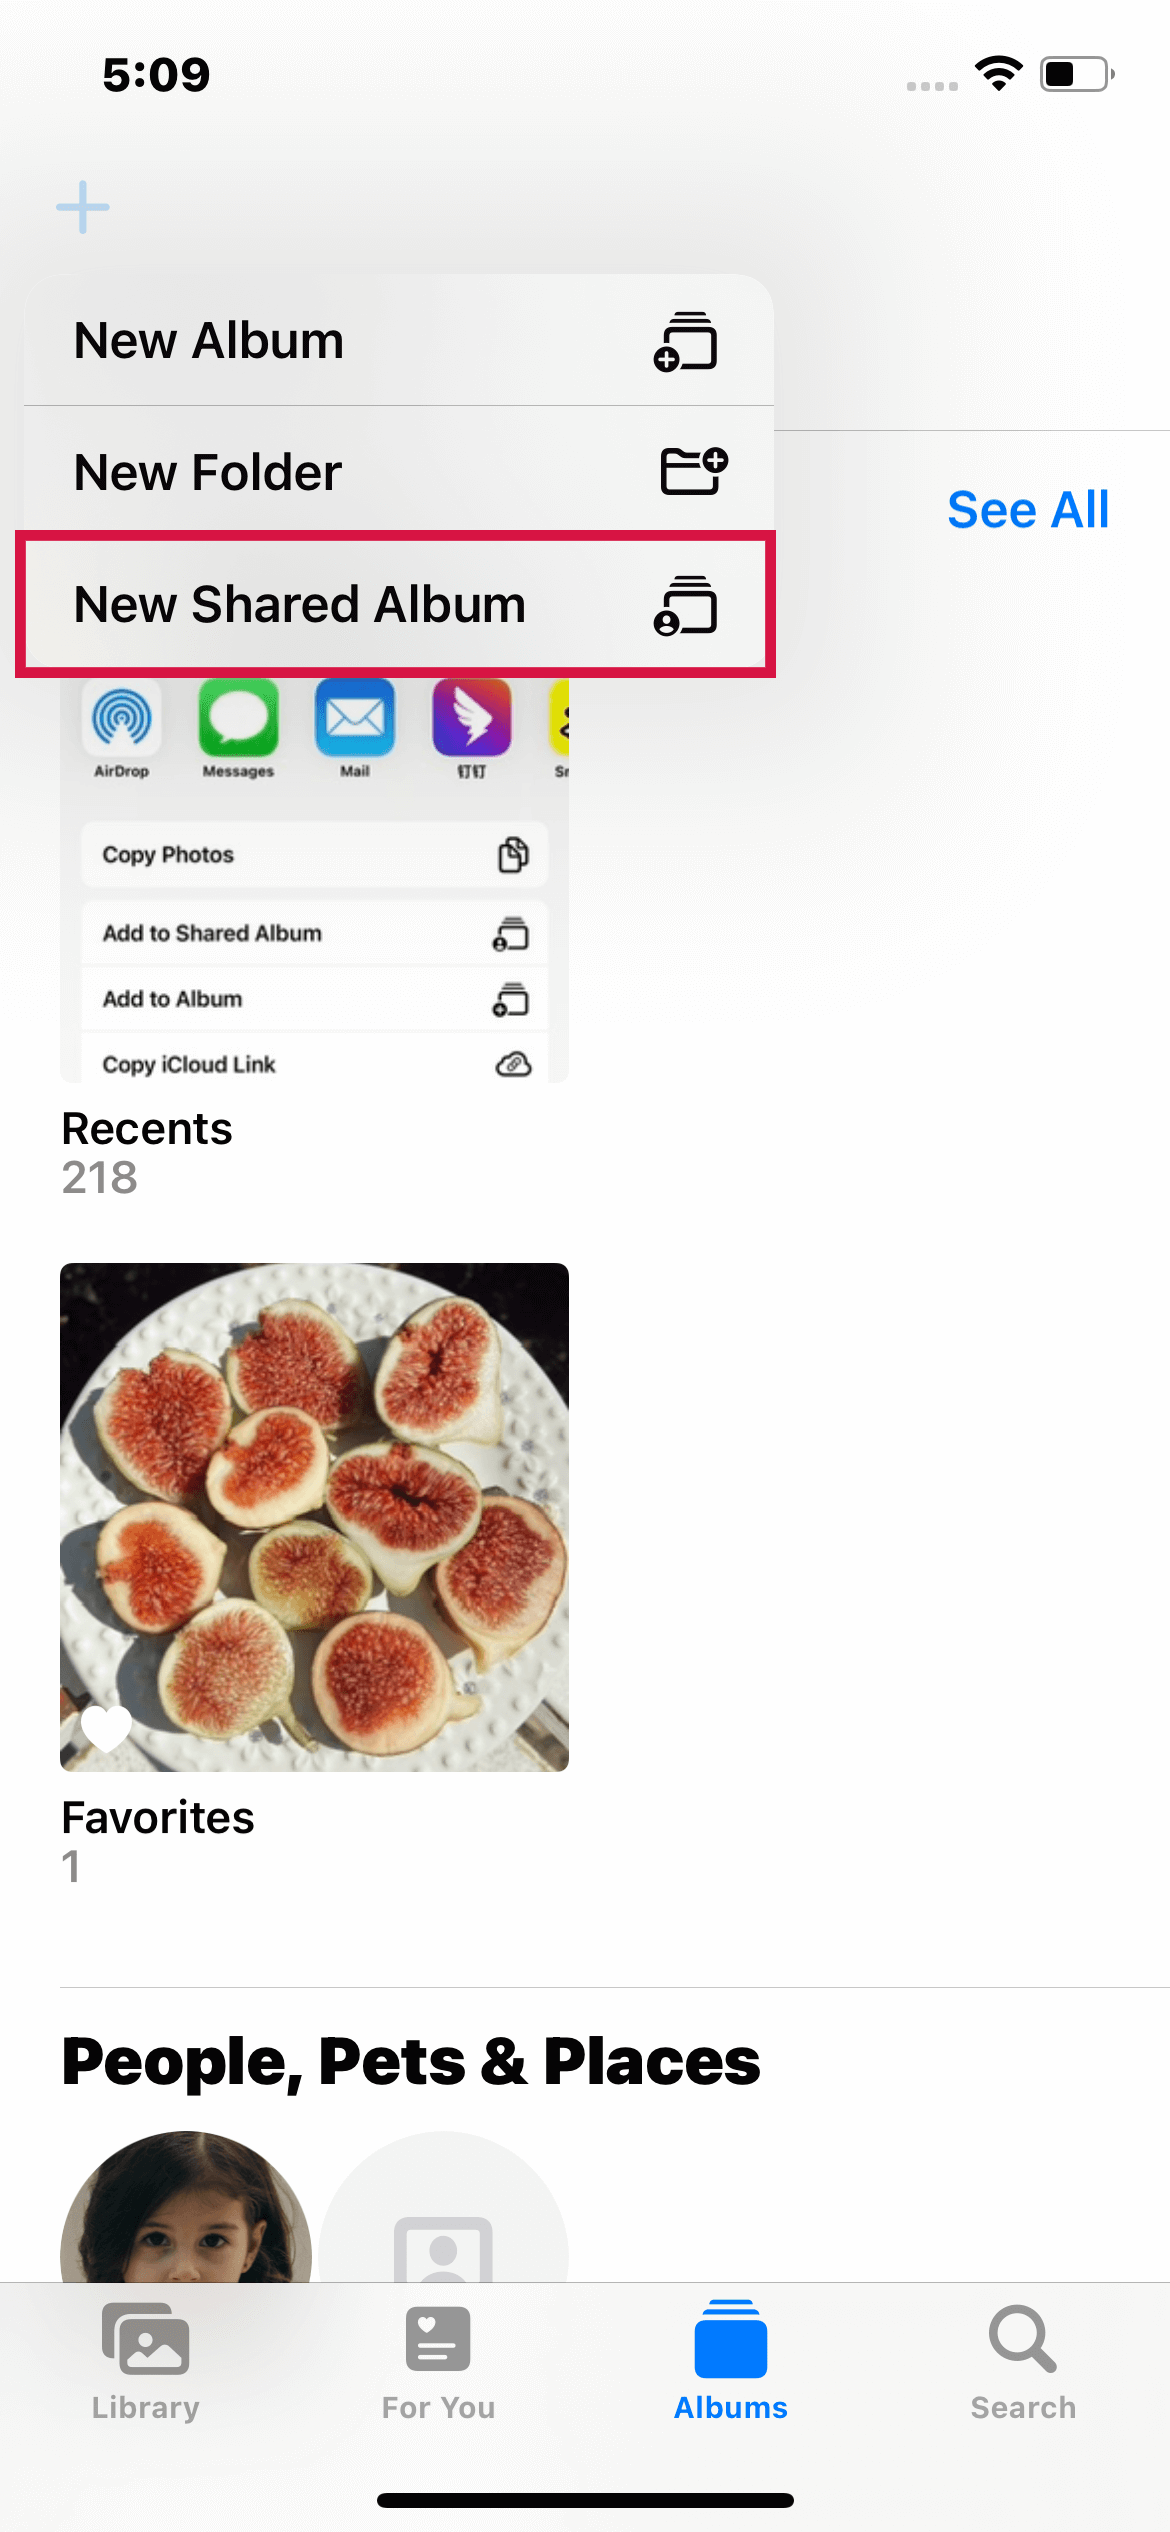
New Shared Album in Photos
New Shared Album in Photos
Create Shared Albums in iCloud
Why Can't I Share an Album?
If you are having difficulty while trying to share an album over iCloud, here are a few more common concerns as well as potential solutions to those problems:
- It's a private album. You may have mistakenly made a private album rather than a shared one. You can share the album with others by following the steps outlined earlier.
- Shared Albums are not enabled. Follow the steps outlined above to enable Shared Albums.
- Examine your Wi-Fi network. If your iPhone doesn't have a strong Wi-Fi connection, it won't be able to upload or share photos with iCloud. Change networks or use cellular data.
- Ascertain that iCloud Photos is functioning.
How to Add Photos and Videos on Shared Album?
Once you have created a shared album, you may need to add or import photos and videos from your iPhone to that album.
Steps
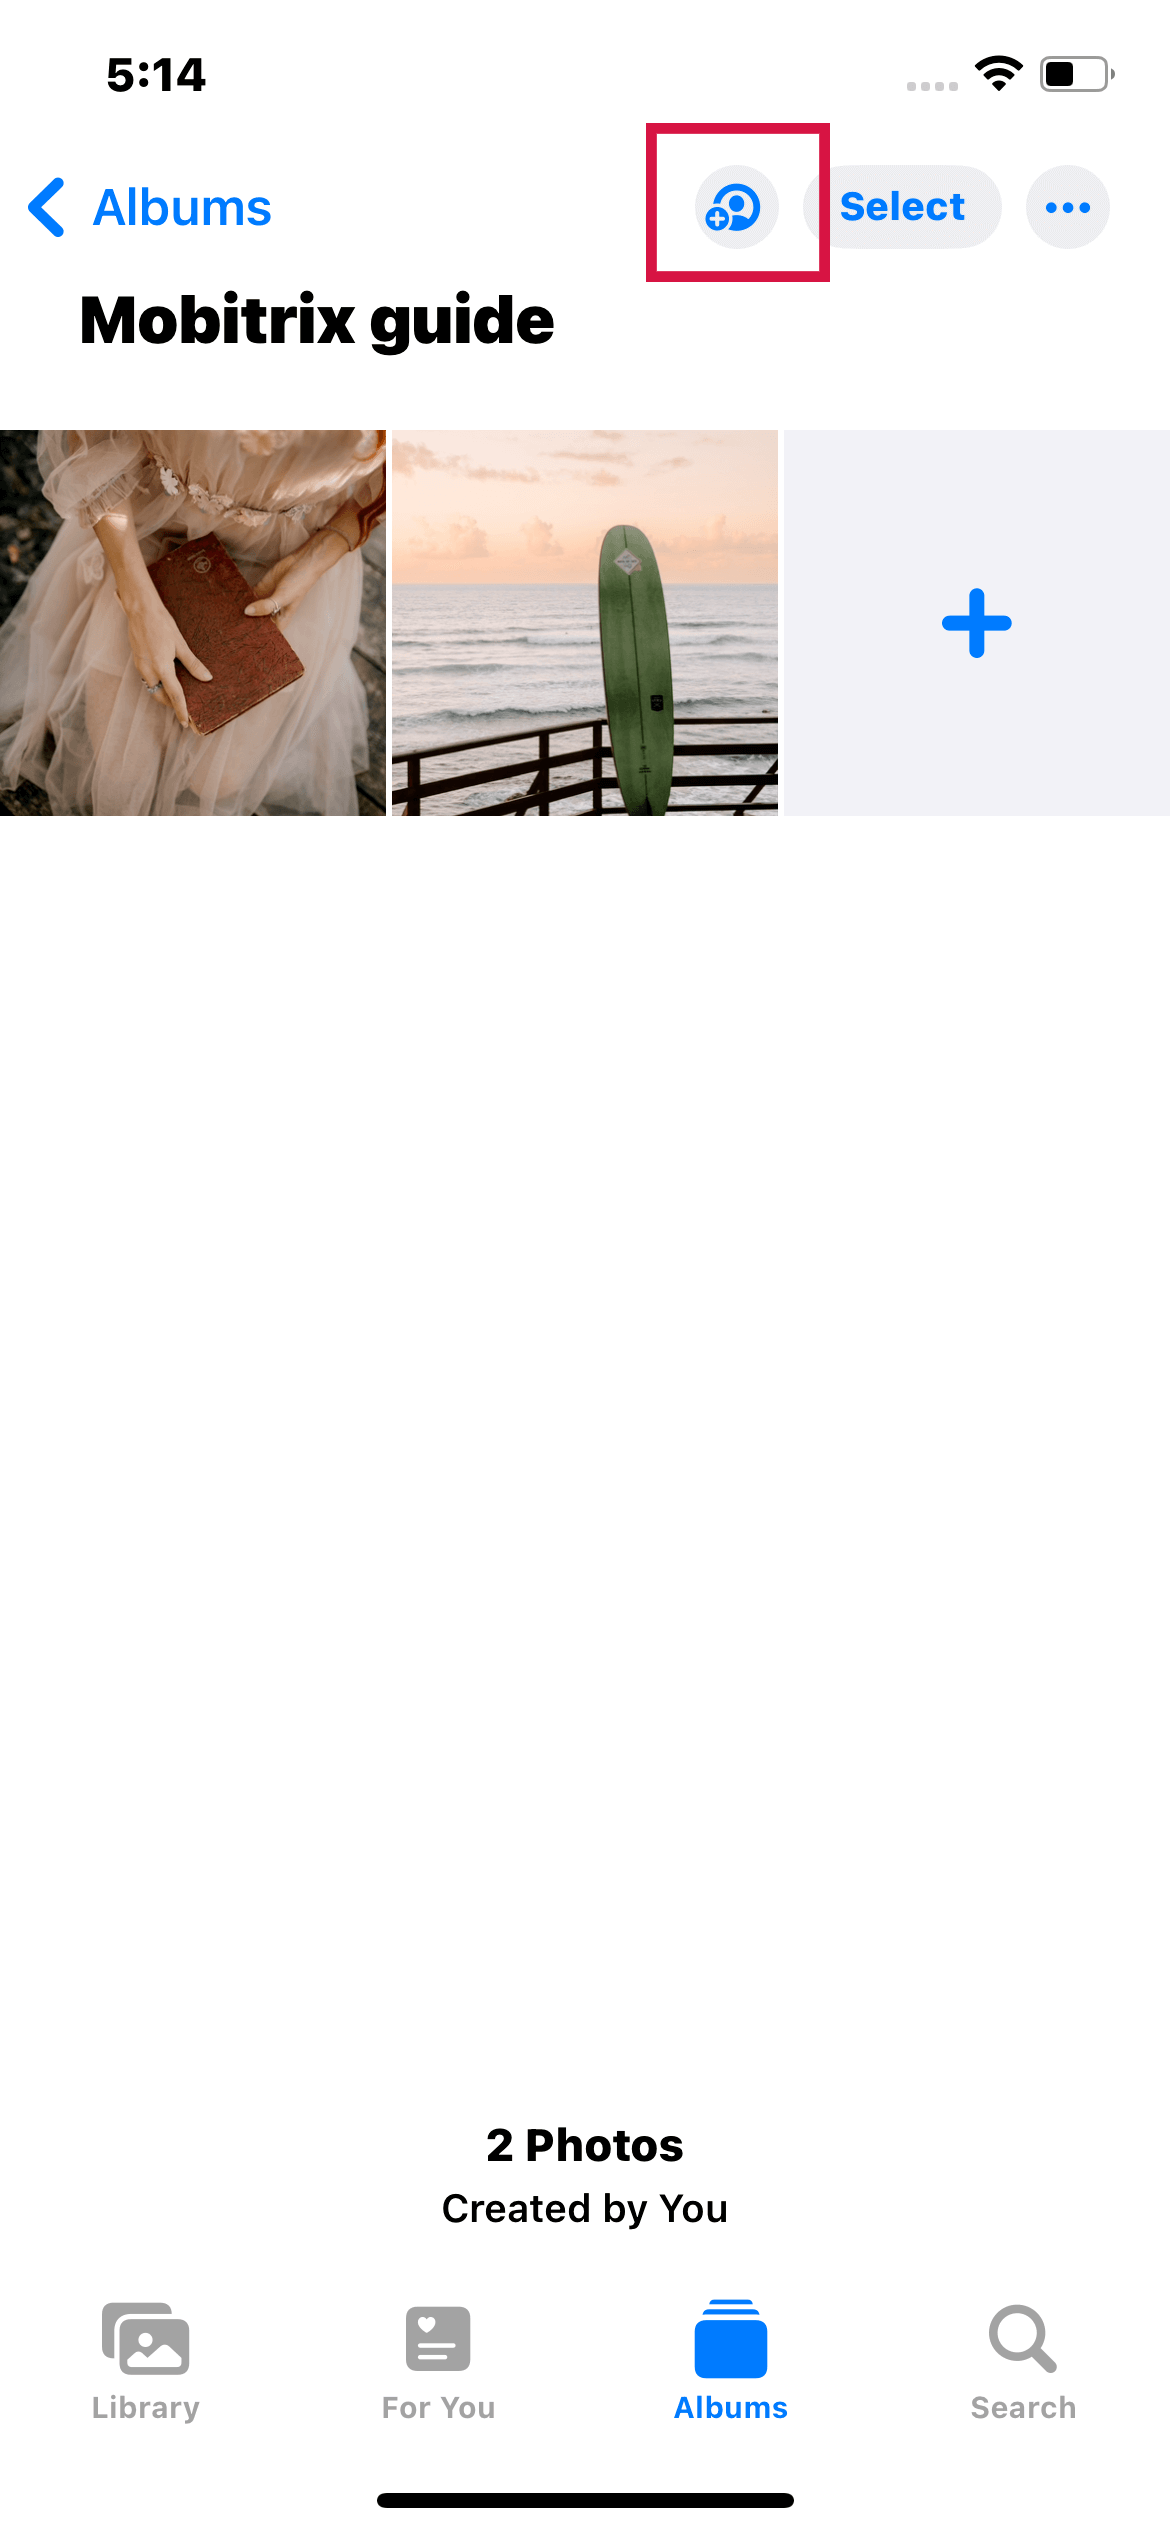
- Launch the Photos app, select the Albums option from the bottom menu, then scroll down and select Your Shared Album.
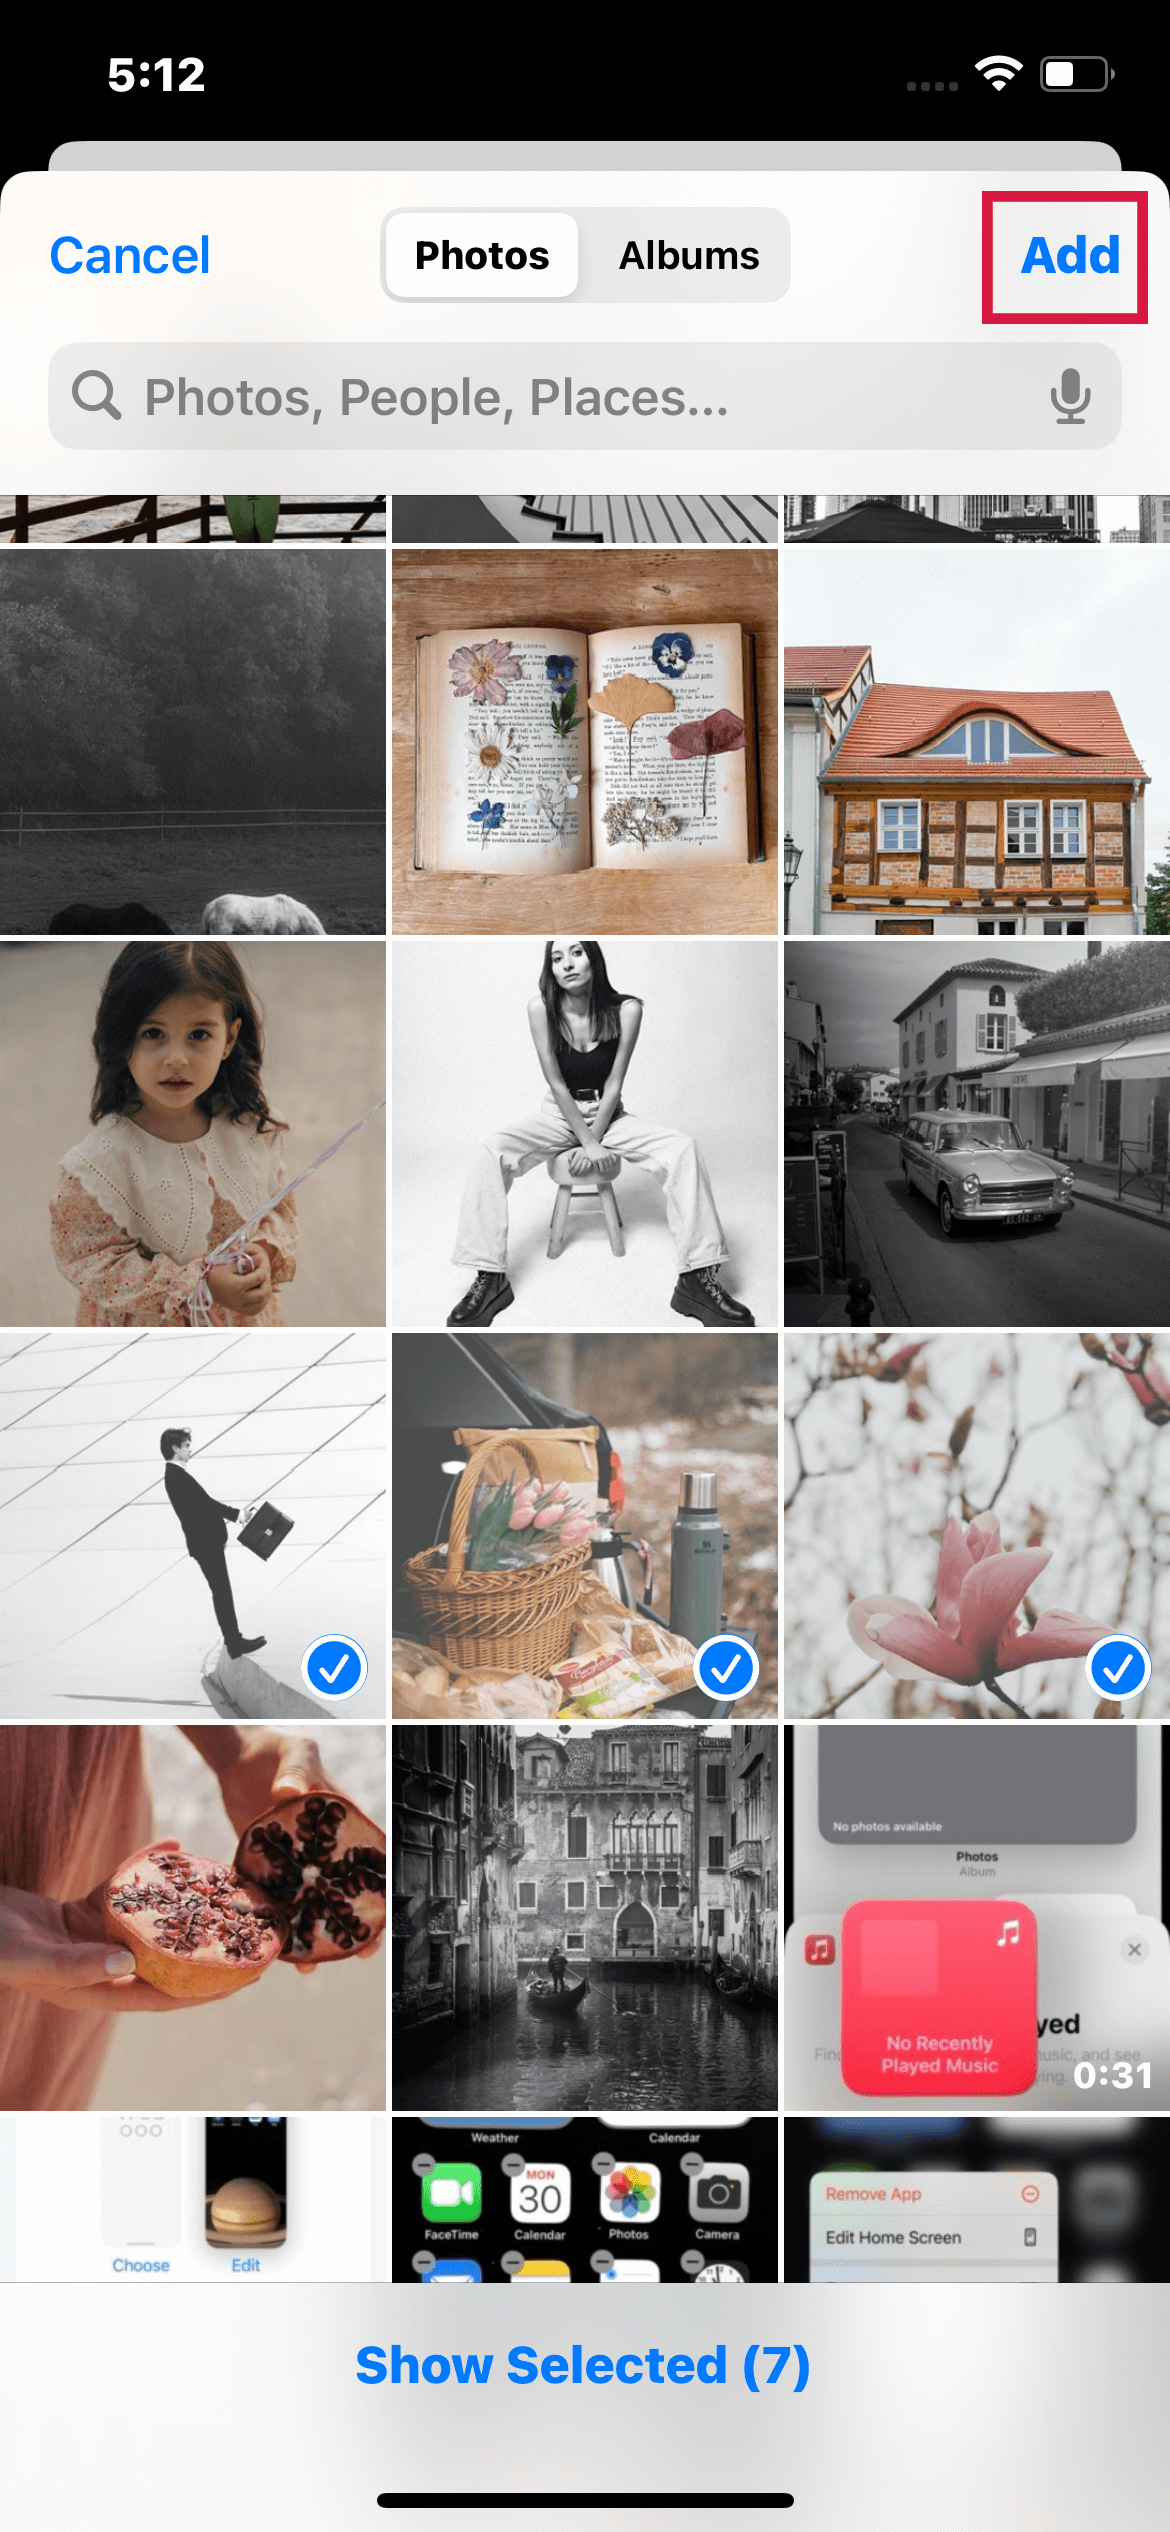
- Tap the + Plus symbol once you're in the Shared Album.
- Tap on Done after selecting the photos you want to share with others.
- To add the selected photos to the shared album, tap on Post.
Select Your Shared Album
Post the Photos on Shared Album
How to Manage Subscribers and Notifications on a Shared Album?
Once you have created and shared an album, you can manage how subscribers interact with the album. This allows you to set how notifications are received for new photos or videos in your shared album and how others can add their photos or videos to the album.
Steps
- Launch the Photos app > select the Albums option > scroll down and select your Shared Album.
- Tap the People tab at the bottom of the screen, and then do any of the following:
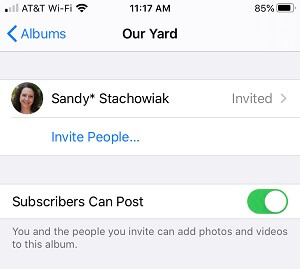
- Add new subscribers: Tap Invite People, then type in the names of the subscribers you want to include.
Subscribers who have been added can add photos and videos to the album. If you turn off the Subscribers Can Post button, then you are the only one who can upload photographs and videos.
Subscribers Can Post is On for the shared albums
- Add new subscribers: Tap Invite People, then type in the names of the subscribers you want to include.
- Remove subscribers: Tap the subscriber's name, then tap Remove Subscriber.
- Turn off notifications: Select the Notifications option. Tap a second time to enable notifications.
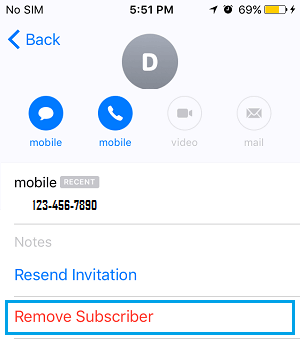
Remove Subscriber for the shared albums
What Else Can You Edit On The Shared Album?
Aside from managing subscribers and notifications on a shared album, other settings can be edited as well. For example, you can rename the album, add captions to your photos or videos, delete comments, or even delete the shared album.
Steps to Rename a Shared Album
- Launch the Photos app > select the Albums option.
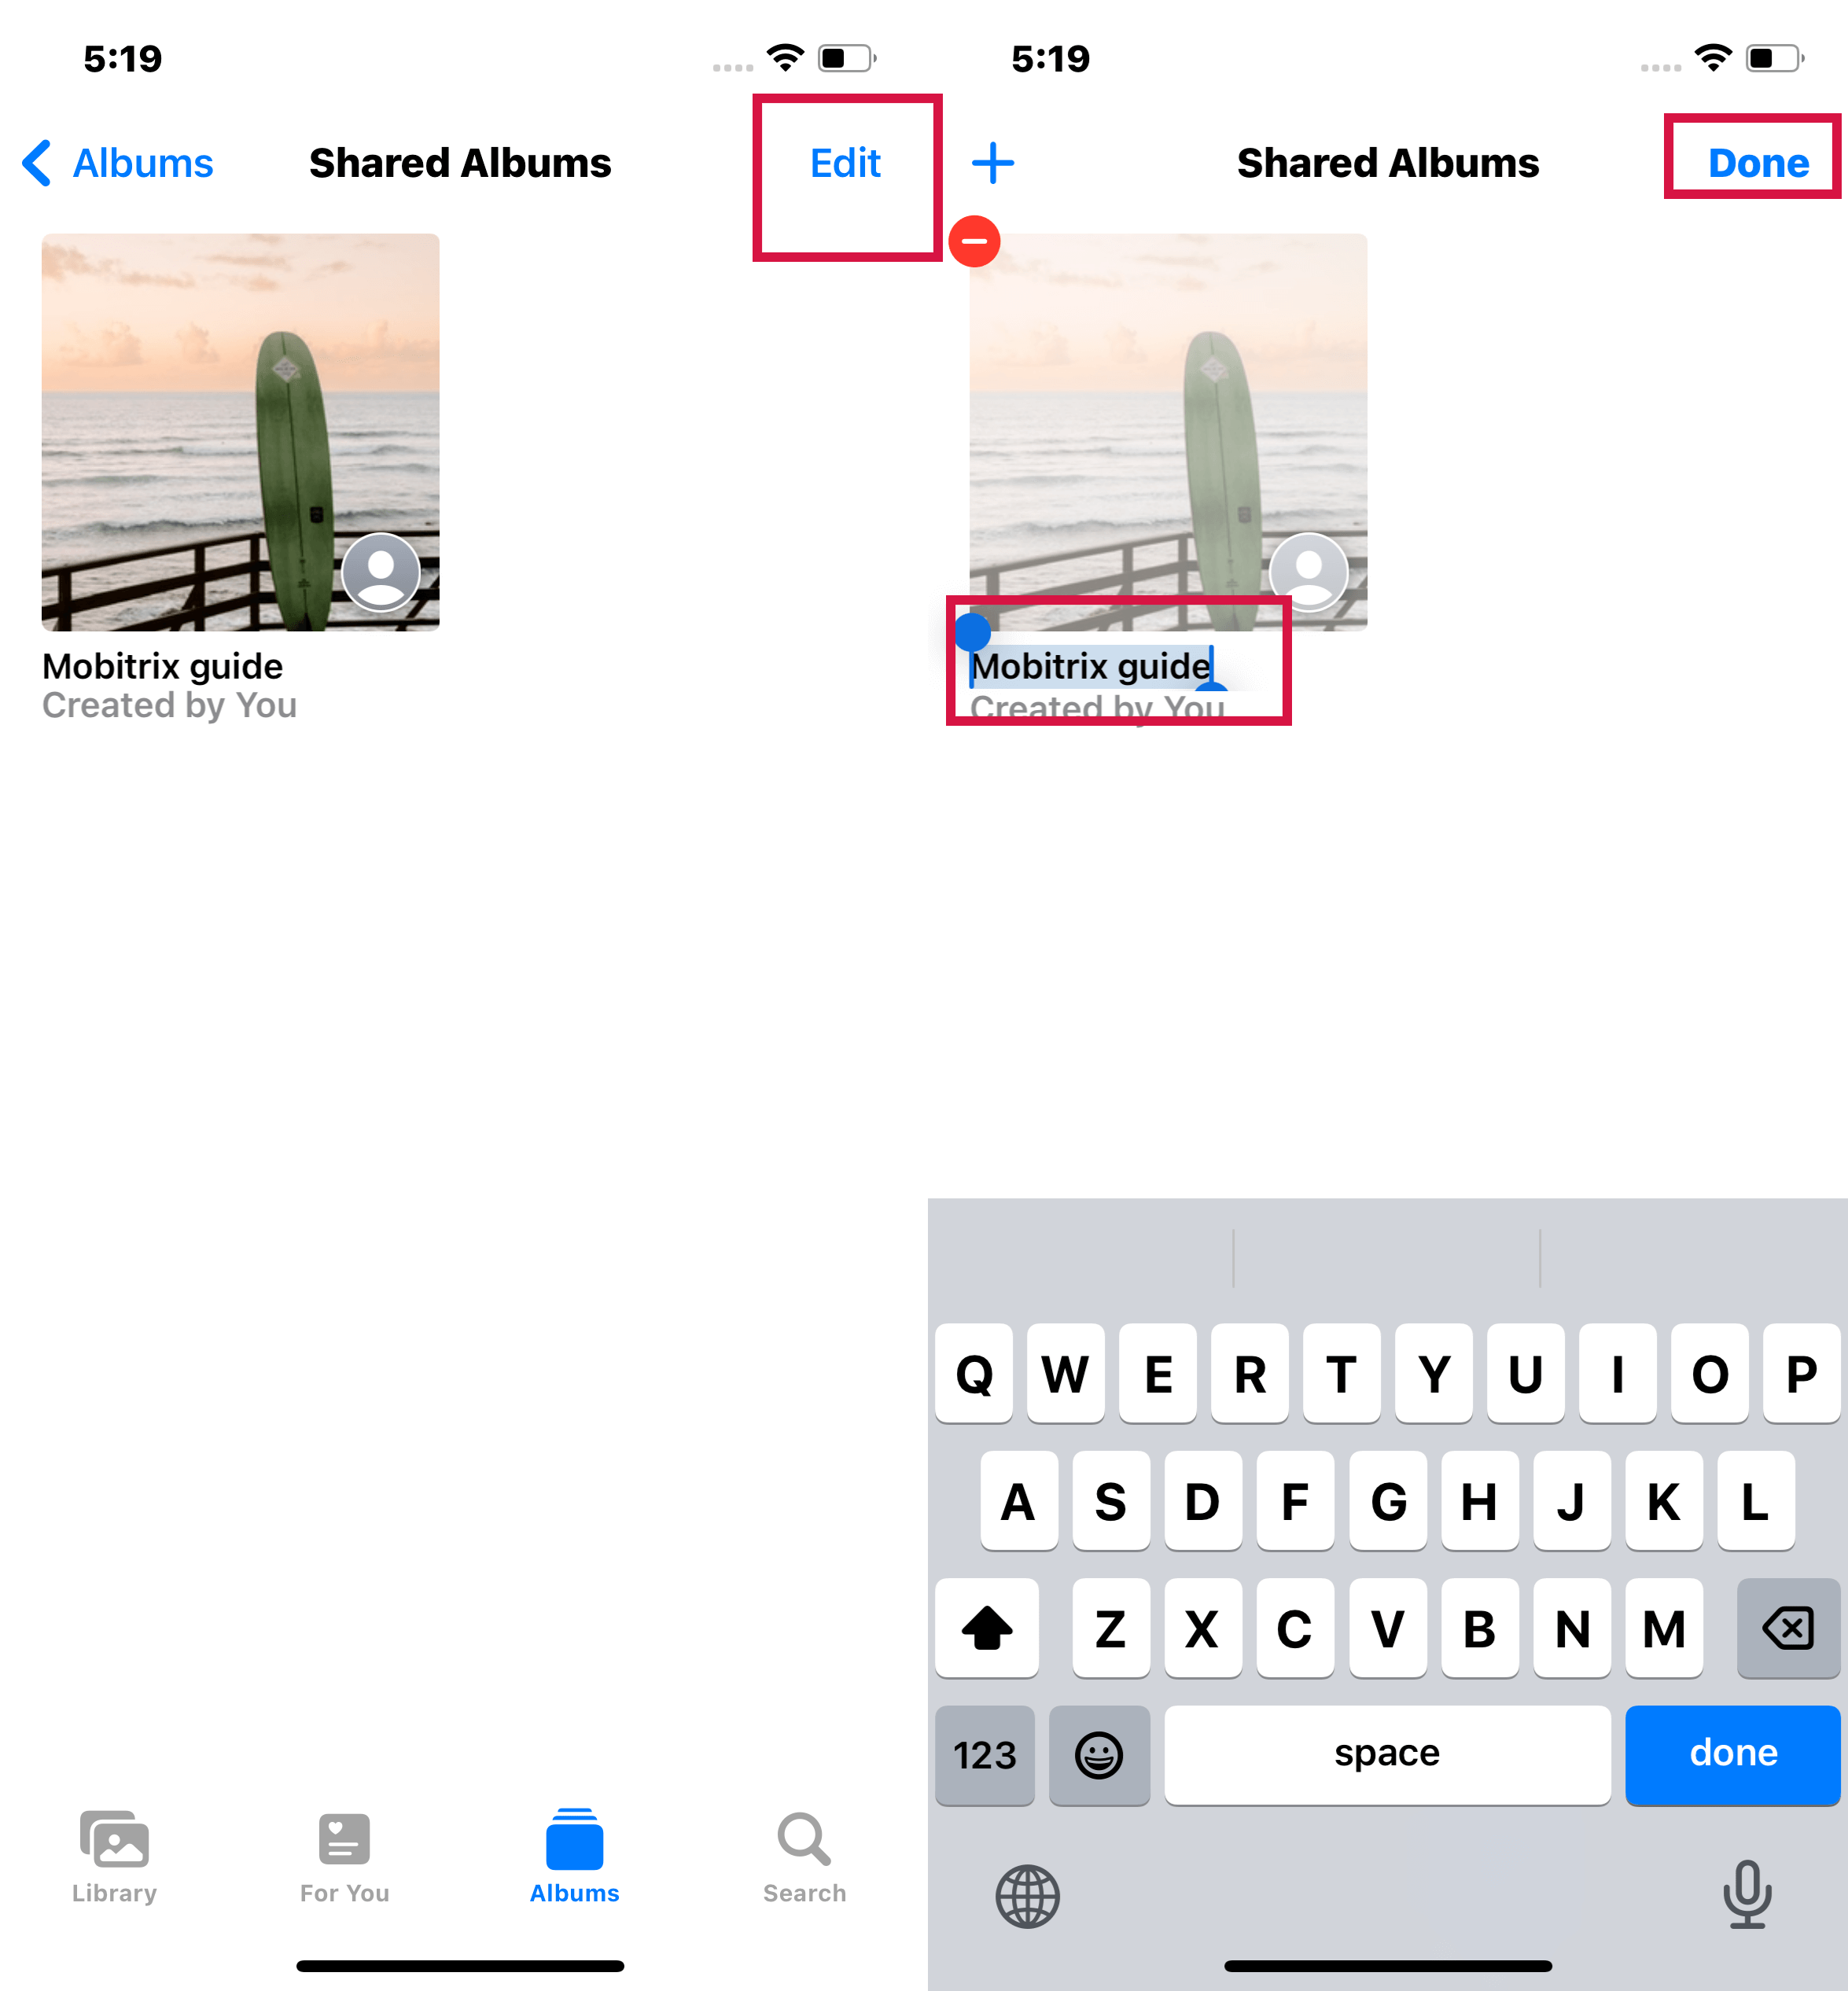
- Scroll down to Shared Albums in Albums, and then tap See All.
- Tap Edit, select the album's name and type in a new one.

See All in Shared Albums
See All in Shared Albums
Steps to Delete Photos, Videos, and Comments
- To delete photos and videos: Tap Select in your Shared Album. Choose the pictures or videos you want to delete, and then click the trash icon.
- To delete comments: Touch and hold the comment on a shared photo, then tap the Delete button.
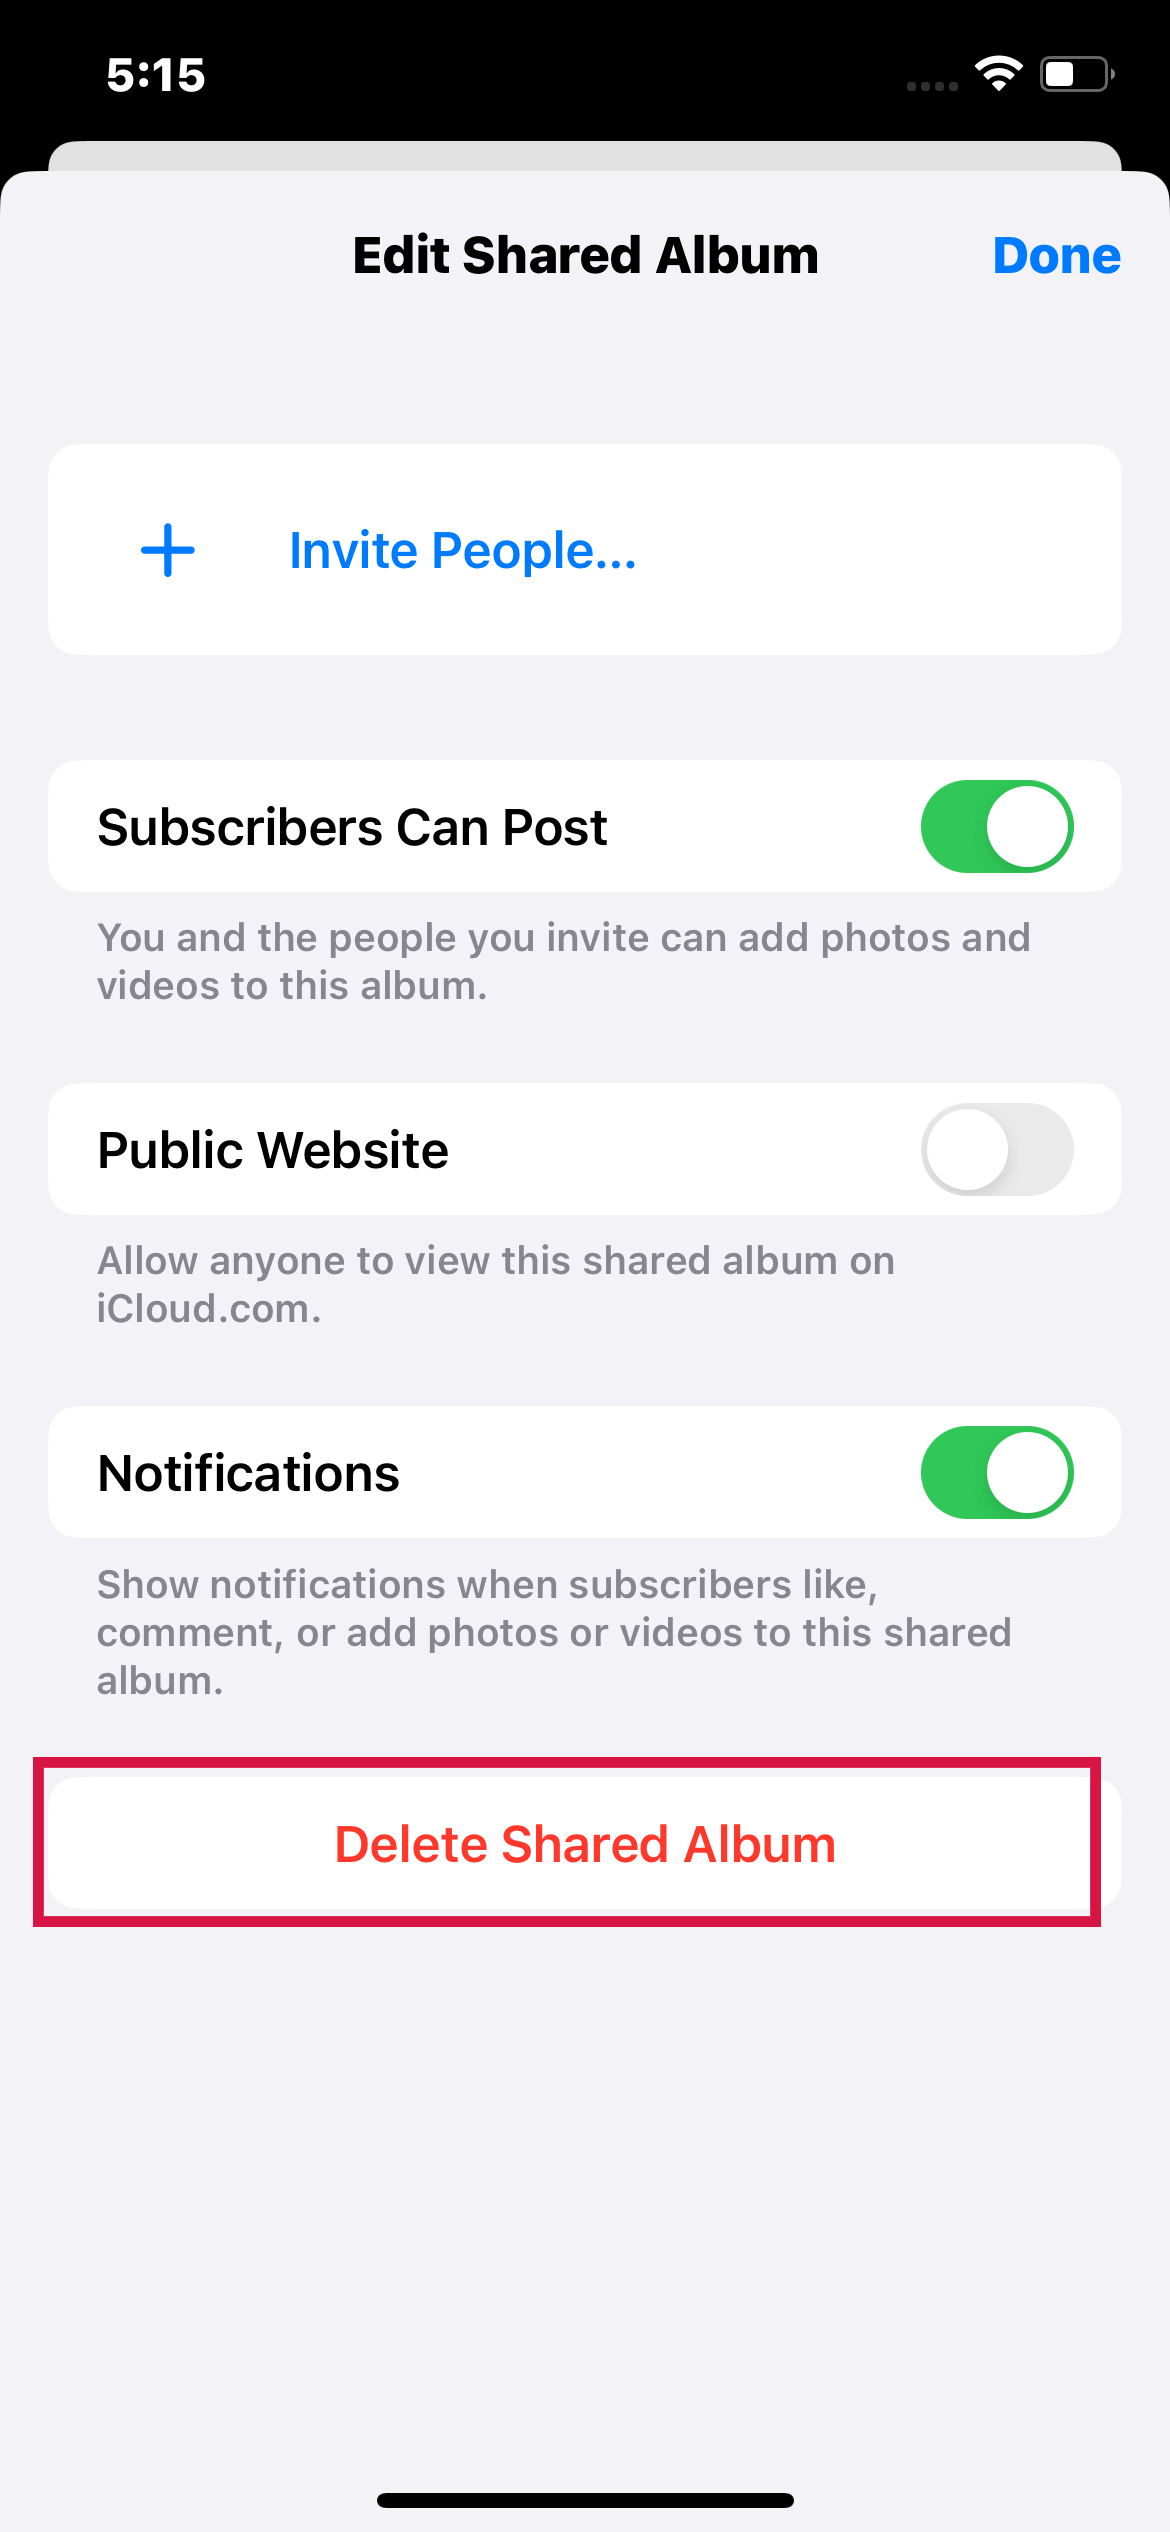
Steps to Delete Album
- Launch the shared album.
- Navigate to the People tab.
- Select Delete Shared Album.
Delete Shared Album
- When seeing your shared album list, you may tap Edit and then the Delete option to remove a shared album.
People tab in Shared Albums
Tap Delete in the window that displays to confirm this action.
How to Accept Shared Album Invitation From Others?
If a friend or family member has shared an album with you, you may need to accept their invitation in order to view their photos and videos and participate in the shared album. This can be done by following the steps outlined below:
- Navigate to your Photos app.
- Select the For You The invitation should be at the top of the list.
- Select Accept.
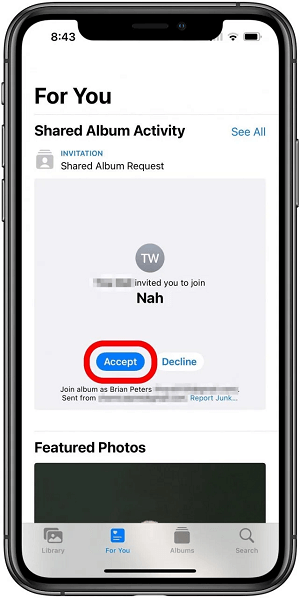
Accept Invitation in Shared Albums
How to Access a Shared Album on iPhone?
Your Shared album can be accessed from the Photos app on your iPhone. It's straightforward to locate.
Steps
- Launch the Photos app on your iPhone.
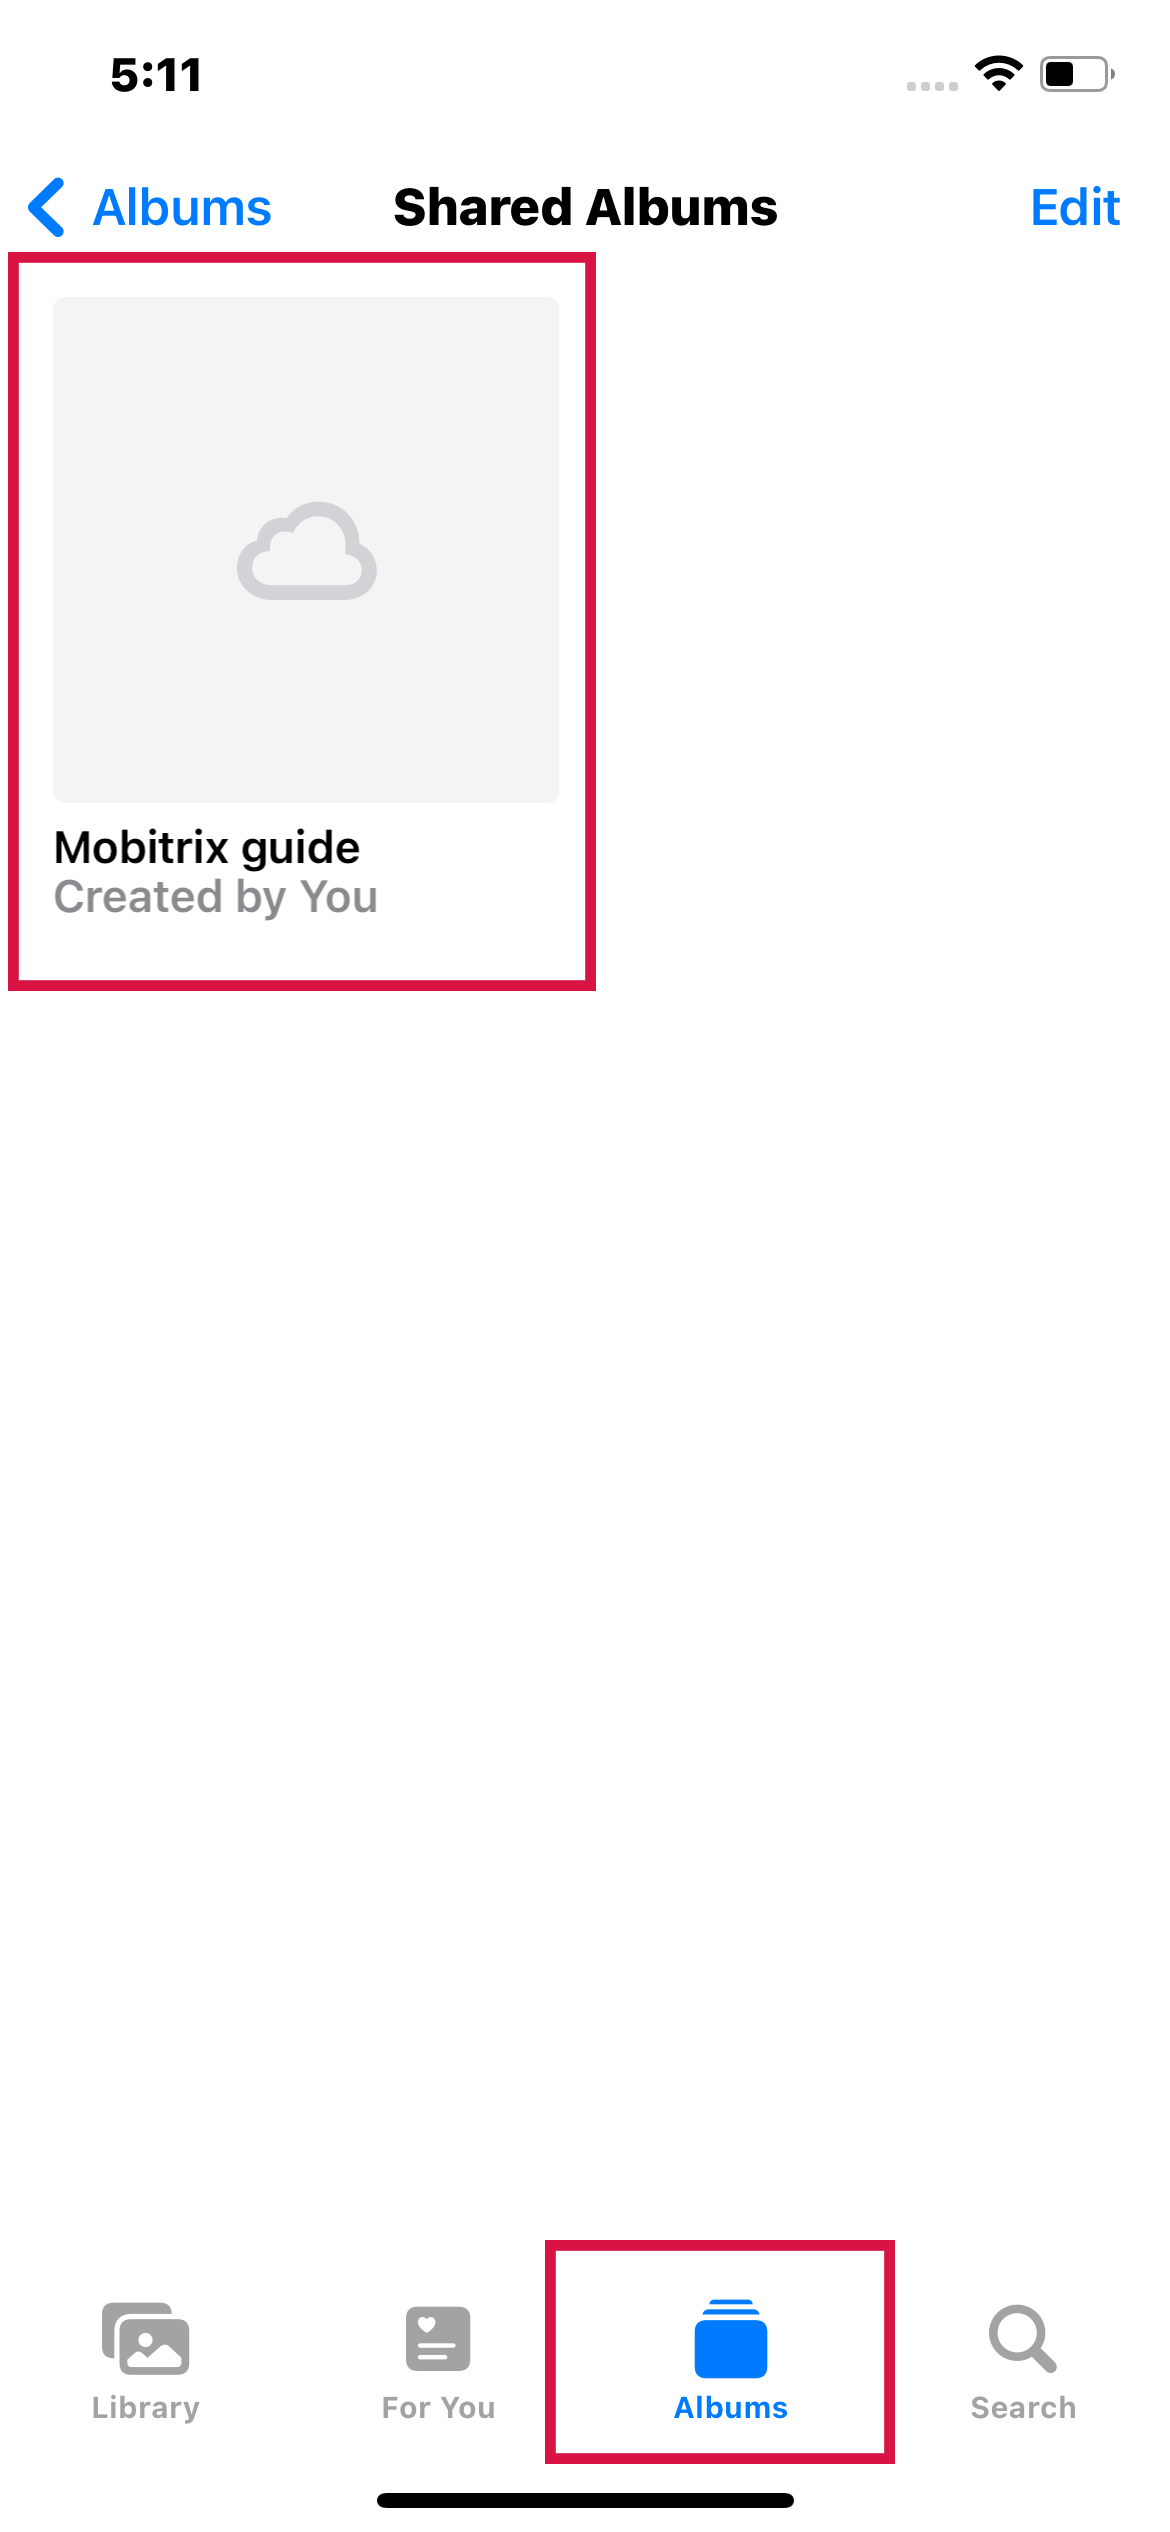
- Select the Albums option.
- Navigate to the Shared Albums menu.
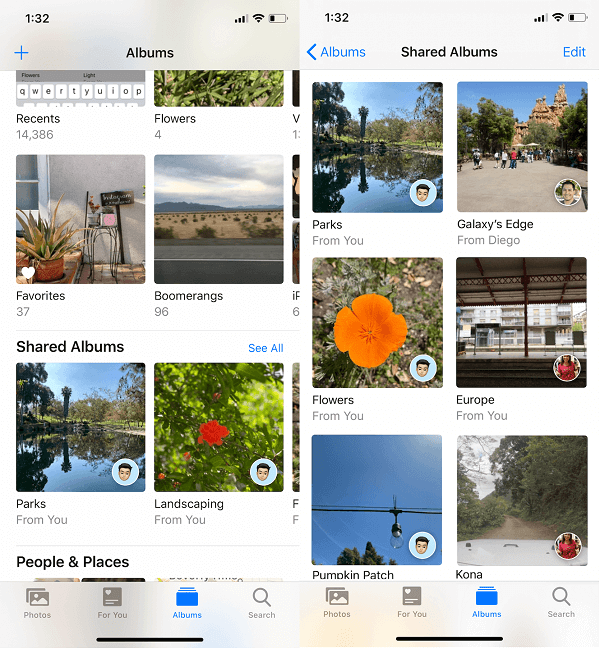
Shared Albums in iPhone Albums
Why Am I Unable to View Photos in a Shared Album?
Here are some possibilities for why you're experiencing problems viewing photos in a Shared Album.
- Your iPhone does not meet system requirements. To use shared albums, you need iOS 7 or higher.
- Photos can't use cellular data. Go to Settings > Cellular and turn on Photos to let Photos use cellular data.
- The iCloud Photos service is down. Check if iCloud Photos works by going to Apple's System Status page.
- There isn't a good Wi-Fi connection. Try using your cellular data or connect your iPhone to another Wi-Fi network.
How to Share Photos Using My Photo Stream?
My Photo Stream is an iOS feature that allows you to automatically upload and sync your photos across all of your devices. It's a great way to keep your photos backed up and accessible from anywhere.
Once you've set it up, any new photos (except live photos) you take on your iPhone will automatically be uploaded to iCloud and then downloaded to your other devices, including your Mac, iPad, and iPod touch. You can also download all of the photos in your stream to your Windows PC.
My Photo Stream only saves your photos for 30 days, as it doesn't use any iCloud storage. In addition, if you have a Shared Photo Streams album, the photos you add to that album will automatically appear on the subscribed devices of your friends and family.
Steps
- Navigate to the Settings app.
- Then, select Photos.
- Select Upload to My Photo Stream from the menu.
- My Photo Stream will then appear as its own album in the Photos app. Go to the My Photo Stream album and select the Share icon > Save Image to save a photo.
Photos in iPhone Settings
These are significant steps for how to create and share an album on your iPhone. Whether you want to share your photos with friends and family or back them up to ensure they are always accessible, this article provides all the information you need to get started.
Always visit Mobitrix for the latest tips and tricks on getting the most out of your iPhone. Thanks for reading!